Blender Camera Tracking Tutorial: 6 Easy Steps

Ever heard of Blender's camera tracking? Follow along as we track objects in a video, create a 3D scene, and add models as if they were in the video itself!
What Is Camera Tracking?
In terms of post-production or video effects, camera tracking is the process of recreating the camera path taken by the actual real-life camera.
Let’s say you take out your phone and record a nice 10-second video of your backyard, and now you want to add a 3D model in such a way that it looks real.
Importing a 3D model and putting it on top of the footage won’t look real nor very good, as the ground in your video would be moving and you would have to animate the model frame by frame to follow (unless you had the camera perfectly still). Using Blender’s 2.8 camera tracking feature, you can do this in a much easier and less tiring way!
In six simple steps, you’ll learn how to use Blender’s camera tracking to extract the camera’s motion from the footage and create a digital scene within your video. We’ll be using Blender 2.8, although all the steps apply to most versions of Blender 2.7 since the system has remained almost identical.
Why Use Camera Tracking?
Camera tracking can be done a number of ways and for a variety of purposes. The following are some common use cases:
- Stabilizing footage: You can tell Blender to stabilize or center footage with a few given markers.
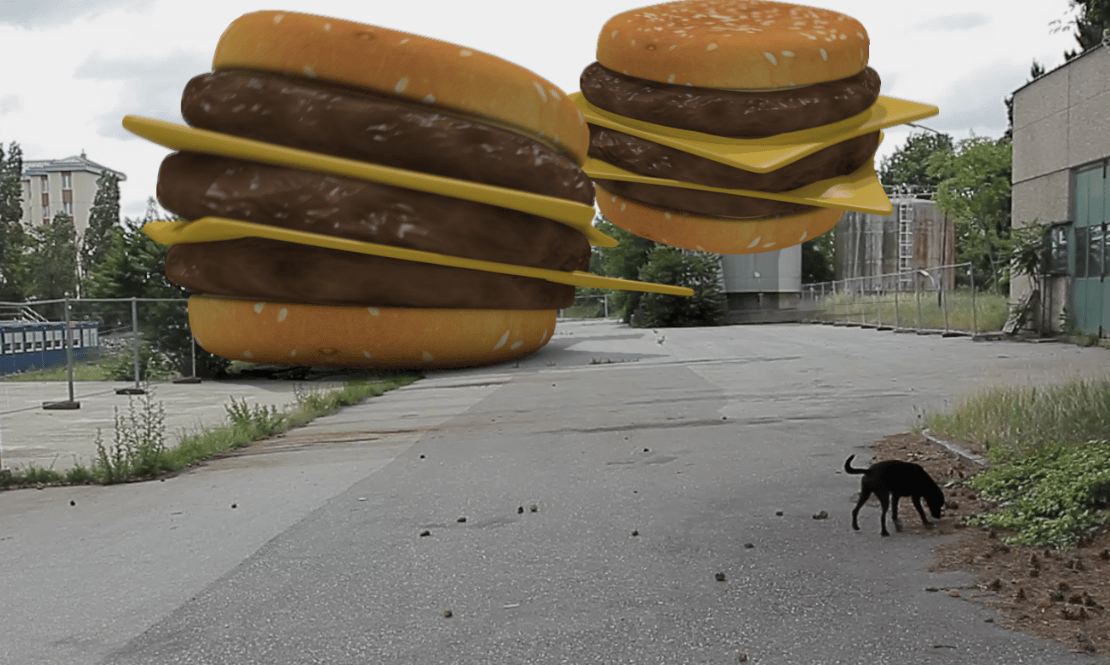
- Placing 3D models into the scene: This is the most common use case after setting up 3D tracking for a video in Blender.
- Placing effects or 2D models: As with 3D models, you can place effect layers or 2D drawings into a video, making them look as if they were really in the original footage.
Now, let’s have a look at how to set up camera tracking in Blender.
Step 1: Preparing the Footage
Recording
First of all, you will need video footage to work on. You can do this by grabbing your phone and recording a small video clip, no longer than 10 seconds. It can be of a room or an outer space, such as a garden, street, or anything similar.
Make sure you have good lighting and that the footage isn’t too shaky, as this will make things harder. It’s also recommended to record at a higher resolution, if possible, as this will really help us in the next steps.
Transferring
After you’ve taken the video, transfer it into your PC, check that it looks good, and make sure it’s not blurry or too shaky.
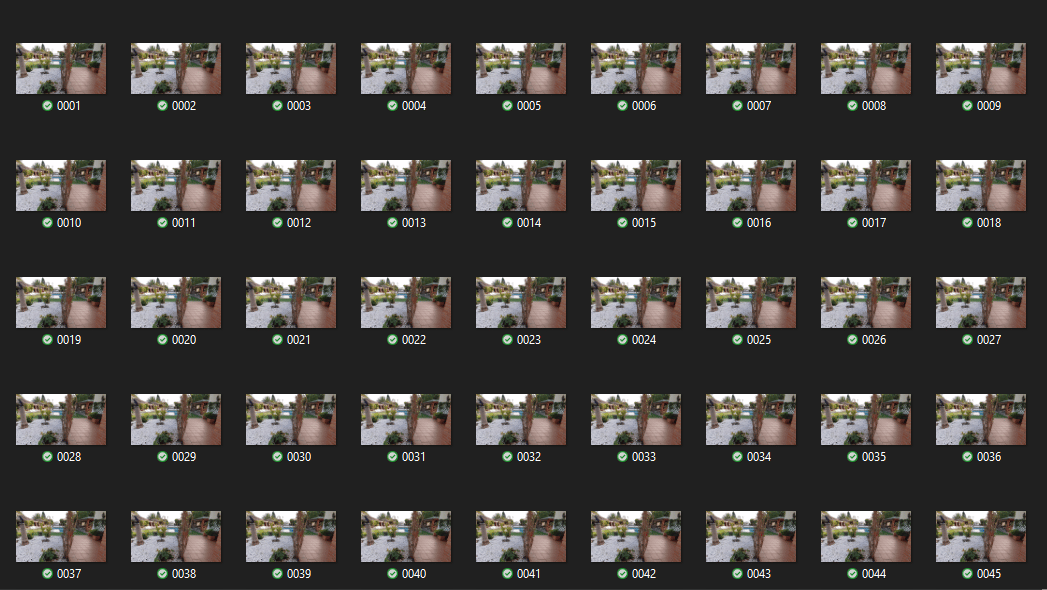
Converting
Lastly, we will need to convert the video into an image sequence. To do this, go to “Video Sequencer” and click “Add” to import the video footage you just took.
Next, click the output tab on the right menu, and under “Output” choose “PNG” as the file format. Make sure you specify a folder where all the images should be saved in.
On the top left, click “Render” and “Render animation”.
Of course, rendering can be done with other software; just make sure you aren’t losing image quality.
Step 2: Importing the Image Sequence to Blender

Once your video is a pile of images, open a new instance of Blender.
Go into “Movie Clip Editor” and at the top, click “Open”, selecting all the images from your video. You can do this by either selecting them one-by-one or pressing ‘A’ on your keyboard (if the images are in their own file).
You should now see how the video can be played inside Blender, but it will probably go quite slow. To solve this, click the “Prefetch” button and “Set Scene Frames” so that the frames specified in Blender match the total number of video frames.
Step 3: Adding Tracking Markers
With the footage ready, it’s time to add tracking markers into our footage.
Before we add any markers, we need to tweak some small settings under the “Tracking Settings” menu:
- Where it says “Motion Model”, change “Loc” to “Affine”.
- Make sure to check the “Normalize” box.
- Under the “Tracking Setting Extra” submenu, change the “Correlation” value from 0.75 to 0.9.
You’ll need to add at least eight markers, preferably on areas of the footage which are easy to track, such as objects with high contrast, like white stones on a dark floor, a golf ball on grass, or specific patterns in a tiled floor. Although not compulsory, we recommend you start placing the trackers in the first frame.
To add these trackers, hold CTRL and right-click. Each time you do this, a small white square should appear; use the mouse to place it on the part of the footage you want to track. Keep doing so until you have at least eight visible trackers in your scene. You can also scale them up by pressing ‘S’ on your keyboard.
Step 4: Tracking the Footage
Once you’ve placed all the tracking markers, it’s time to actually start tracking the footage.
Tracking
There are two common ways of doing this, either press “Alt + Right Arrow” to track one frame forwards or press “Ctrl + T” to track the entire footage. Make sure you have all of your markers selected before doing so.
If everything goes well, all the markers should start tracking the part of the footage you placed them on and stay there until the end of the video.
Issues
There may be marks that go red and stop tracking. Don’t worry – this is quite common, especially if the footage is hard to track.
To fix this, select the markers that stopped tracking halfway through and resize them a bit. This will create a new keyframe for the tracker, which should help to properly track the footage.
Repeat this process for all the markers that didn’t track throughout the entire footage. Note that you may need to resize them more than once.
One last thing to keep in mind: If upon doing this step, a marker still doesn’t want to keep tracking, leave it alone and add another. Not all markers will work perfectly, especially if the footage is blurry.
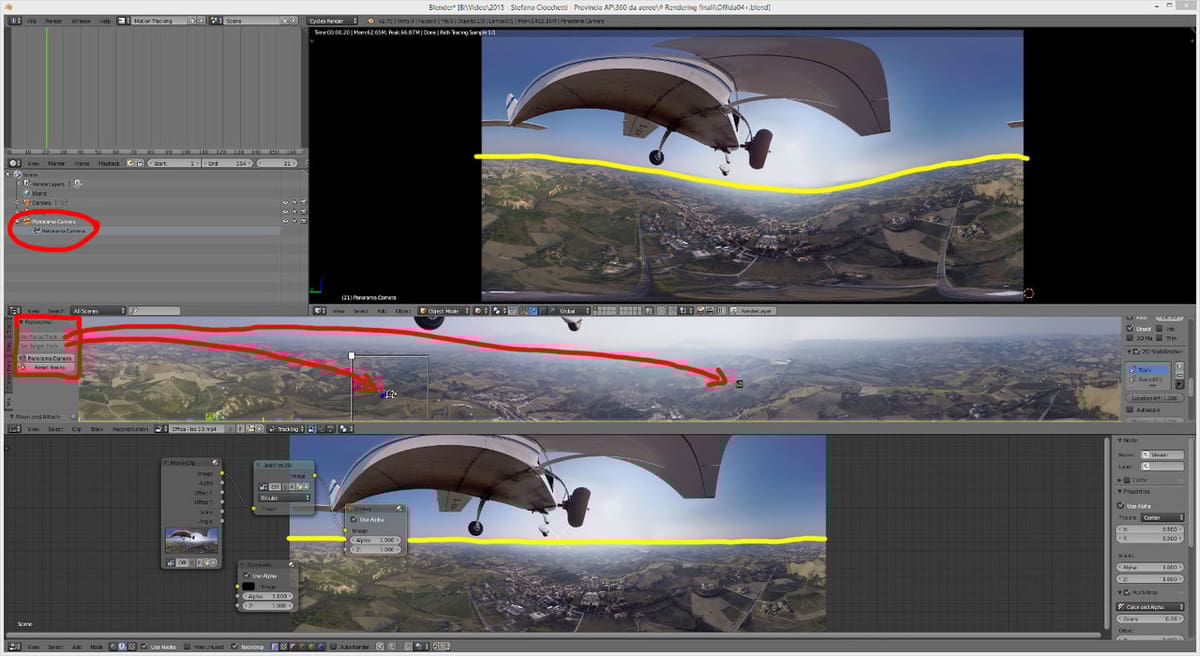
Step 5: Solving the Camera
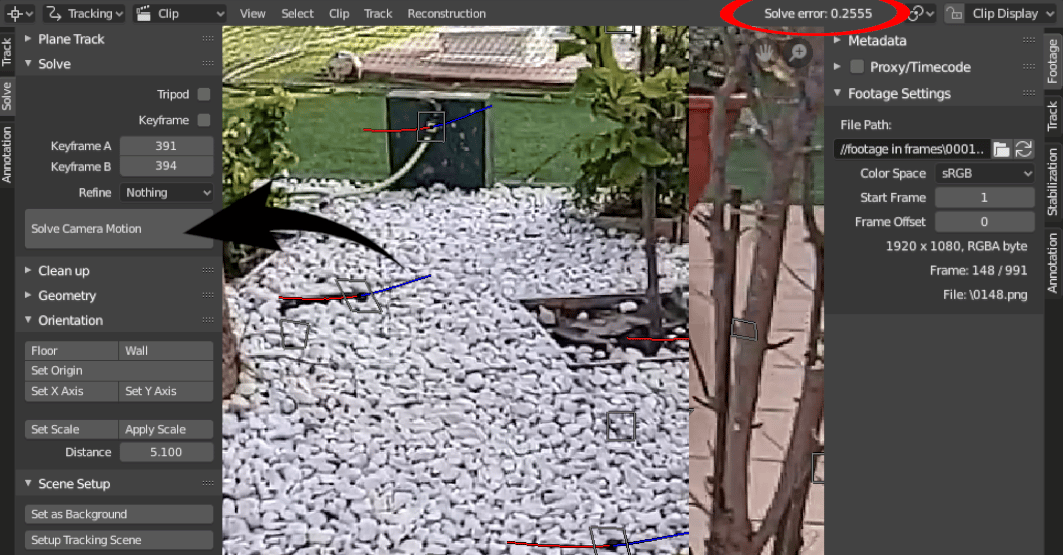
We’re almost done creating a 3D camera for our scene.
With at least eight markers properly tracking our footage, it’s time to “solve” the camera motion. In other words, we’ll have the program calculate its approximate movement.
- Go to the “Solve” tab located on the left section.
- Check the “Keyframe” box.
- Next to “Refine”, change “Nothing” to “Focal Length, Optical Center, K1, K2”.
- Click the “Solve Camera Motion” button.
If everything went well, Blender will now have created a very similar camera trajectory to the one that recorded the real footage.
You’ll get an “average error” in the top right displayed as some numbers. We advise keeping this average error below 0.5 for good results.
To do this, click the “Clip Display” tab, also located on the top right, and enable the “Info” box. This should allow you to see the average error for every individual tracker you placed in the footage.
The aim is to delete the markers with an extremely high average error or lower their “weight” by going to the “Track” menu while the tracker is selected and reducing the “Weight” slider to a lower value of around 0.6.
Step 6: Setting the 3D Scene
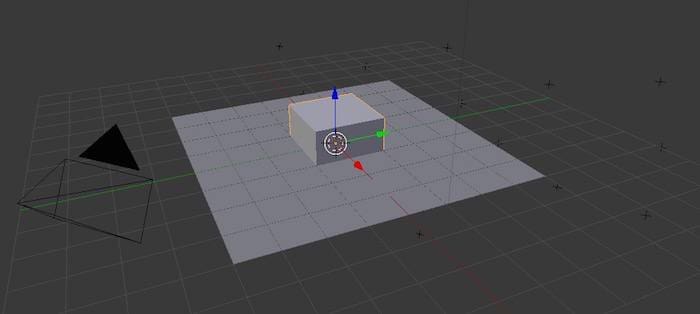
Once you’re happy with your tracked footage, go to the “Scene Setup” menu located to the left and click “Setup Tracking Scene”.
If you now go back into the 3D viewport and to the camera view, you’ll see how the default cube and a flat plane will move together with the video background of the footage you tracked. However, there are still a few final steps to make it look good.
Go back into the “Movie Clip Editor”. Under the “Orientation” menu, you’ll see the following options:
- Floor
- Wall
- Set origin
- Set X-axis
- Set Y-axis
- Set scale
Choose one tracker to be the origin, another tracker above that to be the Y-axis, and one to the side of the origin tracker to be the X-axis. Choose three trackers which more or less make the floor of your scene and click “Floor”. Finally, choose two trackers and set an appropriate scale for them.
With all of this done, you should now have a proper 3D camera solution for your scene. That means you can now proceed to put a 3D model anywhere in your 3D viewport, and it should hopefully look as if it were part of the video you took!
(Lead image source: Kenan Proffitt via YouTube)