Blender: Smooth Shading – Simply Explained

In Blender, smooth shading is a great way to make an object's surfaces appear smooth. Read on for more on Blender's smooth shading features!
Shading is a popular technique that controls the color of a 3D model based on how it is illuminated in the 3D scene or space. Different shaders affect 3D models in different ways, and you can even find custom shaders online.
One excellent way you can use shaders is to make a 3D object appear smooth, which can visually enhance your scene depending on what you’re designing. Blender allows you to do this easily with the Shade Smooth tool, which doesn’t require you to download a shader.
The other popular way to make models appear smooth in Blender is a tool called the Subdivision Surface modifier. This tool, however, isn’t always the best method because it breaks down a surface into more geometries, using a lot of computing power (resulting in a higher likelihood of a crash). Shading a model smooth doesn’t adjust its geometry but rather changes how it appears in Blender, resulting in almost the same effect.
In this article, we’ll go over how to shade a model smooth in Blender. We’ll first review the difference between smooth and flat shading, then dive into the different techniques that can be used.
Smooth vs. Flat Shading
Before we get into Blender’s various smoothing tools, it’s important to discuss the difference between smooth and flat shading. Similar to basically every other 3D modeling platform, Blender uses flat shading for 3D objects by default.
Flat shading involves lighting each face of a model differently based on its angle and position relative to the light source in a scene. This makes the different faces of a model distinguishable, and the edges appear sharp, which is useful when designing complex objects where you need to select specific areas on a model.
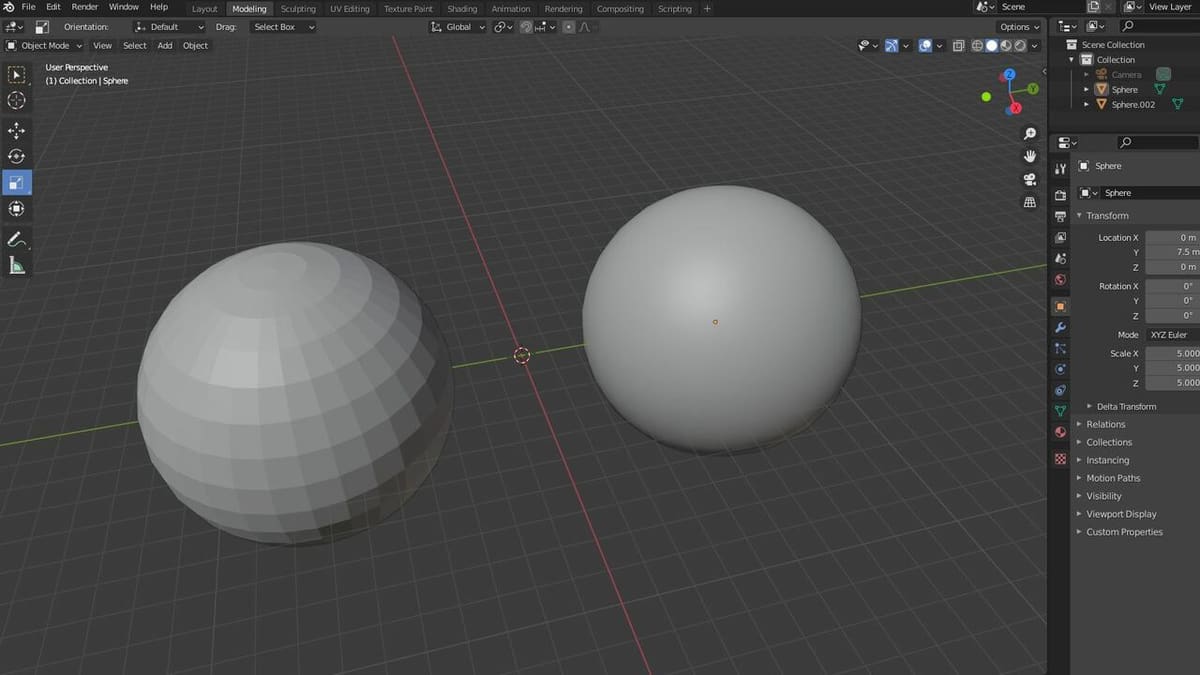
Smooth shading, on the other hand, uses a special technique known as linear interpolation to make 3D models appear smooth. The result is a model with virtually indistinguishable faces and invisible edges, just like a perfect curve. Smooth shading is more computing-intensive than flat shading but is still a lot less intensive than using the Subdivision Surface modifier.
Of course, you wouldn’t want to use smooth shading on every model in Blender. Smooth shading models with hard edges produces a visually odd effect that makes it difficult to tell which face is which on the design. This effect isn’t desirable in every situation.
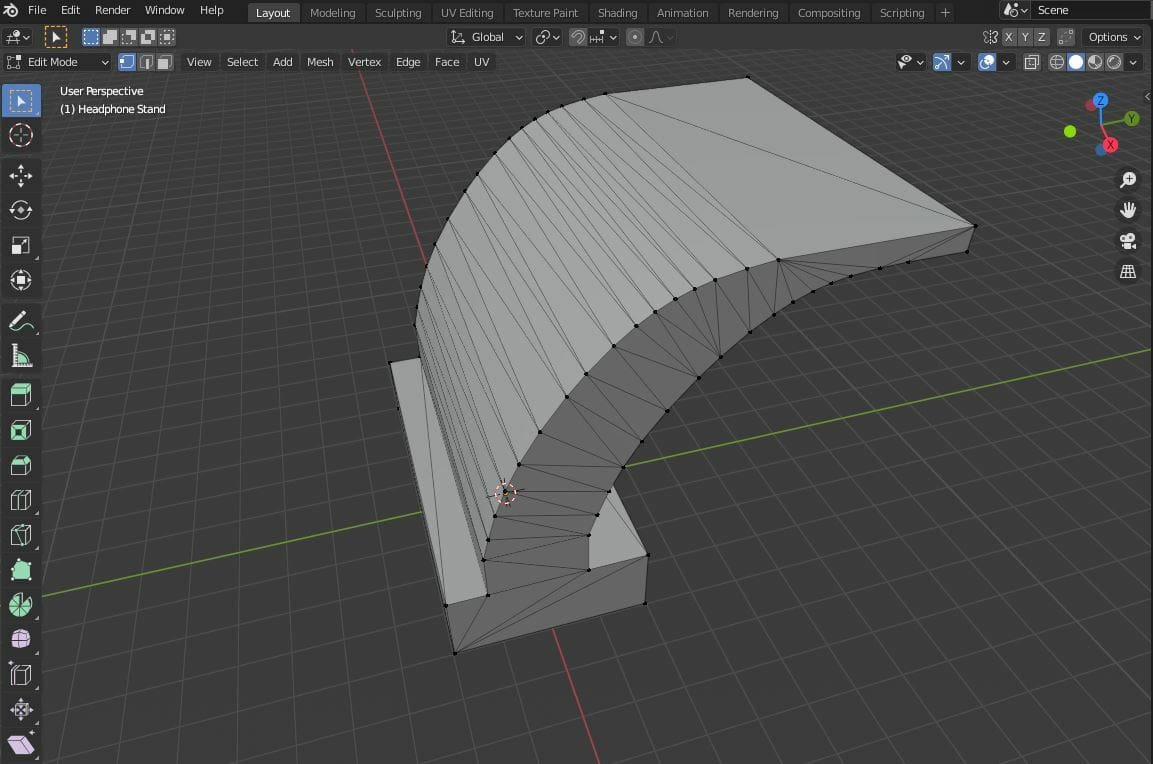
For example, let’s say you’re designing a headphone stand with a curved frame and a flat top. Smooth shading the model would smooth out its curves as well as the hard edges of the model. The hard edges wouldn’t look as sharp as they really are, making it challenging to design features on or around the model.
How to Do It
Now that you know the difference between smooth and flat shading, we’ll go over how you can shade a model smooth in Blender. The most basic form of smoothing shades the entire 3D model.
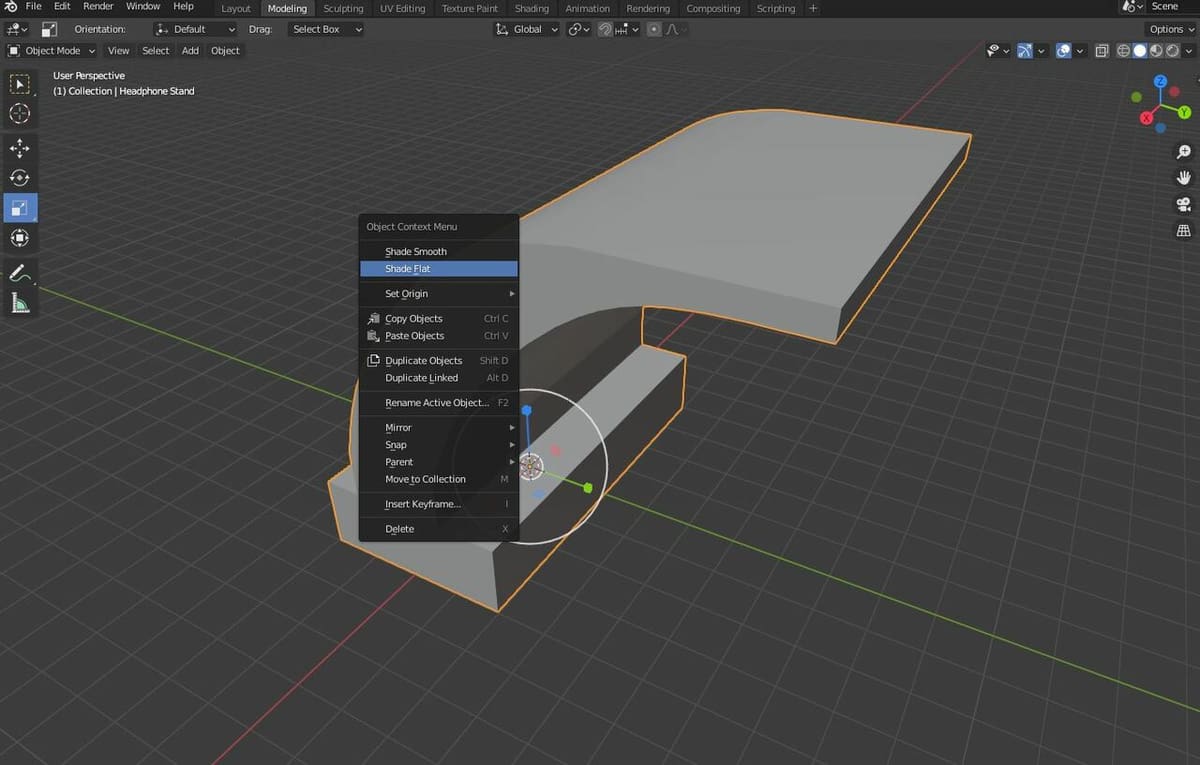
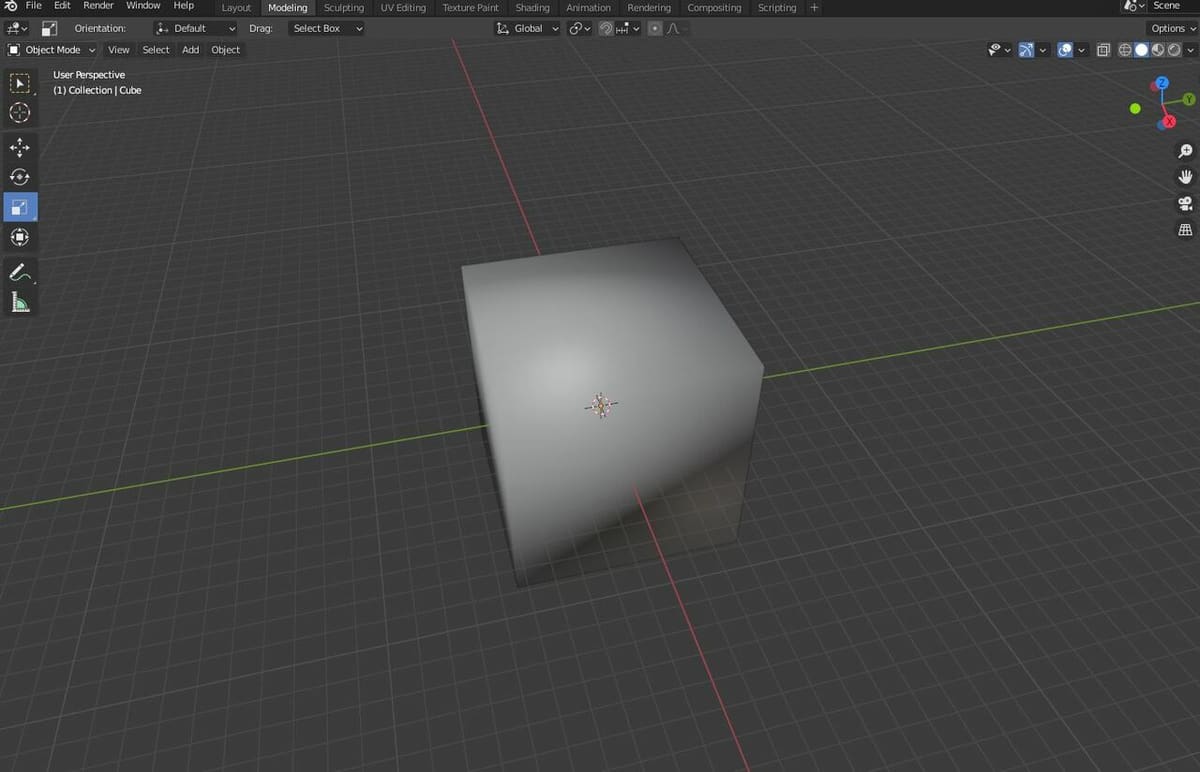
This process is very easy. All you have to do is import a model in Blender (or use the default cube), right-click the object, and select “Shade Smooth”. You can switch back to the default shading mode by right-clicking on the model again and choosing “Shade Flat”.
While shading a model smooth is easy, there are also more advanced techniques that you can use that offer more control over the process. We’ll discuss them in the next couple of sections.
Auto Smooth
In contrast to the Shade Smooth feature, Auto Smooth shades a model based on the angles of its edges. It’s a toggle feature in Blender, and users can define the angle’s threshold. The tool will only smooth edges that have an angle less than or equal to the one you set.
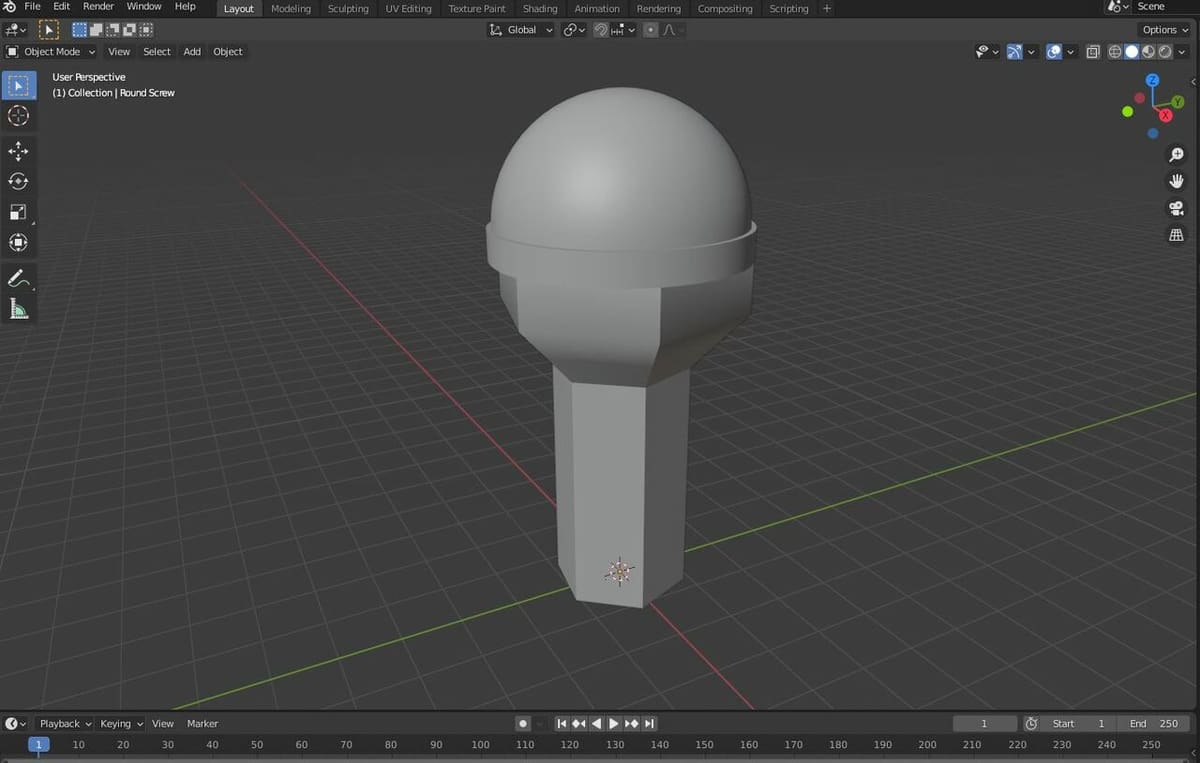
For example, let’s say you’re designing a unique peg-like insert with a semi-spherical top, and you want the top of the model to appear smooth but not the edges of the peg’s base. You could activate the Auto Smooth feature and set an angle parameter around 35°, which would smooth the spherical part and the sharper edges. The wider angles of the peg’s base, however, will remain sharp.
How to Do It
Using the Auto Smooth feature is also pretty easy:
- Open Blender and import your desired model.
- Right-click the model, then select “Shade Smooth”.
- In the Properties editor on the right, locate and open the “Object Data Properties” category (the green triangular icon).
- Click “Normals”, select your model, then check the “Auto Smooth” box.
- Set your angle by entering it as a numeric value or moving the slider left and right.
Mark Sharp
The Auto Smooth feature is great, but it can only be controlled by one single parameter, making it difficult to use. Luckily, Blender has a feature known as Mark Sharp that allows you to keep selected edges on a smoothed model sharp, even if the edges are inside of the Auto Smooth feature’s angle parameter. In other words, the tool allows you to make exceptions to the Auto Smooth parameter.
How to Do It
You can utilize the Mark Sharp tool in Blender by following the next steps:
- Open Blender and import your desired model.
- Right-click the object, then select “Shade Smooth”.
- Open the “Object Data Properties” settings category, then click “Normals”.
- Activate the “Auto Smooth” feature and set your angle parameter.
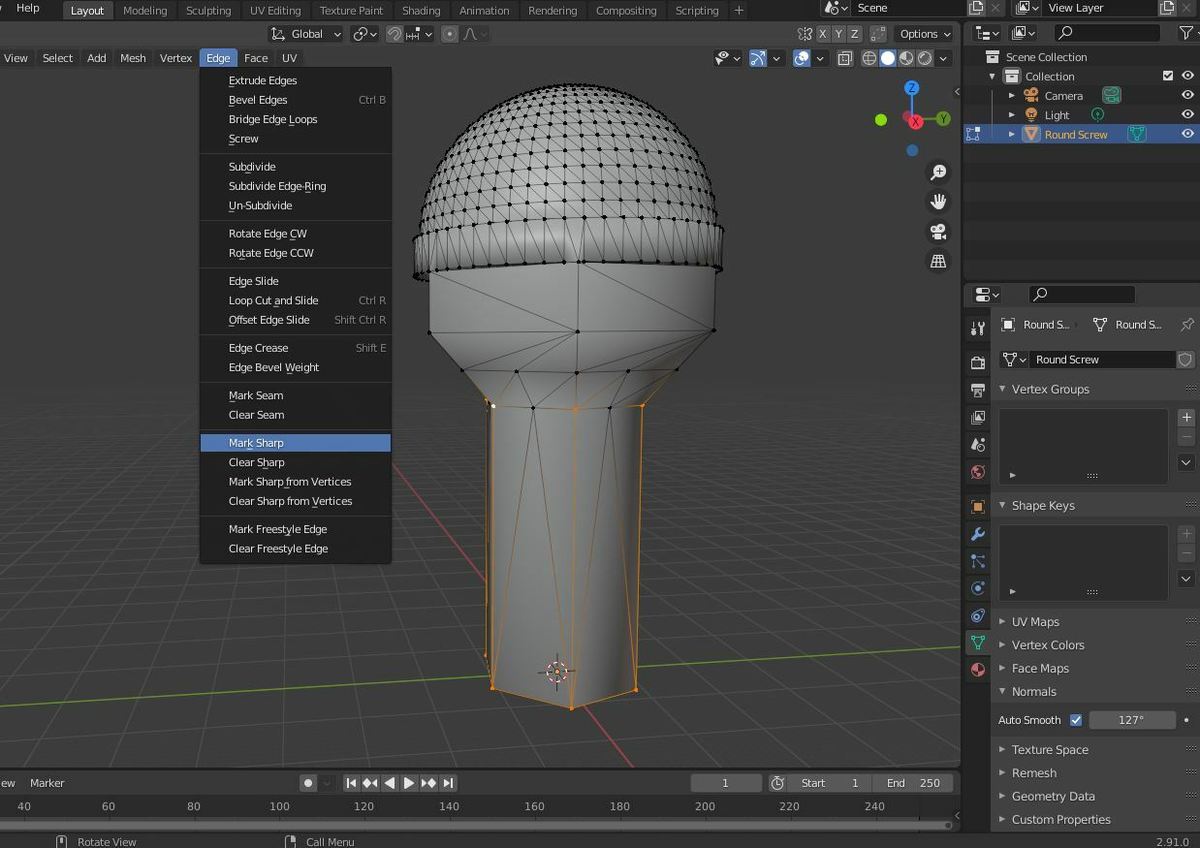
- Select your design, and click the tab key to enter into Edit mode on your model.
- Hold down the Shift key while clicking the vertices that make up the edges you want to keep sharp.
- Click the “Edge” drop-down menu on the toolbar at the top of your screen.
- Select “Mark Sharp”. The edges you selected should be highlighted blue to indicate they’re marked sharp in Edit mode.
- Click the tab key to exit out of Edit mode.
And that’s it!
