Blender: Text Editor – All You Need to Know

Simplify your workflow and create useful add-ons using the Blender Text Editor. Keep reading to learn how, plus some useful tips and tricks.
Nowadays, the UI of most 3D modeling software is jam-packed with options that allow us to do everything we need from within the viewport itself. Still, you’ve likely wished that you could create custom buttons and dialogues that could help you speed up repetitive tasks. With Blender’s Text Editor workplace, you can do just that by writing your own code!
With a programming language based on Python, you won’t be messing with any of Blender’s “core” functionality in the Text Editor, but you can create scripts to help with heavy workloads. From simple UI changes to complex add-ons that can create hundreds of objects in a matter of seconds, Blender’s Text Editor (not to be confused with editing 3D text) can be a treasure trove for those looking to expand Blender’s default capabilities.
To take advantage of this, having some prior Python experience will help you out. However, don’t fear if you’re unfamiliar, as there are built-in code templates included in the Text Editor. Plus, in this article, we’ll go over what Python is, how to navigate Blender’s Text Editor, and give you a brief overview of using the built-in template to create your own custom tool. Let’s get to it!

What Is Python?
Python is a programming language used in a variety of applications, like building software and websites, that is relatively easy to learn given the vast variety of online tutorials and editors available for free. Blender has a built-in Python interpreter and API documentation that can be of use when working with Python inside the Text Editor.
We can use Python to tweak part of Blender’s UI to better suit our workflow and create handy buttons that perform a series of tasks such as generating an object. For some users, the effort of creating a script may not be worth it, but in certain scenarios where a task has to be repeated several times, using the Text Editor can save a lot of time.
An example of this can be generating a city landscape from scratch, compared to having a button that generates building-like geometries with a degree of randomness. This and much more are made possible thanks to scripts and add-ons created in the editor.
Next up, we will get familiar with the core aspects of the Text Editor workspace and afterward, we will put our new knowledge to the test by creating our own script.
Text Editor UI
It’s now time we start to get familiar with the UI of Blender’s Text Editor.
To get started, open a fresh instance of Blender and select “Text Editor” from the Editor Type selector at the top left side of the workspace (under the “File” menu). Alternatively (and preferably), you can also switch to the “Scripting” workspace by selecting it from the Top Bar. Doing so will create a multi-panel view of the text console and the 3D viewer, which can be handy while scripting.
Once inside the workspace, we will find a gray screen with only a few options at the top menu. Since we don’t have any scripts yet, we’ll go ahead and click on “New” from the top menu to get one started. If you’ve worked with Python before, you may find this interface to be similar to that of other script editors.
Now that we’ve got our script layout set up, let’s go over the most essential features of the workspace.
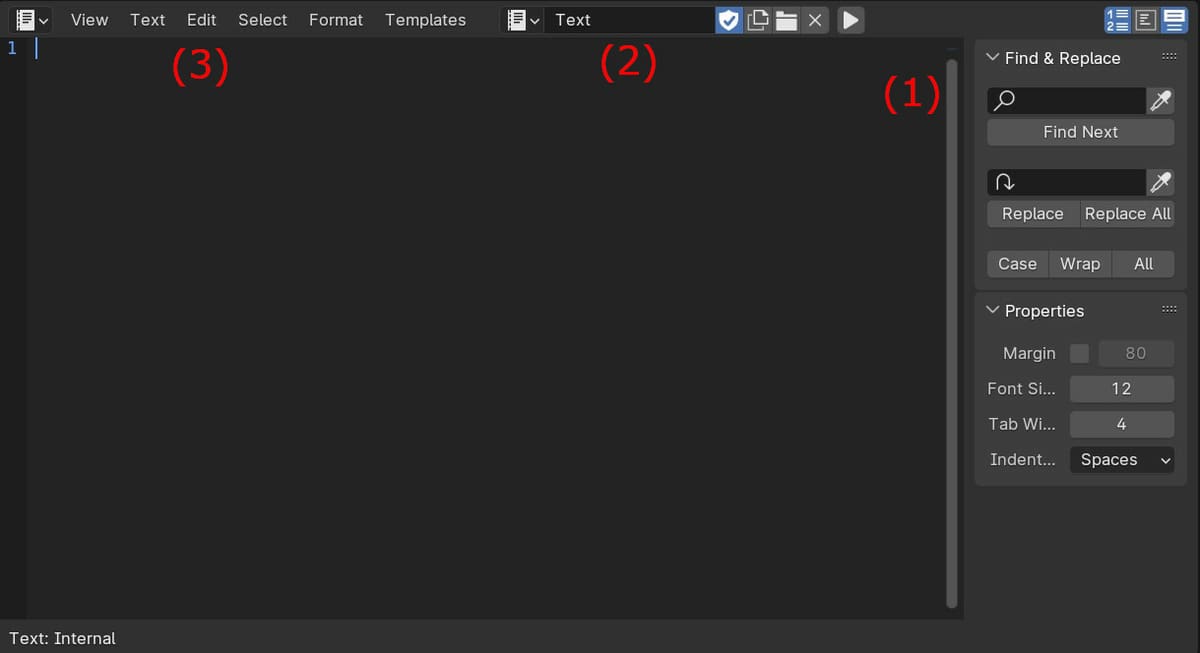
(1) Navigation
On the right-hand side of the workspace, next to the Outliner, you’ll find a tiny arrow that you can drag to open up the Navigation menu. You can also access this by pressing “Ctrl + T”. Here, you can search for specific lines of code and replace them with others in addition to setting the text format and style.
(2) Header
Located along the top of the script field, you can find shortcuts to open previous scripts, start a new script, as well as the name of the current script, which you can easily modify by clicking on it. The triangle-shaped play button is what you’ll press when you want to run the script.
(3) Text Editor Menus
Located on the left-hand side of the script browser, there are six different menus to help you organize your code.
- View: Zoom in and out, plus other navigation and area controls
- Text: Create, save, and open scripts
- Edit: Basic text editing options such as Copy, Paste, Undo, Duplicate Line, Jump To, and so on
- Select: Selectively highlight certain types of text
- Format: Add or remove indents; toggle comments on and off
- Templates: Find a large variety of prewritten code
So now that we’re familiar with the essential components of the Scripting workspace, let’s dip our toes into how to make use of the script templates to make our own tool within Blender.
Using Templates

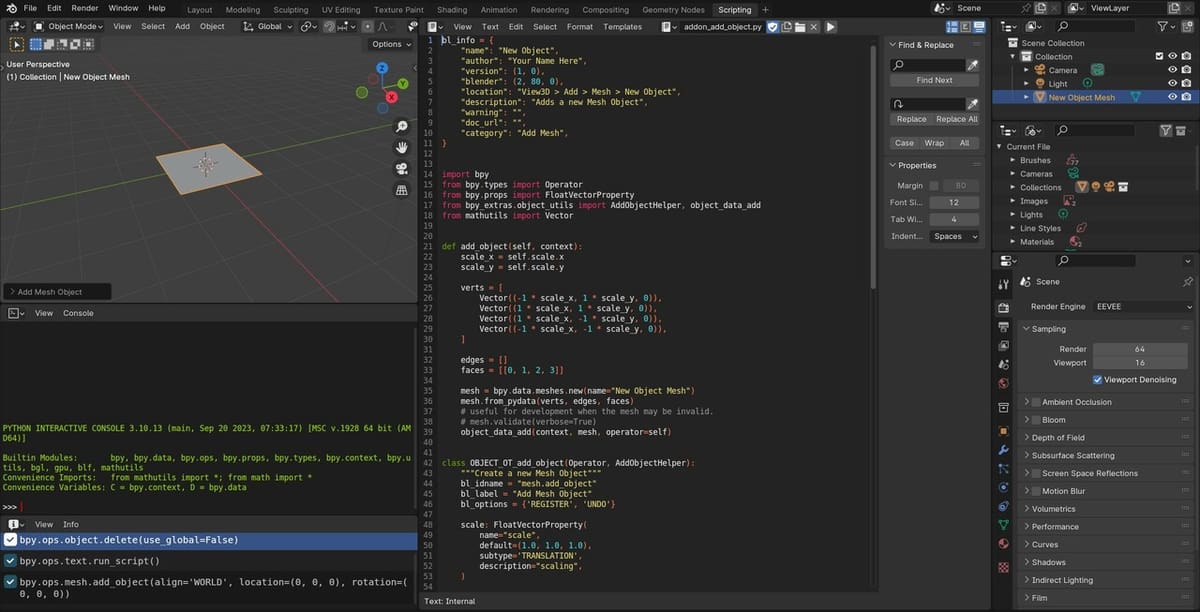
In this walkthrough, we’ll be using a script template to create a custom mesh option under the “Add > Mesh” menu in the Modeling workspace. Of course, the coding can also be done from scratch, but using the templates makes the process much faster and beginner-friendly.
If you haven’t done so already, we suggest changing to the Scripting workspace so we don’t have to keep switching between the Text Editor and Modeling workspaces. In the 3D viewport of the Modeling workspace, you can delete the default cube. You can also click and drag the borders of the 3D viewport to make it larger if you wish. Then take the following steps:
- Open up a template by navigating to “Templates > Python > Addon Add Object”, which is the menu’s first option.
- Leave the template as is, and execute it by using the play button in the header bar. (Nothing should happen.)
- In the 3D viewport, we will open up the object menu by pressing “Shift + A” and then selecting “Mesh”. You should now be able to choose a new “Add Object” option at the end of the menu, which will add a plane to the scene.
We have now successfully opened and executed our first script, but it is not yet customized. In the next section, we will tweak a few parameters to make it our own.
Editing Templates
There are many areas from the template we can customize, but to get started, there are a few essential things to set up. First, we’ll want to set a name for the objects created with this script, and then we’ll learn how to avoid creating a new option every time we edit and run the script.
We will start by assigning a name to the custom object to find it easily in the Add menu and the Outliner:
- Navigate to line 35 of the script. It should include the default
(name="New Object Mesh"). - Change the name within the quotation marks (“”) to describe your custom mesh, for example, “Building”.
- Navigate to line 67 of the script, which should display
text="Add Object". This is located in the section of the script that defines the option in the Add menu. - Replace “Object” with the name of your mesh, so that the text within the quotation marks reads “Add Building”, for example. You can also change the icon (line 68) to one of the built-in options.
- Execute the script, then check that it worked by opening the “Add > Mesh” menu in the 3D viewport as we did previously and selecting your customized option. In the Outliner, the new mesh should be called the name you just assigned.
By now, you may have noticed that each time we run the script, a new “Add Object” shortcut will be created in the Add menu. In some cases, this could be useful to create many, slightly tweaked custom mesh options, but as we experiment with creating our custom mesh, we’ll want to avoid this.
To avoid creating repetitions of our new option, it’ll only take a few steps:
- Locate the line of code containing the
(add_object_button)function, which should be line 83 in the default template. - Delete the line completely.
- Run the script again. All changes made should now apply to the existing shortcut without creating a new one.
These tweaks are just the start of customizing your script. There’s much more that can be done, including modifying the object that gets generated each time.
For example, we can change the scale of the generated object by locating the scale: FloatVectorProperty( line of code, on line 48 of the default template, and changing the three default values (line 50). Note that each number represents the X, Y, and Z coordinates.
Experiment by changing other parameters within the script and even trying out other templates.
Useful Add-ons
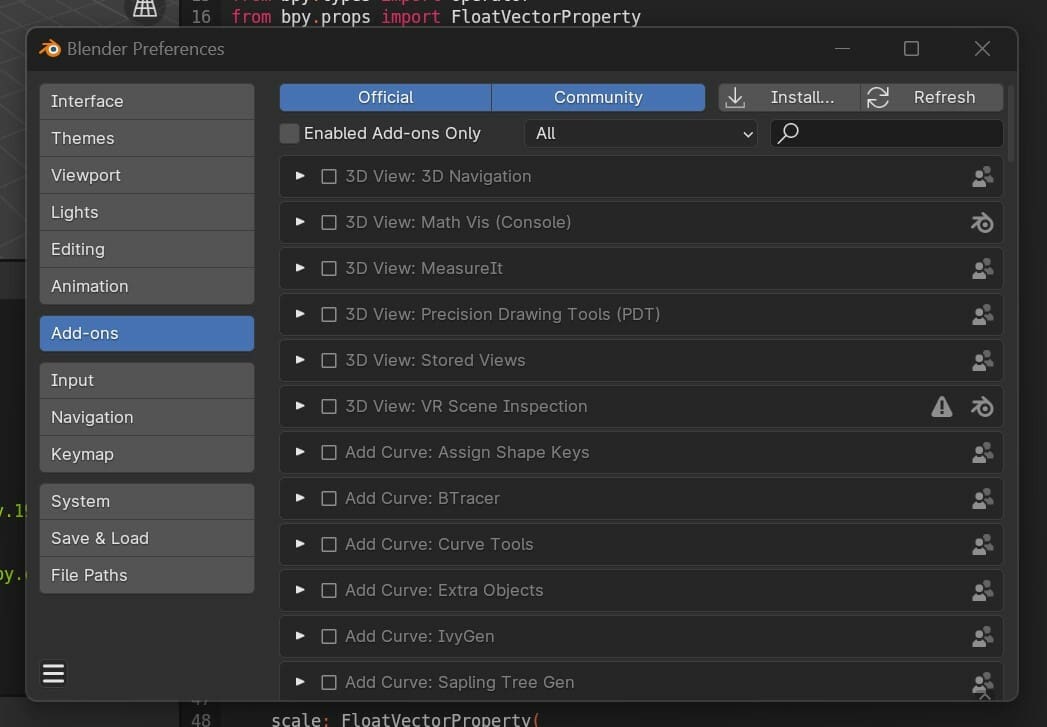
This would not be a complete guide without mentioning some useful add-ons that can make it easier to work in Blender’s Text Editor.
Most of you may be familiar with the use of add-ons inside Blender, and fittingly, you can also create add-ons for the Text Editor using the Text Editor itself. The Blender Artists community curated a list of useful add-ons for the editor, which is a great starting place for those of you looking for some extra functionality. Favorites include an autocomplete tool, development tools for debugging, and a general workflow optimizer.
We also recommend taking a look at the scripting toolbox add-on, as it offers a very neat toolbox enhancement with features such as a console toggle and an autorun feature that executes the script automatically after a change, among many others, and is still supported by the latest Blender versions.
It’s important to remember that not all add-ons will be compatible with the latest version of Blender, so make sure to double-check that the one you’re looking to install is supported.
Tips & Tricks
As if getting the hang of modeling in Blender wasn’t already difficult enough, adding coding into the mix creates a whole new set of challenges. However, spending the time to learn, experiment, and master text editing skills in Blender will surely pay off, just like the time put into learning 3D modeling.
Before you go, there are a few things to keep in mind to be sure you’re starting off on the right foot:
- Do not download any add-ons from sketchy sites. While Blender has a few security measures to prevent the execution of malicious scripts and add-ons, it is better not to risk it! The Blender Artists community has loads of useful resources you can trust.
- Install your custom scripts as add-ons. Scripts you work on will otherwise only be active for the current instance of Blender. To keep your script active the next time you open Blender, you will have to install it as an add-on. This will also allow you to easily toggle our scripts on and off.
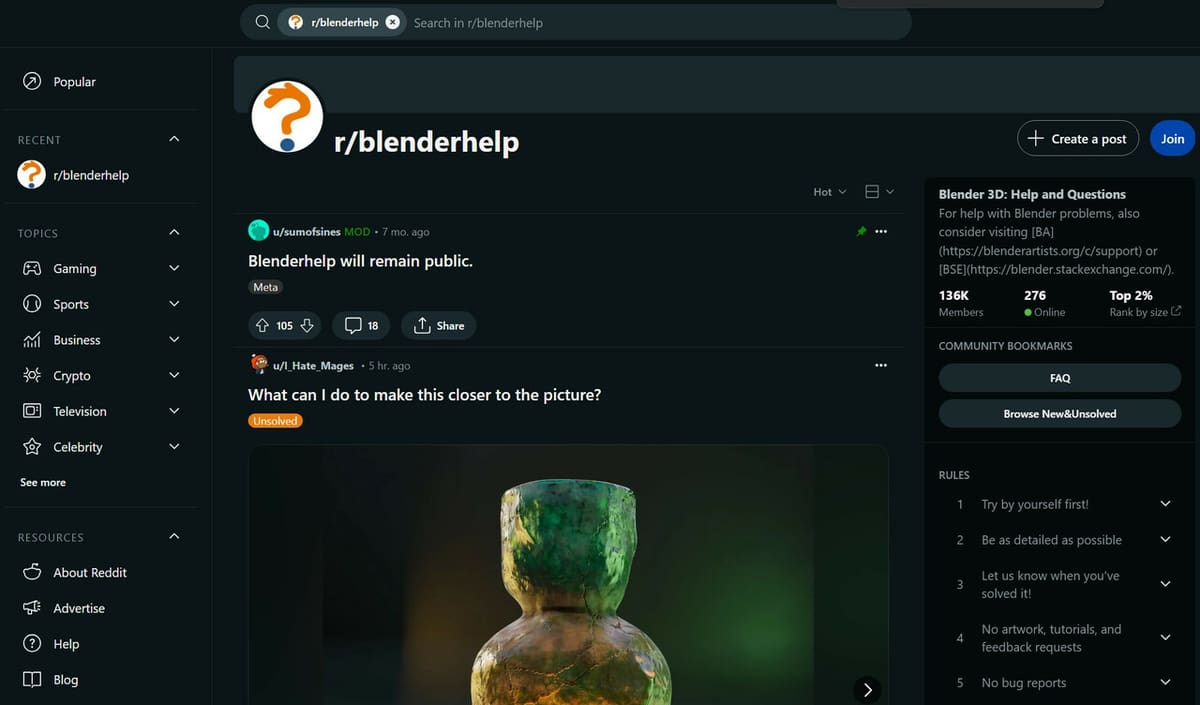
- Don’t feel shy to ask for help. There are many forums such as Blender Artists or Blender’s support Reddit page where you can ask questions if you ever get stuck.
License: The text of "Blender: Text Editor – All You Need to Know" by All3DP is licensed under a Creative Commons Attribution 4.0 International License.