Blender: Weight Paint – Simply Explained

Weight paint is essential to many aspects of the modeling workflow in Blender such as rigging, applying modifiers, and particle spreading, among other things. Explore this guide as we exlain Blender weight paint and show you how to use it!
What Is It?
Blender is one of the most popular 3D modeling programs available. Combining functionality and accessibility (it’s free), this software is used by 3D artists, indie movie studios, and even game developers. Among its many functions, though, 3D modeling is a pretty significant one.
Weight paint is a brush type found in Blender which allows the user to create a heatmap on an object with vertices on it. This is a crucial tool for 3D modeling in this software, but it’s just one of many. If you’re looking for more, take a look at our other in-depth Blender tutorials.
Weight paint can be used in many situations, and here are some examples:
- Character Rigging: Using weight paint will allow you to determine how much of an effect moving a bone on the model will have on a set of vertices.
- Physics Simulation: You can define which parts of an object will be affected more by modifiers.
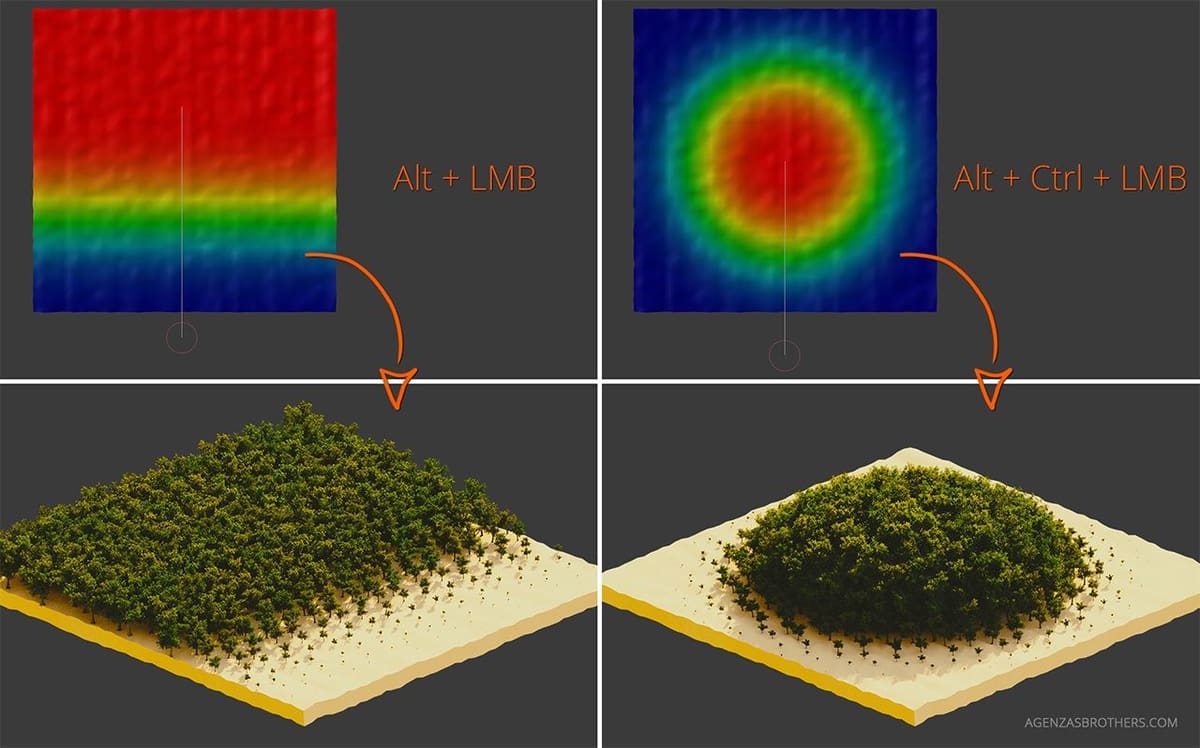
- Particle Spreading: Whether you have an emitter or hair particle modifier, you can paint in which places on the object you want those particles to be on.
They are still many more uses for weight paint, and in the next sections, we will explain how to use this tool in Blender.
Step 1: Creating a Model
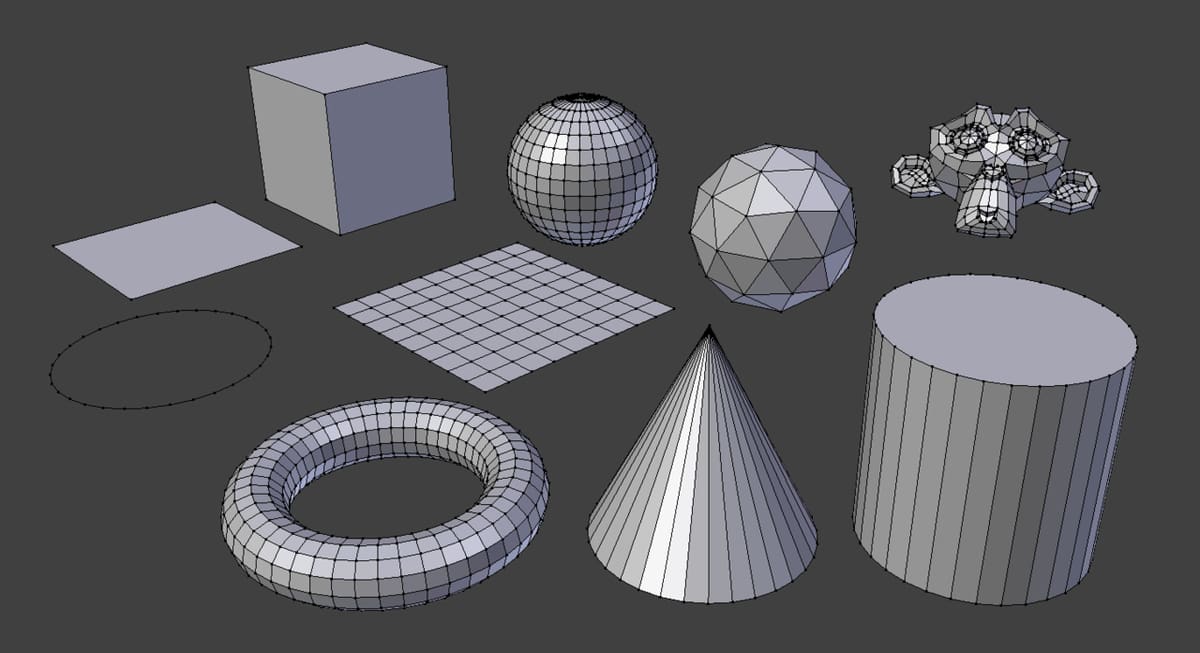
In order to use weight paint, you will need to have a suitable model. Almost any model can work, but it should have enough vertices to work properly.
Let’s start from zero: Open Blender and create an object. We recommend using the default monkey head and a flat plane. Once you have created both, put each one on its own space so they are not overlapping and let’s proceed to the next step.
Step 2: Subdividing the Models
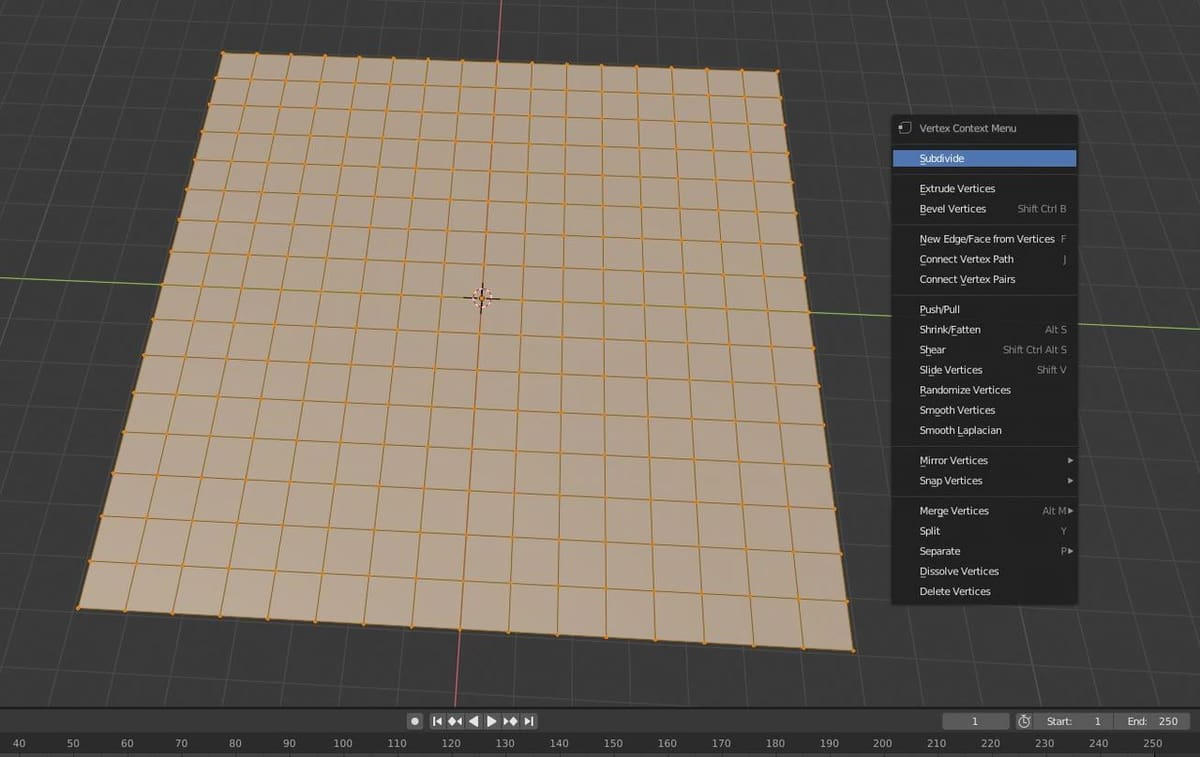
For weight paint to work, your model will need vertices. Some models, like the monkey head you just created, already come with many vertices. But others, like the flat plane you also created, only have four vertices at the corners, which is no good.
To fix this, select the model, go to Edit Mode, and press W. Make sure the entire model is selected. Subdivide the plane at least four times and return to Object Mode. In Blender 2.8, the same process applies except that you must right-click in order to display the subdivide option.
Remember that this process is not always necessary. This is required only if the model you want to apply the weight paint on doesn’t have enough vertices on it.
Step 3: Using the Weight Paint Tool
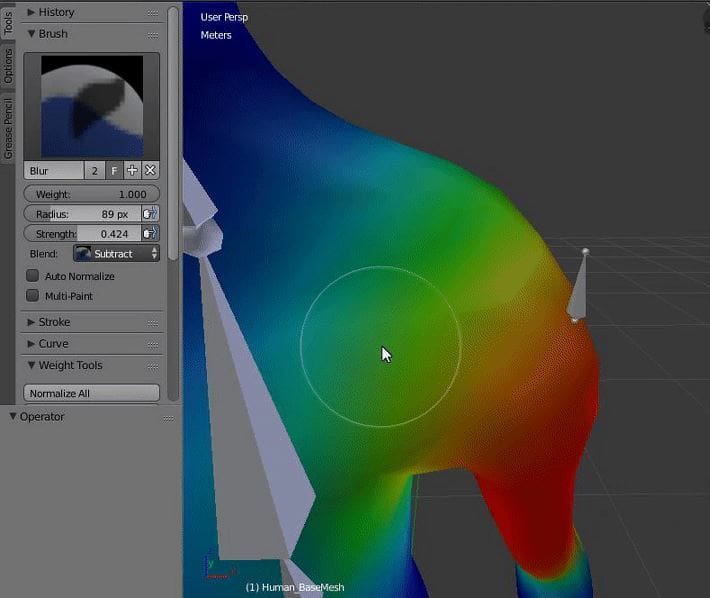
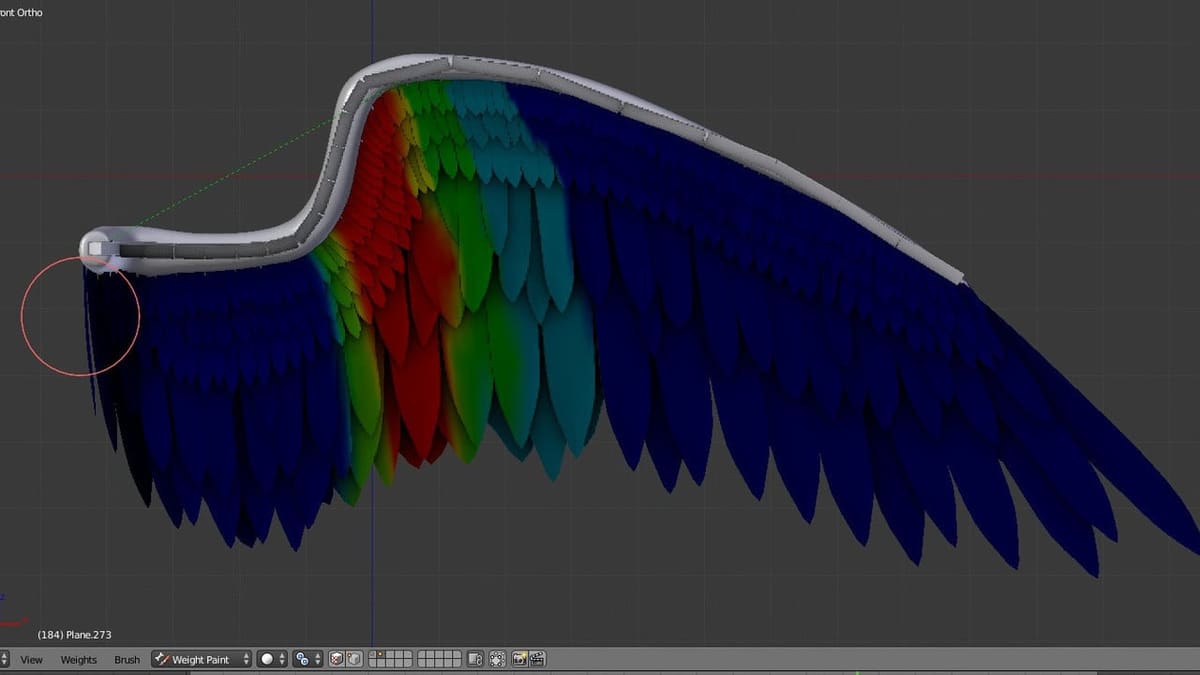
With our model subdivided, go to “Weight Paint Mode” by clicking on the same button you pressed before to go into Edit Mode. Then, start painting the model as you wish, for now. You will see the model turning a dark blue color, and as you paint it, it will change color.
If you’re already familiar with texture painting, this should be pretty much the same thing. You can think of it simply as painting a 3D object. The only difference is that you’re not using this tool to turn the model into a fancily colored heatmap – the colors won’t be visible outside the editor, anyways.
Remember some of the examples given in the intro? The process might seem kind of artistic, but in reality, it has nothing to do with that. Weight paint gives each vertex a value (represented by the color on the heatmap), which is then be used for things like rigging, modifiers, and more.
Brushes
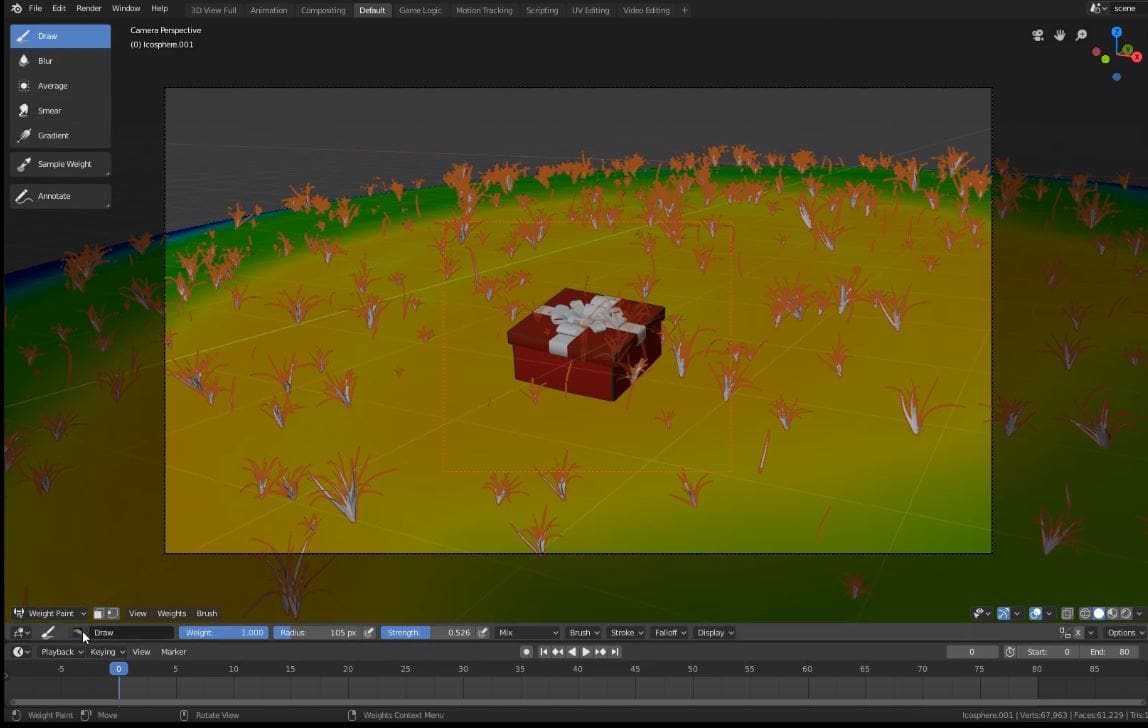
If you’re using Blender version 2.8, the menu section for weight painting has changed slightly but is easier to use, in our opinion. In the top left, you will have six tools from which to choose from (Draw, Blur, Average, Gradient, Sample Weight, and Annotate). Furthermore, you can right-click to open a small menu with three variables (Weight, Radius, and Strength).
Although each one is easy to understand, go ahead and try them one by one, changing values to see what effect that has on the weight drawing, until you find the best combination for your needs. The same options are available for the previous version of Blender 2.79, except that they are laid out differently.
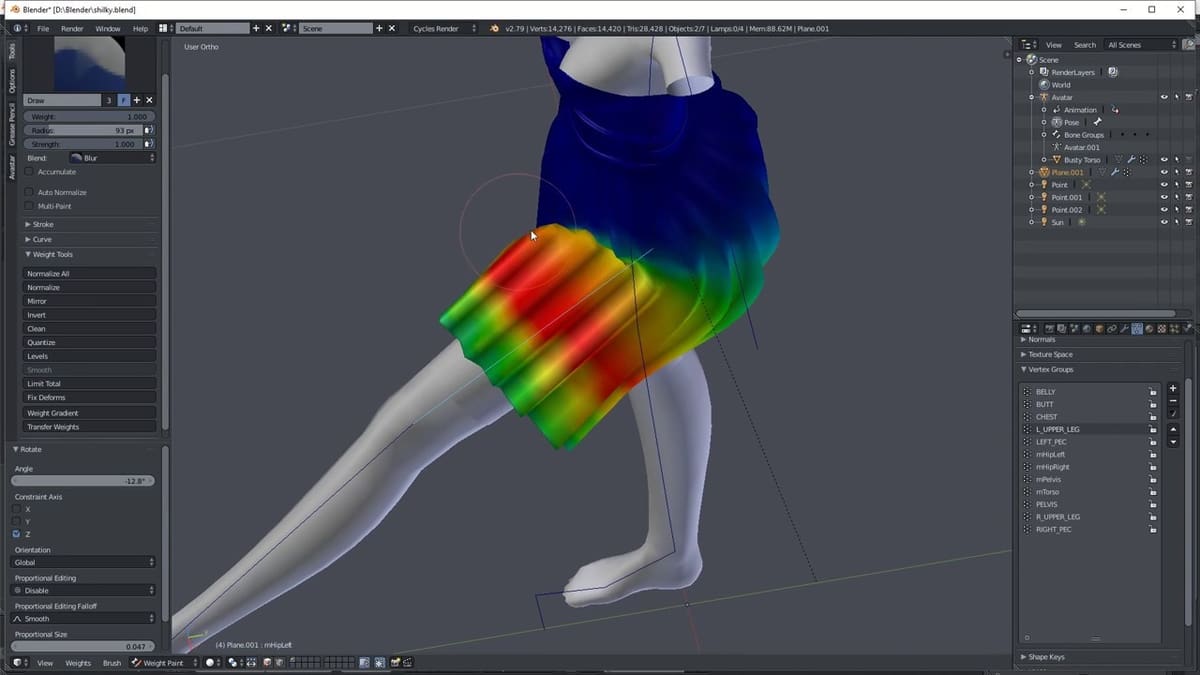
Real World Example
Over time, you’ll see how this tool becomes more and more handy, not just when creating new things but also when it comes to problem solving.
Below is a video showing one of the many uses for Blender’s weight paint tool, where we fix clipping issues between an object and a particle system using this tool.
Feature image source: Blender Artists