Cantilever 3D Printer: All You Need to Know

Cantilever 3D printers feature a unique design with only one X-axis support. Read on for all you need to know about these printers!
Whether a seasoned 3D printing veteran or just starting out, it can be important to know the different types of 3D printer designs and styles. Understanding your options can help you better choose your next printer. Plus, it will help with troubleshooting or when looking for upgrades.
Each type of printer offers its own unique capabilities, along with different strengths and weaknesses. Some styles, like delta printers, use three separate arms to move the hot end, while others, like polar printers, use different coordinate planes entirely. However, the most common printer design is an inverted ‘T’ with two beams to support the X-axis. We’ll focus on a variation of this design, the cantilever printer. With only one X-axis support, the pros and cons can be day and night compared to the typical printer with two X-axis beams.
In this article, we’ll explore the pros and cons of cantilever printers and take a look at some examples. Read on to learn all you need to know about cantilever printers!

How It Works
Much like CoreXY, delta, and belt printers, a cantilever printer is just another 3D printer design.
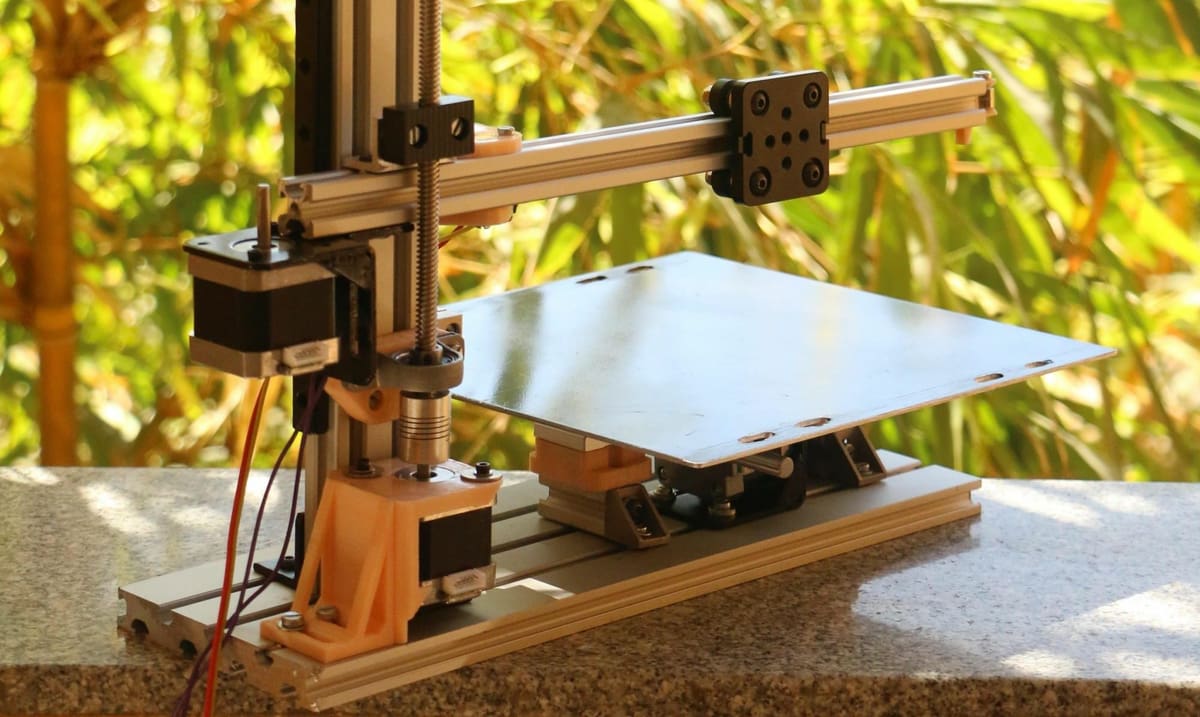
With that said, a cantilever printer looks quite distinctive with its single-arm design and small footprint. It shares many attributes with traditional printers that have two supporting beams on either side of the X-axis. The key difference with the cantilever structure is that the X-axis is only supported on one side. Tight tolerances are all that keep it in line, and for this reason, this one support requires extra reinforcement. The arm is commonly supported with extra aluminum framing or lead screws for bracing.
A cantilever printer is still a bed slinger, a printer that moves the bed back and forth for the Y-axis and uses the same filament and cartesian coordinates as most other 3D printers. The main differences in the cantilever design come down to ways to reduce weight.
As the cantilever printer only has one X-axis support, it’s important to lessen the strain on it by reducing the weight and forces acting upon it. This reduction is accomplished by making the printhead as light as possible and reducing the bed size to keep the X-axis arm short. This means Bowden extruders are common on these printers, and heat blocks are kept light.
These changes come with a few advantages and disadvantages, which we’ll go over next.
Pros

The light design of a cantilever 3D printer offers unique advantages over standard styles. The main difference is the cost-effective nature of the design. The single beam can make it much cheaper to manufacture, with fewer components and an easier assembly process. For this reason, cantilever printers are primarily used for budget machines that cut costs while preserving print size.
This includes printers like the Tronxy X1, which costs around $180, even with an adjustable 150- x 150- x 150-mm build plate and a hot end temperature range of 170-275 °C. Cantilevers make it easier for manufacturers to keep costs low while still creating useful machines.
With only one beam, these printers have a much smaller footprint, making them perfect for makers with space constraints. While every machine is different, this style has an intuitive, easy-to-understand design. It can also be easier to fix and repair cantilever printers since they have fewer components and an open layout. For those with a small space or looking to complete simple printing jobs, this style can be a great option.
Cons

Cantilever printers are generally niche designs for a reason. Vibration can end up having a massive effect on print quality as persistent vibration on the X-axis can create banding, waving, and ghosting if not controlled. These are all visual flaws – lines or ripples on a print – that result from a hot end that is unable to create uniform layers because of the constant vibrations on the axis.
Rigidity is essential to prevent vibration, and the tolerances must be exact on a cantilever printer. This necessitates high-quality bearings, guides, and a reinforced beam that can tightly constrain the hot end to a rigid path. As time and use wear down the joint, it introduces play, which leads to increasingly larger errors, including print failures.
To decrease the strain on the arm, the printhead must remain as light as possible. This typically means no large fans, no direct extrusion setup, and no heavy heater. Cantilever designs almost always use Bowden extruders for this reason alone. While smaller cantilevers are more space efficient, the larger cantilever build-volume to occupied-volume ratio often can’t match the quality obtained from traditional designs, and large beds produce a host of problems for the single beam.
As the bed moves back and forth, it transmits force through the frame. This force grows as the 3D print gets larger on the plate, creating more inertia with every move. The energy is transferred to the hot end, creating deviation in XY- and XZ-planes. Cantilevers work if the guides are rigid and the bearings have no play. But even then, you may need to print slowly to avoid the bed bouncing around.
The fundamentals of the design simply place too much strain on a single joint, and as firmware and slicer upgrades improve the max speed of traditional printer designs, cantilever printers may not be able to keep up.
Printers
For those with limited space or who are just looking for an easy-to-understand motion system, the cantilever style could be a great fit. The printer options below offer everything from active vibration compensation to mesh leveling and pressure advance.
However, if the options provided below aren’t for you, there’s also an endless variety of hands-on, DIY machines designed by hobbyists around the world. These designs explore original ideas that fill specific niches and applications. For example, the Flatpack by eponra is a design that folds into a filament roll box for easy storage.
For more of these custom designs, check out this Printables Collection, which offers dozens of unique machines. If purchasable is more your thing, read on for some great pre-assembled cantilever 3D printers that are ready to go!
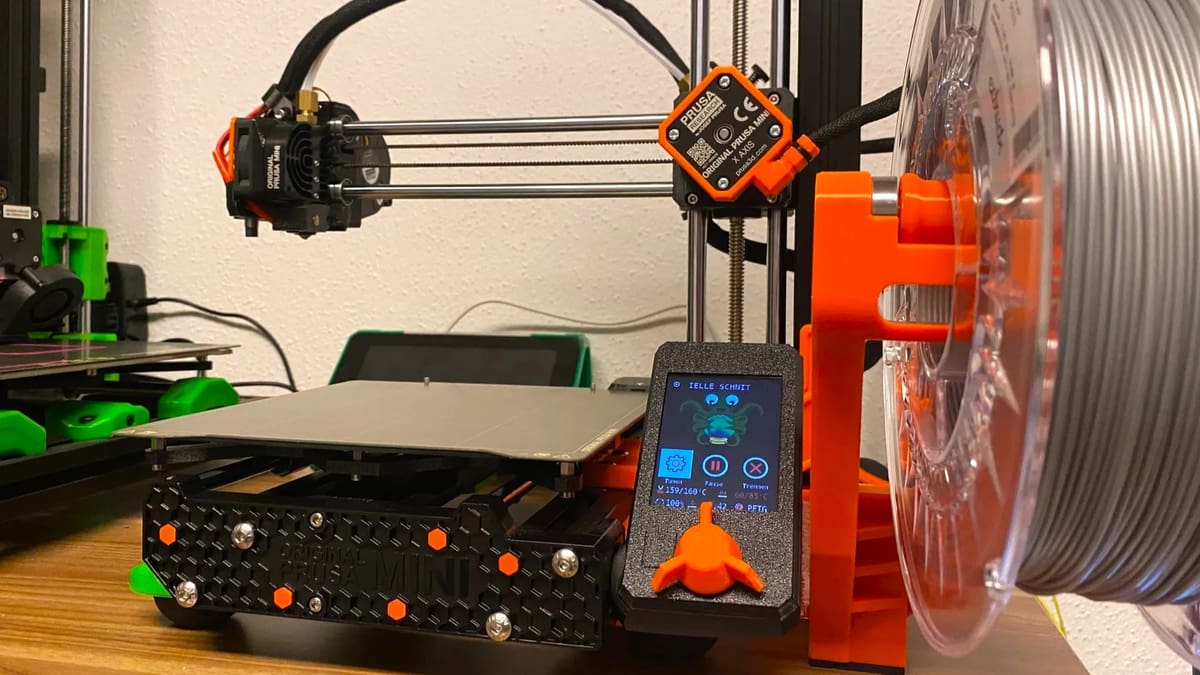
Prusa Mini+
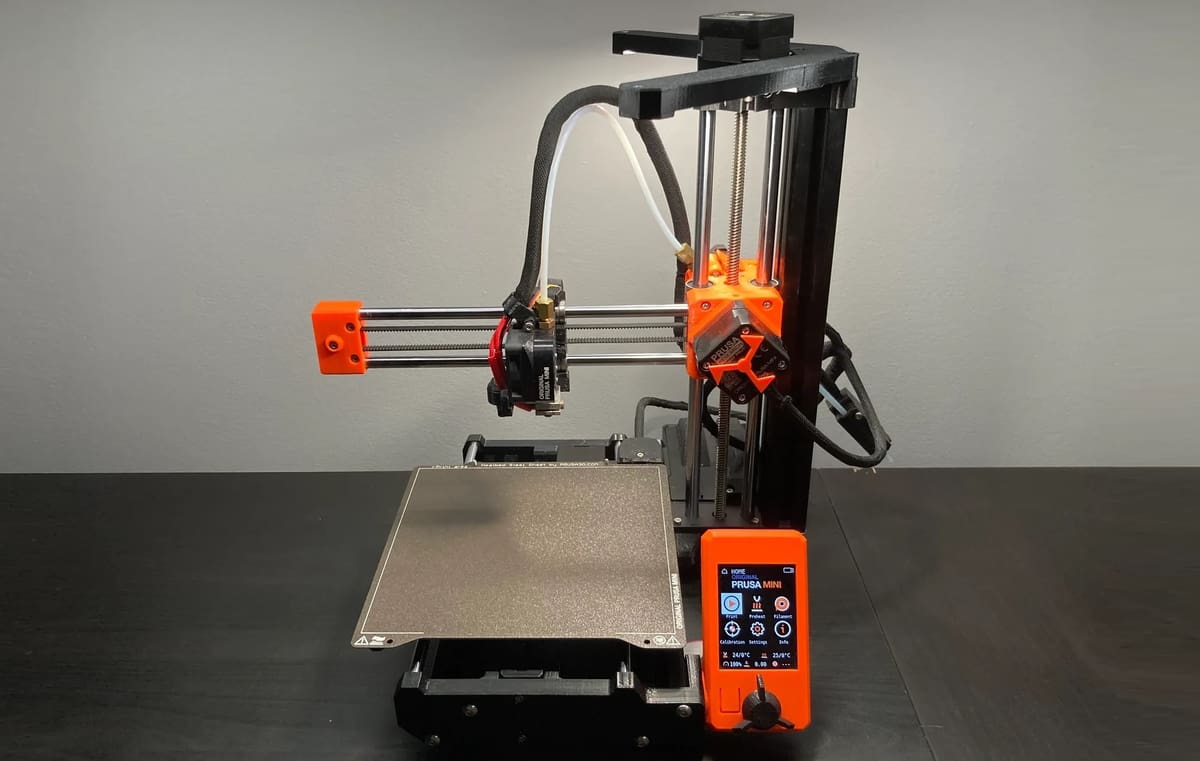
Prusa’s Mini+ comes either in kit form or partially assembled and packs several advanced features for easier printing. With full auto-bed leveling and a bulked-up support column, this machine counters vibration with a sturdy design and input shaping.
While compatible with most other slicers, Prusa machines are recommended to use with PrusaSlicer. Designed by Prusa, this slicer has an exact profile of the Mini+ for more accurate prints. This, coupled with a 16-point bed mesh calibration system, creates a detailed measure of the machine’s capabilities for reliable printing.
Although the Mini+ is relatively expensive, in the long run, it provides better value with fewer repairs and failed prints – especially if you consider upgrades and mods.
- Price: ~$430
- Size: 180 x 180 x 180 mm
- Features: Bowden extruder, input shaper, pressure advance, fully automatic mesh bed leveling, heated bed
Bambu Lab A1 Mini
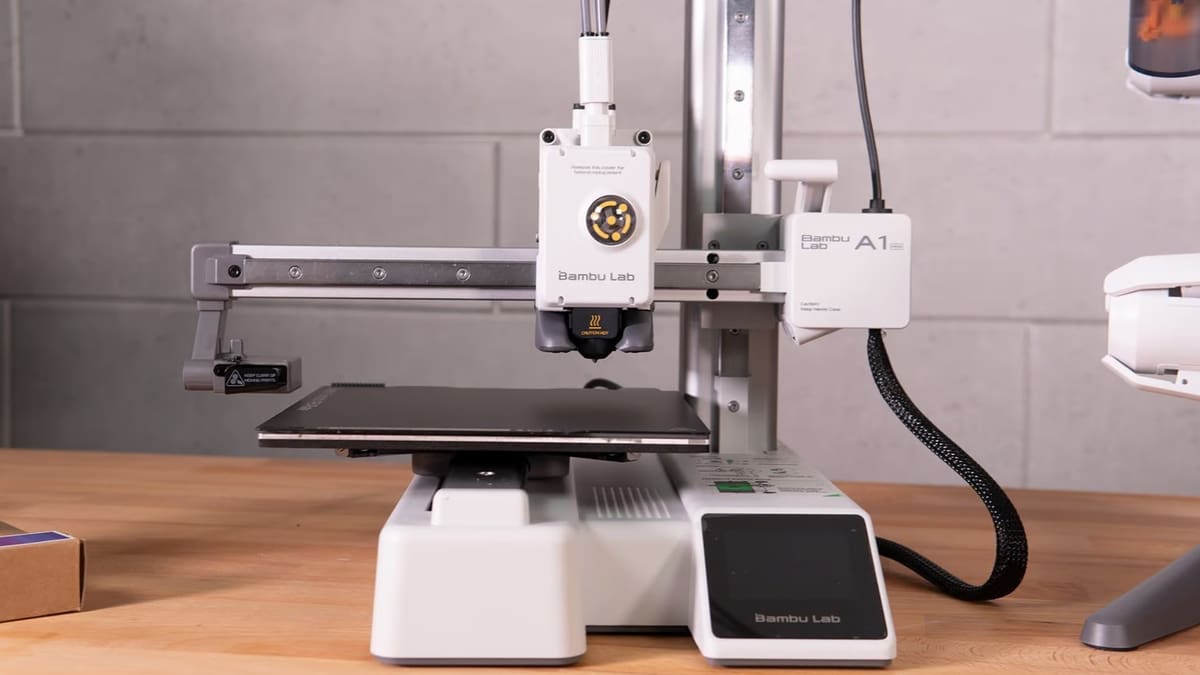
The A1 Mini by Bambu Lab is a newer machine that brings an array of features not often seen in cantilever designs. The A1 has a direct extrusion setup and, with a ~$160 add-on, four-color printing with the AMS Lite. The AMS Lite feeds directly into the A1 and provides seamless integration.
With a quick-swap hot end design, dual fan cooling, and cloud access, this printer is packed with great functionality for a low cost. To counter vibration, the printer is equipped with all metal rails and bearings along with vibration resonance, nozzle pressure, and flow rate calibration. While the build plate is smaller than many other budget printers, it makes up for it with high-end calibration procedures and accessibility.
- Price: ~$300
- Size: 180 x 180 x 180 mm
- Features: Direct extrusion setup, full-metal linear rails and bearings, vibration compensation, flow rate compensation, Z-offset calibration, vibration resonance, chamber camera, heated bed, power loss recovery
Ender 2 Pro
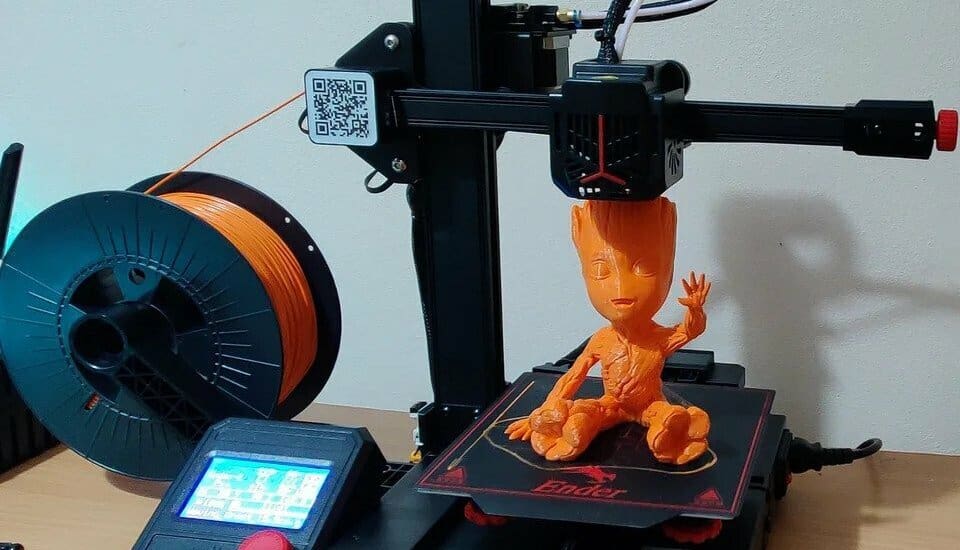
This portable printer from Creality features a carrying handle on top and a lightweight design to reduce vibration. The smaller bed counters momentum issues with vibration, and the Bowden extruder takes the weight off the print head.
Designed for beginners, each main component on the Ender 2 Pro is colored red for faster repairs and a better understanding of the machine components. With power loss recovery, a heated bed, and belt tensioners, this is a budget printer best suited for small spaces and those just starting out.
At time of writing, the Ender 2 Pro is All3DP’s budget pick for small 3D printers, yet it’s getting trickier to get one’s hands on it. Should you struggle to get one, you can have a look at the Kingroon KP3S 3.0, a budget printer that really impressed us when testing it in our workshop.
- Price: ~$130
- Size: 165 x 165 x 180 mm
- Features: Bowden extruder, power loss recovery, heated bed
License: The text of "Cantilever 3D Printer: All You Need to Know" by All3DP is licensed under a Creative Commons Attribution 4.0 International License.
CERTAIN CONTENT THAT APPEARS ON THIS SITE COMES FROM AMAZON. THIS CONTENT IS PROVIDED ‘AS IS’ AND IS SUBJECT TO CHANGE OR REMOVAL AT ANY TIME.