
How to Print a Colorful Lithophane with Bambu Lab Printers

Wondering how to take your lithophanes to the next level? Read on to learn how to print vibrant Bambu Lab lithophanes!
Have you seen the eye-catching, 3D printed panels or tablets that magically reveal an image when lit from behind? They’re called lithophanes, and they’re plaques of translucent material whose thickness varies in such a way that, when lit from behind, they create an image by altering the amount of light that passes through. It’s easy to create one with a fused deposition modeling (FDM) printer and white filament.
However, have you ever wondered about creating a colorful lithophane? If the answer is yes, we’ll tell you how to do it with a Bambu Lab printer.
Let’s start by comparing 3D printing to its older brother, ink printing. Using just four colors of ink – cyan, magenta, yellow, and black – you can print colorful 2D images. This is possible because the printer mixes these hues as needed based on a digital version of the image to be printed. Similarly, filament colors can be mixed to create a 3D printed colorful “image”. It’s worth mentioning that the resolution of an ink printer is drastically greater than a 3D printer. Nevertheless, the results with a 3D printer are astonishing. The only constraint, of course, is the capability to accurately change the filament color as needed mid-print.
This represented a challenge two years ago because of the single-nozzle nature of most 3D printers, leading to manual changes. However, the new automated filament changing setups – like Bambu Lab’s Automatic Material System (AMS) – solve this issue. The AMS consists of a four-spool storage unit, a set of individual feeders (one for each spool), a filament hub that routes the desired filament towards the extruder, and a set of sensors that help during the retraction, cutting, and purging stages. The combined operation of these elements leads to an automated process that can be repeated as many times as needed.
As you can expect, complex hardware like this requires a more elaborate slicing process than that for single-nozzle, single-color printers. Bambu Studio, Bambu Lab’s slicing software, simplifies this task. A user-friendly interface allows us to easily match geometric elements of the model to the desired filament colors. However, for this tutorial, we won’t use this function, since we’ll work with independent STL files on the same plate. Each one of them will be a single color, but more on this later.
So, now that you know what a color lithophane is and how Bambu Lab’s AMS works, let’s dive into the details about how to create your own colorful lithophane!
Step #1: Creating the STL File
The first step is to generate the STL file – files, in fact – that will tell the printer what to print with which color. To do so, we’ll use a tool from a popular website: Lithophane Maker. This website provides a set of features to create different styles of lithophanes, including heart-shaped, curved, light boxes, and one of our favorites, lithophane globes. We’ll use their Color Lithophane Maker tool for this tutorial.
While there are other websites that create lithophanes from images, this is the only one we’ve found that creates color lithophanes using one STL file for each color, as opposed to other methods that consist of printing a single white lithophane and using color-printed paper behind it.
Without further ado, let’s jump into the instructions:
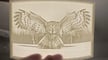
- Select a colorful image of your choice. We will use an AI-generated Ironman image from user SuddenlyIntentionallyTempest34.
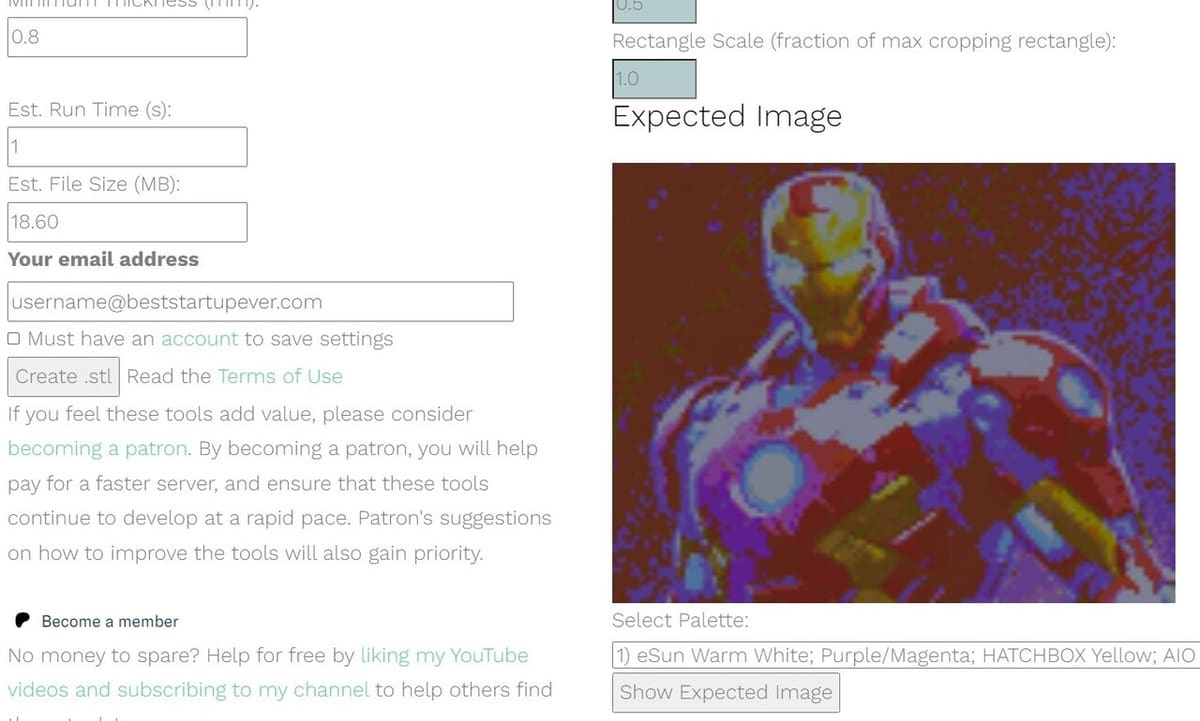
- Go to the Color Lithophane Maker tool and upload your image.
- Modify the main parameters. We suggest the following values:
- Layer Height: 0.08 (0.1 is also fine)
- First Layer Height: 0.15
- Width: 144 (to fit Bambu Lab Backlight Board)
- Height: 108 (to fit Bambu Lab Backlight Board)
- Maximum Thickness: 1.6
- From the “Select Palette” drop-down menu, select the first option, “1) eSun Warm White; Purple/Magenta; HATCHBOX Yellow; AIO Cyan”. Don’t worry if these aren’t the filament brands you’re using. We’ll explain this step in detail in the next section.
- Fill out the email address field and click on “Show Expected Image” to see a preview of the lithophane. (You won’t be able to see the preview without signing in.)
- Finally, click on “Create .stl” to generate the STL files.
You will then see a ZIP file in your downloads. Inside, you’ll find five STL files: one for each one of the four colors, plus an additional white (top) one, as well as a .txt file that contains the settings used to create the lithophane.
Note that the width and height values are set so the lithophane fits in the Bambu Lab Backlight Board. However, because it might be out of stock from time to time, feel free to look for alternatives. We found some reliable frames that can fit commercial LED lights, like this printable frame for photo studio LED lights, or this one for the LED light from Bambu Lab’s LED Lamp kit.
Step #2: Choosing Colors

Before continuing, we would like to take some time to talk about and emphasize the importance of picking the right colors to successfully create a colorful lithophane.
Let’s go back to the “Select Palette” option on the Lithophane Maker website. As mentioned, it doesn’t matter if you don’t use the exact same brands and colors described in the default option – or in any of the other options. As long as you stick to the same – or very similar – colors, regardless of the brand, the result should be similar.
As a matter of fact, many brands have bundled some of their filaments with color lithophanes in mind. Bambu Lab is one of them, with their PLA CMYK Lithophane Bundle. In our case, we used white, magenta, and yellow from MatterHackers’ Build Series and Baby Blue from Hatchbox because that’s what we had in hand. What about the result? You’ll see it soon!
Step #3: Slicing

As mentioned, color lithophanes rely on the capability of changing filament colors mid-print.
While this process can be achieved by modifying the G-code to insert filament change commands, this task can become tedious and time-consuming, since we would have to babysit the printer and wait for it to request the manual filament change. Assuming that a color lithophane needs four filament changes per layer, one for each color, for approximately five layers, then the process becomes a nightmare.
Fortunately, Bambu Lab’s AMS comes to the rescue, providing an automated filament change. To achieve the aimed-for results, follow the next steps:
- Import all five STL files into Bambu Studio and click on “YES” when asked if you want to load the files as a single object with multiple parts.
- In the Filament section, ensure that there are four filaments loaded, and specify each one of the colors – cyan, magenta, yellow, and white – to the corresponding filament holder in the AMS. This step is crucial to obtain the desired result. It can be easily accomplished if you’re using Bambu Lab filament and if the printer is connected to your computer. Just load the filaments and click on the “Synchronize filament list from AMS” button in Bambu Studio.
- In the Process section, check that “Global” is toggled. Under the “Quality” tab, set the right values for “Layer height” and “Initial layer height”, based on your settings when creating the STL file. If you don’t remember the values, don’t worry; along with the five STL files there’s the .txt file that contains this information.
- To ensure a solid set of layers, set the infill density to 100% and the pattern to “Rectilinear”.
- Now toggle from “Global” to “Objects” and match each STL file with its corresponding filament color. Use the color included in the STL file’s name as a reference.
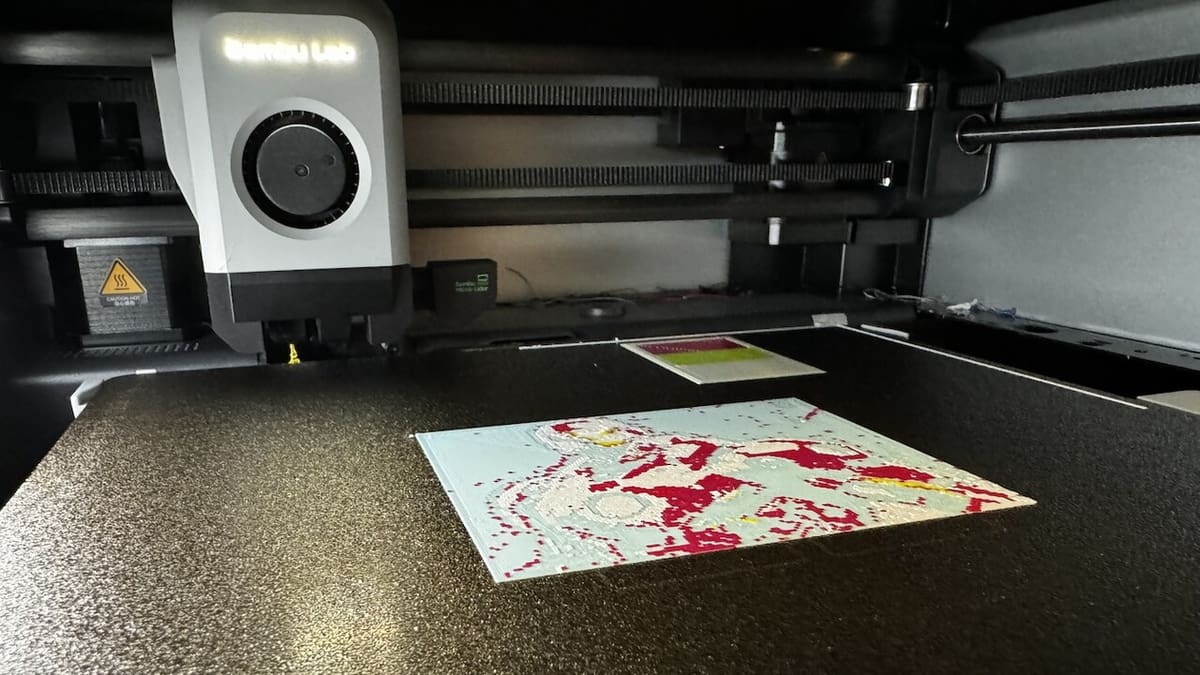
- Click on “Slice plate” and wait for Bambu Studio to finish the slicing process. Once finished, it will show you the breakdown of filament usage and time estimation.
Step #4: Printing
The following steps are quite straightforward and shouldn’t represent a challenge:
- Export the sliced file and save it to a MicroSD card. If your printer is connected to your computer, you can send it directly.
- Insert the MicroSD card into the printer and select the right file.
- Sit back, relax, and enjoy. The printer will do the rest!
Once finished, we recommend waiting for the plate to cool down before trying to remove the lithophane. The next step is to mount it into a frame and set the backlight source.
Step #5: Setting Up
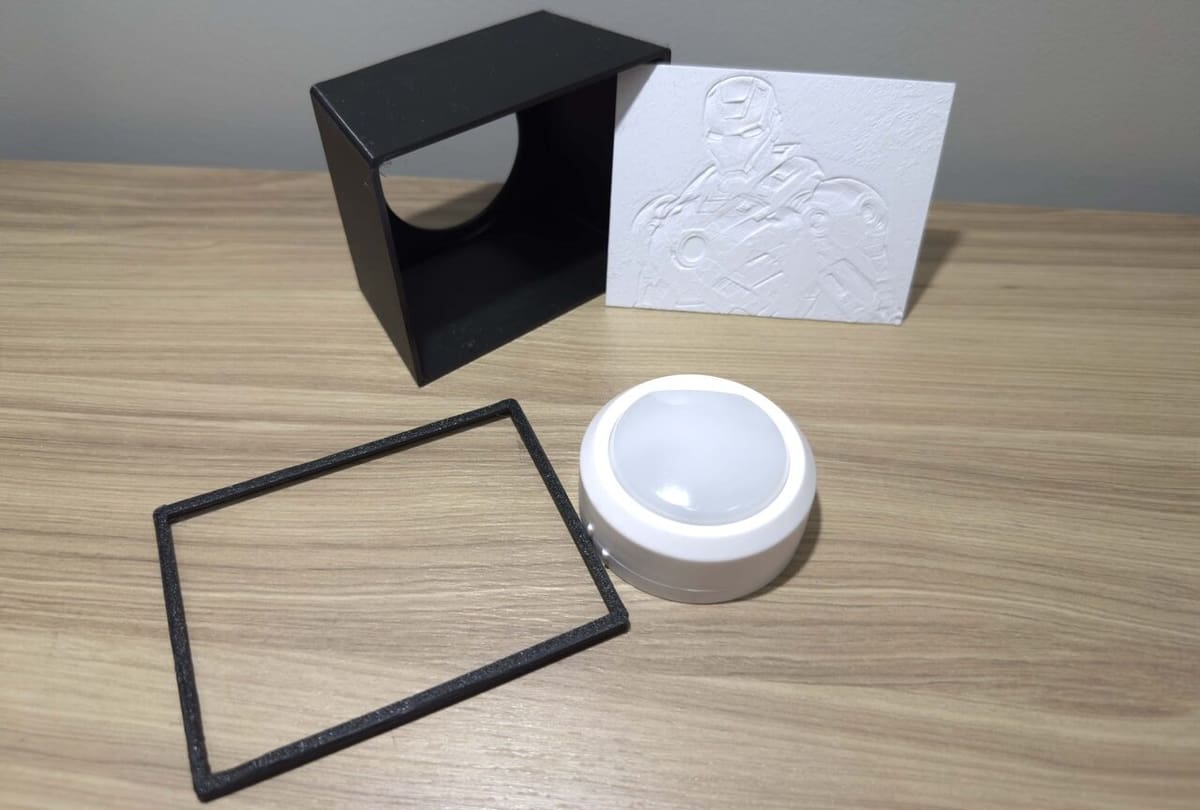
The lithophane by itself is ready to be used. It’s as simple as pointing it to a light source – like the light bulb in the ceiling or the light from a lamp – to see the magic revealed. However, for a better, more consistent display, a nice frame and a uniform light source are needed.
Many people have created frames that you can 3D print. These can be found in many repositories. We found this one to work nicely with Bambu Lab’s LED lamp kit. This other frame uses as backlight these photo booth lights. Additionally, Bambu Lab has developed their own frame, which is compatible with their Backlight Board kit and can be downloaded from the Wiki.
Despite having many already available options, we opted to create our own frame to fit our lithophane. By taking some basic measurements and using Fusion, we created a simple box-like frame to hold a puck light inside and attach the lithophane to the top or front of it.
The last step consists of putting everything together:
- Place and secure the light inside the frame.
- Fix the lithophane to the front of the frame. Depending on your light source, you may need a light guide plate, which is a white plate that helps diffuse light.
And that’s it! You’ve just created your first colorful lithophane. Now, simply turn on the light and enjoy the show.
License: The text of "How to Print a Colorful Lithophane with Bambu Lab Printers" by All3DP is licensed under a Creative Commons Attribution 4.0 International License.