CraftWare: How to Download, Install & Use This Slicer

It pays to know how to get the most out of your slicer. Dig into this comprehensive guide to learn how to download, install, and use CraftWare.
Introducing CraftWare
A slicer converts your 3D models into a format that can be understood by 3D printers. Many makers are familiar with tools like Cura and Slic3r, but fewer know about CraftWare, a slicer developed by the well-established 3D printing company, Craftunique.
Well-known for the CraftBot 3D printers, this Hungarian company released the slicer free of cost for general use. Besides being free, it’s packed with features that can significantly enhance your 3D printing experience.
This article should get you started with CraftWare so that you have everything you need to know before you dive in.
Download and Installation
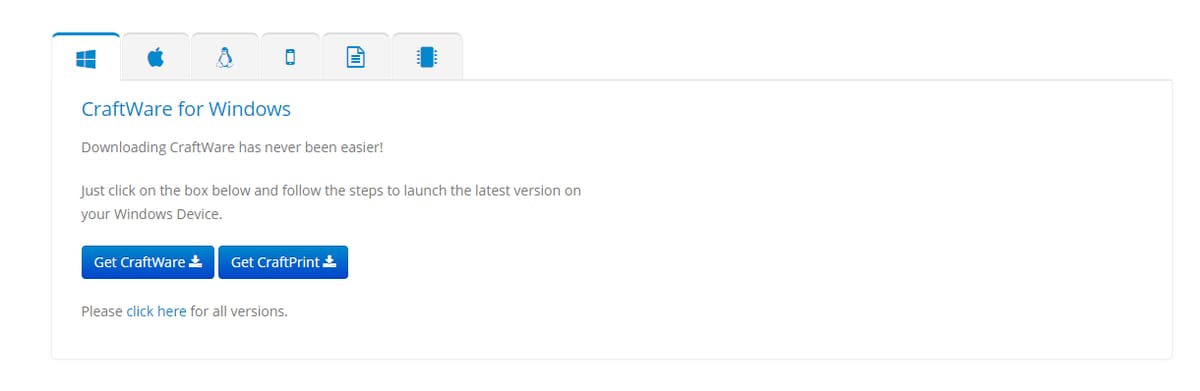
The CraftWare slicer is available to download for free. When you visit the site, you’re greeted with some information regarding the slicer and a few tabs for different operating systems, documentation, and additional software.
Let’s consider an installation procedure for Windows. (The process for other systems is similar.) Among the download options available, you need to click on the “Get CraftWare” tab. A pop-up window will appear prompting you to create an account. The process is very straightforward and hassle-free, and once you complete the setup, the download begins instantly.
The other button, “Get CraftPrint”, allows you to download control software for your printer. Not entirely necessary, but cool to have.
Also, they have a link to all their previous versions just below these two links. So, in case things go wrong, you can always switch to a more stable previous version.
Once the EXE file completes downloading, all you have to do is run it and follow the steps. Assuming everything goes smoothly, you’ll be up and running with CraftWare in just a few minutes.
CraftWare Basics
The software has three basic views:
- Object view: Modify, orient, bisect, duplicate, etc.
- Support view: The support settings for your object.
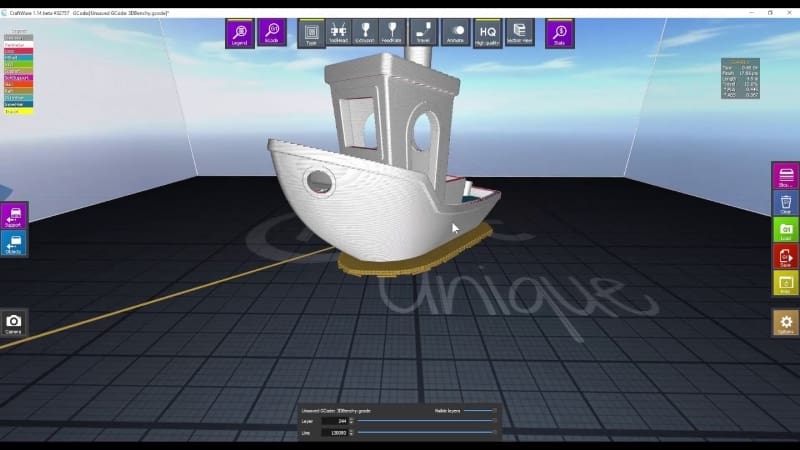
- G-code view: Once you’ve sliced the object, this view shows the sliced preview of the model.
Every setting that you’ll need to set up the slicer for your machine will be in the options tab on the right-hand side. We’ll take a look at the settings in order:
- General: These are just your general settings, like language, updates, etc. There’s not much to edit here. You can leave the settings as they are.
- Graphics: An overview of the graphics settings.
- Keyboard: Information about the keyboard shortcuts that you can use to navigate in the slicer.
- Colors: These are the colors that the slicer uses when differentiating between different line types in the final G-code. This is just a visual aid, so you can change the colors or leave them as they are.
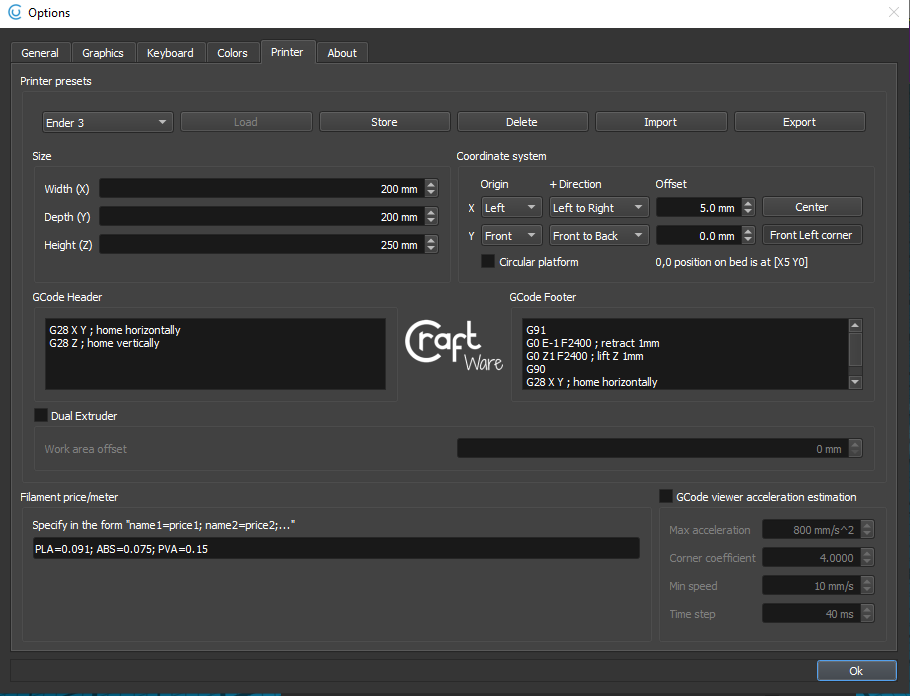
- Printer: This section is where you configure your printer for the slicer.
- Printer presets: If you have a CraftBot printer, the software has a preconfigured profile. If not, select a profile and input your printer parameters in the next sections.
- Size: Set the build volume of your machine in millimeters.
- Coordinate system: Each printer will be different when it comes to these. If you’re coming from another slicer into this, input the same offset and origin settings as the previous one.
- G-code header: This is the G-code that will be run before your actual printing begins. For example, you may want to home the printer and prime the nozzle before the printing starts. You can set the custom G-code as you wish.
- G-code footer: This is the ending G-code. It generally commands the printer to shut down the heaters and home.
- Filament price/meter: If you would like to know the cost estimation for your printed part, you set the price for your material here.
- About: This section shows the different improvements that were made in each version of the software.
Setting Up the Object
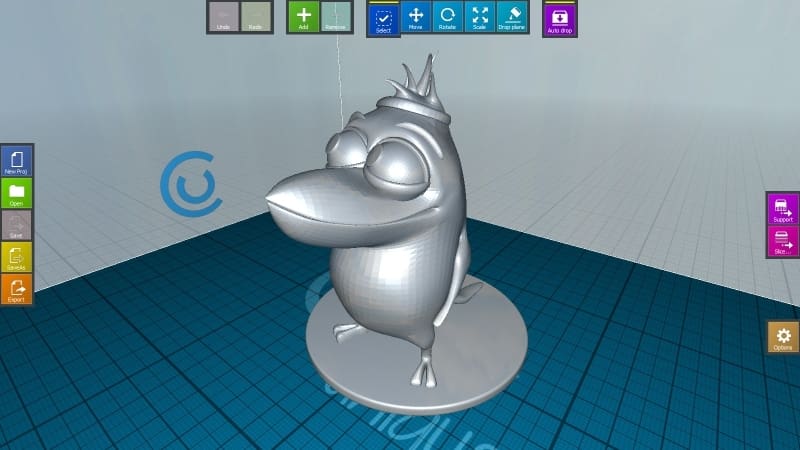
Once you’re done configuring the printer, you’re ready to proceed with preparing your object for the slicer. It includes orienting the object, duplicating it, and setting it up the way we want it to be.
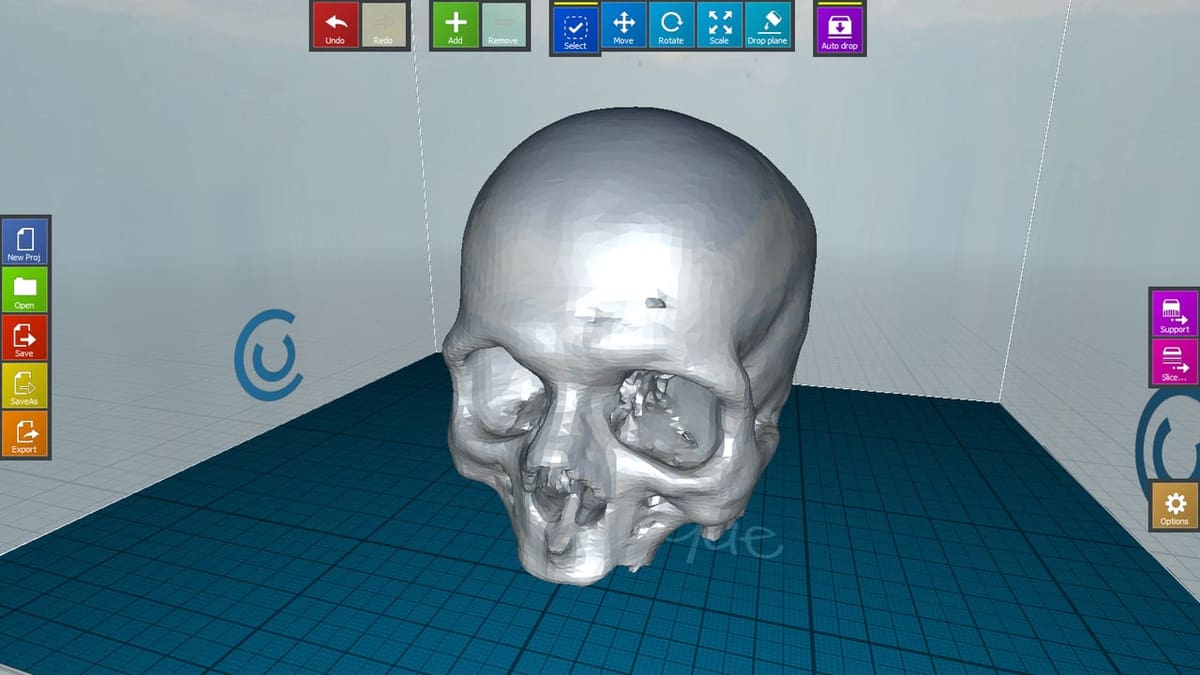
- Add: To bring an object into the slicer, you need to click this tab. It lets you select the file you want. STL, OBJ, and 3MF file formats are supported.
- Move: Once the object is on the build plate, you can move it as you like.
- Rotate: This lets you rotate your object in any direction you would like. The arrows are the pivoting points, meaning the object revolves around the arrow with the arrow being the center of rotation.
- Scale: If you want to change the size of your object, you can do so in this tab. The size of your object is denoted in millimeters and percentages. You can vary these options.
- Drop: This is a great feature to have. It lets you choose a side on which you want the object to be laid flat on the bed.
- Bisect: A unique feature that helps you to fit a large object into your build volume. If your model size is bigger than your build volume, the bisect option helps you a lot.
- If you click on the Bisect tab, a yellow frame appears. This is the cutting plane.
- You can drag the cutting plane around and click and drag on purple arrows to rotate the plane. If you want to snap the plane at 90 degrees, click on the purple arrows once.
- After selecting the required position of the cut, click on the Bisect option at the bottom of your screen.
- This cuts your single object into two different objects.
- Now, each cut is a separate object and you can orient it as you like.
- Autodrop: Like the previous drop option, this also lays the object flat on the bed. But you don’t need to select any surface. The slicer does this automatically.
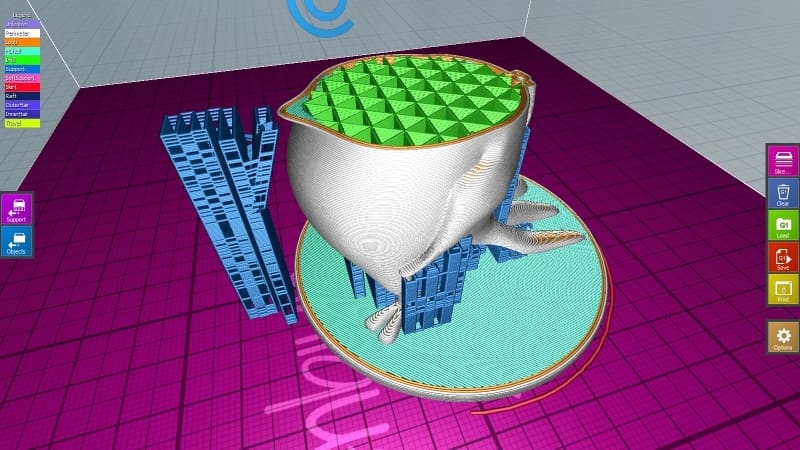
Supports
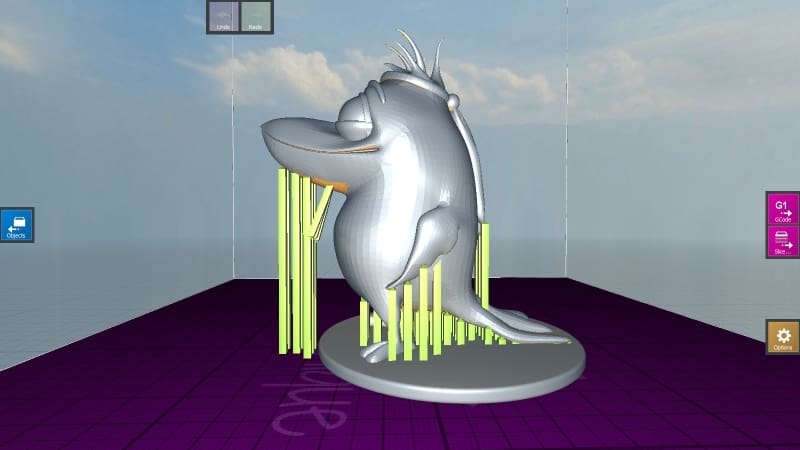
Select the support option on the right side of the screen to enter into the support view. Support generation is probably the strongest point of CraftWare. Adding manual supports is very easy in CraftWare. The supports also come off very quickly from the printed object.
- Automatic support generation: The name says it all. The supports for your model are generated automatically.
- Support bar thickness: This lets you choose the thickness of each supporting member. The default is 1.8 mm. You can always change this.
- Minimum surface steepness: This is the surface steepness angle of your object. It is recommended to set this value at 50-60º.
- Automatic supports only from bed: When you tick this option, the supports are generated only from the build platform. No supports are created on top of the object.
- Manual supports: Move the cursor to the area you want the supports to be and click there. A supporting member is created. If you want to delete any of the supporting members, hold Ctrl and click on the support you want to delete.
Slicing
CraftWare provides you with two options for slicing your objects. We’ll be having a look at each of these modes in detail.
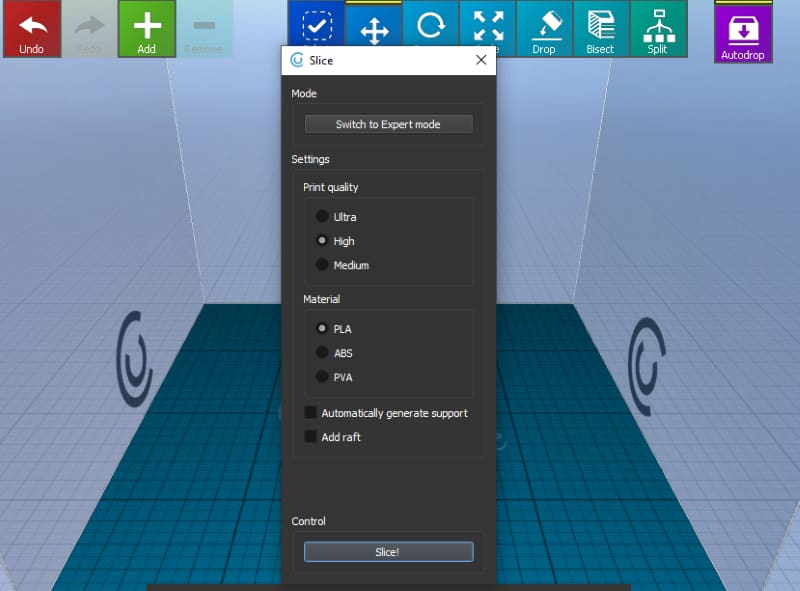
Easy Mode
This mode has preconfigured settings for slicing your object. If you want a fast print and don’t want to be bothered much, you can choose this setting. You can choose from three options:
- Print quality: Sets the layer height for your object.
- Ultra: 0.1 mm
- High: 0.2 mm
- Medium: 0.3 mm
- Material: Here, you can choose the material you’re going to use. It has a preset temperature profile for the selected material.
- PLA: 215 °C
- ABS: 250 °C
- Automatically generate support: Generates support structures automatically.
- Add raft: A raft is like a base for your object. It’s used to reduce warping and increase bed adhesion. A raft is recommended for use on ABS materials, though it isn’t necessary. By selecting this option, CraftWare adds a raft automatically beneath your object.
That’s it for the easy mode. Click on “Slice” and the viewer changes to G-code view.
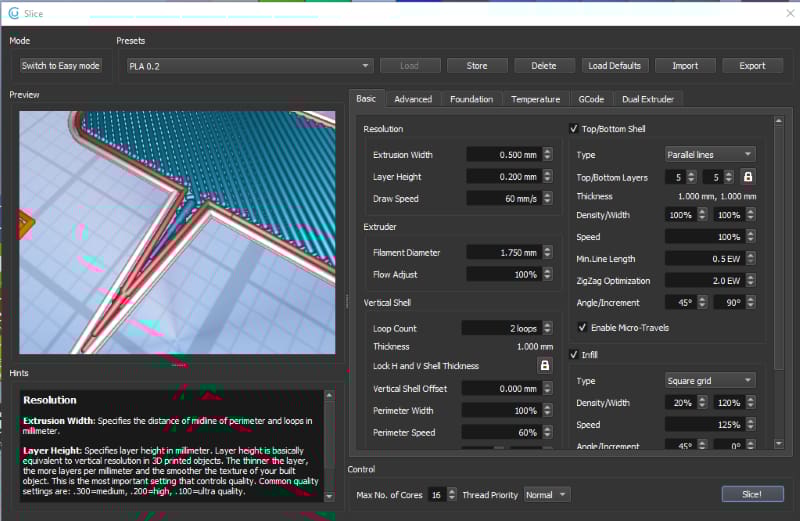
Expert Mode
This is for those who want to fine-tune their settings, change infill, and customize the entire printing experience. It allows for more control over the final output, and by extension, you get an overall better object. Expert mode has lots of settings. A few are standard, and others provide some additional control. We’ll take a look at the important ones that you should know to slice your models.
Basic Settings
- Resolution: This affects the quality and the look of your objects.
- Extrusion width: Width of a single extruder line.
- Layer height: The smaller the layer height, the better the quality but longer the print time.
- Draw speed: This is the primary printing speed of the object. You can set yours by printing the speed calibration tower and get it perfected.
- Extruder: The extruder-specific settings.
- Filament diameter: Input the diameter of filament you’ll be using.
- Flow adjust: It is the extrusion rate. It is the rate at which the material is extruded. By default, it is set to 100%. But if you’re facing any extrusion issues, you can change this setting.
- Vertical shell: This is the vertical wall of your object.
- Loop count: The number of walls you want in your object. A higher number of walls equals strength.
- Thickness: Based on the extrusion width and loop count setting, it shows the total thickness of your vertical wall.
- Top/Bottom shell: The base and upper layers in your object. You can choose whether or not to have them.
- Top/Bottom layers: Specify the number of solid layers you require on the top and bottom surface of your model.
- Thickness: This value is calculated automatically, based on the layer height set.
- Density: It specifies the distances between the lines of the horizontal shell. At 100%, the distance is precisely 0 mm between the lines. The lesser the density, the more the distance between 2 consecutive lines.
- Width: The extrusion width of a single line. When width increases, the number of lines decreases.
- Speed: Dependent on the draw speed set. 100% is the same as the set draw speed.
- Minimum line length: Any line smaller than this length is not printed.
- Angle: Sets the angle of parallel lines type on the first layer.
- Increment: This angle is added on every layer for parallel lines.
- Micro travels: If enabled, the head only travels and does not extrude material in short sections of the layers.
- Infill: The infill settings of the model are controlled in this section
- Type: The structure of infill responsible for imparting strength to object.
- Density: The amount of infill you want to extrude material inside the object. A higher value means improved strength, but also uses more material and takes more time.
- Width: The extrusion width of a single line of infill. A higher value gives you more strength
- Speed: Speeding up infill printing can save time without jeopardizing quality, to a certain degree.
- Angle: The angle of the first layer of infill.
- Increment: This value adds to each subsequent layer of infill.
- Vase mode: This is a special mode used to print hollow objects without any infill. Only top and bottom shells of the object are printed. A very famous model that’s generated using vase mode is the Curved Honeycomb Vase.
- Spiralize: This prints the object without any retraction. It eliminates any Z Seam, and your nozzle is continuously moving upwards in the Z direction. The object is essentially made of a single long strand of filament.
Foundation
These settings control the initial layers of your model.
- First layer: Denote the first layer settings of the model.
- Height: A higher first layer height, improves bed adhesion.
- Extra adjustment: It controls the flow rate of the first layer. You can increase this for a solid first layer, but don’t tweak it too much.
- Draw speed: Printing speed for the first layer should be slow. This ensures that the material lays down smoothly and sticks to the bed well.
- Travel speed: The movement of extruder during the first layer. Should be lower than base setting.
- Temperature: A hotter first layer means a better adhesion to the print surface.
- Skirt: It’s an outline of your printed model for just a single layer. Helps in priming the nozzle before actual printing begins.
- Offset: Set the distance at which you want the skirt to be from the object.
- Minimum length: The minimum length of material that needs to be used before printing begins.
- Brim: Brim is the additional material on the base layer that helps with adhesion of object and support structures to the bed. It increases the first layer surface area, improving adherence. After printing, a brim can be removed away easily. Here’s a guide that tells you all about the skirt and brim settings.
Temperature
Here, you can set the material extrusion temperature.
- Fan speed: Enables/Disables the part cooling fan. Some materials benefit from cooling, others don’t need it. While using the fan, disabling it for the first few layers will give stronger first layers and improved bed adhesion.
- Heating: Controls the bed and hot end temperatures.
You can also store your settings, export, or load the saved presets in expert mode. Once you’re through with your settings, just hit “Slice”.
G-Code
The G-code viewer lets you get a preview of the object. It shows you exactly how the model will be printed. It’s a great tool to check the settings before you proceed with printing the model.
- Type: This shows you every kind of line differentiated by color. You need to toggle the Legend tab for color settings.
- Tool head: If you’re using a dual extruder system, you can view which part of the model is printed through which extruder.
- Extrusion: If you have different extrusion settings for different areas, these are shown here.
- Feed rate: The speeds at which different areas of the model are printed.
- Section view: Shows a cross-section of the model.
- Stats: This lets you view all the stats regarding the model.
- Layer: By sliding the bar, you can view the specific layer you want to.
- Line: The lines that make up the layer can be viewed here. It is a preview of the layer you select to see.
- Visible layers: The number of layers visible at a time.
When you save your G-code file, you’re good to go.
Happy printing!
(Lead image source: CraftBot)
License: The text of "CraftWare: How to Download, Install & Use This Slicer" by All3DP is licensed under a Creative Commons Attribution 4.0 International License.