Cura: Custom Supports – Simply Explained

If Cura support generation isn't up to your standards, check out the Custom Supports plug-in to achieve your ideal settings!
Cura is many makers’ go-to slicer because it’s free, open-source, and very user-friendly.
The software’s support feature is an easy and helpful tool for slicing your everyday prints that contain overhangs. At the same time, it may not be the best support solution for every kind of model. The feature sometimes applies supports unnecessarily to certain parts of the model and, other times, not at all. Indeed, you can’t choose where supports are placed besides choosing the overhang angle threshold and whether they’re touching the build plate.
A few years ago, Krasimir Stefanov came up with a solution to this problem by creating a plug-in called Custom Supports, which allowed one to create adjustable, customized supports that can be placed wherever needed. Unfortunately, this plug-in is incompatible with Cura versions 5.0 or newer, so it was eventually removed from the marketplace.
Not to worry though, because a similar plug-in called Cylindric Custom Support has since been released by 5axes that possesses much of the same functionality as the original. You can download and install it for free from GitHub. As hinted at by its more than a million downloads and positive reviews, it’s easy to use and is packed with many useful features. That said, the plug-in isn’t compatible with the latest release of Cura (5.7) at time of writing, so if Cylindric Custom Support is the goal, you might want to download an earlier version (i.e. 5.2). Whether the plug-in and latest releases will become compatible or not, remains to be seen…
In this article, we’ll be going over everything you need to know about this plug-in. At the end of the article, we’ll also touch on a method to add custom supports without a plug-in. Let’s get to it!

How It Works
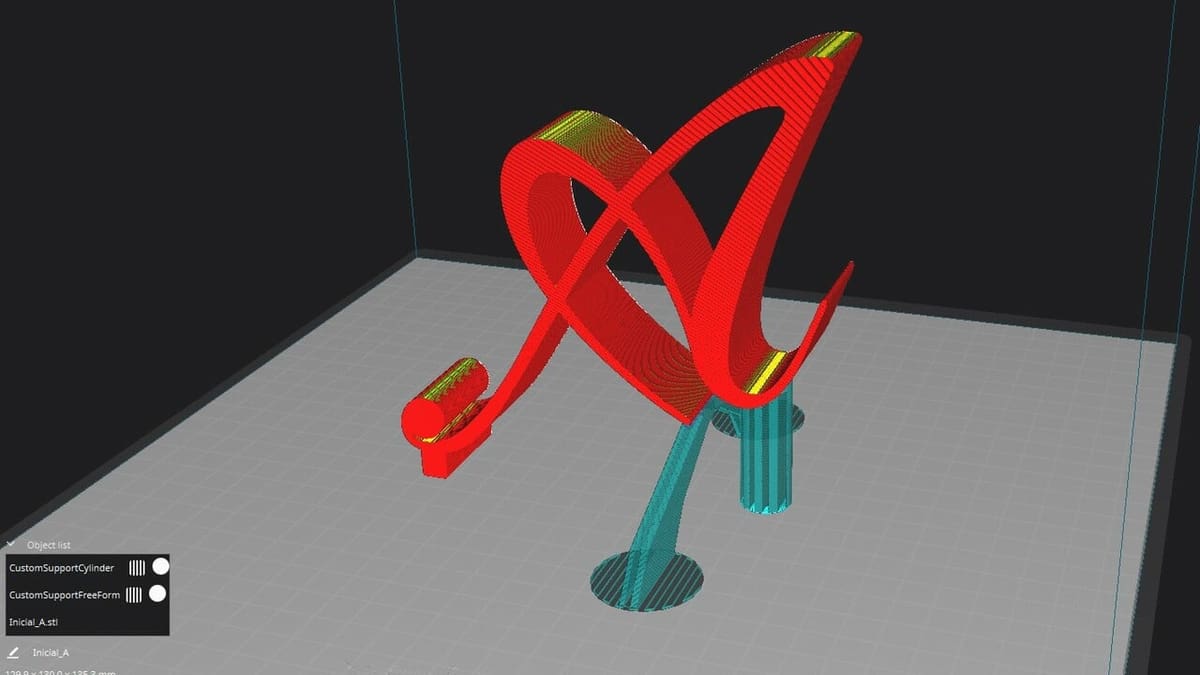
The Cylinder Custom Support (CCS) plug-in works by letting you choose a support type and then manually place it on your model. The custom supports can be used as the only source of supports, or to supplement Cura’s automatic supports.
Once installed in Cura (you’ll have to restart the program), the CCS options can be found in the vertical taskbar on the left-hand side of the window, below Cura’s default icons to manipulate the model.
From that menu, you can choose between six different support geometries, all of which have an adjustable size and angle.
- Cylinder: The typical solid cylinder shape for a support.
- Tube: A hollow cylinder support shape with the option to adjust the inner diameter.
- Cube: A solid, rectangular-shaped support.
- Abutment: A wedge-like structure that’s useful for printing tall objects. One can choose to set these supports on the Y-axis and to equalize heights across multiple supports.
- Freeform: Choose from one of seven available geometries: Cross, Section, Pillar, Bridge, Arch-buttress, T-support, and Custom (not to be confused with the main Custom support type). One can also choose Auto Orientation for these structures.
- Custom: The user defines the region that needs support using two clicks, then the support adapts its shape to the given geometry, as demonstrated in a video made by the plug-in’s developer.
The last two types of supports are the real deal, giving the user the most flexibility. Depending on your needs, the many available geometries under the Freeform support can be of great help (or rather, of great support). A test of the Freeform geometries was carried out by CHEP, where he was able to print particularly challenging bridges without issue.
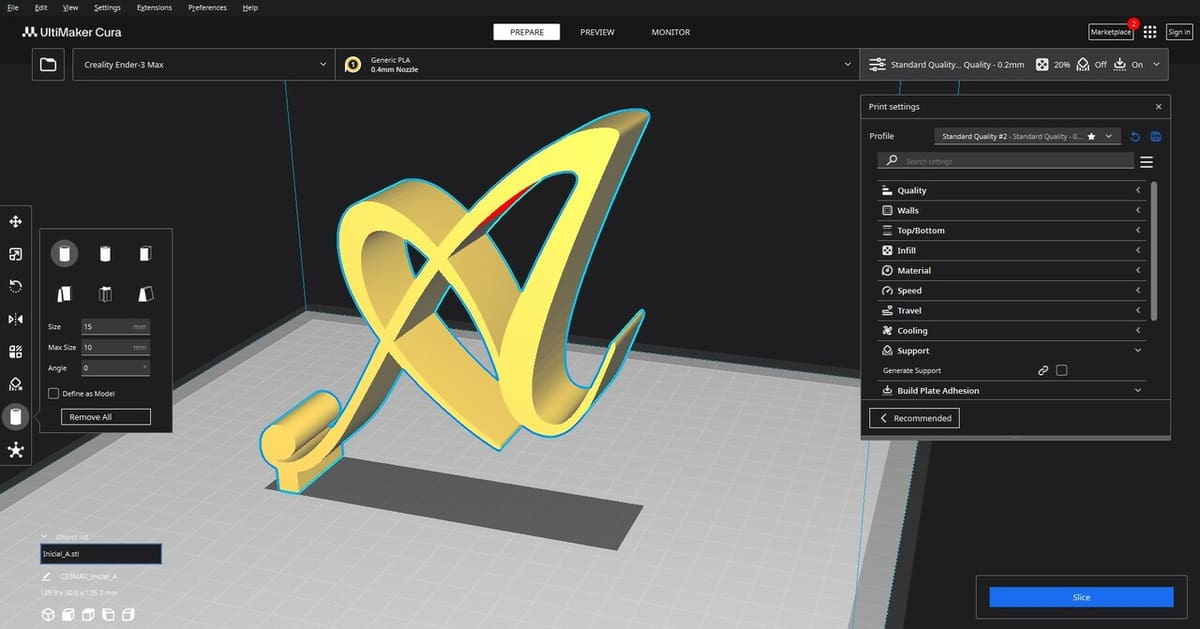
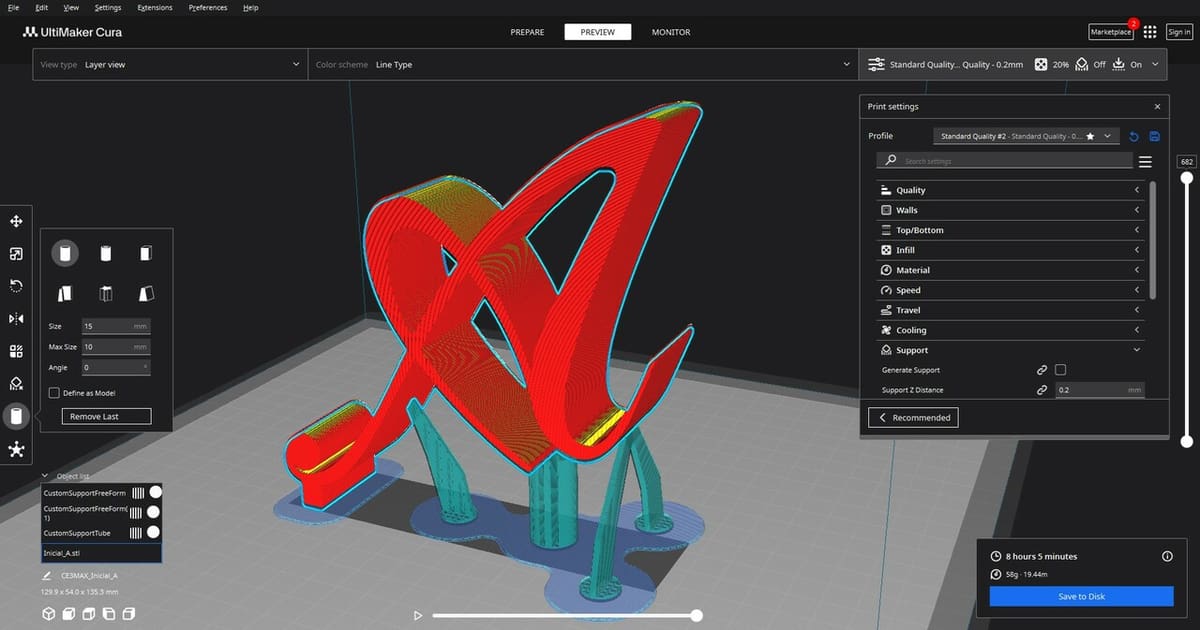
Once you’ve placed a custom support on the model, modifying it is as easy as using Cura’s default Move, Scale, and Rotate tools as you would do with a normal model. When sliced, Cura automatically turns the added geometry into a support structure.
Pros & Cons
This plug-in allows much more functionality over standard, built-in Cura support generation. It’s a great addition to the Cura workflow, as it adds many more opportunities to perfect how you’d like your model to be printed, even when geometries get complicated.
As we’ve mentioned, it’s completely free, though you can always donate to the creator! The program potentially allows you to reduce how much filament gets consumed by supports, as well as save prints from failure. You can even choose to put small supports in areas that would traditionally not have support, such as unattended overhangs, for extra peace of mind. The possibilities for this plug-in are vast.
Despite the transition from the original Custom Supports plug-in to CCS, we’re happy to say that, rather than reporting issues, users are glad to find a suitable alternative. This new plug-in doesn’t just replace the old one, it also brings additional functionality, like more support geometries.
However, there’s no such thing as a perfect plug-in, and this one is no exception. One downside we’ve found is that the custom support option that adapts to the geometry of the model isn’t as accurate as we might hope, often needing adjustments after being created and placed. Updates are frequently made to CCS, so this feature could improve in the future.
Another potential disadvantage is that, depending on what you’re printing and the type of custom supports you’re applying, the printing time can substantially increase. While the print still may come out quicker than with Cura’s default supports, the more recent tree support option is hard to beat in many cases.
Manual Custom Supports
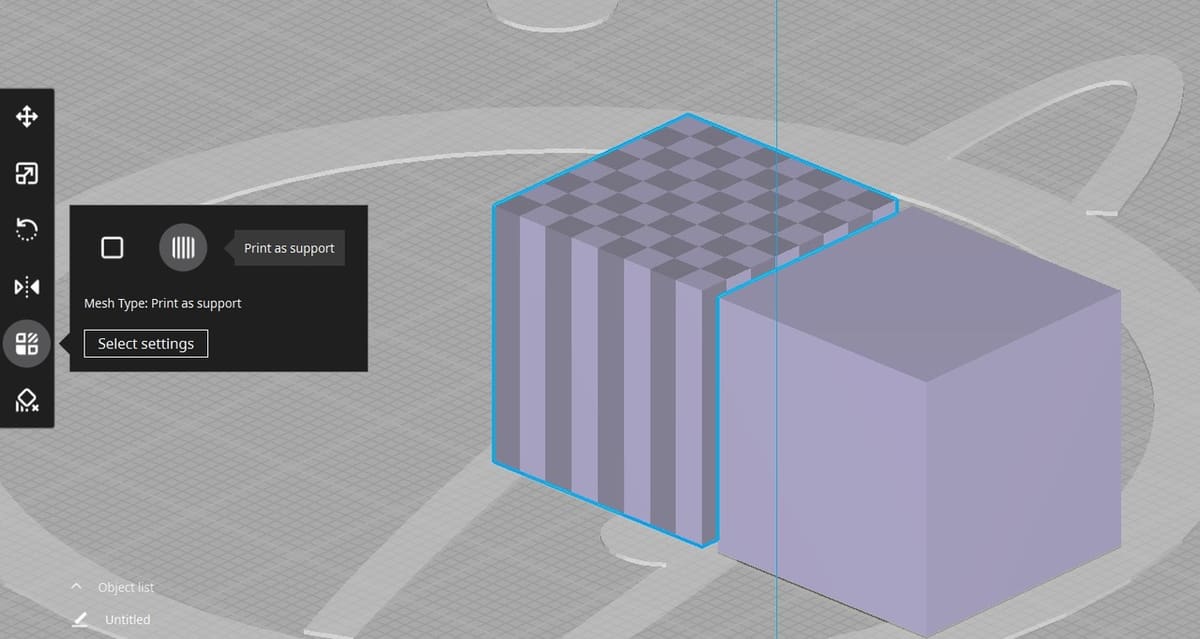
You may want to add supports without this plug-in for various reasons, and there’s an easy way to do this within Cura itself.
The process consists of importing an STL in the shape of the support you need and intersecting it with the area you’d like to add supports. With the support model selected, navigate to the “Per Model Settings” on the left side of the UI and change the mesh type to “Print as support”. This will prevent additional walls inside of the model where the infill is supposed to be.
An advantage of using a manual technique is that you don’t have to place multiple small supports, as you can bring in one large STL to become the support instead. Between this method and the Cylindrical Custom Support plug-in, the possibilities for support optimization are greater than ever before.
License: The text of "Cura: Custom Supports – Simply Explained" by All3DP is licensed under a Creative Commons Attribution 4.0 International License.