
Cura: Print One at a Time – Simply Explained

Cura's print "One at a Time" slicer setting can be super handy. Read on to learn how it works, how to use it, and more!
Cura is arguably the most popular slicer for FDM 3D printers. It’s an open-source platform that turns 3D models to G-code that’s interpretable by your 3D printer. A slicer is necessary for 3D printers (unless you’re using pre-sliced G-code), and well known for its wide array of features, Cura is one of the best out there.
Slicer settings adjust how a 3D model will be printed by your machine. Print speed and layer height are among the most well known settings. A useful but lesser known setting in Cura is the print sequence “one at a time” – in some slicers, it’s called “sequential printing”.
If you’re printing multiple models or duplicates of the same one, the feature instructs your 3D printer to print one model at a time. In this article, we’ll tell you all about the one at a time print sequence feature in Cura, discussing its limitations, benefits, and how you can use it. Let’s dive in!

Advantages & Disadvantages
The print one at a time feature in Cura is definitely unique, but it’s not perfect. There are some natural limitations when printing with this special mode.
Advantages
Printing one model at a time may not be a super popular method of printing, but it has some benefits. Most obviously, when you want multiple prints, you can print the model you need first, then the other parts will be printed after.
For example, let’s say you want a phone case printed quickly, but you’d also like to print a new phone stand while you’re at it. You can import both models, then print the phone case first. Once the case has finished printing, you can gently remove it from the bed, and the stand will finish later.
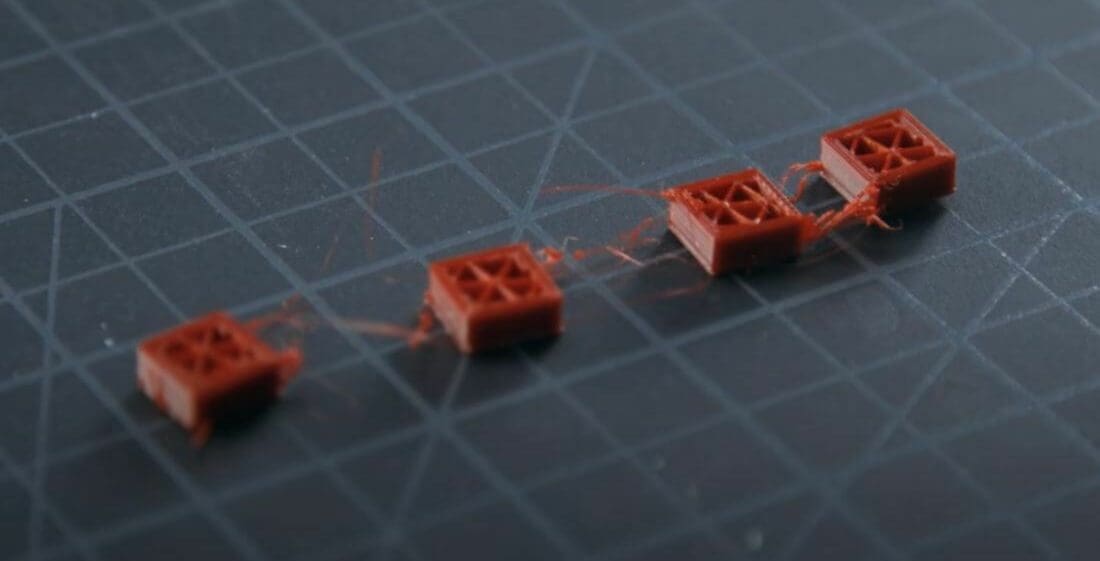
A less obvious advantage of printing one part at a time is reduced stringing and printing time. If you want to print multiple models all at once, the printer will have to make travel moves every layer to reach all the parts. More travel moves means not only longer print times but also increased potential for stringing as the printhead moves from model to model. Printing one at a time can eliminate inter-part stringing and skip the constant travel moves, which will reduce the print time.
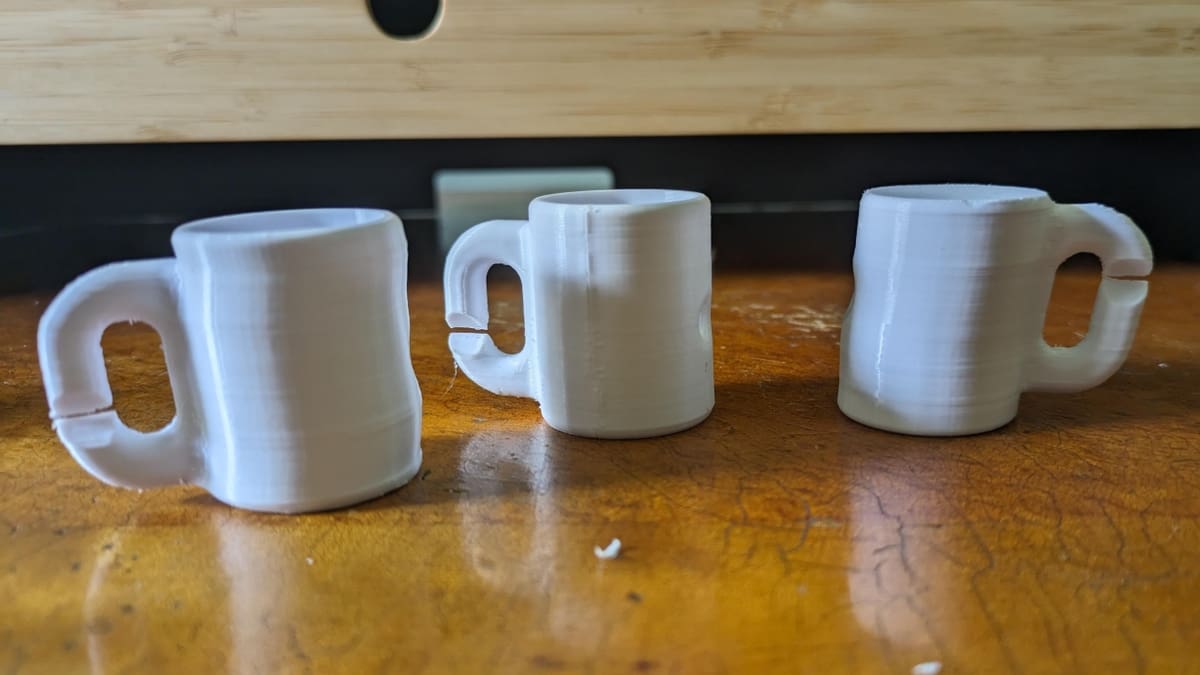
Another benefit is that if your printer fails mid-print when producing models one at a time, you won’t get a bunch of half-printed parts. Instead, unless your printer failed right off the bat, you’ll get at least one or a few successfully printed models.
Disadvantages
Now that you’ve seen the bright side of this Cura feature, it’s important to note the limitations of this printing style. Primarily, these disadvantages relate to the build space, as the slicer won’t let you print in ways that could harm the printer (the printhead running into a printed part, for example).
This is especially true when it comes to the available build height that you’re allowed to use. When you’ve imported multiple models in the one at a time mode, you’ll immediately see that the build height is significantly reduced to around 30 mm, depending on the printhead offsets for your selected machine in Cura.
This happens because the gantry (or gantries) on the printer could collide with and damage one of the previous prints on the build plate. For this reason, the slicer requires that all imported models be smaller than the minimum height of the gantry over the build plate.
Besides losing almost all the build height, you’ll also lose some build area across the X- and Y-axes. That’s because the printhead requires a fair amount of clearance over other models, so it doesn’t run into them. In other words, this space allows the printer to produce one part without interfering with another.
Lastly, it’s important to point out that at this time, Cura doesn’t allow you to use different settings between multiple parts printed one at a time, so all parts will be printed with the same settings.
Modifying Printer Dimensions
One way to mitigate the loss of build volume is to confirm and, if necessary, modify the measurements of your printer’s printhead and gantry height in Cura:
- Go to “Settings > Printer > Manage Printers…”
- In the Preferences window, select your active printer from the list of preset printers. It should appear in italics.
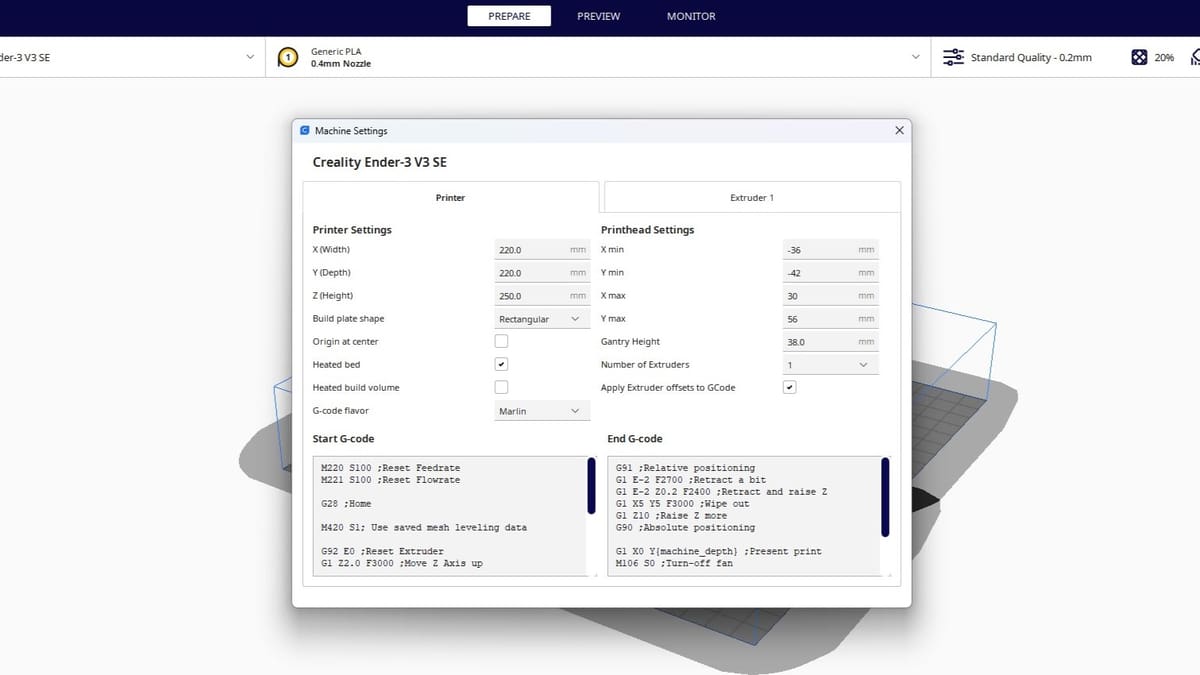
- Click the “Machine Settings” button.
- Confirm and modify the Printhead Settings as necessary.
If you’ve made any mods to your printhead, you’ll definitely want to confirm the dimensions related to the printhead are accurate. The gantry height setting significantly impacts how much of a bite the one at a time feature will take from your build volume.
Some users set this to an artificially high measurement, then ensure the models’ placement on the build plate avoids potential collisions during printing. Obviously, there are risks involved here if you misjudge the printhead’s movements.
How to Use It
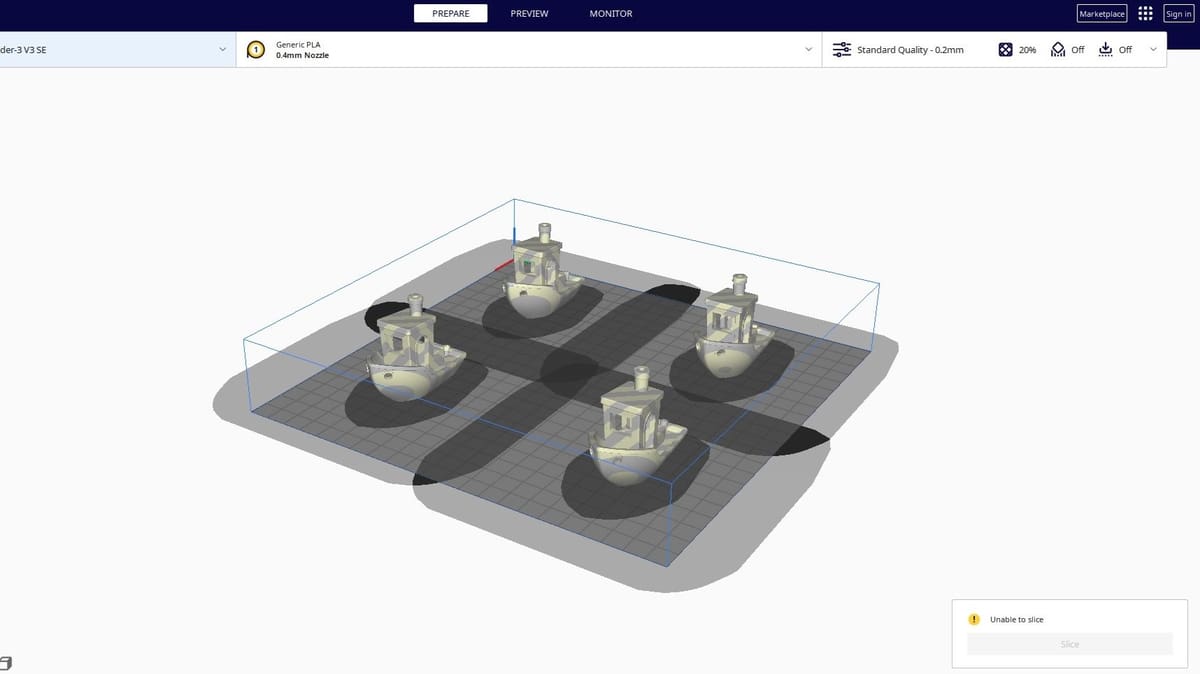
Using the one at a time print sequence in Cura is pretty easy, but it can be a little confusing at first glance. Part of the reason for that is
the darker, shaded regions around each inserted part. You’ll have to reposition each model so that the outermost shaded area isn’t touching the base of the model.
Sounds complicated? Don’t worry – we’ll walk you through it:
- Import your first model in Cura.
- Next, ensure that you can see all of the settings by expanding the Print Settings Panel, then clicking the hamburger button (the three dashes) just to the right of the search bar. Select “All” in the drop-down menu.
- Search for “Print Sequence”. Alternatively, you can scroll down to the “Special Modes” section and find it there.
- Click the drop-down menu, then select “One at a Time”.
- Import your other designs into Cura or duplicate the current one.
- Move, scale, or orient them so that they all fit inside the build space. It’s ok if this outermost shaded area touches the shaded area, as well as the brim or skirt, of another model; it just can’t intersect the base of another part. It’s usually best to separate your models as far as you can, without placing one on the unlevel areas of your print bed like the corners.
- Click “Slice”.
- Move to the “Preview” section in Cura to view the G-code of the print.
- Use the slider tool on the side of the “Preview” section to adjust what layer you see to make sure that the part you wanted to be printed first will be. If it’s not, you can manually set the print sequence (see our tip below).
- Once you set your models to print in the desired sequence, save the G-code file to your printer or memory device.
And that’s all there is to using the one at a time printing sequence feature in Cura!
Tips
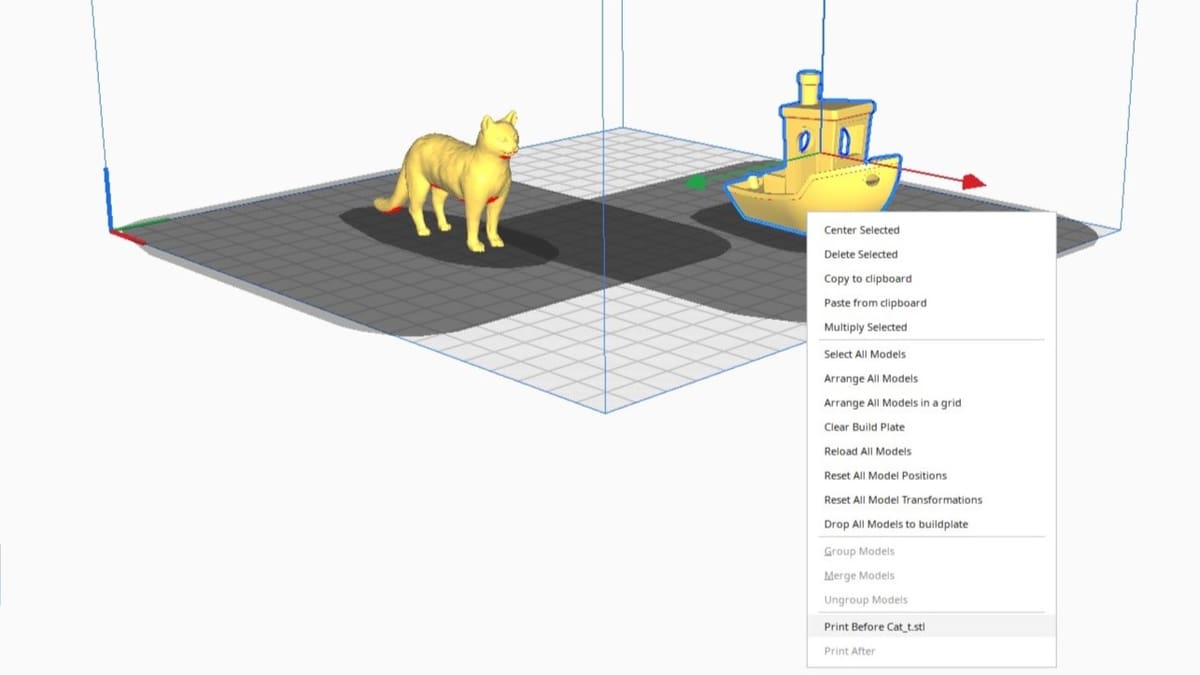
Make sure you always check the G-code, as this is very important to ensure everything will go as planned. If you want a specific model printed first, make sure that you import that model last, as the most recent insert should be printed first. Alternatively, Cura allows you to set the print sequence manually. Click the checkbox for “Set Print Sequence Manually”, which is just below the Print Sequence setting. Then, right click on one of the models, and at the very bottom of the pop-up menu, select the order in which you want to print the selected model.
If you have a dual-extrusion printer, nothing should change in this process as long as you’re printing with only one extruder at a time or leave enough clearance between them. On this note, make sure that you always leave enough clearance between parts so the two printheads on your machine don’t collide. Even though Cura includes a buffer zone to prevent you from slicing G-code that could damage your printer, it’s best to double-check.
Finally, when taking off the first print while the next model is being made, always remember to remove the part carefully and gently so the current print won’t be disturbed.
License: The text of "Cura: Print One at a Time – Simply Explained" by All3DP is licensed under a Creative Commons Attribution 4.0 International License.