Cura Profile: Add Your Custom Machine to Cura

The 3D printing community loves tweaking and sharing printer settings. Learn to create your own Cura profile to add your 3D printer to Cura!
Everyone's Favorite Slicer
One of the most important pieces of the 3D printing workflow is the slicer. Today, most makers and companies use Cura, a free and open-source program from Ultimaker. From its inception, Cura has been constantly evolving, adding new features and plug-ins that make it more powerful.
While there are a few open-source slicers on the market, what sets Cura apart is their commitment to hosting third-party manufacturers’ printers and printer profiles on their software. Although this helps Ultimaker’s direct competitors and could mean a loss of business, they continue to do so. We surmise that it’s really a win–win for Cura and its community, attracting developers and testers who speed up the process of Cura’s development.
In this article, we’ll be going over the process to add your printer to Cura. But first, we’ll need to look at where an important piece of this process takes place: GitHub.
GitHub
GitHub is a website that helps developers from around the world collaborate on projects they love. The platform allows creators to keep track of project development and records changes made along the way, known as version control. GitHub also tracks collaborators’ contributions, including the exact lines of code added or removed by them.
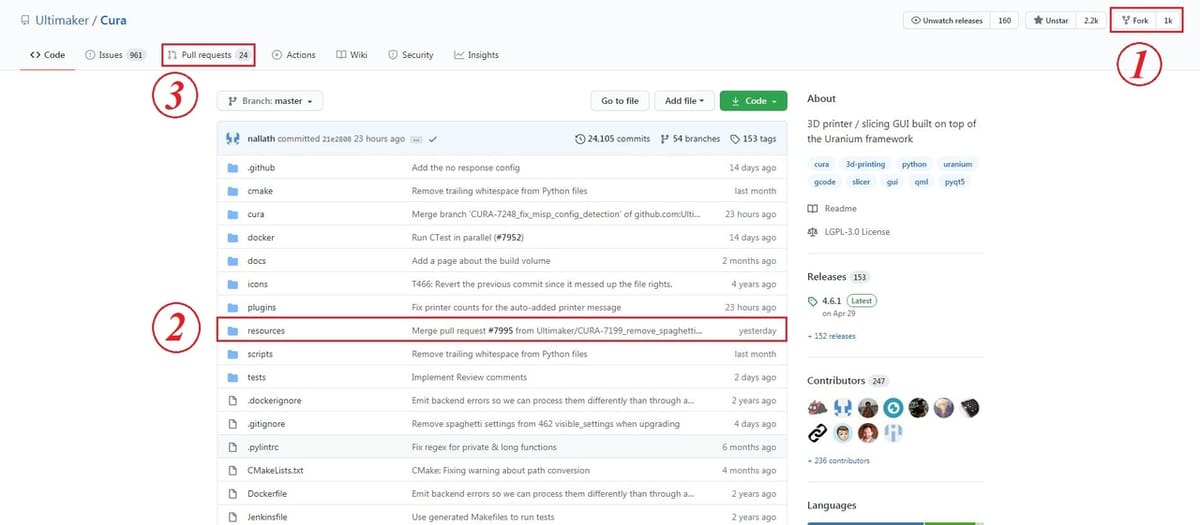
To keep it simple when adding a printer, we’re going to show you how to “fork” a project (marked as 1 in the above image). Forking a project means we’re making our own personal copy of a project, so we can play around and make changes without accidentally creating bugs in the main source code.
After forking the project, we’ll add our machine files under the resources folder (marked as 2). Once we’ve done that, we can then submit a pull request (marked as 3). The pull request tells the project owner to check the addition and make sure everything’s fine.
Let’s begin!
Step 1: Preparation
Before we fully get into the project, there are a few preparatory things that you’ll need to do.
- Create an account on GitHub.
- Download and install Notepad++ (a free editor that’s useful to create the files for your machine). The files that we’ll make and modify are JSON files.
- Download the latest version of Cura, locate where the source files have been stored after installation, and navigate to the resources folder. The resources folder is where we’ll be adding our required files to the definitions, extruder, and meshes folders.
For this project, we’re going to create a machine called All3DP2020 that has a build volume of 200 x 200 x 200 mm, a single extruder, and a heated bed. The steps are the same if you’ll be adding your own machine.
The first thing to do is to create a machine definition file.
- Enter the definitions folder and create a new file.
- Here, we’ll be naming it “all3dp2020.def.json”.
Step 2: Creating a Definition
We’ll now follow Cura’s guide on setting up the definition file. We can also make use of the example file that’s set up for the Ultimaker Original printer as a template. The definition file for the All3DP machine can be downloaded and also used as a reference.
With that, let’s get into a few details of the definition file and understand what it does and how it does it.
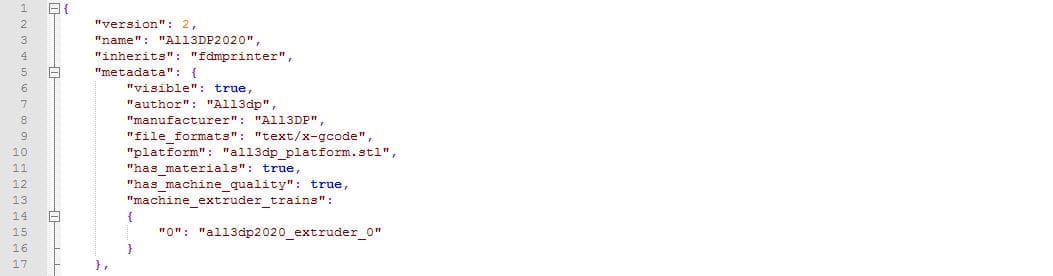
- Make sure the “version” and “inherits” lines are exactly the same as above. The name can be anything you like.
- The metadata section has a lot of personalized settings, including the manufacturer and author name.
- The “visible” section needs to be true for your machine to show up, and also keep the “has_materials” and “has_machine_quality” lines as true. We’ll be setting up a few quality definition files later in the article.
- The “machine_extruder_trains” section defines your individual extruders. For our example, we have a single extruder, which we’ll call “all3dp2020_extruder_0”. We’ll need to create a file with that exact name in the extruders folder and key in the settings for our extruder.
- The platform setting helps you add a bit of customization when your machine is chosen, which is also a good place to add some branding if you’d like. You’ll need to enter the exact filename of the mesh file that you’ve saved in the meshes folder (more on this later).
- In the overrides section, add the build volume, gantry height, and the start and end G-code commands.
Step 3: Defining Your Extruder

Once done with the definition file, let’s add our extruder profile.
Navigate to the resources folder, then the extruders folder, and create a definition file. You can create a file by simply copying and pasting an existing definition file and changing its name. Make sure the name of your file is the same as what you listed under “machine_extruder_trains”.
For our case, we’ll name the file “all3dp2020_extruder_0” and open the file using Notepad++. As mentioned before, you can download our sample file if you’d like.
Additionally, the following can be helpful as you are creating an extruder profile:
- Check that the “version”, “name”, and “inherits” lines are the same as what’s given in the example file.
- In the metadata section, your “machine” setting should be exactly the same as what you set for your definition file earlier. In our case, it will be called “all3dp2020”.
- The “position” setting should be set as “0” for the first extruder. If you have another extruder, create a separate file for it with a position setting of “1”.
- The overrides section contains settings for the extruder number, nozzle size, and filament diameter. Make sure to fill these out accordingly.
Finally, we can add our bed mesh as an STL file.
- Create a 3D model of how you want your print bed to look as an STL file. Feel free to add branding or a logo as well.
- Save it in under the meshes folder (in the main resources folder). When you name your STL file, make sure it matches what was given under the platform section of the machine definition file. Ours was “all3dp2020_platform.stl“.
Step 4: Testing Locally
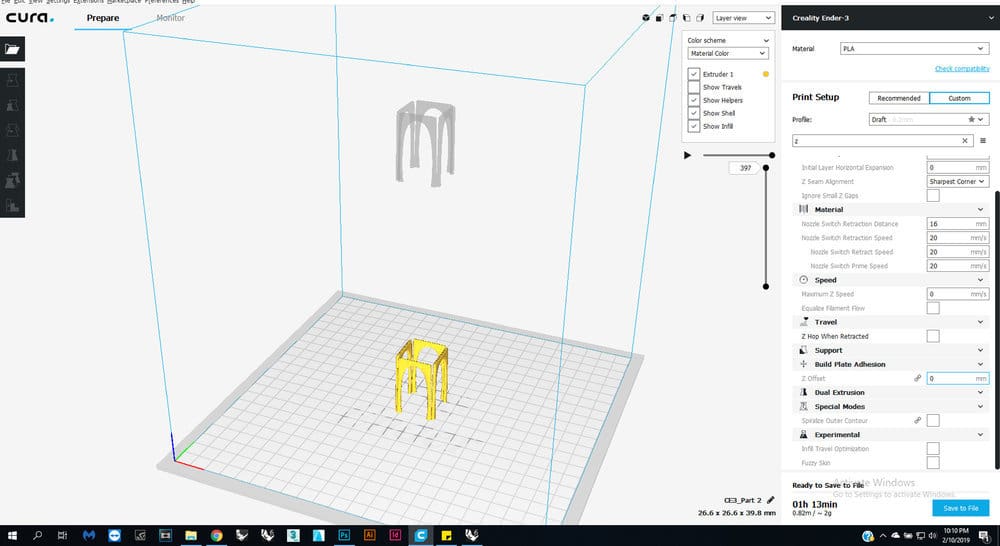
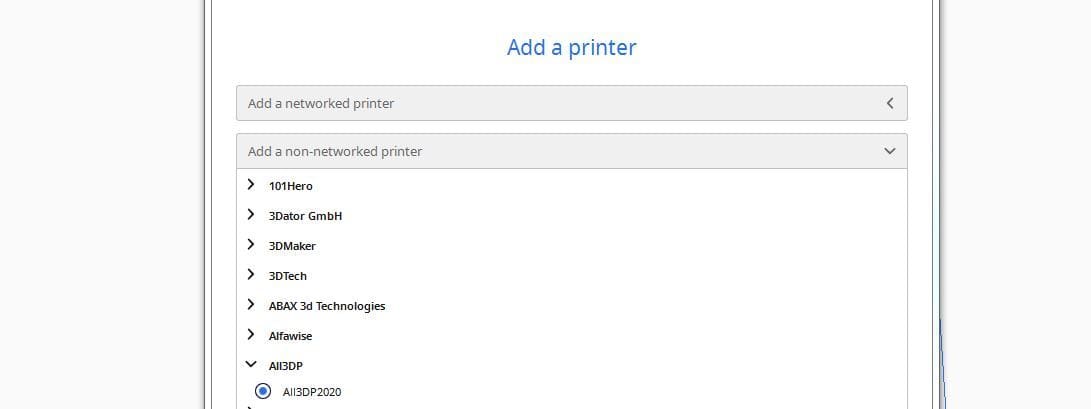
Once you’re done with adding your files into the respective folders, you can now open Cura and add your machine by hitting the “Add Printer” button. Go through the various settings and see if anything should be added or removed.
Cura has thousands of settings under the profile section, so be careful, as some of the default values may not be ideal for your setup. For example, the retraction length is set to 6.5 mm and this could clog an E3D extruder.
Now that you’ve added your printer, let’s take a look at creating our own built-in profiles.
Step 5: Setting Up Custom Profiles
To set up custom profiles, create a folder for your printer in the quality folder (under the main resources folder). In this case, ours is called All3DP2020.
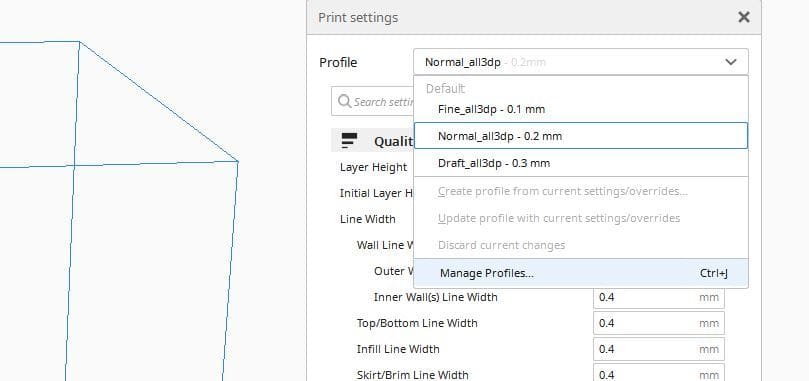
In the quality folder, you’ll find generic quality files that load for any custom 3D printer that’s added. We’ll copy the Draft, Fine, and Normal files, as we want to have three profiles for our machine. Paste these files into the folder (the All3DP2020 folder in this case) that you created earlier. Note that these files have an extension of .inst.cfg.
Let’s look at the settings that can be modified:
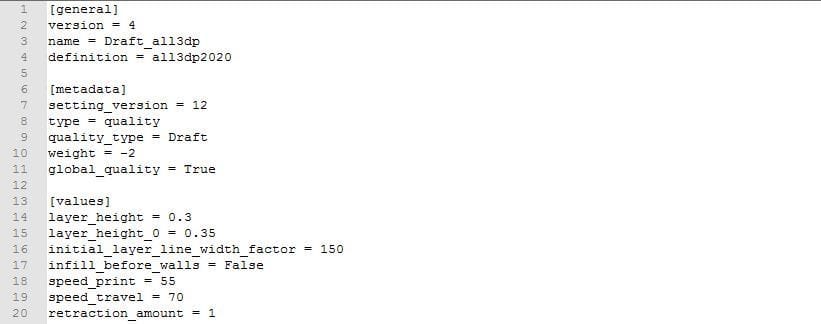
- The general section has three settings: version, name, and definition. The version setting can be left the same and the name setting is what’ll be shown as your settings profile name. We’ll be calling this setting “Draft_all3dp” and the definition should be set the same as your definition file. (We’ll set it as all3dp2020.)
- In the metadata section, keep the settings the same as shown but make sure to change the “quality_type” setting for each new profile created. In our example, there are three profiles: Draft, Normal, and Fine, each with different layer-height settings.
- The last section is called values, which is where we set each individual setting to exactly the way we want. To do so, we’ll use the placeholder variables given by Cura. (It can be found in the definitions folder at the fdmprinter.def.json or at their Github page.) Note that the Boolean settings such as true and false need to have the first letter capitalized (i.e. “True” and “False”).
- You can create multiple profile versions with different settings, just remember to give them an appropriate name so your users will understand what each profile can be used for.
Step 6: Creating a Pull Request

Now that you’re done creating and testing your machine locally, it’s time to upload your files to GitHub and create a pull request.
- Go to the Cura GitHub page and fork the project by clicking on the fork button on the top right.
- Go to your repositories section on your profile and click on Cura. (This is your personal version of Cura and will be called “Your username”/Cura.) You’ll be able to see folders similar to the ones you worked on earlier. We’ll be uploading our files into the definitions, extruders, meshes, and quality folders as we did locally.
- Navigate to the definitions folder and click on “Upload Files” on the top right to upload the definitions file that you created. Do the same for the extruder, platform, and quality files. While uploading, make sure to leave a comment on what’s being uploaded or if any changes are being made to the previous design.
- Now that you’re done uploading your files, go to the pull request section and hit the pull request button. You’ll now be able to see your pull request appear under the pull request section of the original Cura. There’s an automated system that will go through your files and let you know if all is good. You can also ask for your pull request to be reviewed by someone from the Cura team. In case you do get stuck, feel free to review the structure of other machine profiles and definitions.
Once your settings are approved, Cura will usually push it out with an update in the next version. When that next version comes out with your printer in it, celebrate!
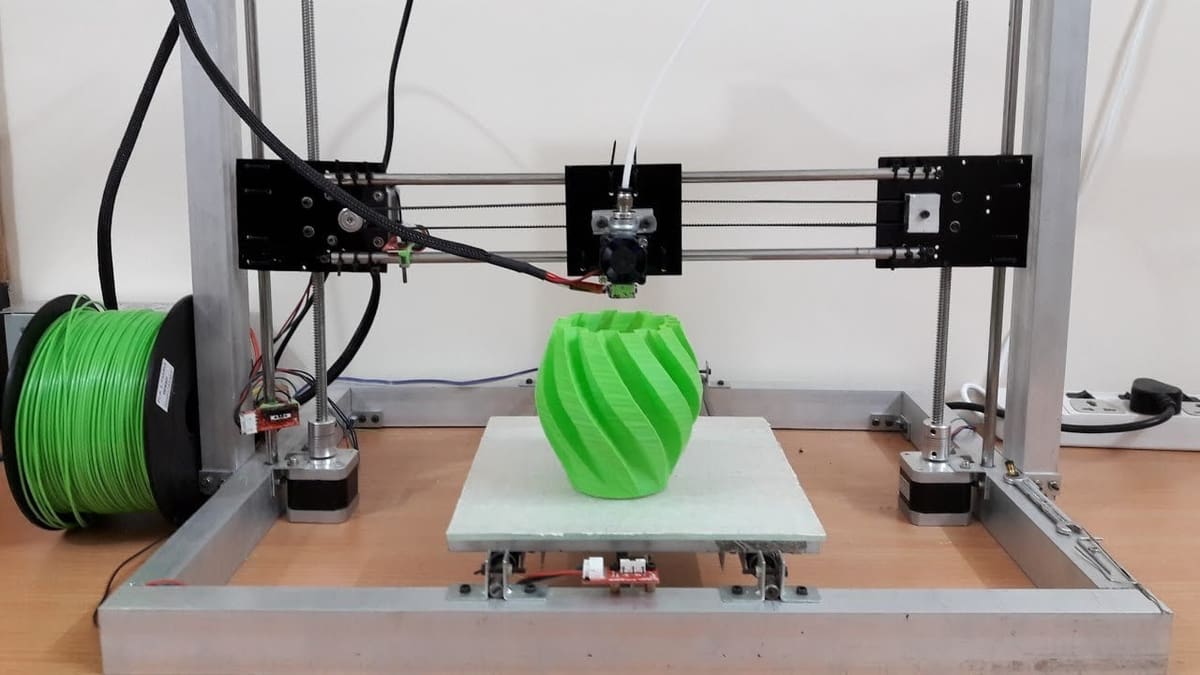
Lead image source: RZtronics via YouTube
License: The text of "Cura Profile: Add Your Custom Machine to Cura" by All3DP is licensed under a Creative Commons Attribution 4.0 International License.