How to Make Your Own Custom Beyblade: 3 Easy Steps

There's more theory than you'd think when it comes to the design of your own custom Beyblade. Check out all the specs to get you started!
Beyblade is both a TV show and a collection item based on the TV show. It’s a popular trend in Japanese animation to have an anime paired with the selling of some merchandise, with the show itself serving to establish the lore and promote the collectible items.
Some other examples of this besides Beyblade include Pokémon with its video games and trading cards, Yu Gi Oh with cards for master duels, and Bakugan with the Bakugan Monsters.
Beyblades are a spinning top toy that launched in 1999 along with the Beyblade animated series. They’re used in what’s known as a Beyblade Battle. The battle is very simple: you and an opponent launch your Beyblades at the same time using a ripcord, calling out “let it rip” to start the match, which is funny and iconic. The Beyblades clash and the first one to stop spinning or get launched out of the rink loses, and the last one standing is the winner.
Both in the show and in real life, the type of Beyblade matters. Different top geometries, weights, or launching techniques could make all the difference between losing or becoming the best Beyblader in the world. There’s practically endless customization possible when it comes to Beyblades but first, let’s start with the basics.
Basics of Beyblade Mechanics

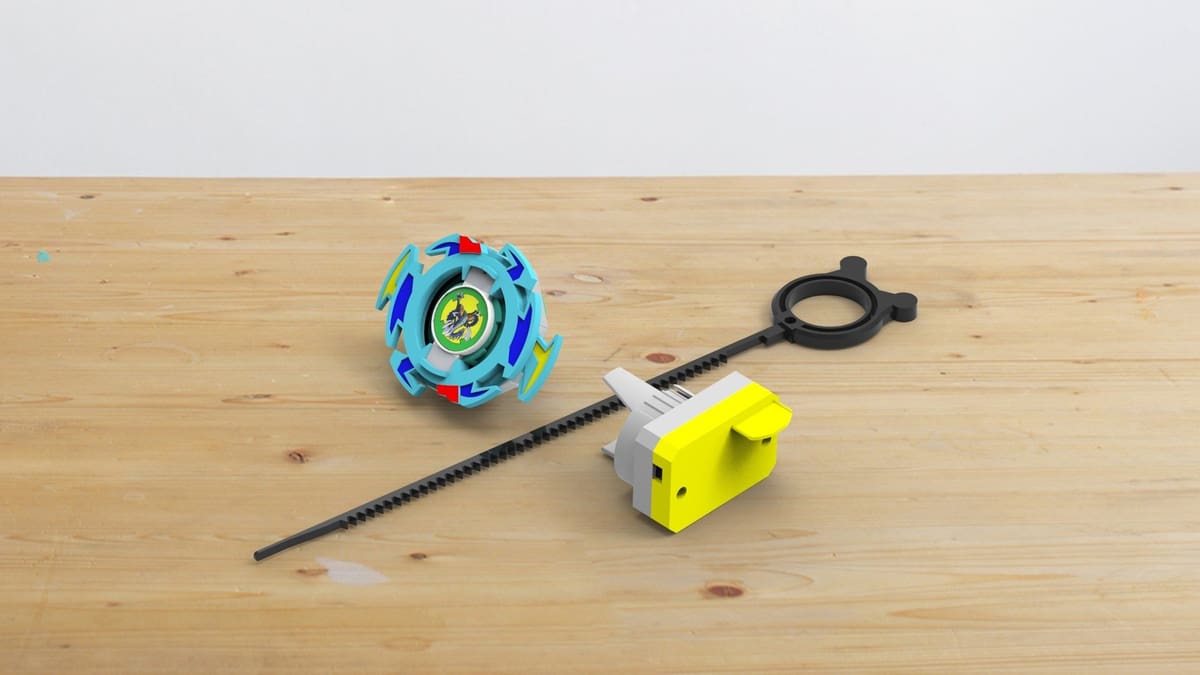
Before being able to create your own Beyblades, you first have to understand what it entails, so let’s nerd out for a second. The complete Beyblade requires the ripcord launcher and the Beyblade itself, but the ripcord launcher doesn’t change, so we’ll be focusing on the Beyblade.
There are three main components of a Beyblade:
Energy Layer
The Energy Layer is the component that makes contact with the opposite team’s Beyblade to try to launch it off course, and it’s usually equipped with spiky patterns. On one hand, you want it to be able to strike the enemy Beyblade, but you also don’t want to make it easily stackable, so a good balance must be struck. It’s located on the topmost part of the Beyblade and can be composed of more than one ring.
Force Disk
This layer gives weight to the Beyblade and is located in its center. Again, you must find a balance in the design as too heavy of a Beyblade will cause it to stop spinning sooner, but if it’s too light, it could be easily pushed out of the rink by the enemy Beyblade. Some strategies for force disks include using multiple disk layers or uneven weight distributions for cool effects.
Performance Tip
This is the bottom part of the Beyblade that makes contact with the rink (Bey stadium). It’s the most standardized geometry, which is usually an upside-down cone or pyramid. There are a few different advanced strategies for it, such as varying angles, adding spring systems, or even patterns to improve aerodynamics, resistance, and bouncing.
Beyblade Customization
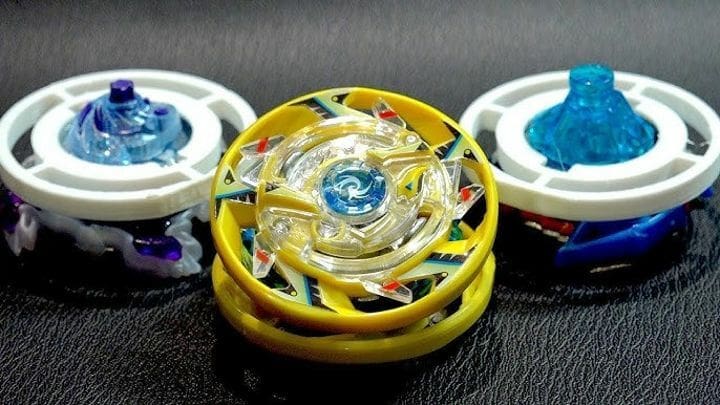
Now that we understand the Beyblade mechanics, we can see that there are a lot of choices to be made. Of course, if you’re going to buy commercial Beyblades, you’re going to be limited to the designs they offer. However, you can take matters into your own hands, and design your own unique energy layer with your own Beyblade name (no guarantee that it’ll beat a Storm Pegasus, though). Manufacturing the design yourself is also made easy thanks to 3D printing.
In the following sections, we explore the ways in which you can design your own Beyblade and become a Beymaster. Before doing so, let’s have a small discussion about naming terminologies:
When researching Beyblade components, you may see names like “Storm Pegasus 105RF”. In this “Storm” refers to the Fusion Wheel, the “Pegasus” to the energy layer, the “RF” tells you the type of performance tip, meaning “Rubber Flat”, and the 105 is the height of the spin track, which is the part that connects the performance tip and the fusion wheel.
And with that said, let’s get started with designing our own custom Beyblade!
Step 1. Get Some Inspiration

Oftentimes, the challenge with designing is thinking up something original that stands out. Generators can help you come up with the conceptual stage of design. We’ve gathered some that are useful to get to know existing designs or to generate interesting combinations of Beyblade layers.
- Beyblade Planner: On this page, check out the “Parts” tab where you can see a catalog of every existing official Beyblade component option, including accessories such as armors and blades. It’s a good way to explore the possibilities and get an idea of what designs you’d like to implement.
- Beyblade Generator by YogiDragon: Here, by pressing “Let it rip!” (clever), you get a randomly generated Beyblade reference, for example, Mercury Horuseus S130WF, which you can use as a starting point. Remember, Mercury means it uses a Mercury Fusion Wheel, a Horuseus energy layer, and the S130WF indicates details about the spin track and the performance tip.
- Beyblade Generator in Scratch: Scratch is a block-based programming language created for education. Users can sign up for free and create their own programs or use one that someone else has shared with the community. This Beyblade Generator allows you to click on the parts to swap them, gives you the corresponding name of the model, and calculates your Bey’s stats so you can see how different combinations affect your winning chances.
Quick tip: If you get a name like “Meteo Fireblaze R145SF” from one of the generators and try to look it up, it’s possible you won’t get results because such a commercial Beyblade doesn’t exist. Instead, try searching for the names of the individual components.
Step 2. Search Existing Models
Since Beyblades have very standard components and functions, there’s no point in starting from scratch. Instead, you can use premade models and remix them into your own unique version. There are many 3D printing communities and CAD design communities where you can find some good models, but we’ve already done part of the homework for you.
- Thingiverse: Thingiverse is the most popular site for sharing 3D printing files. This also makes it have the highest volume of models available. Searching with the keyword “Beyblade” will give you many great models to start from. Some prime examples include BeyBlade Burst Evolution, Beyblade Dragoon S, and the Draciel Shield.
- GrabCAD: While Thingiverse is a community focused on 3D printing, GrabCAD is more focused on mechanical design. That said, a Beyblade is a fun mechanical toy, and there are plenty of those to go around in GrabCAD. Some featured examples include the Beyblade Guardian Driger, Beyblade Galzzly, and the Beyblade Dragon.
- Cults: Cults is another repository for 3D models, mostly for the purpose of 3D printing. It differs from Thingiverse in that it offers both free and paid models, according to the designer’s preference. A great example of existing Beyblade designs in Cults are those posted by Ghostmaster, who has 159 different Beyblade designs, some paid and some free. Some free models include a Beyblade Finn & Jake inspired by the cartoon Adventure Time, and the Beyblade Digivace, inspired by Digimon.
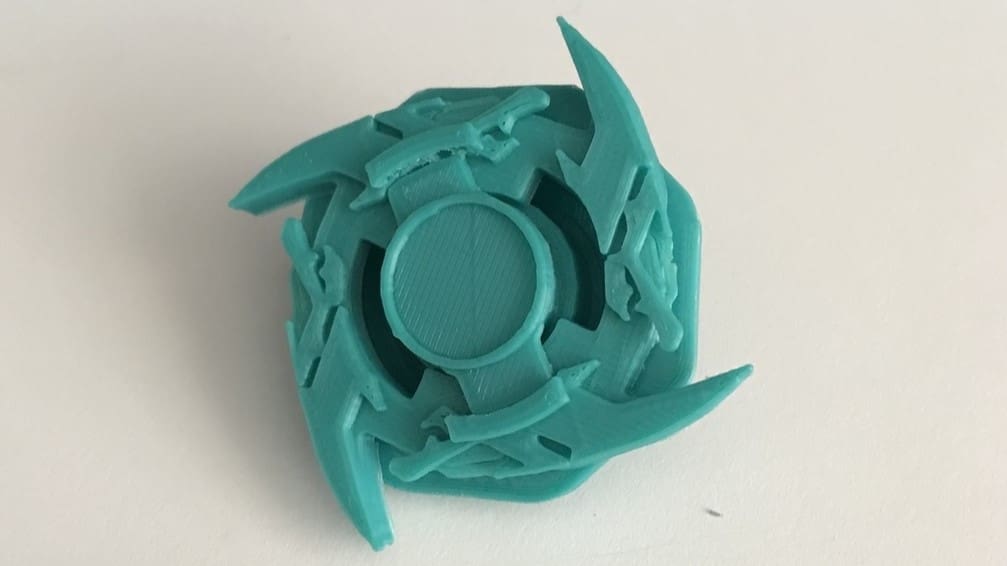
Step 3. Create Your Remix
Now that we know what type of design we want and we have a base Beyblade to start from, it’s time to make it our own. The most common idea would be to create a personalized energy layer with unique spike patterns, a logo or “mascot”, and even a label.
For this step, you’ll need a CAD program to import the parts of the Beyblade you want to customize. Depending on where you got your files from, they may be in STEP or STL format. If you want to modify them in Blender, STL is the way to go, for all other options, STEP is better. You can convert from one format to the other, so this shouldn’t pose too much of a challenge.
There are a few good options for CAD programs to design a Beyblade. Any would surely get the job done, to be fair, but we’ll give you a rundown of how you can choose.
- SolidWorks: If you already have it, then go for it. It’s faster and more intuitive than other picks on the list, and it’s the most effective option when it comes to parametric design where exact measurements are required. However, if you don’t have it, it may be difficult to justify such a large purchase to design Beyblades, unless you plan on making it your profession somehow.
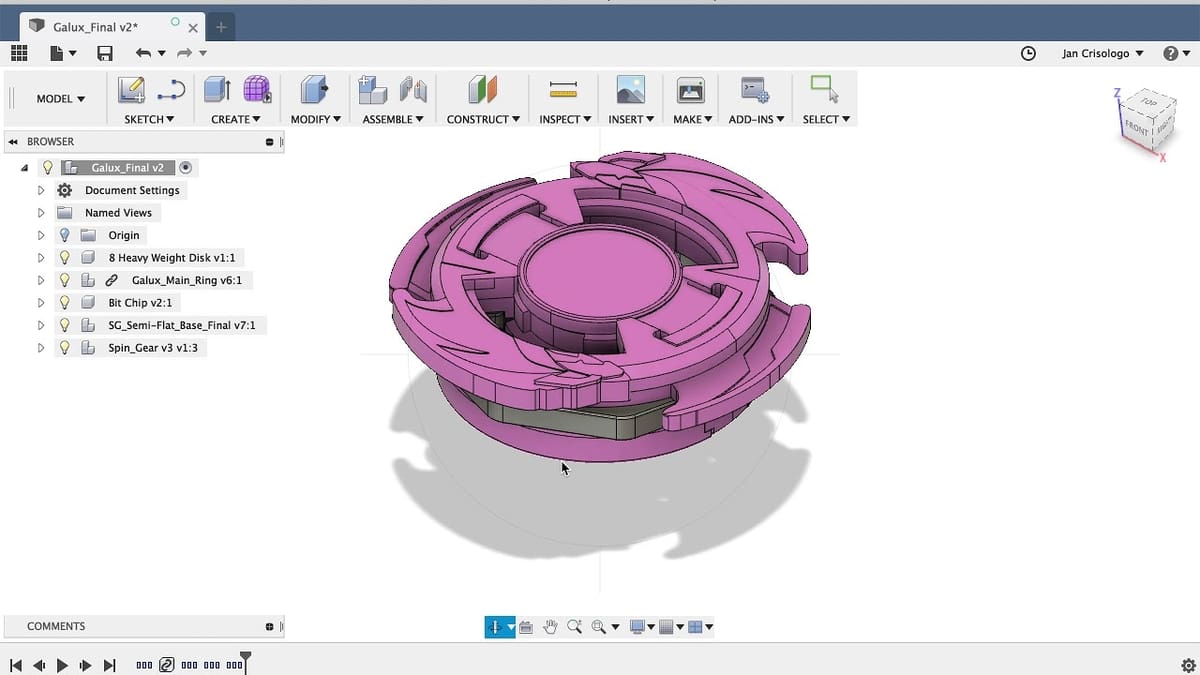
- Fusion 360: SolidWorks’ most common alternative. It’s free for hobbyists and start-ups and very intuitive. You can even do assemblies so you can check how the completed Beyblade looks.
- Tinkercad: Tinkercad is a free, web-based modeling program, also commonly used as an educational tool. It’s a great option, not only because it’s free, but also due to the common practice of sharing customizable models in places like Thingiverse that are parametrized so that they can be easily tweaked in Tinkercad.
- Blender: Blender is more of an artistic modeling software compared to the other options here. Exact technical modeling isn’t its forte, although it is possible. On the other hand, Blender is free and open-source, and the artistic focus will allow you to create more unique and expressive designs.
A Step Further: 3D Print it!
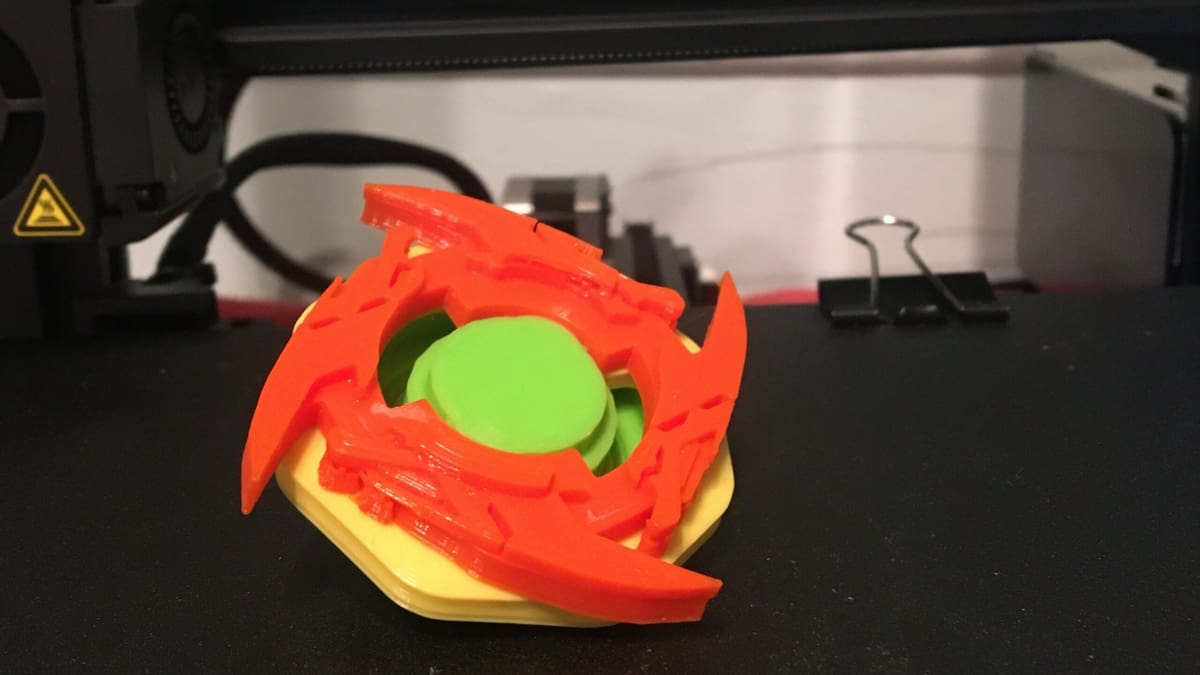
Once the custom Beyblade is done, the next logical step would be to bring it to life and use it in a real-world battle. There are many modern manufacturing techniques: CNC, injection molding, or 3D printing. Out of all of these options, 3D printing is the most approachable (and cost-effective) for DIY manufacturing of custom parts.
Even if you don’t have access to a 3D printer, you can simply upload the STL files to Craftcloud to have any of these models 3D printed in the material and color of your choosing, then delivered right to your door in no time!
If you opt to print it yourself, here are some helpful tips for you to keep in mind:
- Take into account the printer’s tolerance in the design stage. This will be especially important for parts that screw or snap-fit together.
- For snap-fit joints, consider taking a look at our snap-fit design guidelines as there are design considerations like material, geometry, and orientation of the print that are relevant.
- You can use transparent, rainbow, or dual-color filament to make your Beyblade stand out. Beyblade customization isn’t only in the geometry, but also in the graphics and colors!
- You can use post-processing techniques to paint your print and add further details.
- Have fun! It’s Beyblade after all.
License: The text of "How to Make Your Own Custom Beyblade: 3 Easy Steps" by All3DP is licensed under a Creative Commons Attribution 4.0 International License.