
D&D: How to 3D Print Dungeons & Dragons Pieces

There's more than one way to get your D&D 3D print. Read on to find out how you can get customized pieces at a great price by printing them!
It’s 2024 and tabletop games are more popular than ever – none arguably more so than Dungeons and Dragons. From its birth in the ’70s, massive popularity in the ’80s, and gradual decline to dormancy in the ’90s & ’00s, it came charging out of the gate in 2014 with its 5th edition to become more popular than ever.
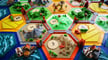
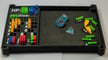
While the game can be played within the “theater of the mind” (without props), many players prefer to use miniature figurines (usually at a scale of 28 mm) to represent their characters, monsters, and villains, as well as terrains like cave walls, dungeon floors, lava flows, and other hazards characters may face. This creates an immersive visual scene and makes tactics and strategies easier to visualize.
The combinations of creatures and terrains that players may face are endless – from ice giants in the frozen North to zombie dinosaurs in steaming tropical jungles, to a cabal of evil wizards in an underground tomb – each situation is unique and often doesn’t use the same pieces.
That’s where 3D printing comes in! In this article, we’ll cover the basics you need to know to get started with creating and 3D printing your own custom D&D pieces.
Why Make Your Own Pieces

Here are a few reasons why you might want to 3D print your own game pieces:
- Cost: Purchasing STLs and materials is often less expensive than buying pre-made products. This bundle of over 80 STLs costs $8, while this 31-piece set of Dwarven Forge tiles costs $199. Even if you throw in a $50 bottle of resin, you’re still coming out at less than half price!
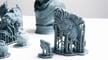
- Variety: With sites like MyMiniFactory, MiniHoarder, and even Thingiverse, you have a huge selection of pieces to choose from. You’re also able to mix-and-match sets as desired. If you want just a single horse, you can download it in seconds. You would have to purchase a pack of figurines, just to get the one you want.
- Guarantee of product: Official figures are sold in “blind bags”, so you never know what you’re going to get, such as this “brick” of figures from the Dungeon of the Mad Mage expansion set. That kind of loot box mechanic simply isn’t viable when purchasing files – you always know what you’re supposed to get, and you can complain to the site owner if you don’t get it.
- Personalization: Generic figurines and terrain are useful because they can be reused for other games and settings. A forest scene can be the site of a battle for one group, and it can be an encounter with a nature spirit for another group. But what if you want something with a certain aesthetic, like Cyberpunk Dwarves or Skyship Pirates? STLs have you covered. If you can’t find something that fits your needs, you can probably get it commissioned – or learn how to sculpt it yourself.
- Model customization: Speaking of personalized models, there are ways to create unique, custom figurines without needing to start a Udemy course on 3D modeling. If you’re adept with 3D modeling software, you can create and tweak your own models. Otherwise, sites like Hero Forge and Eldritch Foundry allow you to build your own figurine from a selection of arms, heads, and accessories, just like Mr. Potato Head. We’ll cover these options in more detail in the “Character Builders” section below.
Types of Models
So now that you know why you might want to use a 3D printer, what exactly can you print? While there’s not an official dictionary of terms, here’s some standard terminology in the tabletop game world to get you started:
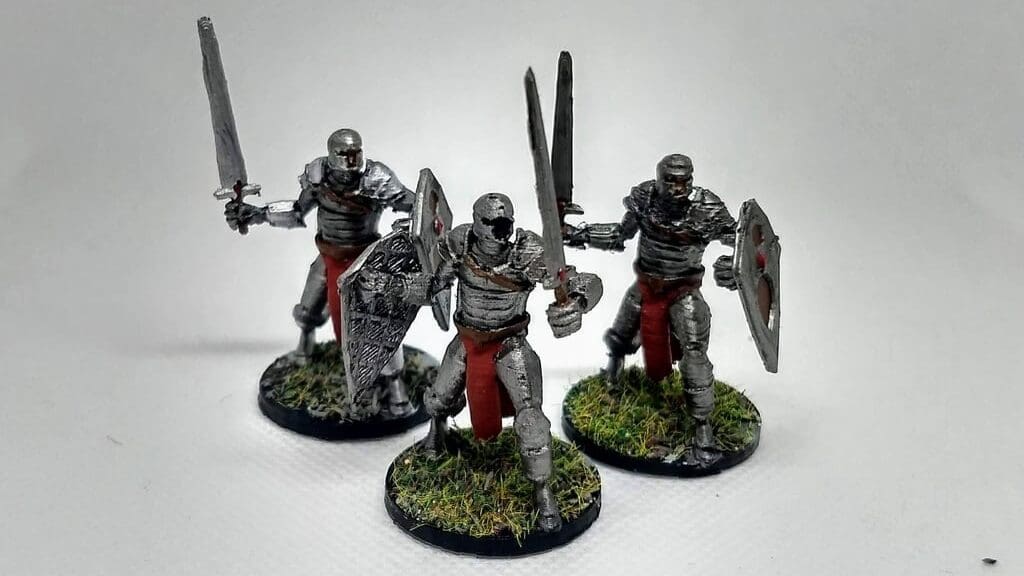
Miniatures (“minis”)
These represent the characters and creatures on the table, from Dwarf bartenders to rampaging Dragons. Each player will have one mini that represents their character, and the Game Master will have minis for the important creatures, such as the monster the players are fighting, or the townsfolk who are running in terror and about to become lunch if the players don’t step in.
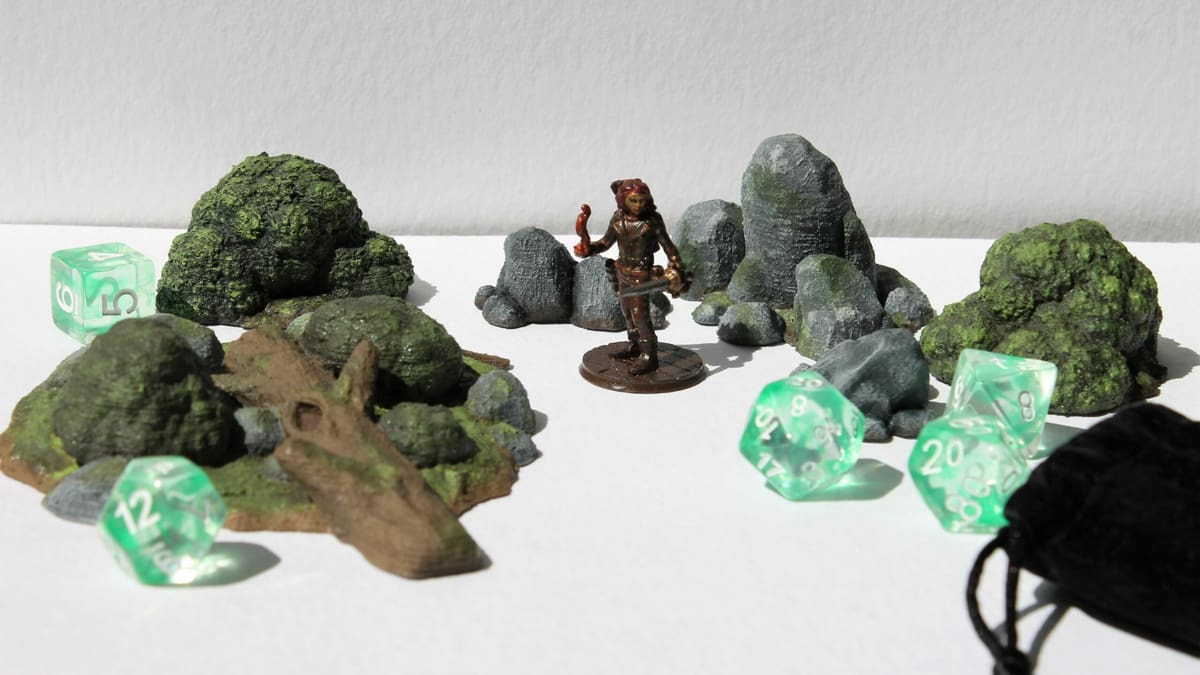
Environment (“terrain”)
This is the landscape the miniatures will be standing on or surrounded by, like a deep forest, a mountain pass, or a rowdy tavern. Such parts are useful for a couple of reasons: First, they automatically upgrade the player’s investment in the scene (particularly if it’s painted), and second, they provide a visual of the obstacles the players might face. A locked door, slippery ice patch, or deadly steam vent are easier to keep track of when you can actually see them.
Props (“scatter”)
Objects that can be moved around easily to dress the scene, like tool racks, tables, barrels, tents, among others. These serve the same two functions as terrain and aren’t necessary to the game, but a bit of scatter here and there will sell the scene to your players. It’s also satisfying to be able to interact physically with the tables, chairs, and other detritus getting thrown around in the bar fight.
Other
With the wider adoption of 3D printing, tabletop games are a natural place to experiment with new printing ideas and techniques. Many supplemental objects to play the game with are being created all the time, including:
- Dice towers for dropping dice down to randomize the results – plus they look cool!
- GM screens for hiding rolls and secrets from your players
- Status rings for showing which creatures or characters are poisoned, incapacitated, stunned, etc.
- Organizers for carrying your stuff
Sourcing Models
Ready-Made Models
There are plenty of resources to get you started. Over the last few years, multiple sites have popped up to service the tabletop 3D printing scene, including:
- Thingiverse: Owned and operated by UltiMaker, a 3D printer manufacturer, Thingiverse is one of the largest and oldest repositories of STLs on the internet. Unlike the other sites on this list, everything on Thingiverse is free to download and print for personal use, including hundreds of models from popular designer mz4250. Other sites have a more nuanced selection, but you can’t beat free!
- MyMiniFactory: While Thingiverse takes a more general approach to its collection, MyMiniFactory focuses almost exclusively on tabletop game pieces. But don’t let the name fool you; in addition to minis, it has the largest selection of environments, props, and everything else you’re looking for to take your game to the next level. About 70% of the content on the site is for sale, with samples and demos making up the majority of the free content. Still, the prices are usually reasonable, and there are always bundles and other deals to be had.
- Patreon: Many 3D modelers make their living through their Patrons, subscribers who pay a fee to access an artist’s new content each month. If a particular artist or group’s style catches your eye, Patreon is a great way to ensure you get as much of their product as you want and at a steep discount when compared to retail prices on, for example, MyMiniFactory. If you stick with them, you can amass a large collection in a very short time.
- Kickstarter: On the other hand, Kickstarter only takes one payment, but you have to wait months, sometimes years to acquire what you paid for (even then, you might still end up empty-handed). Still, if you can afford the wait, there are incredible deals to be had, often at 50% or less than their eventual retail prices. That means you can go all-in on massive bundles and still get a good deal!
Design Your Own

Purchasing and downloading stuff for your game is all well and good, but what if you want to change, edit, or even create your own scatter or terrain? It wouldn’t be uncommon to run into a cool-looking model that wasn’t designed for the type of 3D printing you’re looking to do or to be printable at all.
Printing models come with considerations like hollowing to save material and prevent cracking and limitations on certain features like bridges or floating objects that are impossible or difficult to achieve. Miniatures will likely face heavy handling so it’s best to design for durability. For example, fine protruding features, like a wand, may be susceptible to cracking during gameplay and may benefit from clever tweaking.
There’s a host of helpful tools that you can get for free to help you start editing or making your own 3D models. A few popular tools include the following:
- Meshmixer: A great tool to edit 3D files to ensure printability is Meshmixer. It has tons of tools to edit and repair STL files which can be a huge time saver when downloading models of unknown quality. There are also essential tools to prepare models for printing, like hollowing and supports.
- Microsoft 3D Builder: Look no further than 3D Builder for a tool that can detect and automatically fix manifold errors in your files. These errors occur when the file has overlapping surfaces and can result in the object not being possible to print. It’s also a great program for other simple tasks like merging files together.
- Tinkercad: If you’re totally new to 3D modeling, Tinkercad is a great option, particularly for creating terrain pieces as one can build simple shapes and edit them into more complex forms. It can create surprisingly detailed models and can teach you many of the fundamentals of other 3D design programs, so you can expand your skillset later on.
- Blender: A hugely popular free 3D modeling and animation program that works great for a wide variety of applications, Blender might already be on your radar. For our purposes, its large toolset is better for editing organic models like minis. In particular, you can adjust the mesh to shave, flatten, or even move parts of the mini to adjust its positioning. For example, you can adjust a barbarian to hold their axe over their head, rather than the side. It’s a pretty steep learning curve, but once you get used to it, the sky’s the limit!
Character Builders

While the above tools are great for modifying or making your own terrain and scatter, minis are a different beast entirely. You’ll need to hone your skills and knowledge of anatomy before you can use them to make a mini that resembles your character. Or you could use an online character builder.
Character builders are browser-based applications (embedded in websites) that allow you to customize your own miniature and either download or have the printed model shipped to you. Either way, you’ll be able to create a fully customized game piece that represents your unique character for less than the cost of purchasing a generic official mini.
There are multiple character builders online, including the following:
- Hero Forge: Probably the best-known on this list, Hero Forge boasts a smorgasbord of different options for your mini, including poses, bases, and even colors – provided you go with their premium service, of course.
- Eldritch Foundry: While Hero Forge has more accessories like wings and potion bottles, Eldritch Foundry gives you more control over finer details like facial expressions, nose shape and length, as well as other features. Using a sliding scale like in Skyrim character creation, you can make your Orc fighter look truly unique.
- DesktopHero: There’s the option to assemble a figure like the other sites on this list, but DesktopHero also has something they call “Asset Packs“. This is a one-time purchase of a themed kit (such as Sorcery, Druid, Modern, Sci-Fi) that allows you to download and print as many minis as you like using the assets from the kit. A nifty idea if you’d like to print armies of player characters!
- TitanCraft: From the makers of DesktopHero, TitanCraft has tons of options to customize both humanoid and creature miniatures, as well as a community library where you can view and download creations made by others. Makers love the kitbashing possibilities with this platform, which means you can piece together certain aspects of different preset models to create something entirely unique.
Printing Models
One-Stop Service

If you don’t have a 3D printer or are wondering if investing in your own device is worth it, consider using a 3D printing service to have your custom models printed for you by experts and delivered right to your door.
Craftcloud is an on-demand 3D printing service by All3DP that handles the hassle of printing and cleaning to give you the finished product. Simply take a file that you own, upload it to the server, and pick the material, color, and production location.
There’s no minimum order required, so, whether you’re looking to get one mini or a mountain of terrain, you’ll be able to find a service that fits your needs. With just a few clicks, your terrain or mini will be on its way to being printed and then shipped to you.
Of course, it’s easy to get confused when trying to decide what exactly you need, so we have some suggestions for materials. PLA works great for most terrain pieces and other objects like cases. Standard or high-detail resin works for player character minis but upgrading to tough resin can be beneficial for parts that may be frequently handled or have bits that can break off. For moving parts, such as the hinges for DM screens, opting for durable or nylon-like resins will be worth it to ensure longevity.
Printing at Home

If you’ve collected your scatter, tinkered with your terrain, forged your hero, and are set on bringing these parts to life yourself, one question remains: How exactly will you print this stuff?
Currently, there are two broad categories of consumer-level 3D printing:
Resin Printing
Resin printers dip a build plate into a vat of resin and use UV light to harden the liquid into a solid shape (a chemical process called “curing“). This is the preferred printing method for many mini makers because of the extremely high resolution that is possible, capturing facial expressions, jewelry, and even fabric textures. There are even resins formulated specifically to print highly detailed miniatures. It’s also great for small accessories, like dice and scatter props, but it can be more trouble (and costly) to print larger pieces like terrain and dice towers.
FDM Printing
Fused deposition modeling, or FDM, creates objects from spools of filament that get melted and extruded to form your custom shapes. These printers can be less expensive to buy and maintain compared to resin printers and have larger build volumes. So on the one hand, they’re ideal for printing bulkier pieces like terrain, but they do struggle to achieve the level of resolution that resin printing can. However, with the right settings, you can get close to resin-quality prints out of your FDM printer.
License: The text of "D&D: How to 3D Print Dungeons & Dragons Pieces" by All3DP is licensed under a Creative Commons Attribution 4.0 International License.