Easel by Inventables (CNC Software) – Simply Explained

If you're new to CNC, Easel Inventables provides a user-friendly way to get started, and a little more. Read all about it!
Easel by Inventables is a user-friendly design tool and G-code sender for CNC routers and engravers. While not without its quirks, this super simple tool is so intuitive that we’d be remiss not to discuss it.
If you’re a beginner to CNC or looking for a simpler tool to design signage or other artistic pieces, this might be the software you need. The best part is that it’s a fully cloud-based program so, apart from a CNC router, you only need a computer and an active internet connection.
Easel is brought to makers by Inventables to support their range of CNC routers. Their goal was for their customers to be able to operate easily within a single ecosystem without having to purchase additional software. As such, Easel is freely available, and due to a growing user base the company has also added support for a range of other machines.
In this article, we’ll cover everything from subscription levels to who would benefit from using it and what equipment it works with, as well as how to get started.
Versions, Pricing, & Differences
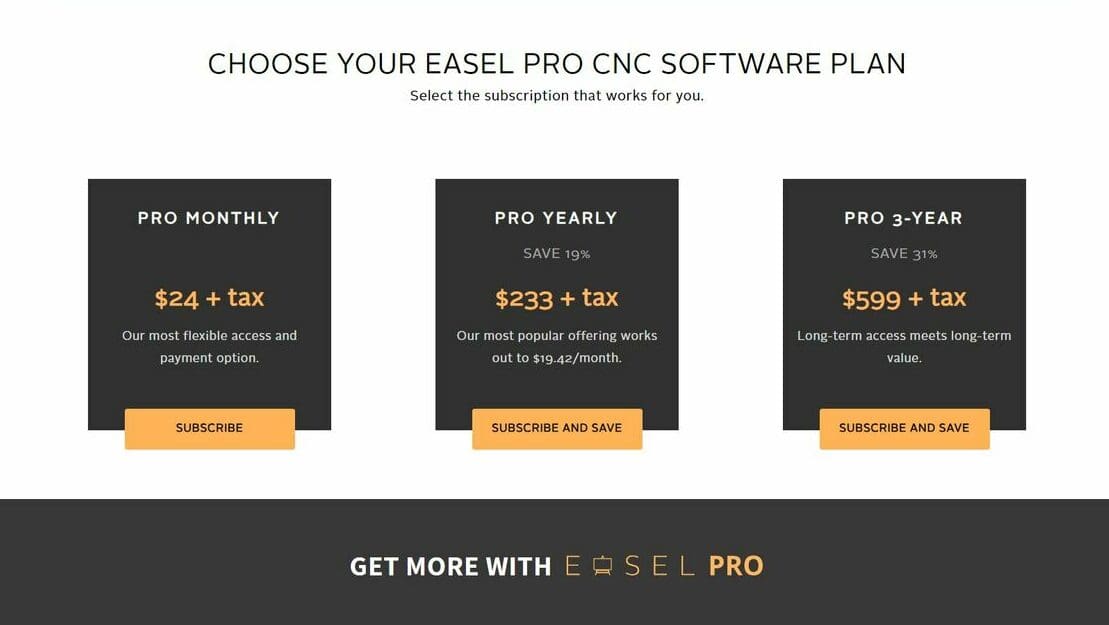
Let’s deal with the elephant in the room. Easel is readily available and free for anyone to use. However, there’s a paid version as well, known as “Easel Pro”. To access the free version, you’ll need to sign up for the free trial of Easel Pro. Don’t worry, Inventables doesn’t take payment details when you register and will automatically transition you to the free version if you don’t upgrade at the end of your trial.
So, what’s the difference between the “Pro” and the free versions? Well, the free one doesn’t set you back ∼$24 a month, but it also lacks several important features (and quite a few useful ones at that).
Firstly, it’s worth remembering that the “Pro” version is free for the first 30 days after you sign up to Easel. Every “Pro” feature is labelled as such within the software, so it’s very easy to understand what you’re using that won’t continue past your free trial.
The important features that are available in the “Pro” version that are missing from the free version include:
- Ramping Plunge Cuts: Reduce the likelihood of binding and breaking.
- Custom Bits, Materials, and Saved Cut Settings: Allow you to use unique and wonderful profile bits or materials outside of the libraries regularly; if your machine has some idiosyncrasies saving the Cut Settings, you won’t have to change the parameters every time you do so.
- Large Material Tiling: Allow you to make parts that are bigger than your machine’s work area.
Some of the arguably less important features available in the “Pro” version are improved font, tool, and material libraries, more toolpath selections, and the ability to select a center origin.
Given the features that we’ve just discussed, maybe it’s time we go over what the software actually does…
What Does It Do?
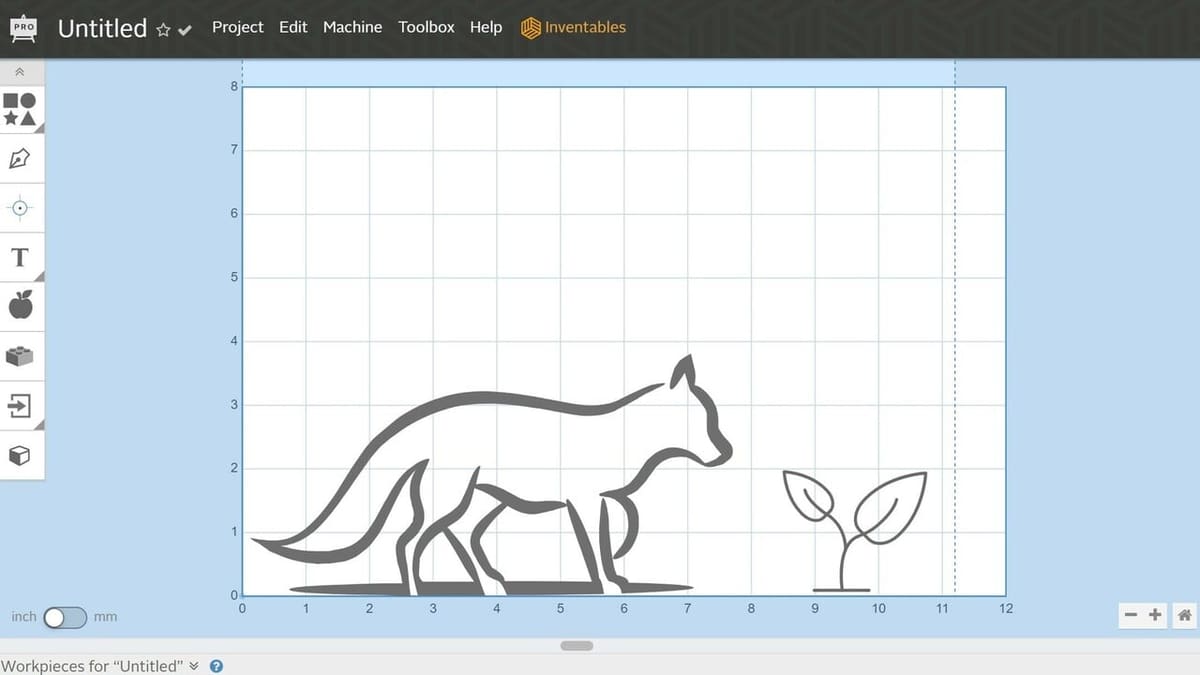
The Easel design space allows you to design a piece to cut out using a CNC router. The nature of the design system somewhat limits you to two and a half dimensions, with curves and slopes being rather onerous to design. Simply put, the way the design tools are implemented lends itself well to signwriting and little else.
That said, the Pro version has a few other tricks up its sleeve, namely v-carving and 3D carving. V-carving allows you to use a “V” shaped bit, and the software will compensate for the changing width of the cut as the bit moves deeper, giving nice lead-ins to cut away areas and a more professional look to any signage you create. The other trick, 3D carving, allows you to import an STL file. Easel will then create the toolpath in order to cut your part out, fully utilizing the third axis.
Both versions of Easel provide machine control. By installing a set of software drivers to provide a connection from your web browser to your machine, your CNC can (usually) be controlled right from the Easel design space. While the software appears to have all the basic necessities for a machine controller, unless you’re running an X-Carve by Inventables and using Windows, connections can be a bit hit-and-miss. This isn’t a deal breaker for the software, as the G-code can be exported and run by another G-code sender, such as B-CNC or Candle.
What Does It Need?
A great feature of Easel’s is its cloud-based nature, which allows you to create your design anywhere and then know that it’s already waiting at your machine-controlling computer. This means that Easel will run on any device that can provide an internet connection and a modern browser.
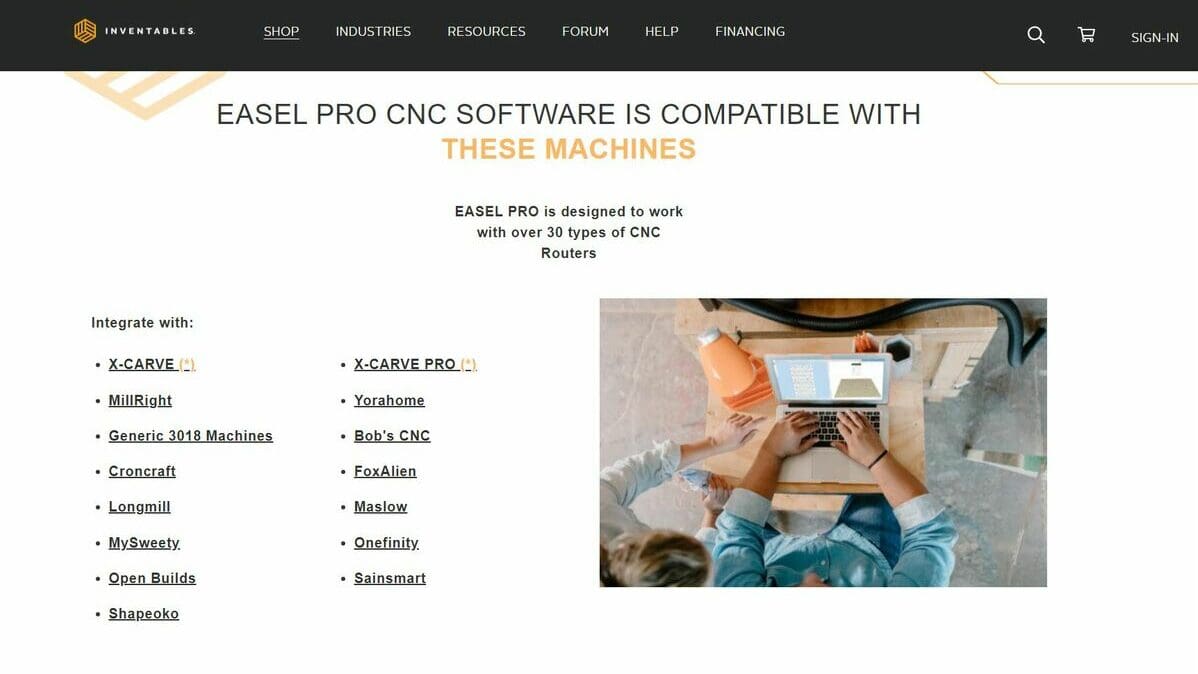
The second thing you’ll need to use Easel (and probably the reason you’re even considering using it) is a CNC router. Easel was designed to run the Inventables X-Carve, but all of the software features are applicable to any 3-axis CNC. Be aware though, as mentioned previously, unless you pay for the “Pro” version, you’ll be limited to just a few cutting bits.
We’ve mentioned machine compatibility a few times now, and while there’s a list of compatible machines (which you can find on Inventables’ website), this isn’t an exhaustive list. Arguably, the best way to determine if your machine is compatible is to simply try the software. After all, the Pro version is free for the first 30 days.
Who Is It For?
So, given the limitations we’ve mentioned above, who is Easel made for? Simply put, while Inventables wanted it to be part of the X-Carve ecosystem for a seamless experience (and it does do that), they’ve made almost perfect beginner software.
All the feeds and speeds are pre-loaded for a range of materials, and the software generates both roughing and detail toolpaths (including returning the spindle to the XY origin to enable easy tool changes between passes). Furthermore, the setup is very straightforward and written in plain and easy-to-understand language. Lastly, if anything goes wrong (for example, the machine can’t be detected), the software will display a button that contacts Easel support, who actually do get back to you with potential solutions and work through the problem with you.
Additionally, Easel is a good option for users who just want a tool that works, and don’t want to learn more about the process than necessary. Someone in this group might purchase the X-Carve simply because they know that it’s one machine and one program that work together without needing more hardware or software to bring into the mix.
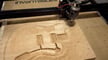
Lastly, experienced makers may need a simpler tool for quick jobs where the time spent booting into something like Fusion 360 and setting up the design isn’t warranted. For example, Easel can have you holding a set of custom keyring tags within 45 minutes. The same task using Fusion 360 would just be finishing the design in that time (or, depending on your computer and internet connection, just getting into the design space).
How to Use It
“But how do I use Easel?”, we hear you asking. It’s very easy.
Firstly, you need to go to the Easel website, where you can find information about machine compatibility, subscription levels, and some general capabilities of the software. Click on “Start Free Trial” and enter your details (as we mentioned previously, you won’t need to enter payment details). This will give you access to the Easel design space and tutorials.
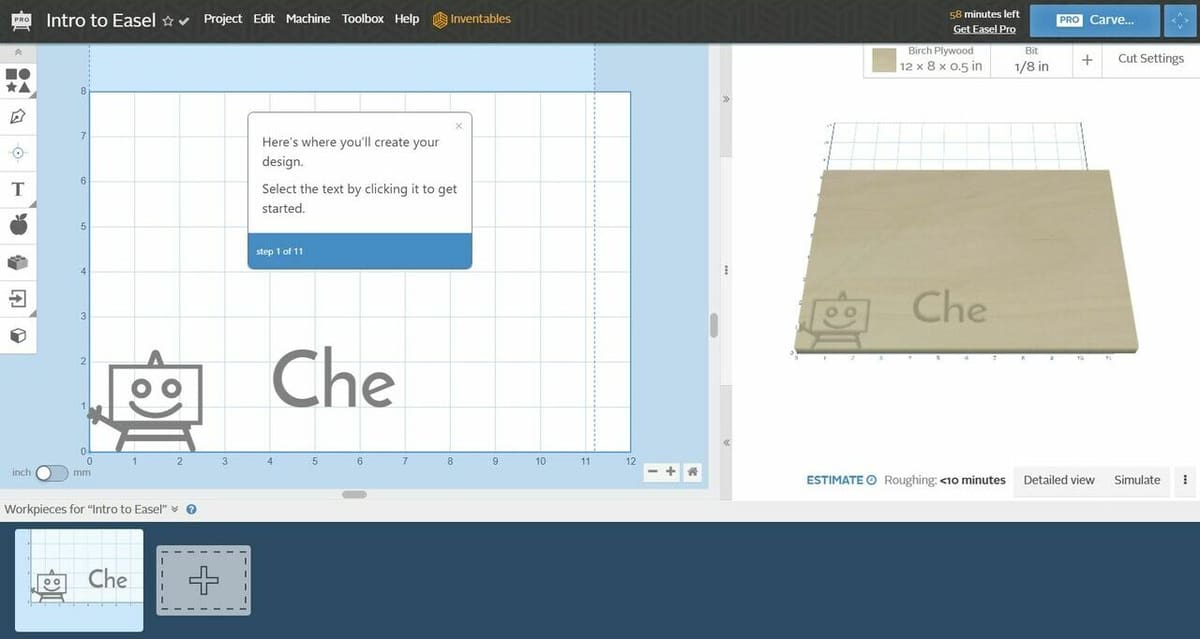
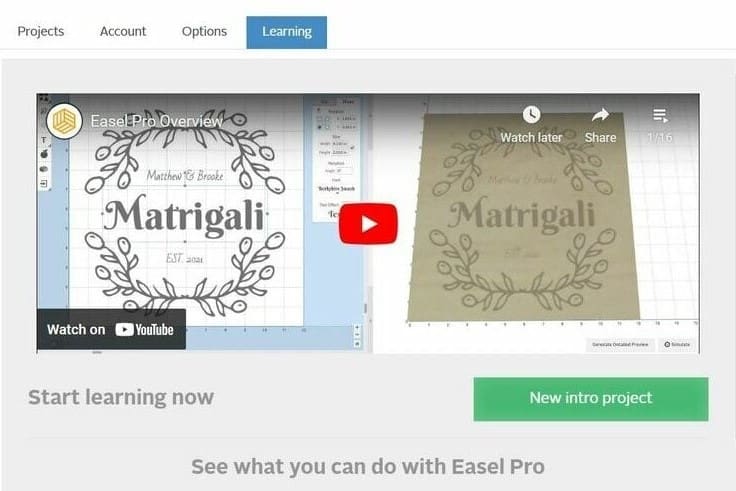
The first thing you’ll see once you’ve created an account will be a tutorial page; this is always available as a tab in the projects management screen. We recommend watching through the tutorials, as they’re an excellent guide to how to use the program and get good results.
Getting Started
On the tutorial screen, there’s a green “New intro project” button, which will send you to the design space with a brand new project that has your name and a little smiley easel next to it (alternatively, you can just select the “Project” tab and the green “New project” button). From here, you can create your design using the drawing tools on the left.
You’ll find two views: on the left, the design work area; on the right, a 3D preview of your creation.
Adjusting Parameters
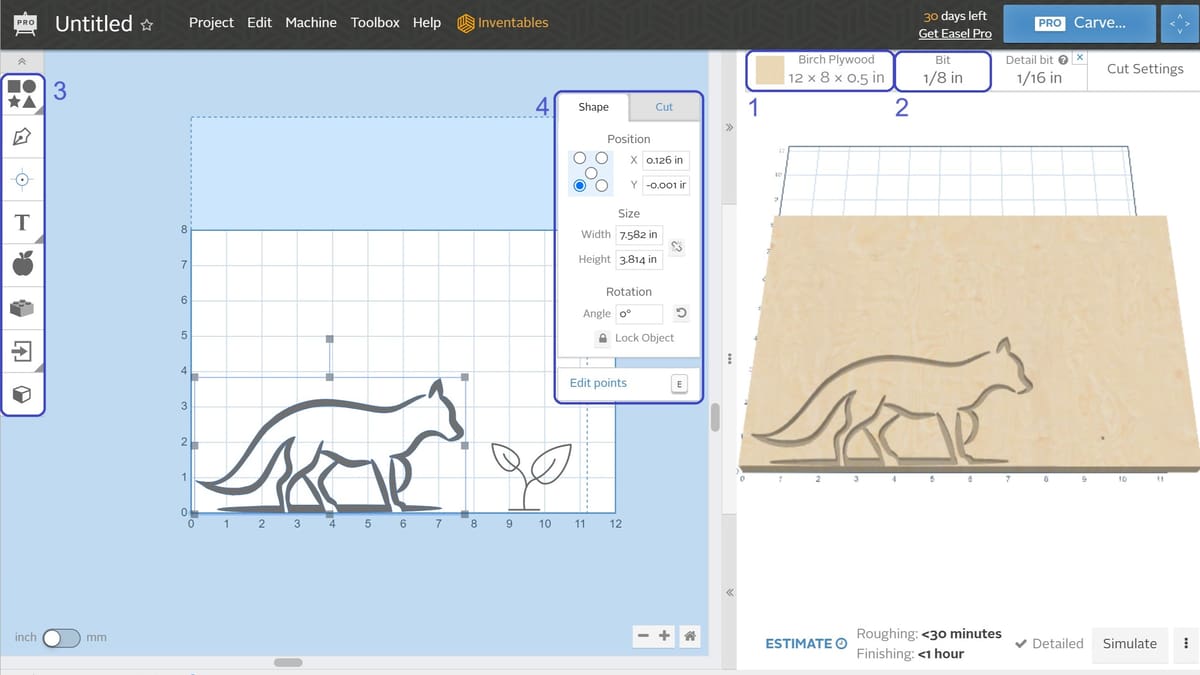
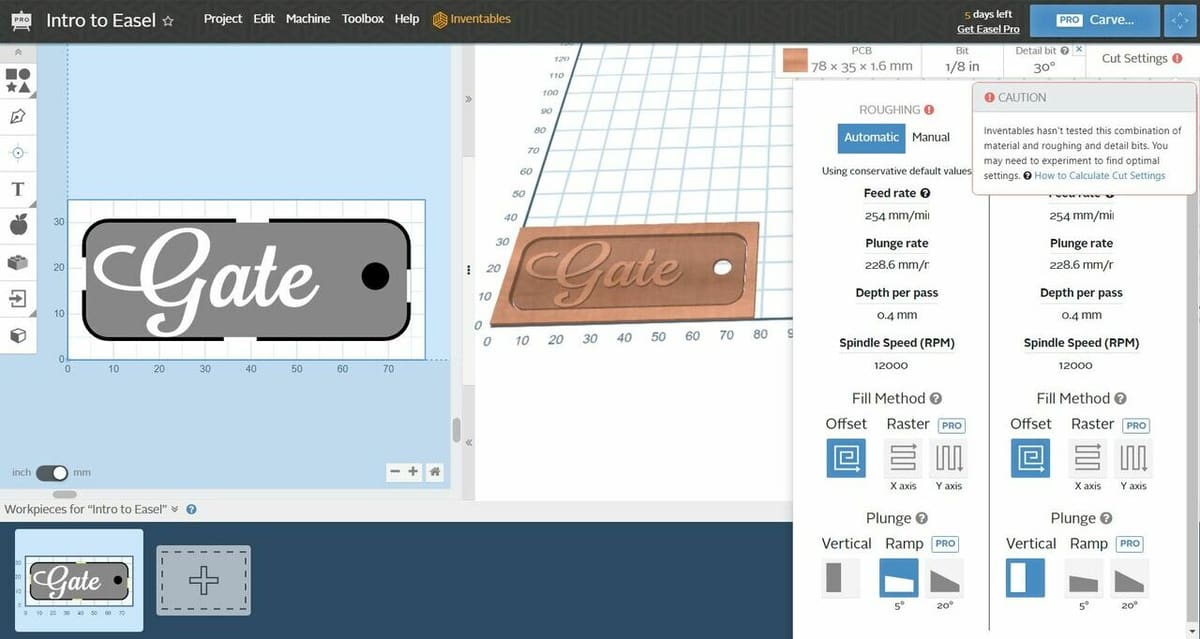
The first thing to do is set up your material; this is as simple as choosing a material from a drop-down list near the top right corner (in the 3D preview window [1]) that’s available when you click on the default option. Inventables has loaded roughing and finishing cut profiles for a range of materials, which takes a lot of the guesswork out of cut depths, feeds, and speeds to start with (this is machining though, so you’ll need to adjust by listening and watching your machine). Enter the dimensions of your stock material into the prompt, select (or add) the bit type and size (found in a drop-down menu next to the material choice [2]), and you’re ready to start designing.
The design features you can use are on the left-hand side of the screen (3), and it’s as simple as clicking to add them. Once you’ve drawn a feature, there’s a floating pane (4) to set its shape parameters (like font or corner radii) and its cut settings (like depth and if the cut is a filled-in area or an outline on or next to the line). This can be accessed at any time by simply clicking the feature.
Your design is built up in layers, and with a little patience, very complex artwork can be created.
Sending to the CNC Machine
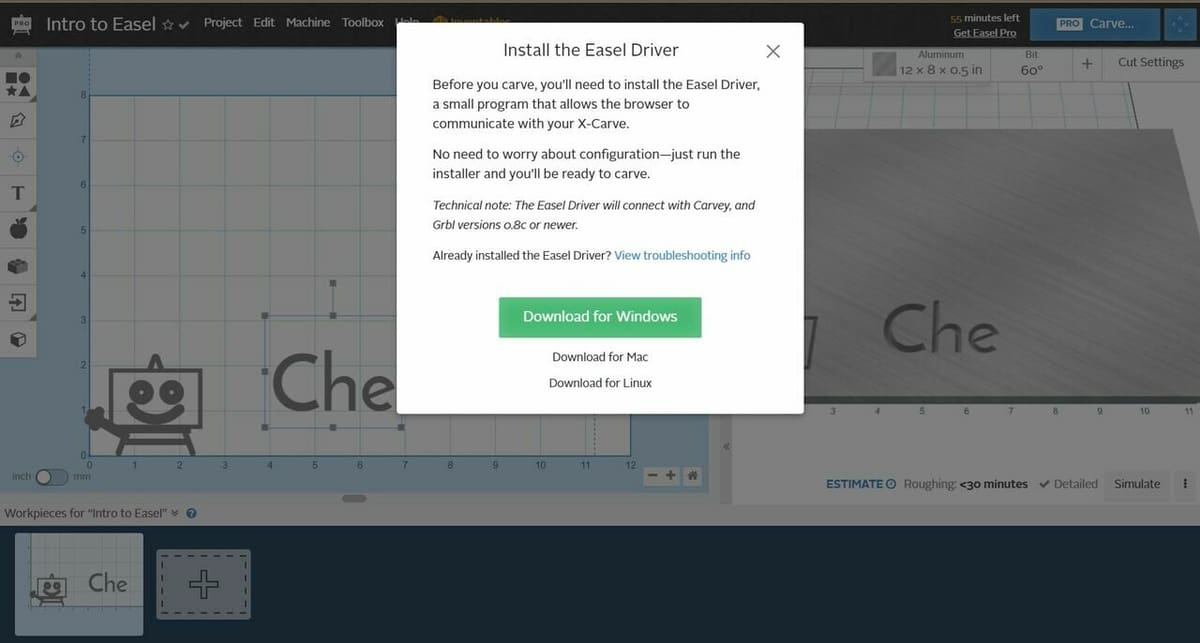
Lastly, set up your machine using the “Machine” menu. The process is very simple, with the only “gotcha” being that you must install the Easel drivers to allow your computer to communicate with your machine.
Set your machine up as normal and zero your axes. Once you’re happy with your design, hit the carve button, and away you go. Of course, if your machine won’t connect (for example, you’re on Linux and using a custom port for the USB connection), you’ll need to download the G-code.
To do this, open the “Project” menu and select “Download g-code”, and you can then send this file using another G-code sender such as B-CNC or Candle. You can also opt for “Download project (ZIP)”, which will download a zipped file containing the roughing and detail passes, with the design in SVG format in case you want to add it to different projects.
License: The text of "Easel by Inventables (CNC Software) – Simply Explained" by All3DP is licensed under a Creative Commons Attribution 4.0 International License.