
The Best Elegoo Neptune 2/2S Cura Settings & Profile

Get started tackling the massive amount of print options in Cura. Read on for the ideal Elegoo Neptune 2 Cura settings for perfect prints.
The Elegoo Neptune 2 and 2S were released in 2021 and remain some of the cheapest and most feature-packed DIY machines on the market. They’re equipped with similar features to popular devices such as the Ender 3 Pro and the Ender 3 V2, including a 32-bit motherboard, a filament run-out sensor, and a magnetic PEI sheet. Offering a delightful printing experience, these machines are an affordable entry into the world of 3D printing.
Even with the best hardware on the machine, the prints can only come out as good as the slicer settings being used. UltiMaker’s Cura is one of the leading slicing programs out there, as it’s both free and open-source. It’s compatible with many machines on the market, not just UltiMaker devices, and allows for a vast amount of setting tuning and customizing.
With over 400 settings to fiddle with, finding the right profile for a new printer can be a daunting task. Luckily, Cura has great base profiles as a starting point. In this article, we’ll cover how to fine-tune your print profiles for the Elegoo Neptune 2 and 2S in Cura so you can get perfect prints every time.
Let’s dive right in!

Getting Started
If you don’t have Cura installed, follow the steps below to download it onto your device:
- Visit the UltiMaker website and click on the box corresponding to your system. Cura is available on Windows, MacOS, and Linux. The program will begin to download automatically.
- Open the installer and follow the instructions to install Cura. Once installed, launch the program and skip through any announcement pop-ups.
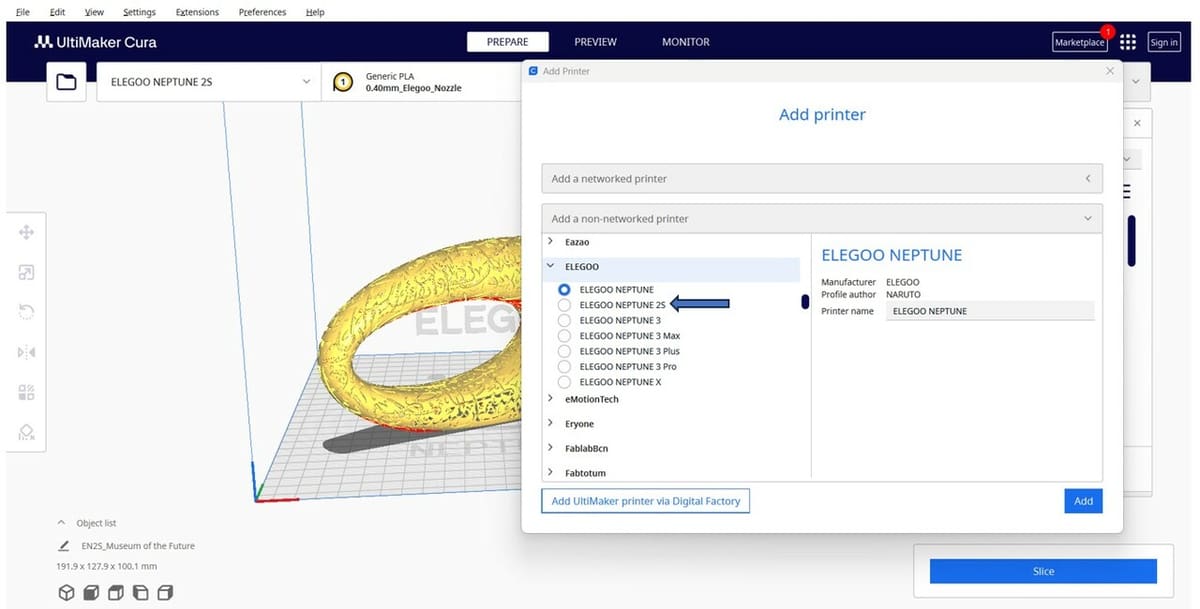
- Add your Elegoo Neptune 2 or 2S to Cura by navigating to the device tab on the upper left corner of the virtual build plate. Click on “Add printer”, then select “Non-UltiMaker printer”.
- Select “Non-Networked Printer” then open the Elegoo dropdown and choose Elegoo Neptune 2S. Hit “Add”.
Now you have the printer’s build volume and some base settings to start off with. Let’s take a closer look at each of the main types of settings. To do so, it’s recommended to adjust the setting visibility. Head over to the Print Settings tab on the right-hand side and click on the hamburger icon next to the search bar. Select “Expert” to gain access to all setting options.
Perfect Profiles
We’ll start with an overview of the basic settings depending on the filament type you are working with. However, these settings are just starting points and may require fine-tuning depending on the filament brand, ambient conditions, and several other factors. Let’s have a look.
PLA
- Nozzle temperature: 205 °C
- Bed temperature: 60 °C
- Print Speed: 60 mm/s
- Retraction: 5 mm at 45 mm/s
- Cooling: 100%
PETG
- Nozzle temperature: 235 °C
- Bed temperature: 70 °C
- Print Speed: 45 mm/s
- Retraction: 4 mm at 45 mm/s
- Cooling: 75%
ABS
- Nozzle temperature: 250 °C
- Bed temperature: 90 °C
- Print Speed: 50 mm/s
- Retraction: 5 mm at 40 mm/s
- Cooling: 20% plus an enclosure
Layer Height

An important parameter that affects time, detail, and part strength is the layer height, which can be found under the “Quality” tab of Cura. A larger layer height can provide greater part strength. Increasing layer height from 0.1 mm to 0.2 mm boosts part strength by roughly 20%. However, the benefits begin to taper off after 0.24 mm.
Layer height also affects the level of detail on the parts. A part printed at a layer height of 0.12 mm would have much more detail when compared to a part printed at a 0.32 mm layer height. For aesthetic parts or models with fine features, consider lowering the layer height, but keep in mind that doing so will increase your printing time significantly.
A 0.2-mm layer height provides a good balance between part strength, part detail, and printing time and will work well for most everyday printing. Under the Experimental settings tab, enabling “Use Adaptive Layers” will tell Cura to adjust the layer height depending on the geometry to automatically balance print time with surface quality.
- Strong: 0.24 mm
- Detailed: 0.12 mm
- Balanced: 0.2 mm
Speed
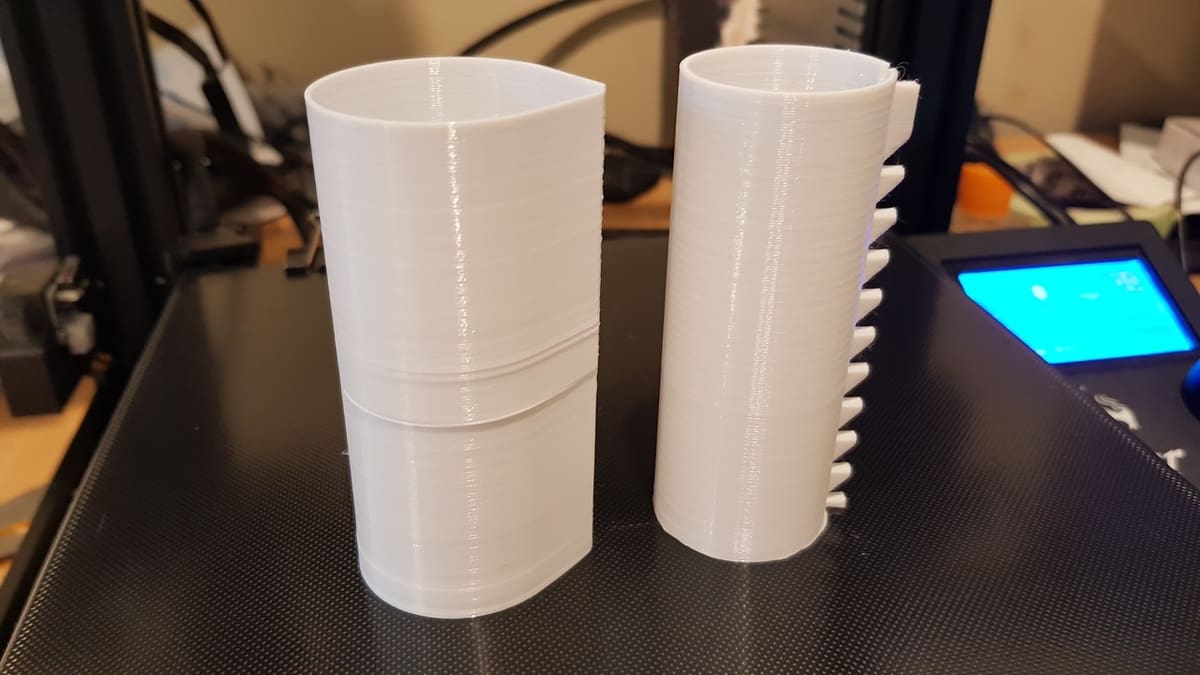
Print speed is an essential element to ensure a good finish on the parts and it also plays a large role in the overall printing time of your parts. Both too high and too low print speeds have their own drawbacks.
Printing at extremely high speeds can lead to under-extrusion, blobs, excessive stringing, lack of precision, poor layer adhesion, and much more. Slowing down the print time will improve layer adhesion and precision but increase the risk of clogging and jamming the nozzle. There are several things to consider when choosing the right print speed.
You’ll generally want to keep the outer-facing surfaces of your model as clean as possible, so stick with slower speeds for walls but increase speeds for internal structures. For example, when using PLA, you can set the Outer Wall Speed to 45 mm/s and increase the Inner Wall Speed to 65 mm/s. This can also work for PETG and ABS, but since they print at higher temperatures, be careful to not increase the printing speed too much, or you can run into layer adhesion problems.
Infill Speed is another setting you can reduce if you are trying to save some time. Infill can generally be printed faster than walls because some internal stringing or blobs won’t be the end of the world. However, printing infill too fast (to the point where there are frequent defects) can result in weaker parts, so keep this in mind if your model is meant to be functional.
If you find yourself running into adhesion issues, you can try lowering the Initial Layer Speed to around 20 mm/s. For other speed settings, like Travel Speed, the recommended values in Cura are a safe bet.
- PLA: 60 mm/s
- PETG: 45 mm/s
- ABS: 50 mm/s
Retraction
In Cura, retraction settings can be found under the “Travel” tab of the Print settings. Retraction is when the extruder pulls back filament slights during travel to prevent excess material from flowing out of the nozzle. The primary settings are the distance and speed at which the filament gets pulled back. The Elegoo 2 and 2S are Bowden-type extrusion, which makes retraction a bit tricky, especially for flexible filaments. Check out our guide on printing TPU on other Bowden extrusion printers for more information.
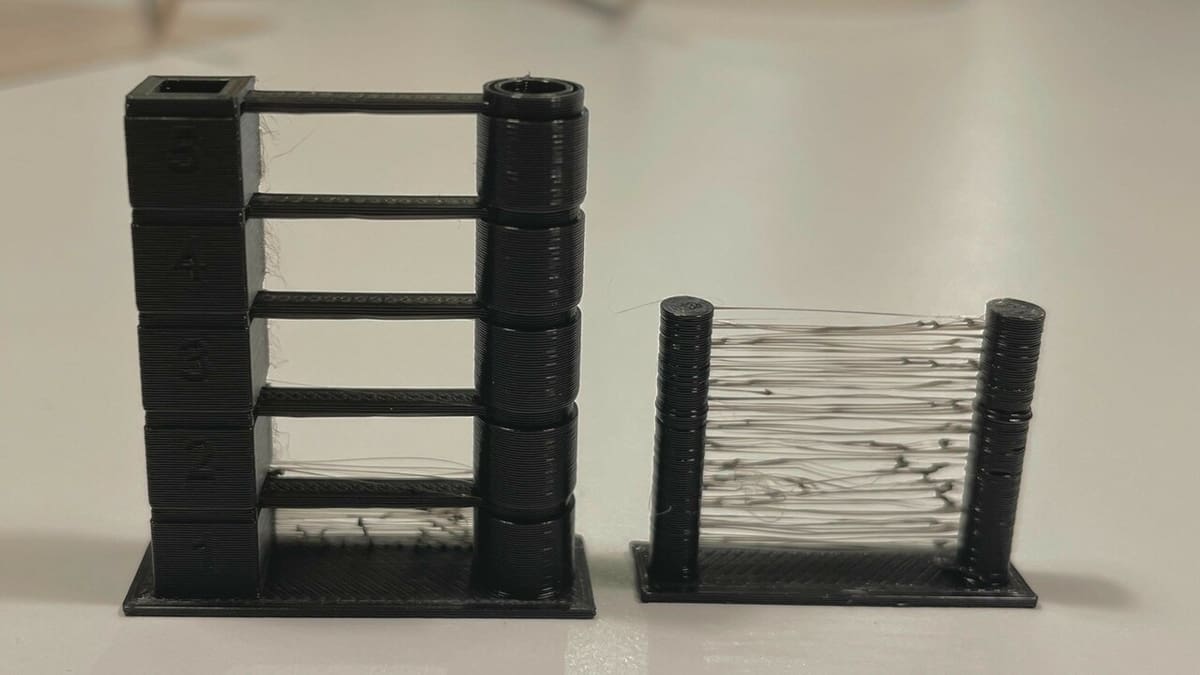
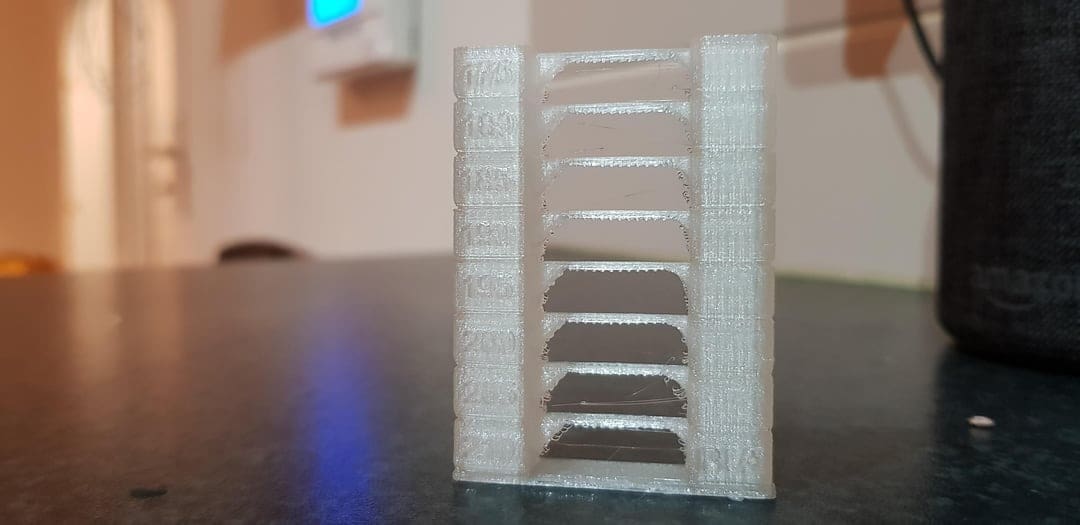
Retraction settings can be used to eliminate stringing defects, but it’s important that the settings be finely tuned, or else under-extrusion becomes a risk. For Neptune 2 and 2S printers, retraction of 5 mm at 45 mm/s is a good starting point. To dial in the ideal values for your system, use a retraction tower from the Calibration Shapes plug-in.
A good tip for the initial retraction tower is to start with no retraction and progress in intervals of 5 mm distance or 10 mm/s speed. While working with the retraction tower, vary only one parameter (speed or distance) in a single tower. Varying both values at the same time will give mixed and hard-to-interpret results.
If stringing still persists after multiple retraction towers it may be because of other factors such as a wet filament.
- PLA: 5 mm at 45 mm/s
- PETG: 4 mm at 45 mm/s
- ABS: 5 mm at 40 mm/s

Infill & Walls
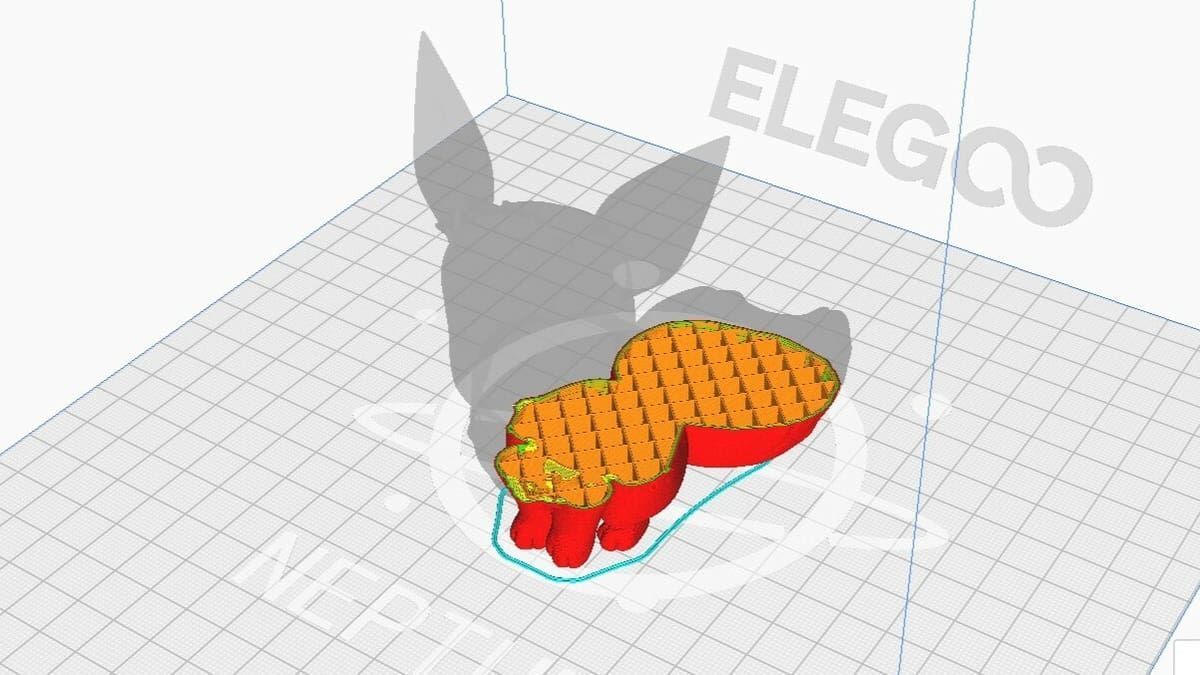
Infill settings play a significant role in print time, amount of material used, and part strength. The infill percentage defines how dense the part is, with 0% indicating no internal structures and 100% infill having a totally solid interior. Increasing infill will lead to longer print times and result in heavier, yet stronger parts.
There are 14 different types of infill patterns in the latest version of Cura (5.4.0). Some of the most used patterns include gyroid, rectilinear, grid, and zig-zag. Picking the right infill pattern and percentage depends on the material and intended application of the part.
Simple aesthetic parts can be printed without infill to save material and time. More complex parts with a closed top, such as busts, may experience failures without infill, so 3-5% can be used to ensure structural integrity while printing. The gyroid pattern is a safe choice since it prints fast and provides good strength as well.
Functional prints that may be subjected to regular stress should have more than 30% infill. These parts will be heavier and will take longer to print. The triangular infill pattern is recommended for parts that need strength as it’s the least likely to deform.
Typical parts that just need to hold up to everyday use can be printed with infill around 10-30%. Use a cubic subdivision or grid infill pattern for a balance between print time while providing sufficient strength. If you’re using a flexible filament, the concentric infill pattern is designed to give bendable support.
On the topic of the structural strength of printed parts, the wall count should be kept in mind. A higher wall count will lead to a much stronger part, but it will take longer to print. However, if the wall count is kept too low, the infill pattern may become visible through the print. The recommended wall count is two for typical parts and three walls for parts that require higher structural integrity.
- Aesthetic parts: 0-5% infill; gyroid; 2 walls
- Functional parts: >30% infill; triangular; 3 walls
- Balanced parts: 10-30% infill; cubic subdivision; 2 walls
Temperature
The temperature settings can be found under the “Material” tab of the Print settings in Cura.
Nozzle
Having a constant hot end temperature is crucial for good prints. Fluctuations or wrongly selected nozzle temperatures may lead to gaps due to low temperatures or blobs when printing too hot. These under- and over-extrusions affect the structural integrity of the part as well.
Different filaments will have different temperature settings, so always check the recommended settings from the filament manufacturer. The optimal hot end temperature settings for the main types of printing materials typically fall around the following ranges:
- PLA: 205-210 °C
- PETG: 235-240 °C
- ABS: 250-260 °C
Bed
A heated bed has many benefits, the primary one being improved bed adhesion. Temperature fluctuations in the heated bed often lead to warping. On the other hand, if the bed is too hot the heat, prints can develop elephant’s foot.
PLA is one of the few materials that can be printed easily without a heated bed, but some heating can still improve results. In contrast, PETG and ABS should be printed on a hot bed for good adhesion and to avoid warping.
- PLA: 55-60 °C
- PETG: 70-80 °C
- ABS: 90-100 °C
Environment
Not only should ABS be printed with a heated bed to avoid defects, but an enclosure is also generally needed to create a warm ambient temperature during printing. If you don’t have an enclosure yet but are antsy to get started with a spool of ABS, you can try out the Draft Shield option in Cura.
You can enable Draft Shield under the Experimental tab of the Print settings. It will build a single-walled shell around the part being printed to help retain heat. Keep in mind that this will work best with small prints and poses a risk of failing and ruining the print without a properly leveled bed.
Build Plate Adhesion
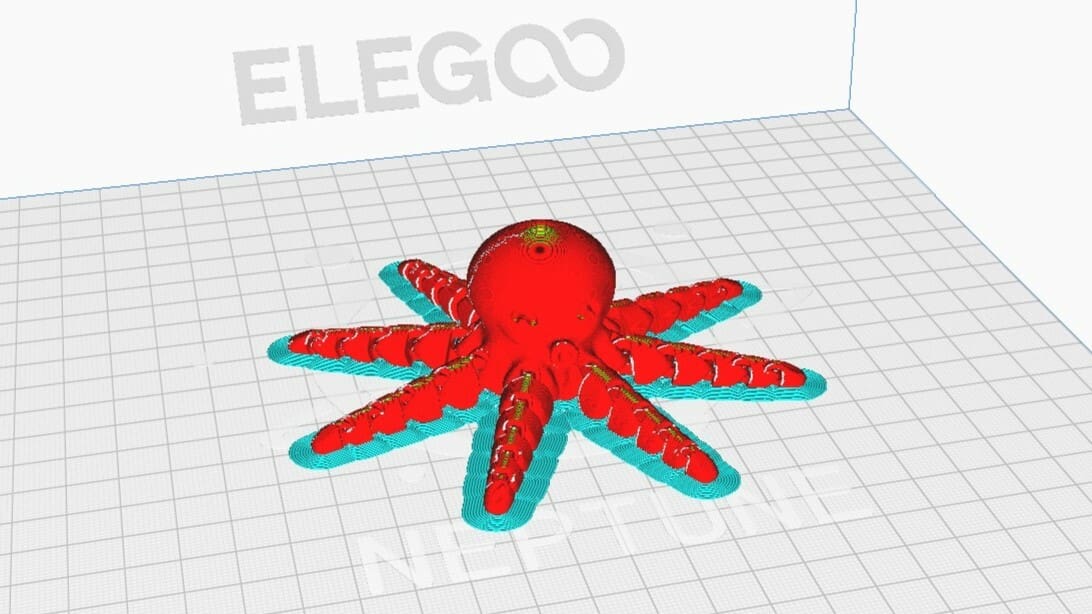
Slicers have bed adhesion assistants which lay down extra material at the start of a print to ensure the print starts out on a good foot. The different types of bed adhesion are skirts, brims, and rafts.
A brim is an extension of the first layer of the print. It helps the print with better adhesion by giving a greater surface area for the print to stick to. Brims mitigate the risk of warping and part failure. In Cura, you can adjust the width of the brim but the default settings will work in most cases.
A raft provides a platform on which the part gets printed. The raft extends beyond the print and acts like a base for the print. Rafts are used to improve the first layer adhesion and prevent warping. You can adjust many aspects of the raft, including the width, print size, and number of layers.
A skirt consists of a couple of lines along the perimeter of the print that does not touch it. While a skirt may not directly contribute to improving first-layer adhesion, it plays a vital role in establishing the correct Z-offset, a critical parameter for achieving a good first layer.
- PLA: Use a skirt for most prints or a brim for taller and faster prints
- PETG: Use a brim to prevent warping
- ABS: Use rafts to prevent warping and help adhesion
License: The text of "The Best Elegoo Neptune 2/2S Cura Settings & Profile" by All3DP is licensed under a Creative Commons Attribution 4.0 International License.