Best Elegoo Neptune 4 (Pro/Max/Plus) Upgrades & Mods

The Elegoo Neptune 4 (Pro/Max/Plus) are great printers, but there's always room for improvement. Check out the best Elegoo Neptune 4 upgrades!
The Neptune 4, 4 Pro, 4 Plus, and 4 Max are some of Elegoo’s newest budget 3D printers. The 4 starts at just $160, but the Max offers more than six times the print volume for $470. All machines offer plenty of features, such as auto-bed leveling, dual-gear direct extrusion, and filament runout detection.
No matter how nice the Neptune 4 is right out of the box, there are still always ways to improve it. While the Neptune 4 and 4 Pro were only released in June of 2023 with the Neptune Plus and Max following shortly after, the 3D printing community has already responded with upgrades designed specifically for these machines.
In the following sections, we’ll look at some of the best upgrades and mods that will take your Elegoo Neptune 4, 4 Pro, 4 Plus, or 4 Max to the next level!
To DIY
Tool Drawer

A tool drawer is a great upgrade for any 3D printer. Who doesn’t have too many extra Allen wrenches, spare nozzles, and screws that could use organizing? This 2-part tool drawer was remixed from a similar design for the Elegoo Neptune 3 and was adjusted to fit both the Neptune 4 and 4 Pro.
The 3D printable drawer should give you enough space to hold extra bed springs, zip ties, nozzle cleaning needles, nozzles, PTFE tubing, and all of the provided screwdrivers and wrenches. Printing the two pieces for this project should also be straightforward, and the designer listed that they used a 0.2-mm layer height and 15% infill density.
- Difficulty: Easy
- Compatible models: Neptune 4, 4 Pro
- Additional hardware: None
- Designer: WestInSpace (remixed from dna001)
- Where to find it: Thingiverse
Anti-Vibration Feet

Vibrations are never good for 3D printers, and too much vibration can cause print quality issues such as ringing and ghosting. Because of this, vibration dampeners (or anti-vibration feet) have become a common upgrade for 3D printers, and you can easily (and affordably) add some to your Neptune 4 and 4 Pro.
According to the maker, these 3D printable anti-vibration feet help reduce noise levels while improving print quality. And the only two items you’ll need to make the feet are the 3D prints and some tape (or zip ties). The designer also recommends using PETG filament, likely for the material’s impact-resistance properties.
- Difficulty: Easy
- Compatible models: Neptune 4, 4 Pro, 4 Plus, 4 Max
- Additional hardware: Zip ties
- Designer: AkashAgarwal
- Where to find it: Printables
Bed Corner Guides
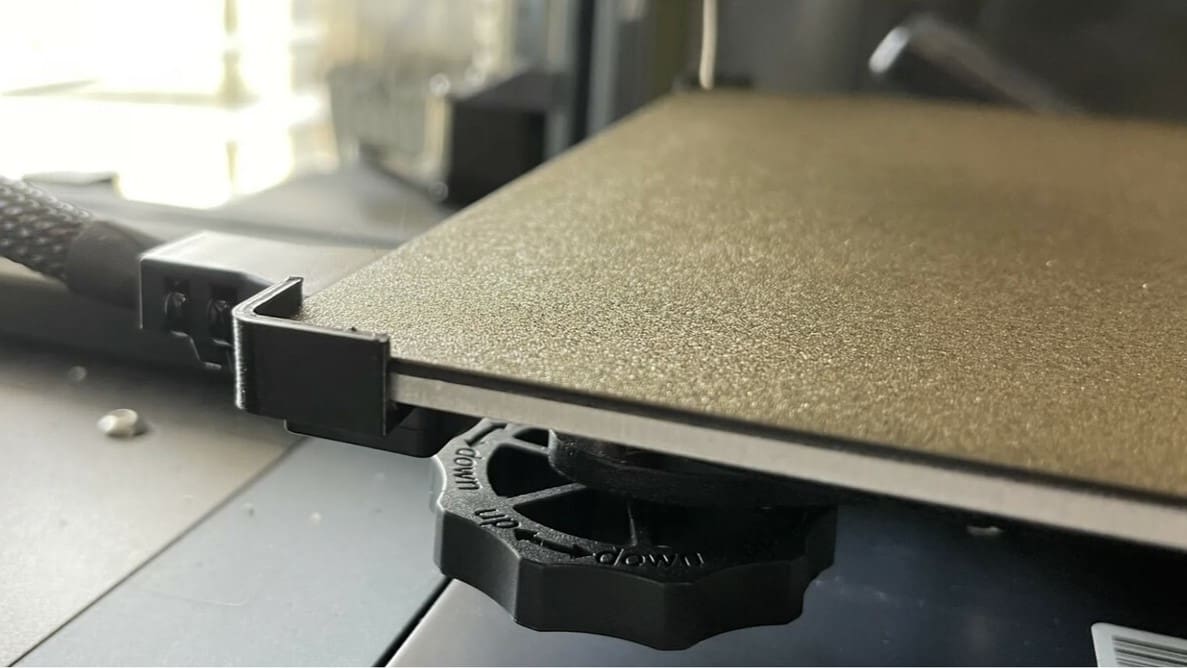
The Neptune 4’s magnetic and flexible build plate is perhaps one of the best features of the printer. However, some users have experienced issues realigning the bed on the printer’s frame after removing it. Luckily, you can 3D print bed corner guides to remedy this issue.
These 3D printable guides are simple in design and function but will make it easy to perfectly align the build plate on your printer. While the creator of this project didn’t provide any printing tips, they used PETG filament for increased temperature resistance. They also noted that you can attach the bed guides to the printer’s frame with double-sided tape.
- Difficulty: Easy
- Compatible models: Neptune 4, 4 Pro, 4 Plus, 4 Max
- Additional hardware: None
- Designer: luisillo
- Where to find it: Printables
Display Stand
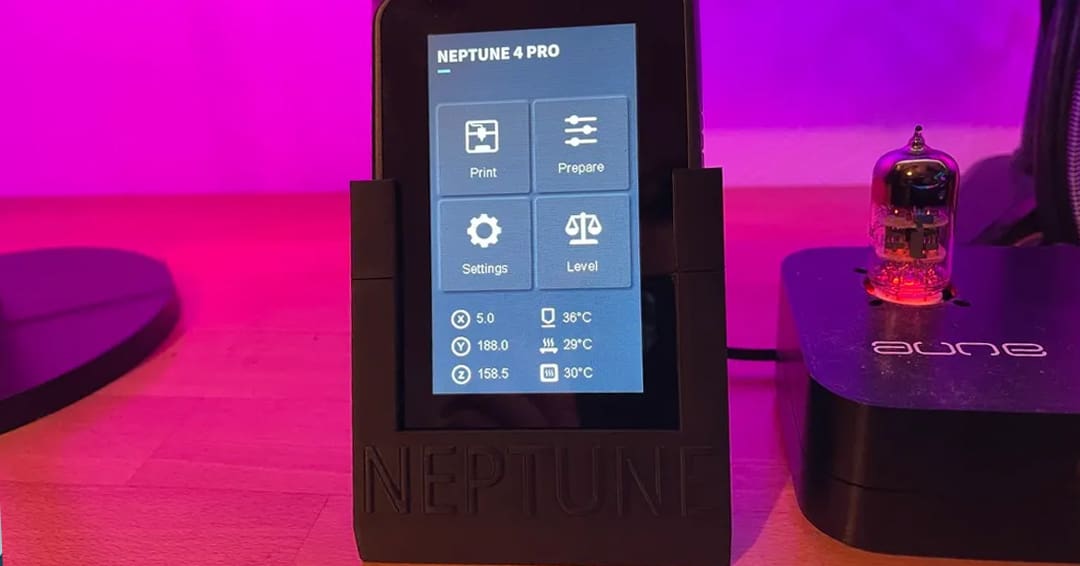
The Neptune 4 series printers come with a convenient touchscreen that can be magnetically attached and detached from its dedicated stand. If the stock mount isn’t conveniently located by your workstation, you can print this useful display stand to place the screen where you need it the most.
The part is really simple to print and doesn’t need any supports. You can also decide to buy a longer cable to be able to place the stand at farther distances from your device. Be sure to check out the equipment recommendations from the creator if you choose to go in this direction.
- Difficulty: Easy
- Compatible models: Neptune 4, 4 Pro, 4 Plus, 4 Max
- Additional hardware: None
- Designer: Gismo
- Where to find it: Printables
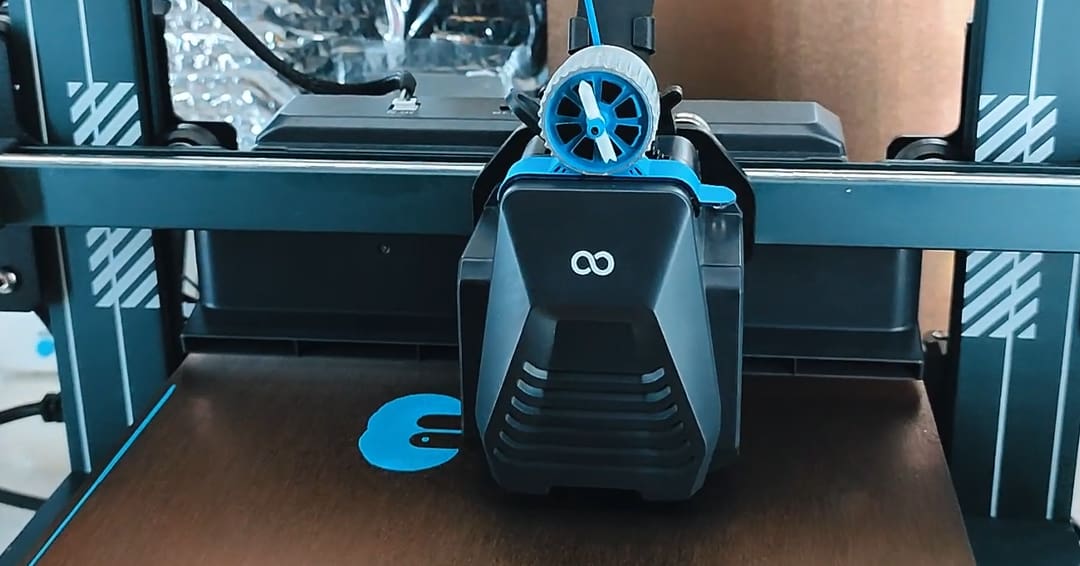
LCD Screen Cover
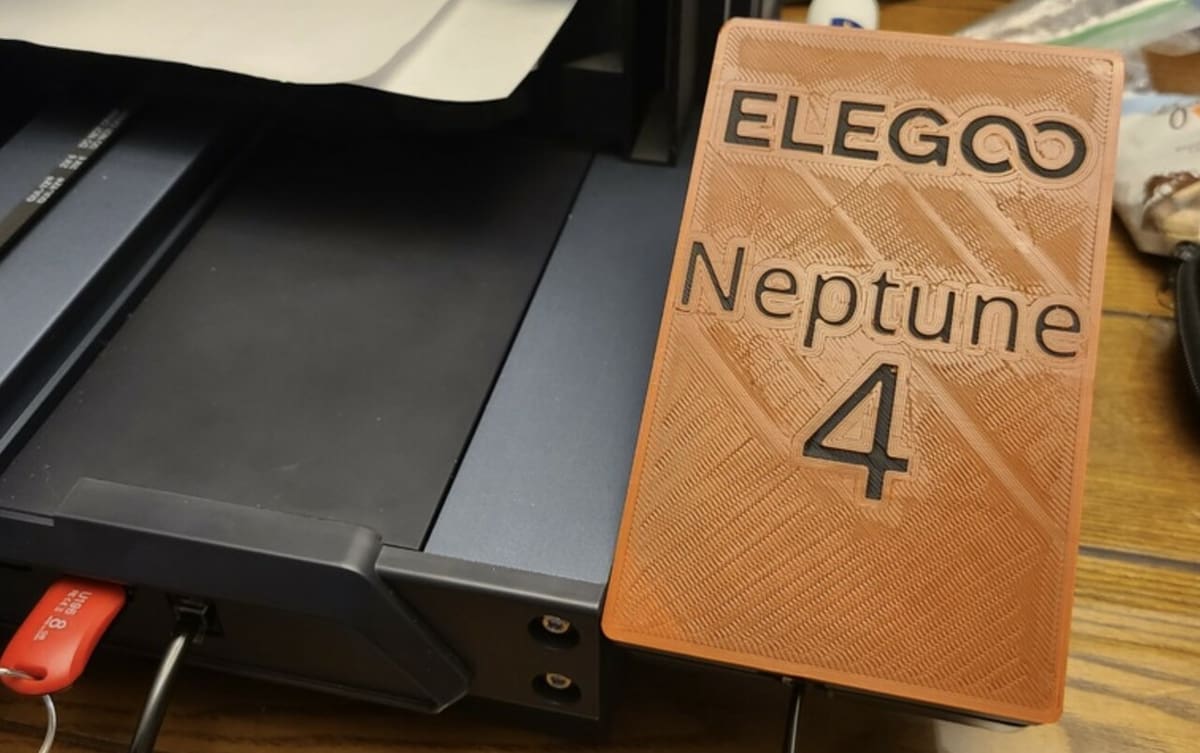
Like most consumer-grade 3D printers, the Neptune 4’s LCD screen never shuts off. While this isn’t an issue, if you keep your printer in the space where you sleep, this light can be annoying. This 3D printable LCD screen cover is a simple solution that reduces the light from the LCD while adding a nice look to your printer.
As you can see in the image above, the screen cover features the Elegoo logo with the name of your printer. The designer also added a second version of the design with lettering for the Neptune 4 Pro.
Printing this model should be super easy. The designer shared a handful of their slicer settings, including a 0.2-mm layer height, no supports, no raft, and a 15% infill density.
- Difficulty: Easy
- Compatible models: Neptune 4, 4 Pro, 4 Plus, 4 Max
- Additional hardware: None
- Designer: WestInSpace
- Where to find it: Thingiverse
Belt Tension Stopper
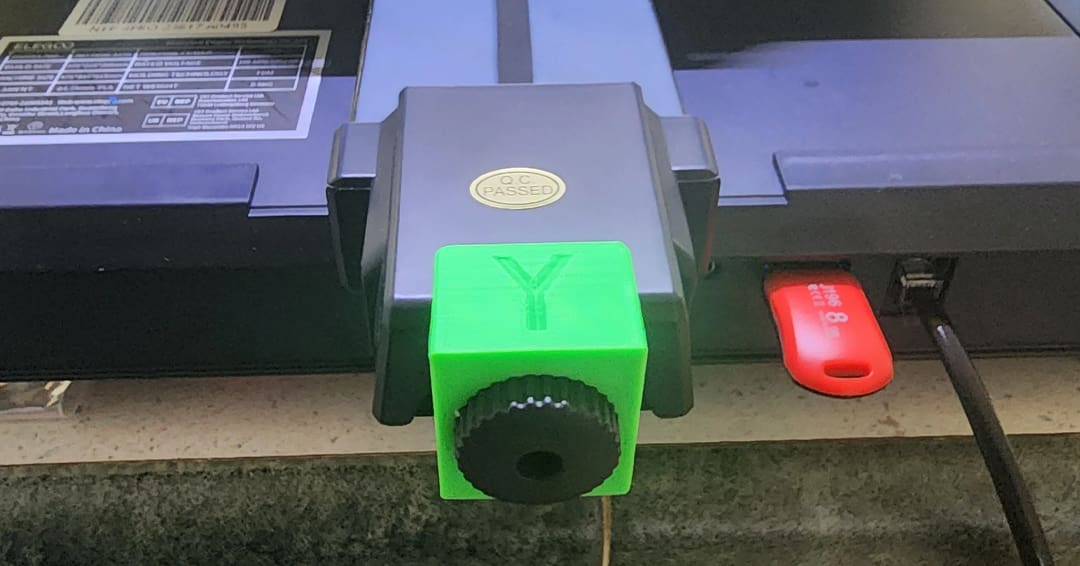
The belt tension is critical for good print quality and device longevity. An inappropriate tension on the belts leads to artifacts on the parts and excessive wear of the belts. The Neptune 4 series comes stock with X-axis and Y-axis belt tensioners to help you with the process. Unfortunately, after some prints, the knob can come loose, obligating you to tune the tension once again.
To avoid frequent belt tuning, you can install this simple mod that maintains the correct tension in the long run. Although you can print these stoppers in PLA, you should consider using PETG, which will hold up better under constant tension. You’ll want to print one for the X-axis and one for the Y-axis. To install them, simply take out the belt screw, place the stopper on the screw, then secure the screw back in place.
- Difficulty: Easy
- Compatible models: Neptune 4, 4 Pro, 4 Plus, 4 Max
- Additional hardware: None
- Designer: SebastianRubner
- Where to find it: Thingiverse
Nozzle Cleaner
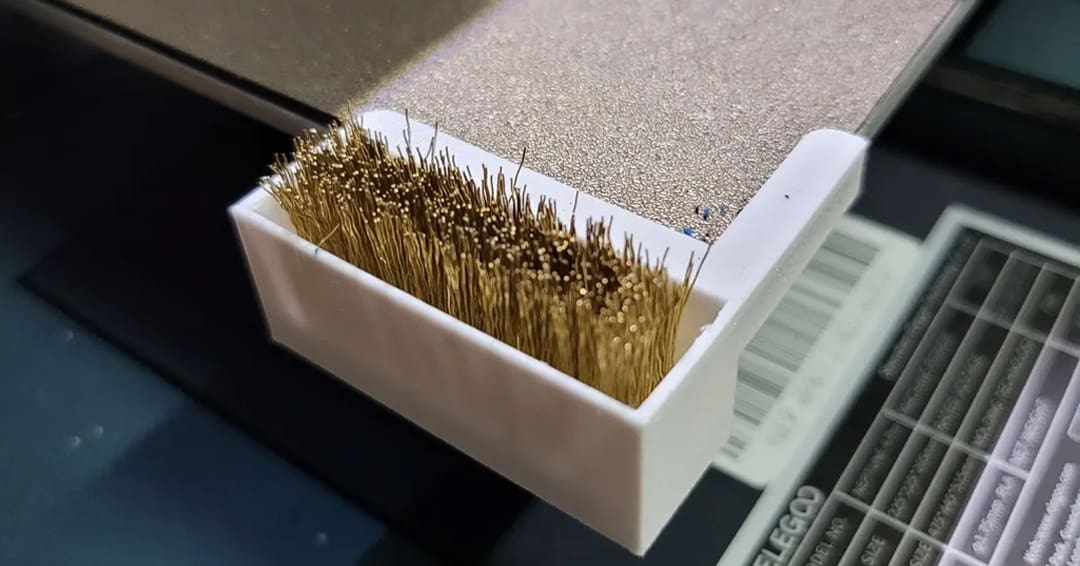
The auto-leveling system on the Neptune 4 series is super handy and prepares your printer in seconds. The machine also calibrates the Z offset using a magnetic sensor, greatly easing the leveling process for beginners. Unfortunately, residue on the nozzle can lead to inaccuracies in the Z offset values. To ensure your nozzle is always clean, check out this mod!
With this design, a brush head can be mounted to the side of your printer bed and a macro can instruct the printer to slide against it.
You can either buy the brush suggested by the designer, or you can use any brush and adapt the mount model to the size. In fact, the creator of the model has uploaded both the STL, the STEP, and the Fusion files for the model. Print the holder with a durable material, such as ASA or ABS, and install the brush head into it. Attach the part to the front left corner of the print bed to complete the physical installation.
If you’re working in Klipper, you can configure your printer to use this cleaning station at the start of a print by copying the macro you’ll find in the “macro.txt” file provided by the designer into your printer.cfg. To finish, add the following line to your start macro:
CLEAN_NOZZLE EXTRUDER_TEMP={params.EXTRUDER_TEMP|default(200)|float} WIPES={10}
Note that the macro was written for a Neptune 4 Pro, so it may need to be adapted to other models or if you choose to place the cleaning station at a different location on your print bed.
- Difficulty: Intermediate
- Compatible models: Neptune 4, 4 Pro, 4 Plus, 4 Max
- Additional hardware: Brush
- Designer: Tom
- Where to find it: Printables, Thingiverse
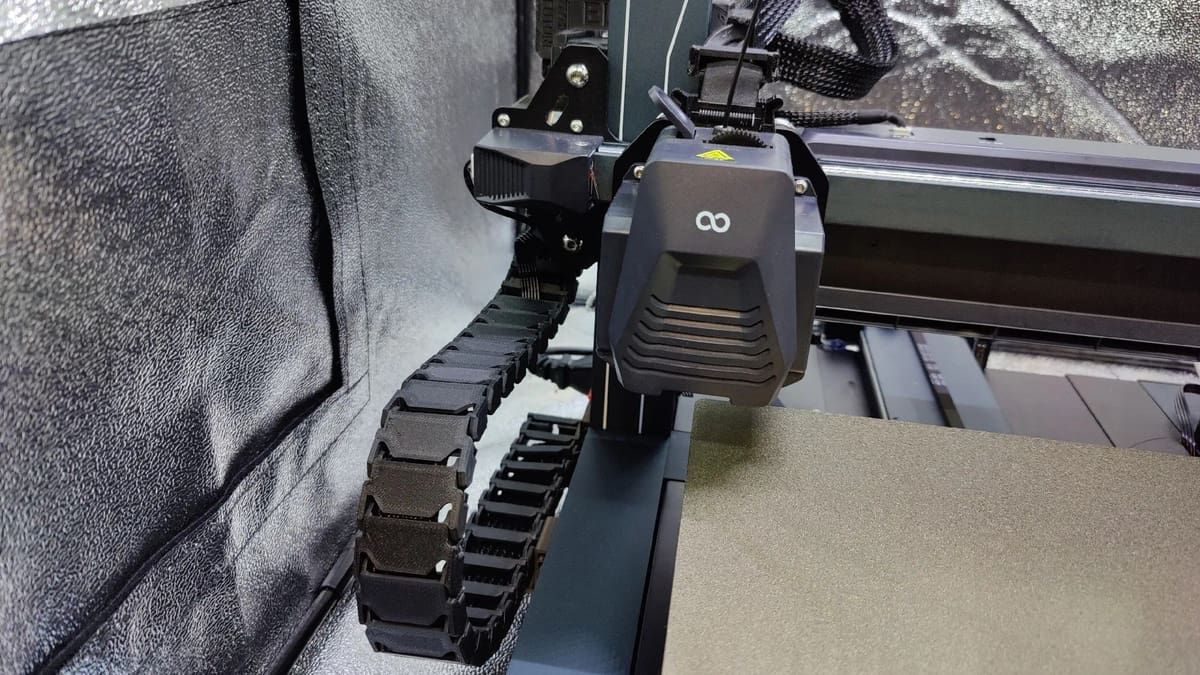
Cable Chain
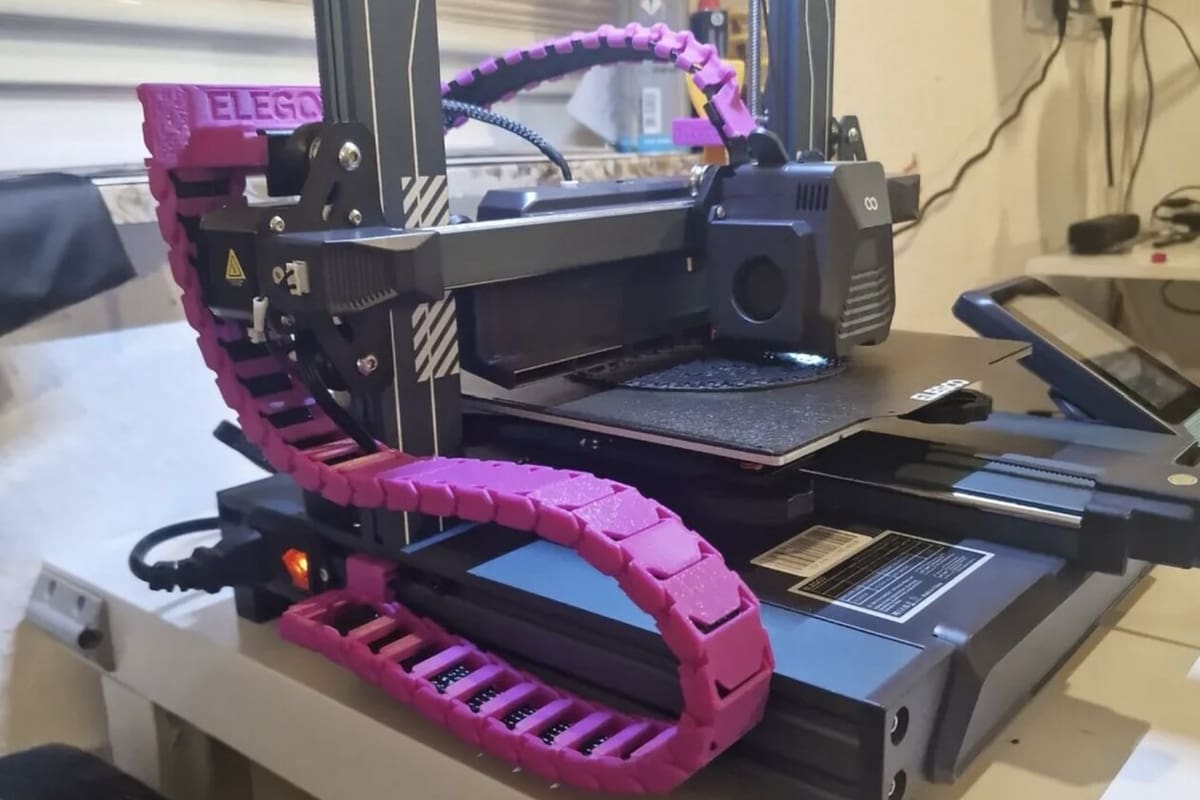
While Elegoo loaded the Neptune 4 with many performance-enhancing features, the printers’ cable management is still a bit lacking. That’s why the first upgrade on our list is a set of 3D printable cable chains to help give your Neptune 4 a cleaner look. Additionally, cable chains minimize the risk of loose wiring causing printing issues, such as catching on the bed.
This set of cable chains has been customized for the Elegoo Neptune 4 and 4 Pro, and the mounting pieces align with the printer’s stock frame to make installing the cable chains a breeze. Plus, the individual chain links snap together, simplifying the assembly process.
Printing should also be easy, and the designer shared that they prefer printing with PETG filament and a 0.2-mm layer height. If you have a Neptune 4 Max or Plus, check out the comments for tips on how to modify the files to fit the larger printers.
- Difficulty: Intermediate
- Compatible models: Neptune 4, 4 Pro
- Additional hardware: None
- Designer: Simin03
- Where to find it: Printables
Improved Spool Holder

Nowadays almost every 3D printer is equipped with a spool holder. These are convenient since they eliminate the need for an external spool holder, but the stock option is not always the most compatible with your setup. In fact, the sock holders are often rigid and fixed, which means the extruder has to fight the friction to pull the filament, potentially leading to printing problems, such as under extrusion. This mod makes pulling filament much smoother and takes some stress off the extruder motor. You’ll only need a few printed pieces and two bearings, and you’ll be ready to go!
You choose between the short and the long versions of this spool holder, with the first model holding spools up to 64 mm wide and the second one extending 76 mm wide. If you need an even larger spool holder for massive prints on the Neptune 4 Max, for example, check out this remix.
Once you have decided which size fits your needs, you can proceed by printing the respective spool and bracket files, along with two adaptor parts. Keep in mind that the printed parts will accommodate 608 bearings, therefore your printer should be properly calibrated to be as accurate as possible.
- Difficulty: Intermediate
- Compatible models: Neptune 4, 4 Pro, 4 Plus, 4 Max
- Additional hardware: 608 bearings
- Designer: fifonik
- Where to find it: Thingiverse
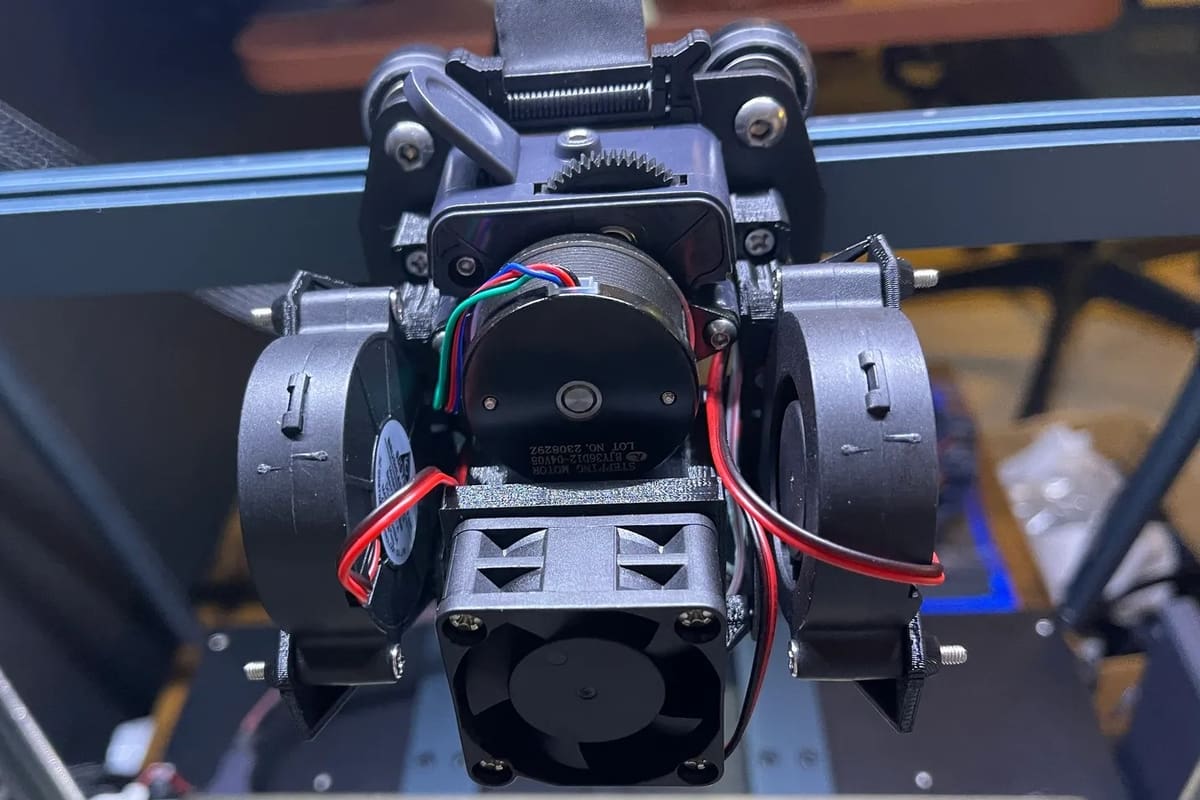
Extruder Visualizer
The extruder is a key part of the printing process and its operation is crucial for good prints. To easily keep an eye on it, you can utilize this cute extruder visualizer. When the extruder motor moves, so does the arm of the extruder visualizer. If you notice that the visualizer is still during a print, you know there’s a problem.
To assemble this visualizer, you’ll need to print three pieces – a base, a gear, and an arrow – as well as a rod and some glue to hold them all together. You can choose between two versions, in the first one the filament is fed from the top and the arrow moves slowly, while the filament is fed from the side in the more compact second version and the pointer moves faster.
Once you have all your parts, you can simply snap the visualizer on top of the extruder gear and you’re ready to go!
- Difficulty: Intermediate
- Compatible models: Neptune 4, 4 Pro, 4 Plus, 4 Max
- Additional hardware: 2-mm rod
- Designer: KrisztianAdo
- Where to find it: Printables
HeroMe Fan Shroud
Often overlooked, cooling is one of the most important parts of the 3D printing process, largely responsible for the quality of overhangs and bridges on 3D prints. If you want to improve part cooling while reducing noise on your Neptune 4, Pro, Plus, or Max the HeroMe Gen 7 printhead is a great upgrade.
If you haven’t heard of it before, HeroMe is a large, open-source 3D printing initiative dedicated to making printhead upgrades for popular 3D printers. The HeroMe Gen 7 project was specifically designed for the Neptune 4 (Pro/Plus/Max), and the shroud doesn’t interfere with the stock attachments, such as the ABL sensor.
According to the project page, the HeroMe printhead shroud for the Neptune 4 uses 40-mm fans, 5015 fans, M3 screws, and some additional hardware. It’s important to note that you should adjust your settings if you switch to this printhead. The designer noted that a nozzle temperature of 230 °C, a 35% fan speed, and a 60 mm/s print speed produce high-quality prints.
- Difficulty: Advanced
- Compatible models: Neptune 4, 4 Pro, 4 Plus, 4 Max
- Additional hardware: Fans, screws
- Designer: JungleG1337 (remixed from MediaMan3D)
- Where to find it: Printables
To Buy
Hardened Steel Nozzle
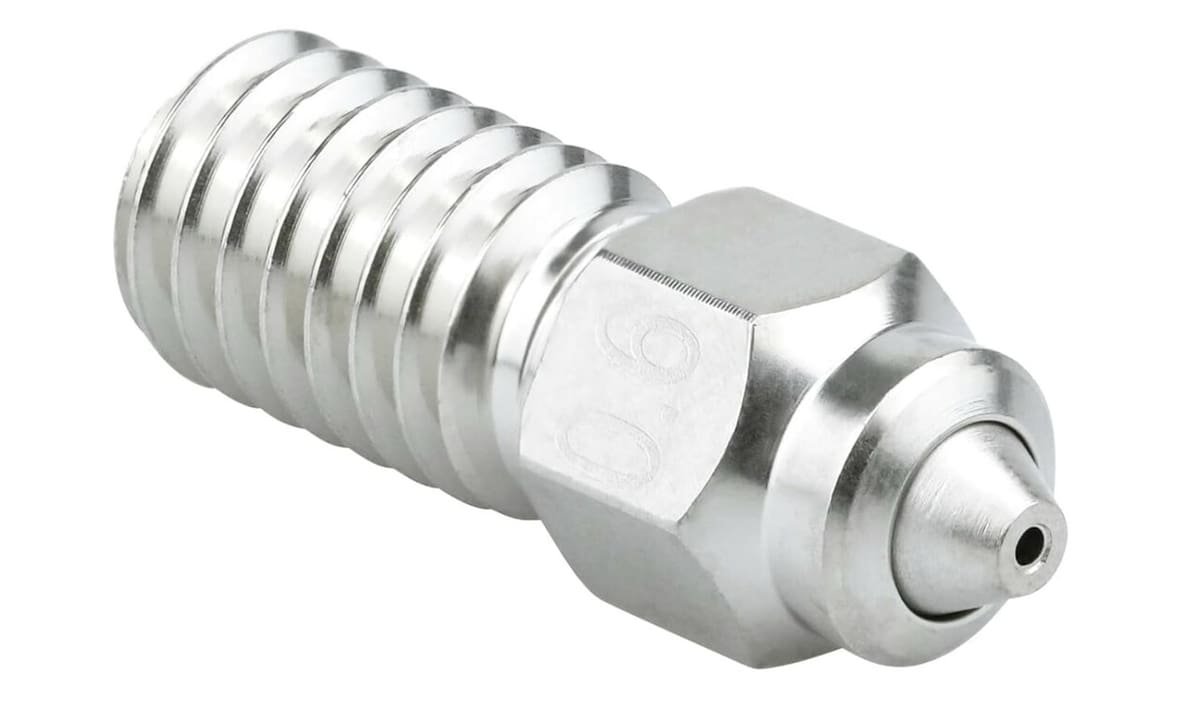
The Neptune 4’s high nozzle temperature (300 °C) makes it capable of printing a wide range of filament materials. However, the Neptune’s stock brass nozzle will likely cause extrusion issues if you want to print glow-in-the-dark, nylon, and other abrasive materials. As such, you should consider upgrading to a hardened steel nozzle.
Hardened steel nozzles are significantly stronger and more resistant to material abrasion compared to brass nozzles, which are typically suitable for PLA, ABS, and TPU filaments. Hardened steel nozzles are more expensive than brass alternatives, but they will last longer and typically yield improved filament extrusion.
There are many different hardened steel nozzles available from many brands. Make sure to choose one that’s compatible with the Neptune 4 hot end, such as the one below.
- Difficulty: Easy
- Compatible models: Neptune 4, 4 Pro, 4 Plus, 4 Max
- Additional hardware: None
- Cost: $10-$20
- Buy: Amazon
OctoPrint & Camera
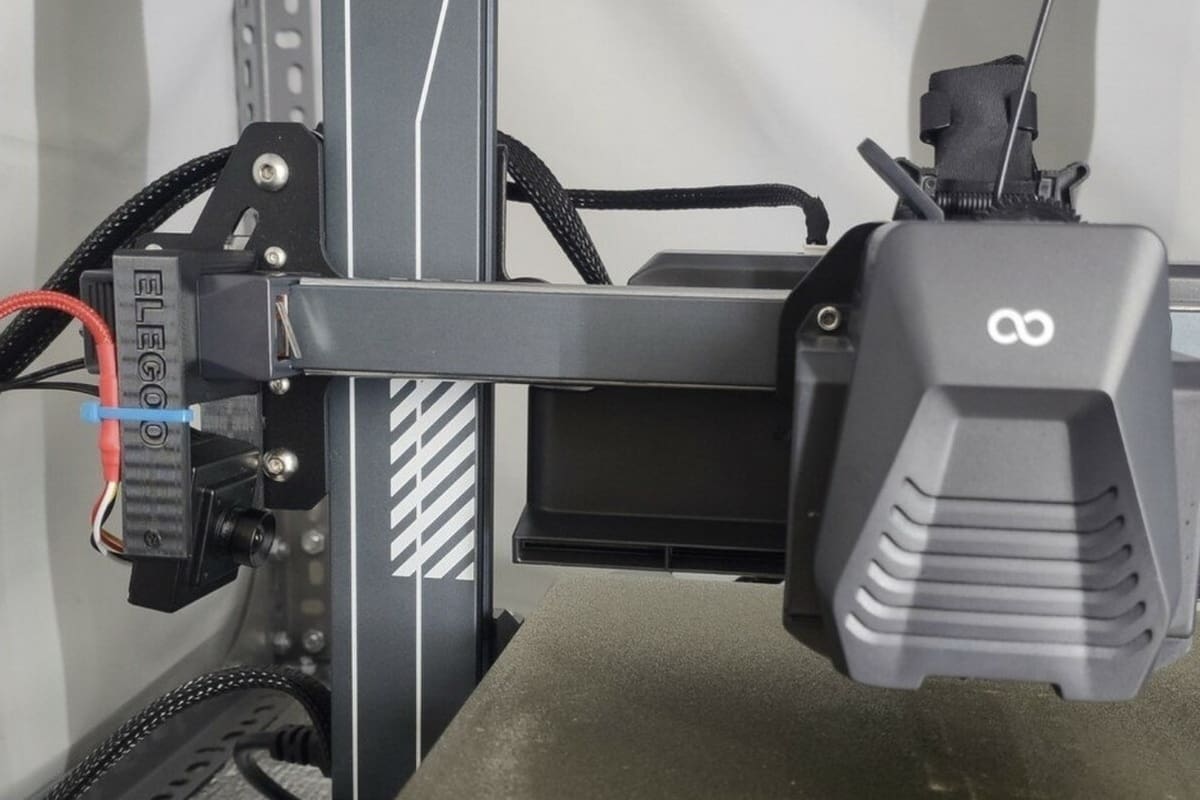
If you haven’t heard about OctoPrint by now, you should know it’s one of the most popular upgrades for 3D printers, especially those on the budget side of the spectrum. OctoPrint is a remote control platform for 3D printers that allows you to fully monitor and control a connected 3D printer over a web browser or mobile app.
From the OctoPrint web interface, you can remotely start and stop prints, manually send G-code commands, and monitor temperatures in real-time. Additionally, you can connect a compatible camera like a USB webcam to your OctoPrint setup to access a live video feed of your 3D printer. This is a super helpful upgrade for anyone anxious about ongoing prints!
You can set up an OctoPrint server for your Neptune 4 or any variant by running the OctoPrint OS (e.g. OctoPi) on a single-board computer, like a Raspberry Pi 4. Feel free to check out our articles on OctoPrint to learn more about the specifics of this upgrade as well as guides to setting up OctoPrint.
- Difficulty: Intermediate
- Compatible models: Neptune 4, 4 Pro, 4 Plus, 4 Max
- Additional hardware: Camera mount
- Cost: $30-$100
- Buy:
- Raspberry Pi: Various retailers
- Webcam: Amazon
Enclosure
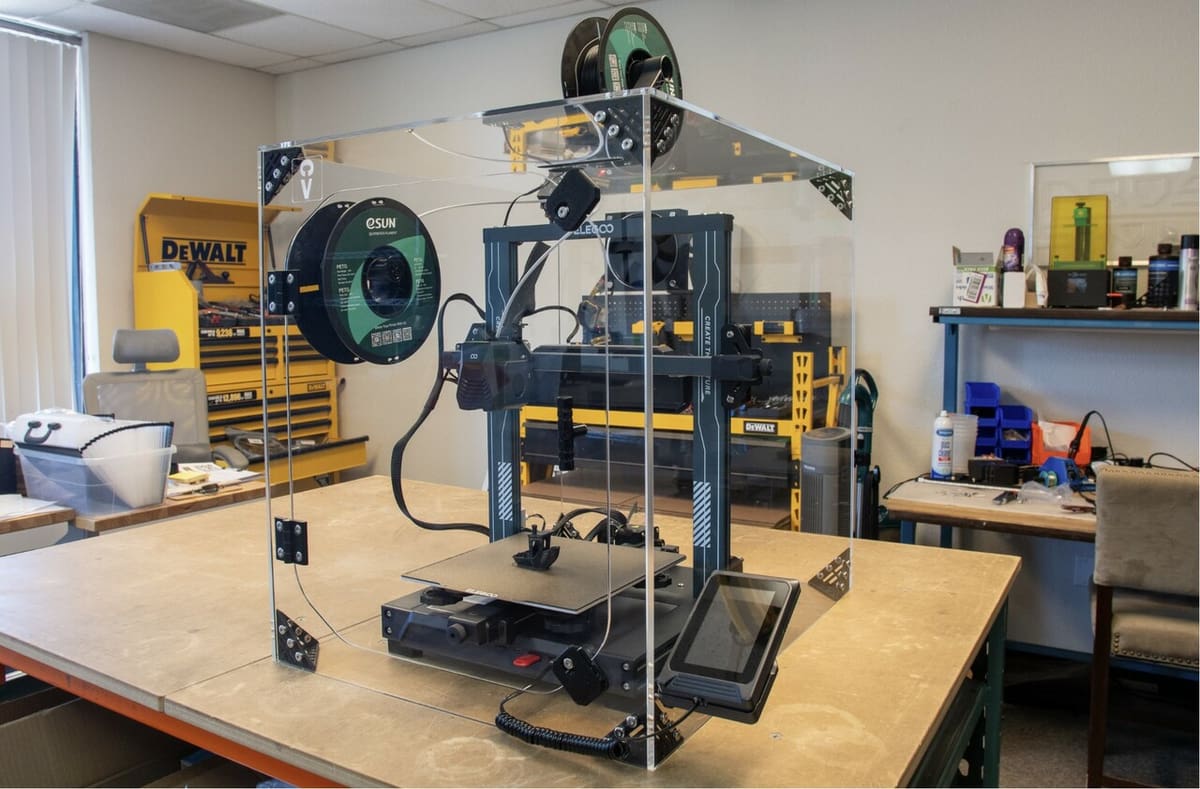
Lastly, an enclosure is a terrific upgrade option if you want to print high-temperature materials like ABS or polycarbonate on your Neptune 4 series printer. For reference, an enclosure slows down the cooling process and keeps the temperature of the printing environment relatively stable to ensure more consistent and higher-quality prints.
If you want to enclose your Neptune 4, you can choose between buying an enclosure and DIY-ing your own solution. If you choose the latter option, we recommend reading our article on DIY 3D printer enclosures. This will be a much cheaper route, especially if you have a Neptune 4 Plus or Max.
If you’d rather just purchase a ready-made enclosure, Clearview Plastics offers a great option that’s specifically designed for the various models in the Neptune 4 series. While it’s expensive, this enclosure offers 360-degree visibility and optional attachments like an air filter. Other purchasable enclosures are also available for the Neptune 4 or 4 Pro, such as the Wham Bam HotBox Mega.
- Difficulty: Varies
- Compatible models: Neptune 4, 4 Pro, 4 Plus, 4 Max
- Additional hardware: None
- Cost: $50-$650
- Buy: Clearview Plastics
Linear Rails
Similar to most budget-friendly 3D printers, the Elegoo Neptune 4 uses a standard V-slot motion system. While this type of motion system is affordable, easy to fix, and generally non-problematic, V-slot systems aren’t nearly as smooth as linear rails.
For reference, linear rails are an alternative motion system comprised of metal tracks with small bearing carriages that glide across the rails. Switching your printer to linear rails is arguably one of the most complex upgrades you can make, but it can yield significant improvements. Moreover, through smoother motion, linear rails reduce vibrations during the printing process, thus improving the quality of prints.
While there aren’t many resources for making this upgrade to the Elegoo Neptune 4, TBStron3D’s store sells many ready-to-go linear rail kits for all versions of the Neptune 4. The kits are surprisingly affordable and come with a helpful tutorial video that will guide you through the installation process. However, it’s still worth noting that there isn’t a ton of information available, so proceed with caution. You will probably need to do some tinkering to make this upgrade work on your machine.
- Difficulty: Advanced
- Compatible models: Neptune 4, 4 Pro, 4 Plus, 4 Max
- Additional hardware: None
- Cost: $50-$150
- Buy: TBStron3D
License: The text of "Best Elegoo Neptune 4 (Pro/Max/Plus) Upgrades & Mods" by All3DP is licensed under a Creative Commons Attribution 4.0 International License.