Commercial filament dryers are widely used, but as any 3D printing enthusiast knows, there’s always room for improvement. Whether it’s a small modification or a full upgrade, these tweaks can make all the difference, especially for more sensitive materials.
On that note, it’s important to consider that the heat from these devices can warp 3D printed PLA mods over time, so it’s better to use filaments like PETG, ABS, or ASA, for example.
In this article, we explore five of the most ingenious and practical designs for filament dryer modifications, selected based on popularity, print quality, and the benefits they offer. If you’re looking to boost your dryer’s efficiency and ensure top-notch print quality, read on to discover these incredible upgrades!
Just make sure not to over dry the filament.
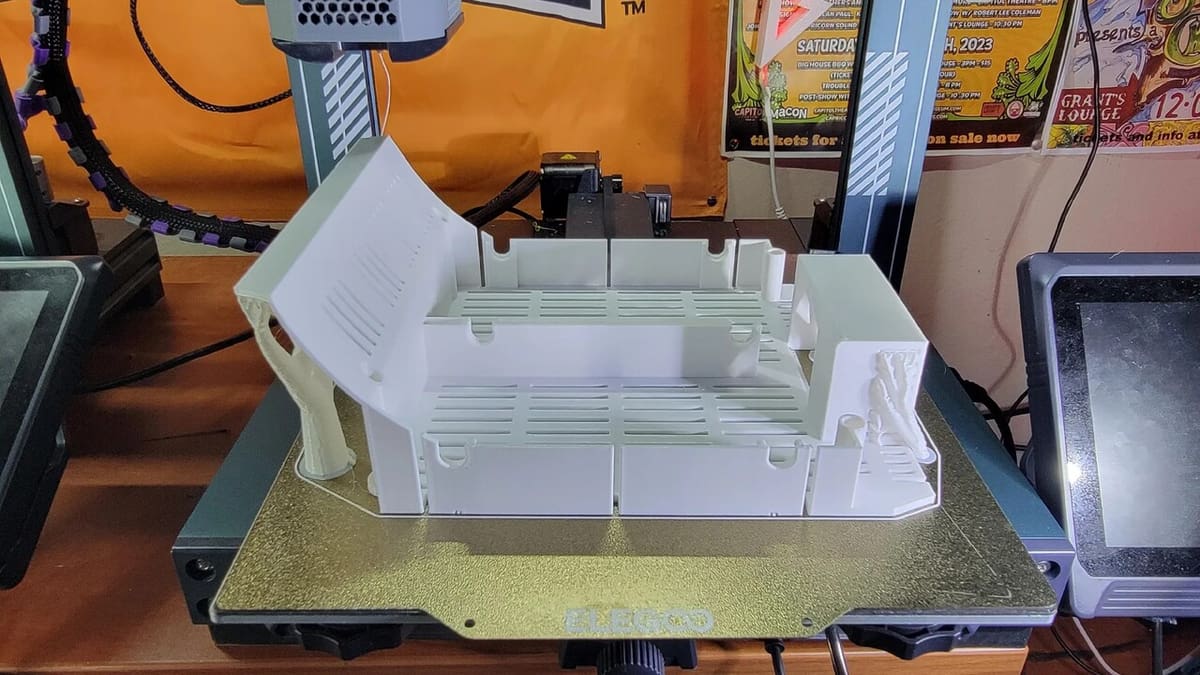
Double Barrel for Polymaker's PolyDryer
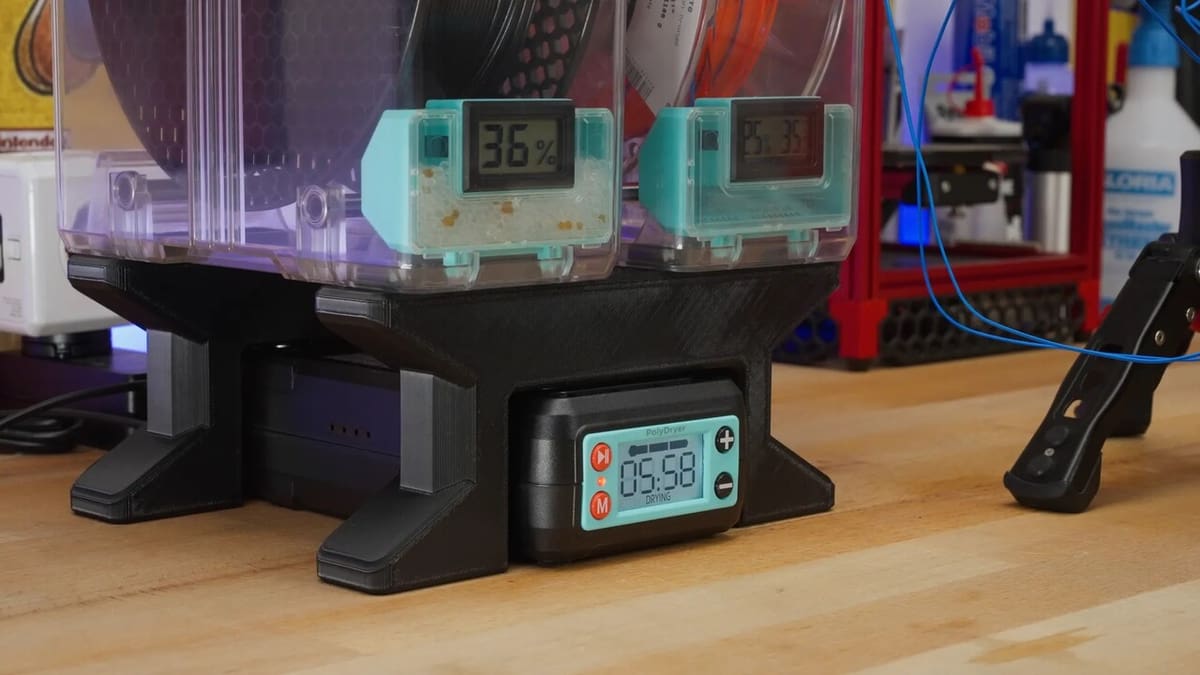
The PolyDryer is a very popular dryer because it is fully sealed, modular, and versatile; however, its active drying unit can only handle only one filament spool at a time. With this modification, the PolyDryer can handle two dry boxes (or even three, with the remix) at once, saving precious time.
In addition to this modification, Polymaker has shared other upgrades and mods on MakerWorld and Printables.
Considering that this modification needs to deal with the hot air from the active unit, the author reproduced the part with PA12-CF and recommends using filaments such as ASA or ABS. There are no direct printing recommendations, but supports can help obtain better results and avoid fitting failures. In the comments, some makers shared that they used four walls and 10% infill with good results, in addition to reporting that the distribution of hot air favors the left side more.
- Who designed it? 3DPrintSOS
- How printable/popular is it? Six useful makes have been shared, and there’s even a remix to use three dry boxes at the same time.
- Where to find it? Printables
Air Gap Spacer for Sunlu's FilaDryer S2
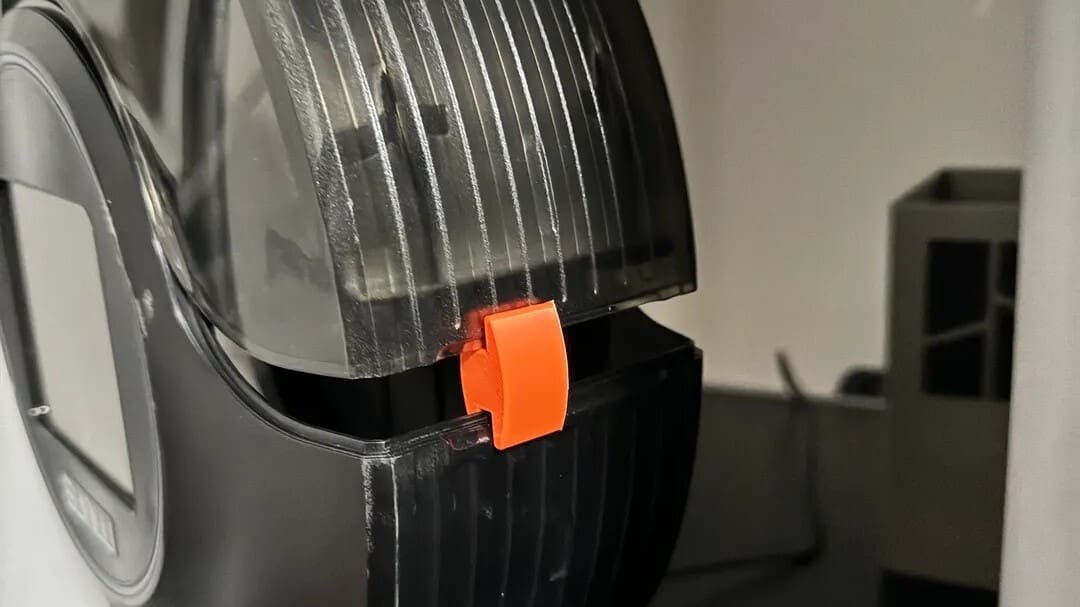
There is a lot of praise for Sunlu’s FilaDryer S2, but also some criticism regarding an aspect of its design that unfortunately persists since the first generation. The moisture vapor that forms can’t escape and can disrupt the entire filament drying process. To solve this without having to lift and hold the lid manually, this spacer is perfect and does the job with just a few grams of filament.
According to the designer, the part is slightly curved to improve strength and adhesion to the heated bed, while it making it also aesthetic. And to add to its practicality, maker Zappes shared in the comments the possibility to easily attach this part to the PTFE tube when not in use, so that it doesn’t get misplaced. While there are no specific printing recommendations, the variety of makes shared include prints in PLA, ABS+, and PETG, with one maker confirming a layer height of 0.2 mm.
- Who designed it? DarkSquirrelDesigns
- How printable/popular is it? This simple and easy solution has already been downloaded more than 420 times and 17 makers have shared their prints.
- Where to find it? Printables
Air Slider Bottom for FixDry's Filament Dryer
FixDry’s filament dryer can hold up to two 1-kg spools or one 3-kg spool. The possibility of handling various filament roll sizes is an important differentiator, and the dryer has several features that make it an excellent option for the task at hand, including a powerful 110-W PTC heater. The high power allows temperatures of up to 70 ºC to be reached in up to 3 seconds, and it has energy-saving features, a 360° circulation fan, and 10 holes that allow both the humidity to escape during heating and to choose the best position for the PTFE tube.
The combination of all these makes the filament dryer flexible and efficient, but there is always room for improvement.
This protective cap mod can be useful to prevent more moisture from entering the dryer after the material’s been dried. Plus, it can prevent ambient humidity and dust from contaminating the filament if the device is used for storage or if it’ll be a while until the spool is properly put away.
To assemble it, the designer placed a frame on the bottom of the filament dryer, drilled 2.5-mm holes and used 3.9-mm countersunk screws. Printing this cap takes between two and a half and three hours, and printing recommendations include the use of supports, a layer height of 0.2 mm, and 20% infill.
- Who designed it? yzfrracer
- How printable/popular is it? With 16 downloads, 11 prints, and several compliments in the comments, this mod has shown that it can make a difference.
- Where to find it? MakerWorld
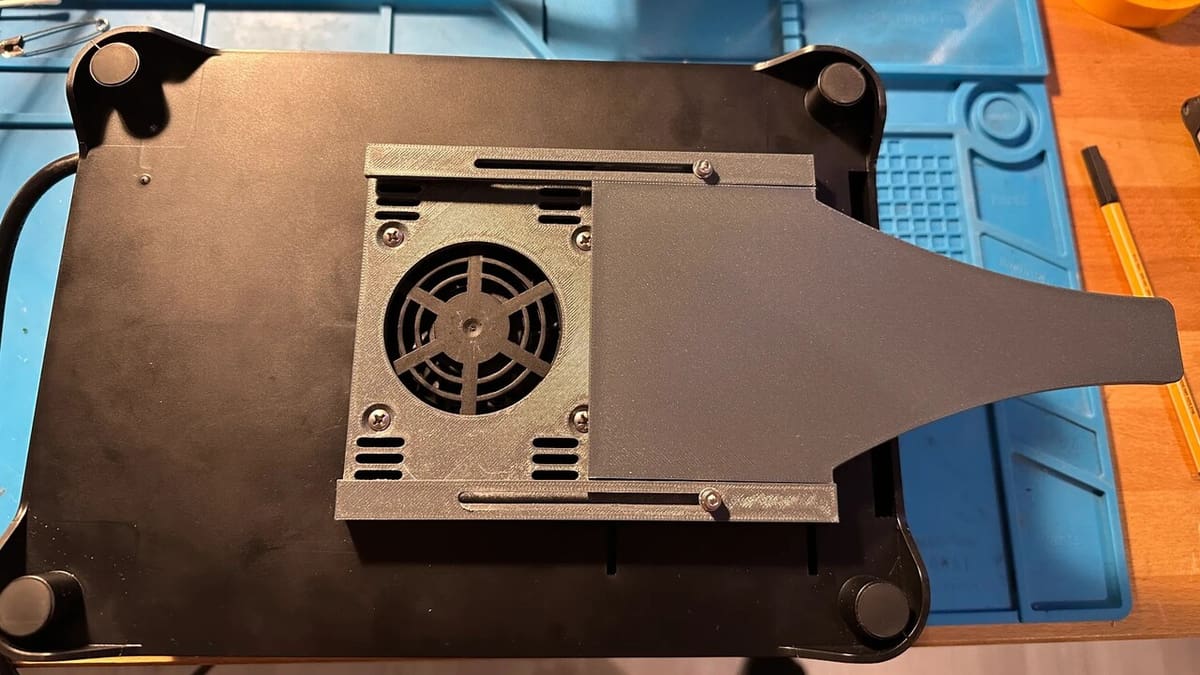
Consolidated Mods for Sovol's SH01
Sovol’s SH01 is a common piece of equipment for keeping filament in optimal conditions. That said, it can be made even more efficient with some clever upgrades, such as this one.
In addition to optimized desiccant storage that takes advantage of an often-neglected space at the back of the dryer, the insert allows for additional options, such as an adjustable ventilation cover and an independent temperature and humidity sensor.
For those who want to replicate these modifications, the process requires attention to some technical details. The first step is to carefully disassemble the original insert, unscrewing the four parts that hold it together, and then replacing it with the new custom insert. This can be printed in PETG for greater strength. It is important to note that the material chosen must be heat-resistant, as the dryer can reach temperatures above 80 °C.
Don’t worry if you’re not sure how to reproduce this upgrade given the more technical requirements. The designer includes a thorough guide with specific recommendations – material choice, layer height – for the different parts.
- Who designed it? anselor
- How printable/popular is it? Good attention to detail is required, but over 150 people have already downloaded it and 5 have shared their makes among many successful comments.
- Where to find it? Printables
PTFE Joiner Adapter for EIBOS' Easdry
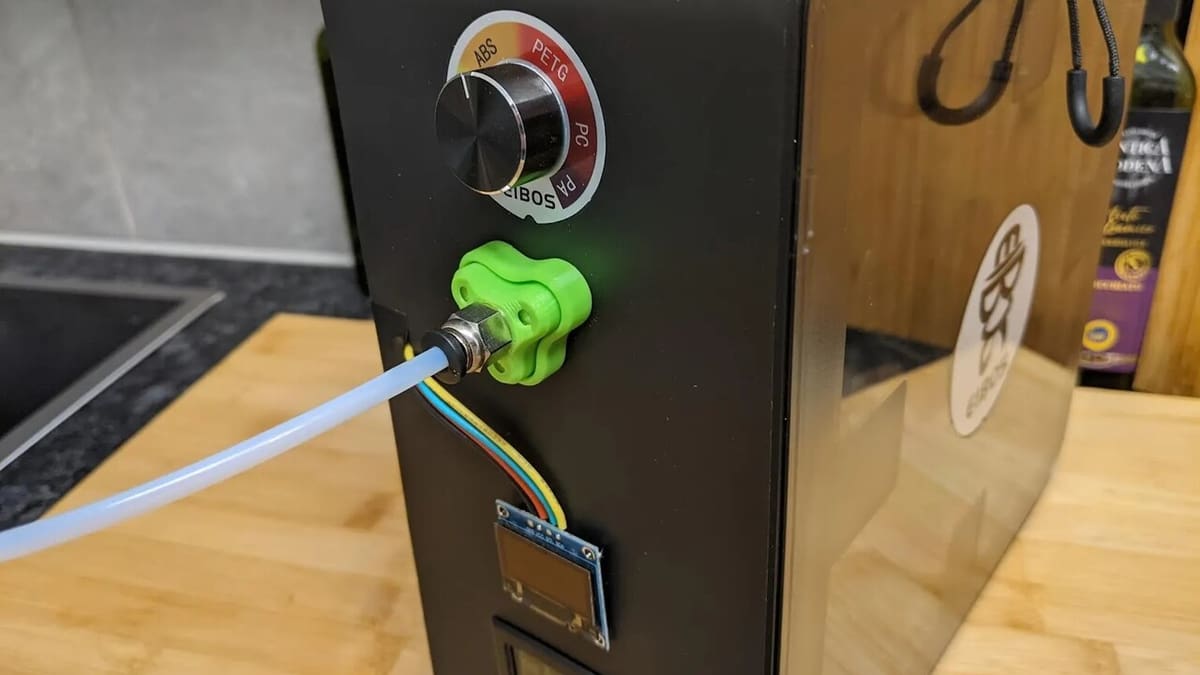
Let’s say you have several EIBOS dry boxes and store your filaments in them, or you simply want to be able to change the box without worrying about immediately storing the filament. Having to connect and disconnect the PTFE tube every time may not be so practical and can even cause gaps to appear due to wear depending on the frequency of use.
To avoid possible wear and tear and still gain in convenience, this adapter for the magnetic joiner is perfect and will leave everything with a beautiful finish.
In order to use this adapter, you’ll need to drill holes in your filament dryer, as the mod is held in place with screws, which are also used for the magnet joints. For the printed parts, as with the other mods in this list, it’s not recommended to use PLA due to exposure to heat. When it comes to print settings, the designer recommends three walls, 20% infill, and a layer height of 0.2 mm. You will also need M3x10 screws, hex nuts, and a drill with a 3-mm bit.
- Who designed it? 6d6178
- How printable/popular is it? 137 downloads, 3 remixes, and 4 makes are proof that this upgrade is worth it as it makes everything more practical.
- Where to find it? Printables
License: The text of "Ingenious DIY Mods & Upgrades for Filament Dryers" by All3DP is licensed under a Creative Commons Attribution 4.0 International License.