Find a Raspberry Pi on a Network with Its IP Address

Make your Raspberry Pi more social by connecting it to a network. Learn how to find your Raspberry Pi on a Network With Its IP Address!
Raspberry Pi single-board computers (SBCs) have become wildly popular in many applications.
From game emulation to 3D printing, plus home automation and plenty ideas for kids, these devices can be used to solve countless problems. One subset of those problems requires network connectivity to upload data to the internet or receive commands from a phone, for example.
In this article, we’ll cover what a Raspberry Pi is, how to find its IP address, and methods for finding it on a network, as well as how you can follow up once you’ve connected it.
Getting Started
Before we start, it’s good to know what we are working with and trying to accomplish. In particular, we’re using a Raspberry Pi SBC (i.e. not a Pico or Pico W) and trying to find it on a network.
Almost all of the Pi SBCs can access a network by using Ethernet, but the Pi 3, Pi 4, and Pi 5 also have built-in Wi-Fi. This is handy because it’s common that networking Pis need to be placed in hard-to-reach places, where an Ethernet connection may not always be possible.
If you have an older Pi but would also like to use a wireless network connection, you can typically use an external USB Wi-Fi adapter.
Finding the Pi's IP Address
For certain applications, you might like to know your Raspberry Pi’s IP address, which is the unique string of characters that identifies it on a network. You will need this to verify the output of the network scanning tools we will be using.
There are two main approaches to finding the IP address. We recommend starting with the first one before trying the second.
Using the Terminal
- Connect a display and a keyboard to your Pi board using the available ports.
- Turn on the Raspberry Pi, and ensure you provided the correct network credentials.
- Open the command terminal on your Pi (it should populate by default).
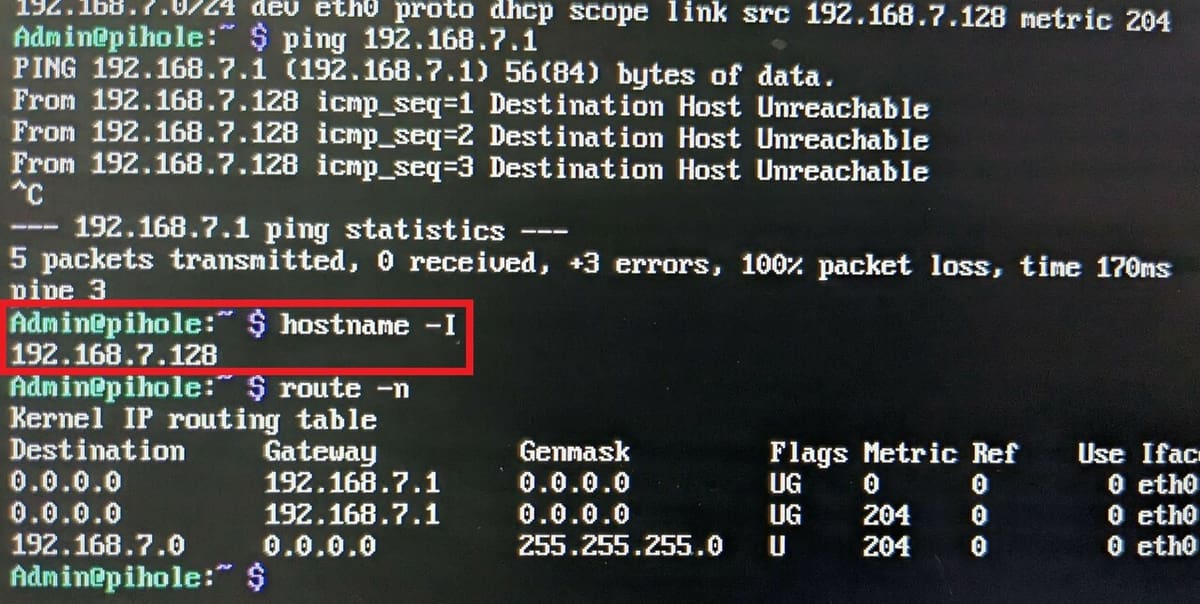
- Enter the command
hostname -Iin the terminal. - Your Pi’s IP address is the first part of the output: it will contain four numbers separated by periods, like so: 192.xx.x.x.
Using Ping
- Turn on the Raspberry Pi board.
- Connect another MacOS, Linux, or Windows device to the same network.
- Open a command line or terminal on the computer and enter
pingplus a space and your Pi’s hostname. By default, your Pi’s hostname will be either “raspi” or “raspberrypi” if you’re using Raspberry Pi OS. If your device is running Retropie, the hostname will be “retropie”. - Once the command is sent, your device will attempt to communicate with the Pi over the same network. Ideally, the output should include “Reply from” followed by the sequence of numbers that make up the connected Pi’s IP address (in the format “xxx.xx.x.x”).
Using the Nmap Utility
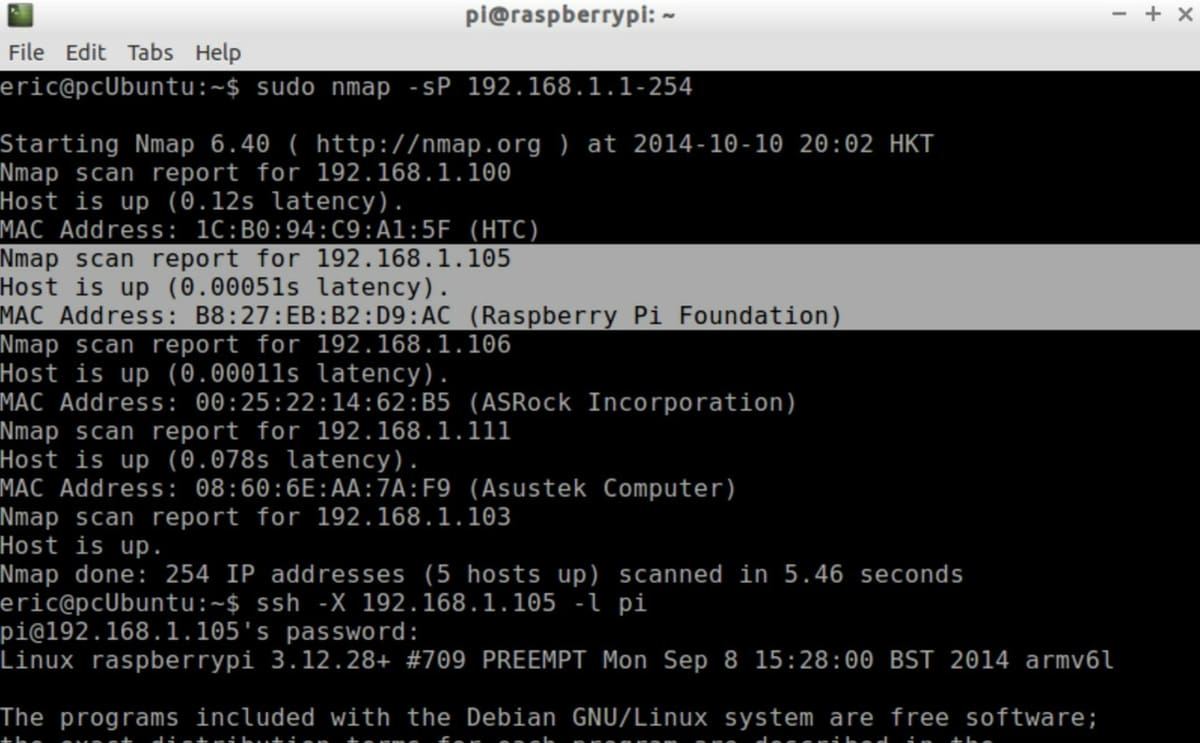
Another way of locating your Pi on a network is to use the free and open-source Nmap utility, used for network discovery. Nmap can be used for port scanning, host discovery (which is what we’re doing), and stack fingerprinting, for instance.
Note that using Nmap may result in legal issues, especially with your Internet Service Provider (ISP). See Nmap’s Legal Issues page for a few examples of how using Nmap could be considered illegal. In our case, you should only be only scanning your own private network, so you won’t be interfering with other networked systems.
Here’s how to use Nmap to find a Raspberry Pi:
- Download the appropriate file from Nmap’s downloads page.
- If you’re using Windows, open Zenmap (the user interface that comes with Nmap), and enter
nmap -sn 192.168.1.0/24under “Command”. Then, press “Scan”. If you you’re using MacOS or Linux, enter the above command in a terminal. (This command scans all IP addresses in the range 192.168.1.0 to 192.168.1.255 – the standard private address space.) - The output will be a list of devices on your network. Look for your Pi’s hostname plus “.lan”. As stated previously, your Pi’s hostname will be “raspi” or “raspberrypi” by default on Raspberry Pi OS or “retropie” if you’re using Retropie.
Using the Fing App
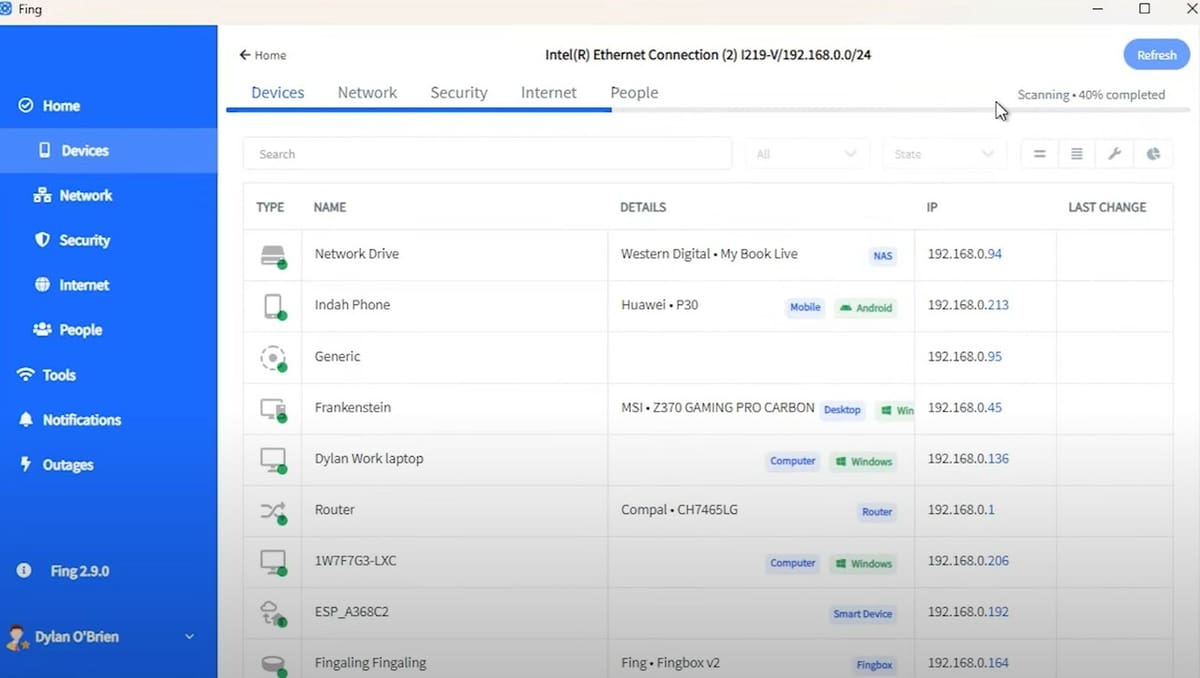
Alternatively, if you don’t have access to a computer, you can use the Fing app on a mobile device. It’s available both in Google Play and the App Store, and there’s also a desktop version.
- First, download the Fing app on your device, and make sure it’s connected to the same network as your Raspberry Pi.
- Click “Scan for devices”.
- You will see a list of devices with IP addresses. Find “raspberrypi.local”, “raspi.local”, or “retropie.local”, and click on the associated entry. You’ll see your Pi’s IP address along with some other information.
Using the Router Software
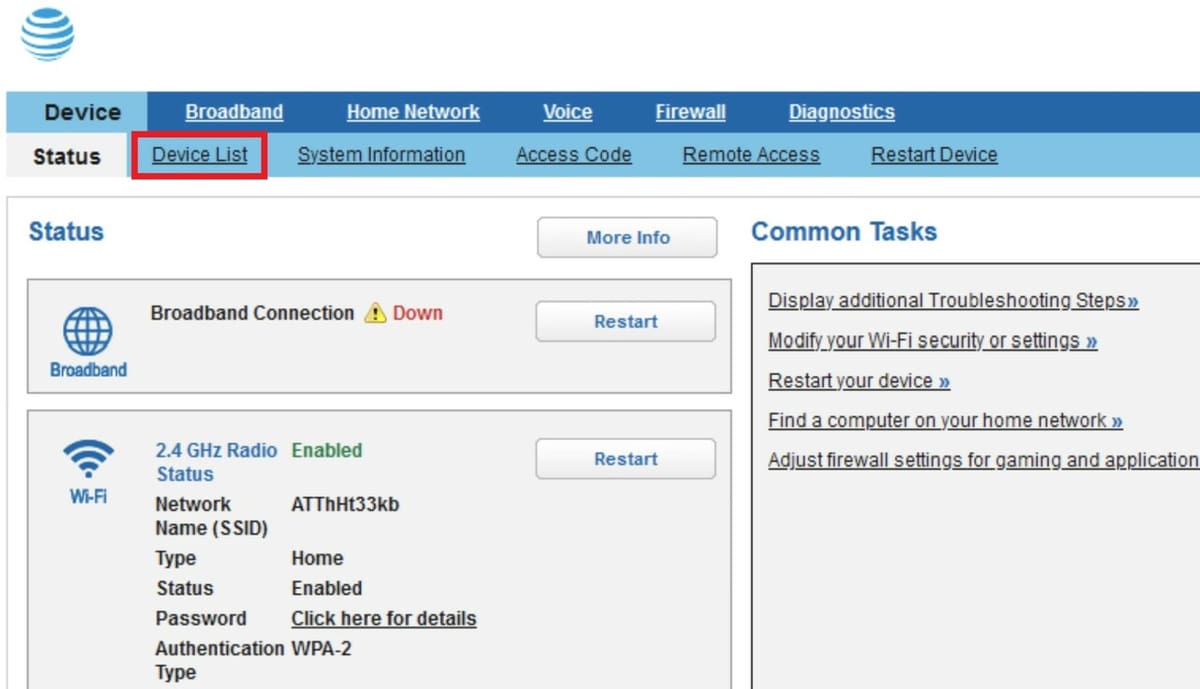
Alternatively, you can scan your network directly through your Wi-Fi router’s control page to identify a Pi’s IP address. This is essentially what the Fing app does, but it’s masked through an intuitive GUI and simplified tools.
To access your Wi-Fi router’s control page, you’ll have to enter the IP address of the router itself into a browser. The IP address of your Wi-Fi router is usually static (doesn’t change) and is set by the manufacturer, meaning you can find it online by searching for your exact router model. Common router IP addresses include 192.168.1.1, 192.168.0.1, and 192.168.1.254 (AT&T).
The interface and exact tools available on the router control page will vary depending on your router manufacturer and model. However, there will likely be a scanning tool that will provide a list of all connected devices and some information about each, including the IP address.
It’s worth mentioning that you might need to provide login information for your internet service provider to access certain features of the router control page. As such, this method won’t be viable if your Pi is connected to a secured public network like those at schools, airports, and workplaces.
Communicating with the Pi
Now that you can find your Raspberry Pi on a network, you’ve opened up a world of possibilities for your Pi. With the IP address, you can remotely access your Pi through a handful of types of internet communication, like SSH or VNC, making it useful in IoT, robotics, and other DIY projects.
While many different software tools are capable of remote communication with a Pi board, PuTTY is one of the most versatile. PuTTY is an open-source terminal emulator that supports many popular internet communication protocols, including SSH and SCP. PuTTY is especially great for quickly and remotely sending commands to your Pi when building projects like an OctoPi server.
You can follow the quick step-by-step guide below to set up an SSH connection to a Raspberry Pi using PuTTY:
- Open PuTTY on your computer (e.g. PC, laptop). Make sure your Raspberry Pi board is turned on and is connected to the same network as your operating device.
- Enter the IP address of your Pi board in the “Host Name” box and set the “Port” to 22.
- Select “SSH” for the “Connection Type”.
- Click “Open”. A terminal pop-up will appear where you can send commands directly from your device to your Pi board and monitor the output.
If you’re interested in some potential internet-enabled projects, you can find many in our list of cool Raspberry Pi projects. For some more inspiration, you check out our selection of Raspberry Pi IoT projects and robotics projects and kits.
License: The text of "Find a Raspberry Pi on a Network with Its IP Address" by All3DP is licensed under a Creative Commons Attribution 4.0 International License.