Fusion 360’s OctoPrint Add-in: What Is It & How to Use It

The new Fusion 360 OctoPrint add-in means you can streamline the 3D printing process even more. Read on to find out how it works!
Handy Tools
Let’s be honest: 3D printing is a fun and productive hobby, but the workflow can sometimes be a tiring task: exporting 3D models, slicing, loading G-code onto an SD card, walking all the way to the printer… And while that’s not really a hassle, the time spent on preparing multiple prints over the day can add up, especially for those working with 3D printers in separate rooms like a basement.
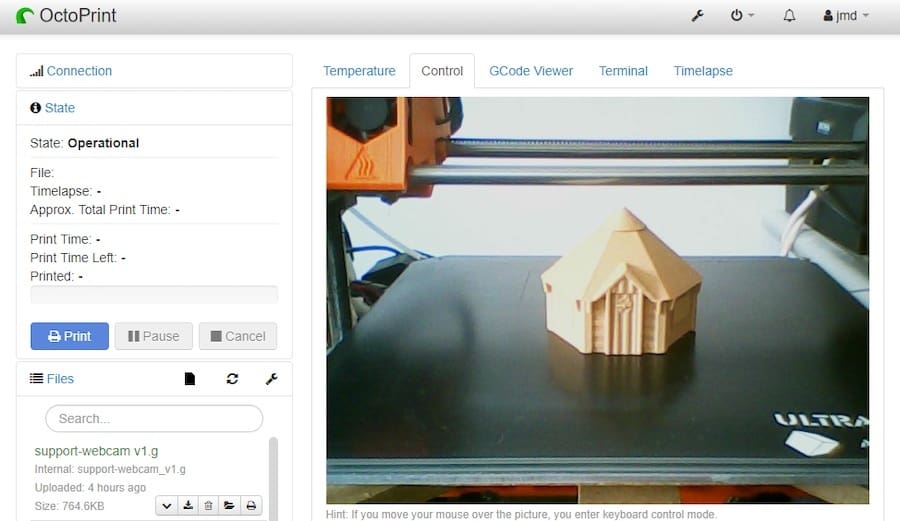
Perhaps that’s why OctoPrint is so popular. It started out as a way of controlling and monitoring 3D printers wirelessly and has grown to become multi-purpose 3D printing software.
Likewise, Fusion 360 is working to streamline the 3D printing process by adding extra functionality to its robust 3D modeling tools. For example, its computer-aided manufacturing (CAM) workspace was recently upgraded to include 3D slicing capabilities, integrating design and slicing tools all-in-one.
In this sense, the clever people at Autodesk have created a way to connect Fusion 360 directly to OctoPrint, ultimately encompassing all the steps required for preparing and running a 3D print. In this article, we’ll explore this new feature from all angles.

The Add-In
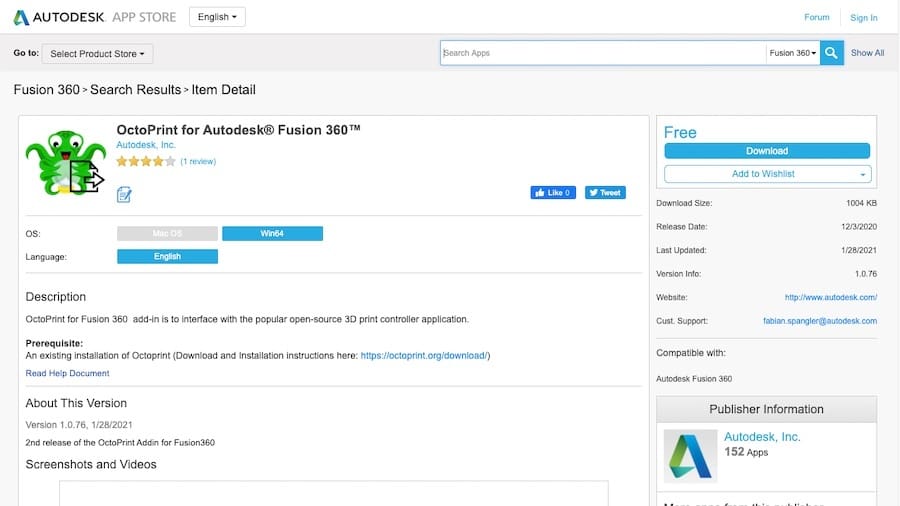
Autodesk’s App Store gathers all proprietary and third-party plug-ins for its products, including Fusion 360. These so-called “add-ins” enhance Fusion 360 by bringing new features or providing an interface with other software, which is the case with OctoPrint’s add-in.
Developed by Autodesk itself, the idea is meant to support to the entire 3D printing workflow. Besides creating 3D models, users can now also slice models and send them to their 3D printers, all inside Fusion 360.
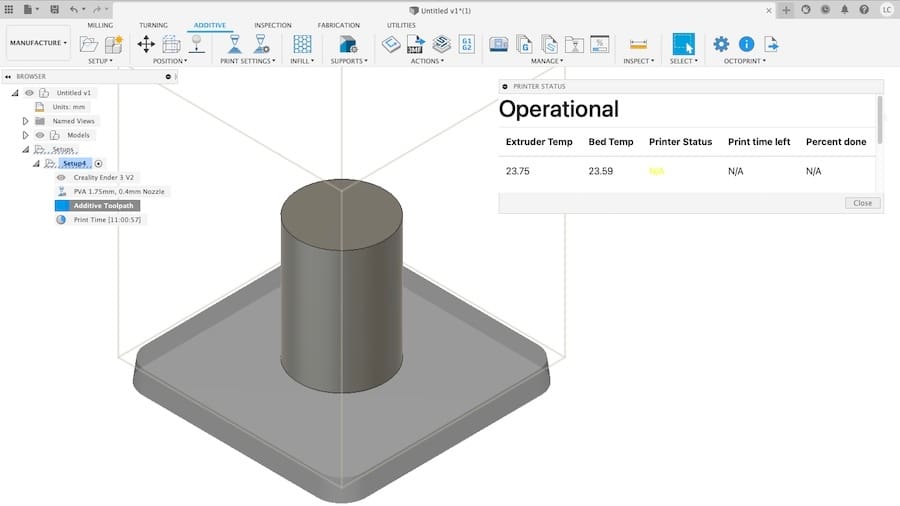
The printer status can also be monitored within Fusion 360, although this feature is still very basic, and no control whatsoever is offered over the 3D printer. Still, this add-in provides a lot of conveniences, to say the least.
In the following sections, we’ll go into some detail about what’s required to run it and how to make it work.

The Requirements
There are a couple of things that need to be prepared prior to being able to run Fusion 360’s OctoPrint add-in:
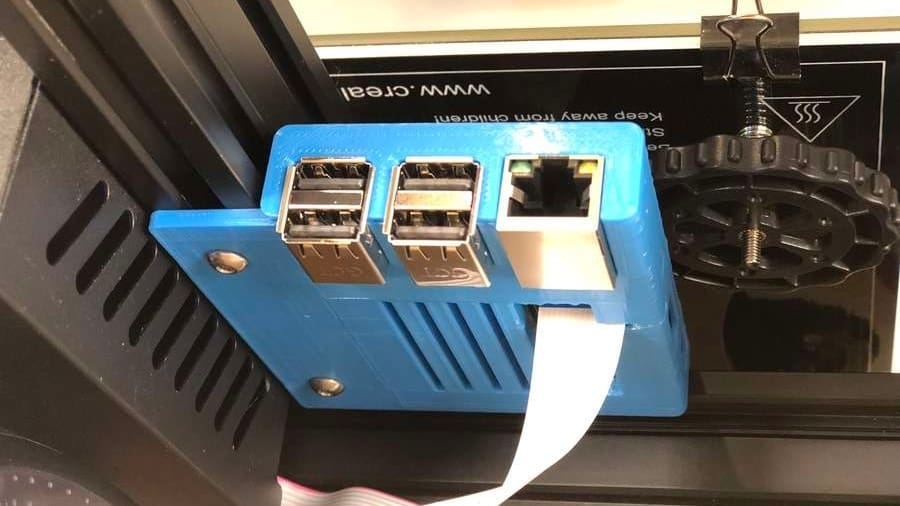
- OctoPrint: As obvious as it sounds, an instance of OctoPrint must be already set up. The most common option is to run the OctoPi firmware on any Raspberry Pi board, although it’s recommended to use a 3B+ model. An SD card and a computer are also required for running and installing OctoPrint, as well as a USB cable to connect to your 3D printer.
- Fusion 360: Another statement of the obvious, but you’ll need Fusion 360 installed and operating. The free personal-use license, while not as comprehensive as it used to be, isn’t missing anything that you’ll need for this process.
- Additive: The built-in slicer for Fusion 360 must also be set up and ready for use. Fusion 360 supports many commercial 3D printers like the Ender 3 and Prusa i3, but some tweaking is recommended to get the best quality possible for your prints. For unsupported printers, a manual setup is required, including a separate post-configuration file.
How to Use It
The add-in can be downloaded from Autodesk’s App Store and is available for Windows and MacOS. Install it by double-clicking on the downloaded file and following the instructions.
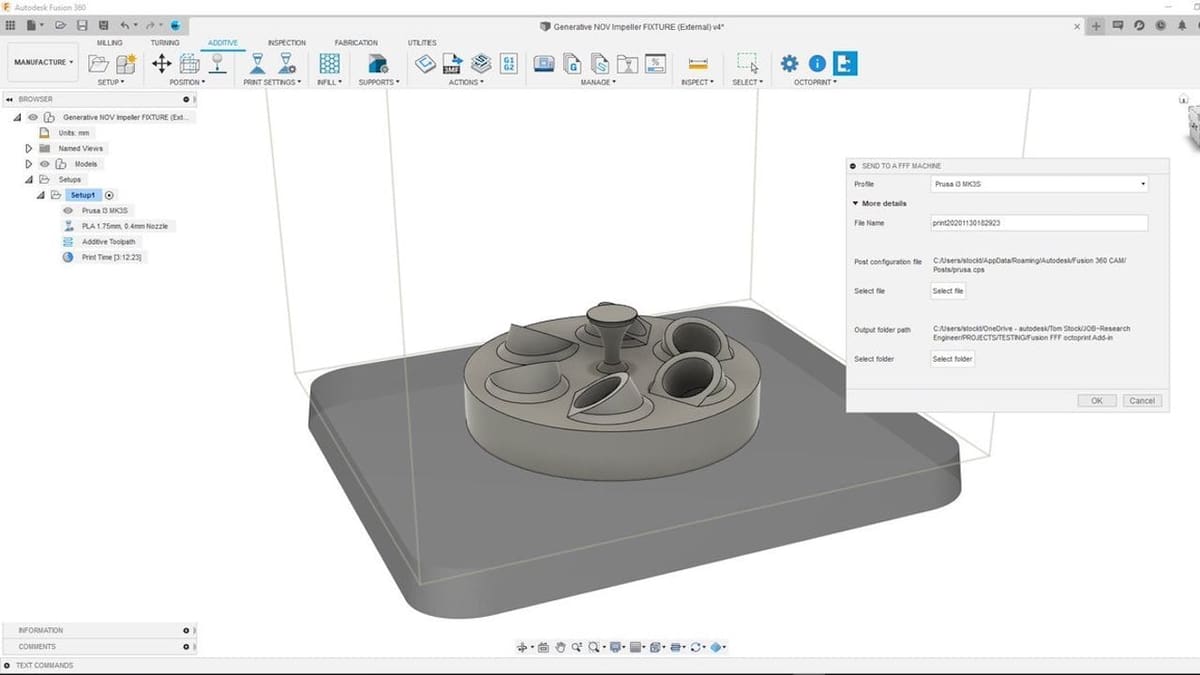
Next, the add-in must be integrated first through Fusion 360’s Manufacture workspace and then connected to your OctoPrint’s instance. For this last setup step, you’ll need to know OctoPrint’s web-interface URL and its API key.
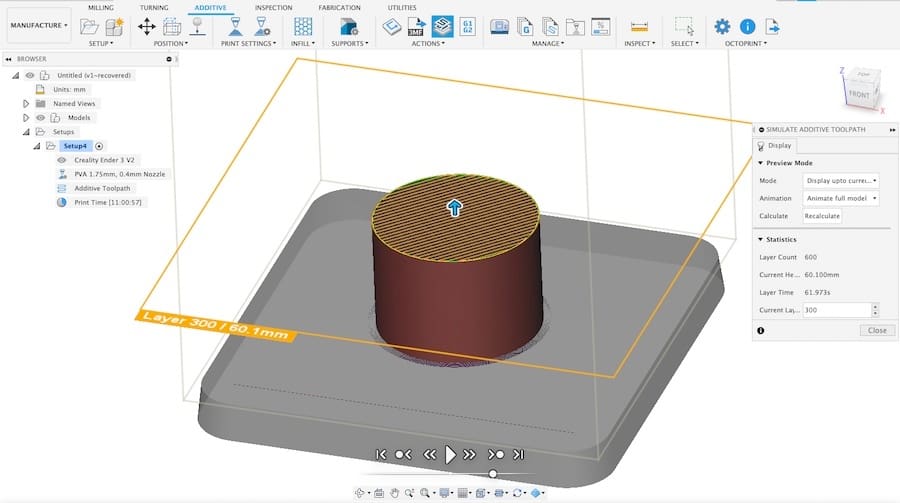
Sending a print job through Fusion 360 just takes the click of a button. With the models sliced and the so-called “additive paths” generated, all that’s left is selecting the correct 3D printer profile from OctoPrint and the post-configuration file for your printer.
The G-code file then is automatically loaded into OctoPrint and the print is started. The user can follow the 3D printer status via a small window in Fusion 360, including seeing the nozzle and bed temperatures in real-time.
For a detailed tutorial on how to set up and run OctoPrint’s add-in, check out this video from Autodesk:
Should I Use It?
So, in the end, is this solution worth it? It depends.
If you already use Fusion 360 for 3D slicing, it certainly is worth setting up OctoPrint and the add-in. This should definitely expedite your entire workflow.
For those using Fusion 360 for 3D modeling only, it’ll depend on whether you’re willing to give up your current slicer for Fusion’s. This built-in feature is still young and very basic, so keep in mind that it doesn’t offer all the advanced features of other slicers like Cura and Simplify3D
However, if you struggle daily with your 3D printing workflow and don’t mind using Fusion 360 for slicing, this add-in is definitely worth a try.
Lead image source: Autodesk Fusion 360 via YouTube
License: The text of "Fusion 360’s OctoPrint Add-in: What Is It & How to Use It" by All3DP is licensed under a Creative Commons Attribution 4.0 International License.