17 Great SketchUp Tools You Should Know

The capabilities of SketchUp are quite broad, but it can also be a little overwhelming to know which tools to use. Here we list the most useful and interesting SketchUp tools so you can get the most out of this unique program.
Origins
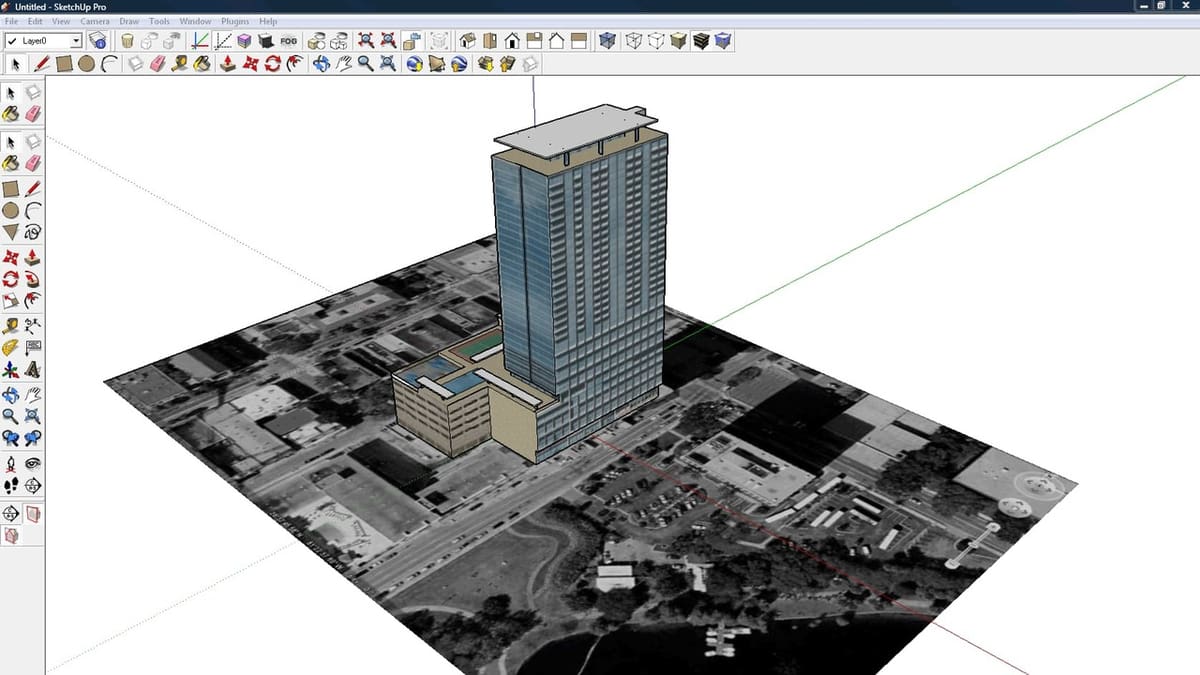
SketchUp is a complete design 3D software originally released in 2000 by the startup company @Last Software. In 2006 the tech giant Google acquired the license of the software after a successful collaboration made it possible for users to insert 3D models in Google Earth. Finally, in 2012, SketchUp became part of the development company Trimble. Throughout the years, SketchUp has evolved thanks to all the improvements provided by these companies.
The reason it’s such a powerful software is that it was originally created for the Architecture, Design, and Filmmaking industries. However, its main purpose has always been to make 3D modeling accessible to everyone. This explains why the program is so intuitive and has such an easy learning curve.
SketchUp has two versions of the software: a Free online-based version that runs directly in a web browser and a Pro desktop version, which you can purchase and download onto your computer.
Sketchup has its own native tools, which are the essence of its simplicity. They allow you to navigate, create, and edit a 3D model, but it also has additional plugins and extensions. These plugins can help us execute a specific task that native tools are less capable of.
Let’s start by listing the most important native SketchUp tools first, the ones that make SketchUp so unique.
Navigation Tools
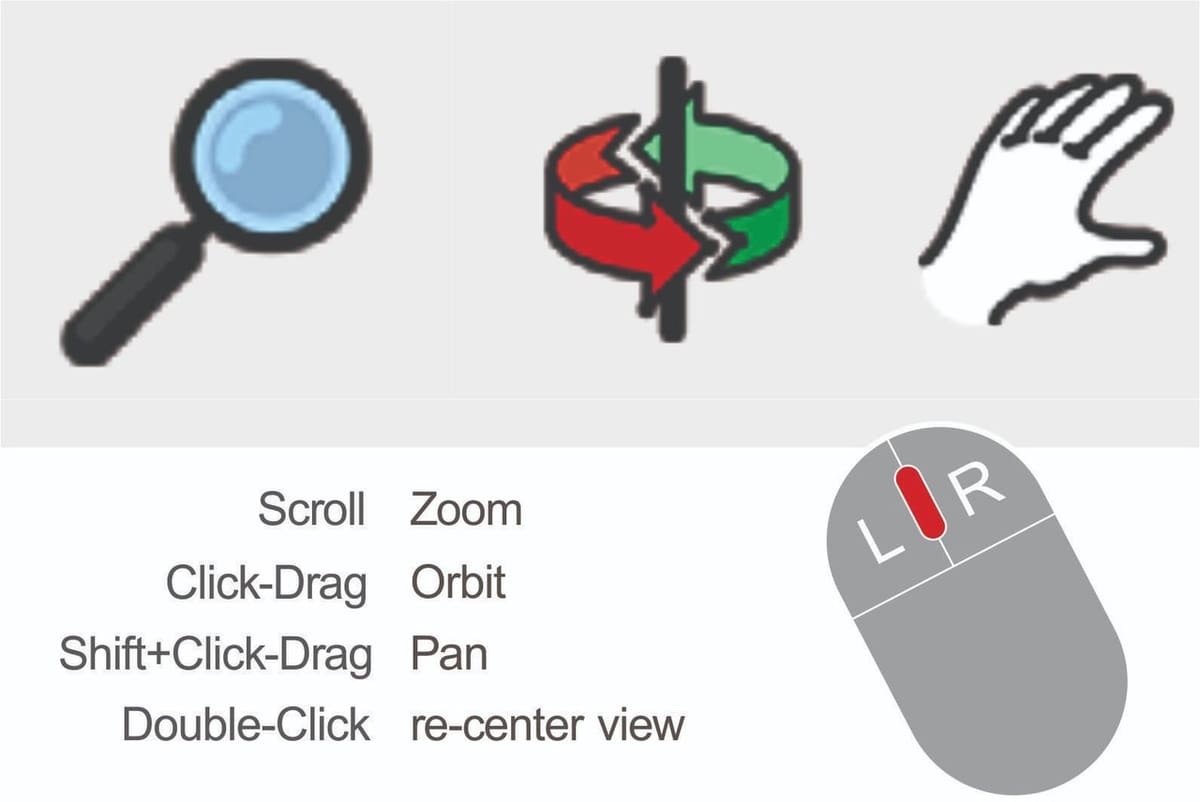
The Navigation Tools allow you to move all around the SketchUp viewport. As you can imagine, you’ll be using them constantly. You can control them only with the mouse buttons or by using the key shortcuts we provide here:
- Zoom: This tool let you get closer or farther from the object you’re modeling by using the scroll wheel of the mouse moving it forward or backward. It’s very useful when you want to see a smaller detail or a general view in the 3D model. The shortcut key for this tool is “Z”.
- Orbit: You can orbit the camera view by pressing and holding the scroll wheel of the mouse. This is very useful to explore our models from different angles. The shortcut for this tool is “O”.
- Pan: The panning tool helps you to move without losing your previous perspective. It only provides you with a vertical and horizontal movement, and that’s very handy when you want to frame a scene. You can access this tool by holding the scroll wheel and pressing Shift at the same time. The other option is to press “H”.
Drafting Tools
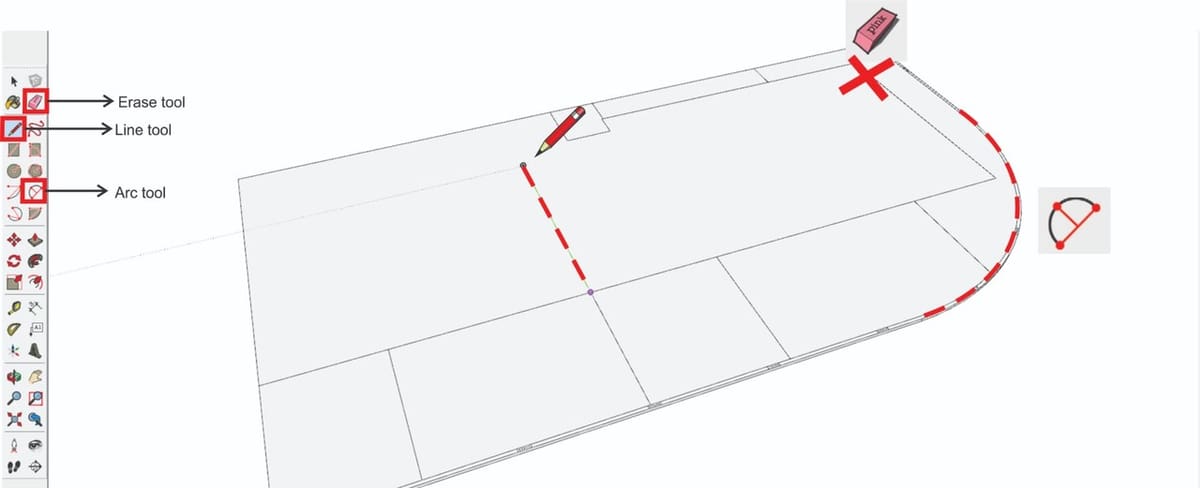
Drafting Tools are the ones that allow you to create something from scratch. These 3 we list below are the more basic, but also the most important:
- Line Tool: This tool is likely used every single time you design something in SketchUp. As a drafting tool it allows you to create any 2D surface by connecting line segments. The lines can be drawn in the X, Y and Z axis with the left click of the mouse. The shortcut key for this tool is “L“.
- Arc Tool: This works similar than the line tool, but instead of only drawing a segment from one point to another, you designate a third point to specify the arc curvature. The shortcut key for this tool is “A“.
- Eraser Tool: It is basically used to erase the line segments you don’t need anymore. The way it works is by clicking with the left button of the mouse over any line. The shortcut key is “E“.
Editing Tools
SketchUp has a lot of editing tools and each one of them are indispensable resources when you are trying to achieve certain results. Here we list the most relevant:
- Push Pull: Without a doubt Push Pull is one of the most used tools in SketchUp. That’s because it allows you to extrude a 2D surface to convert it into a 3D shape. The easy way you can access this tool is by pressing the “P” button, positioning your cursor over the face you want and then clicking the left button of the mouse to start extruding. You can give it a determined value with the numeric pad or simply click again until you’re happy with the result.
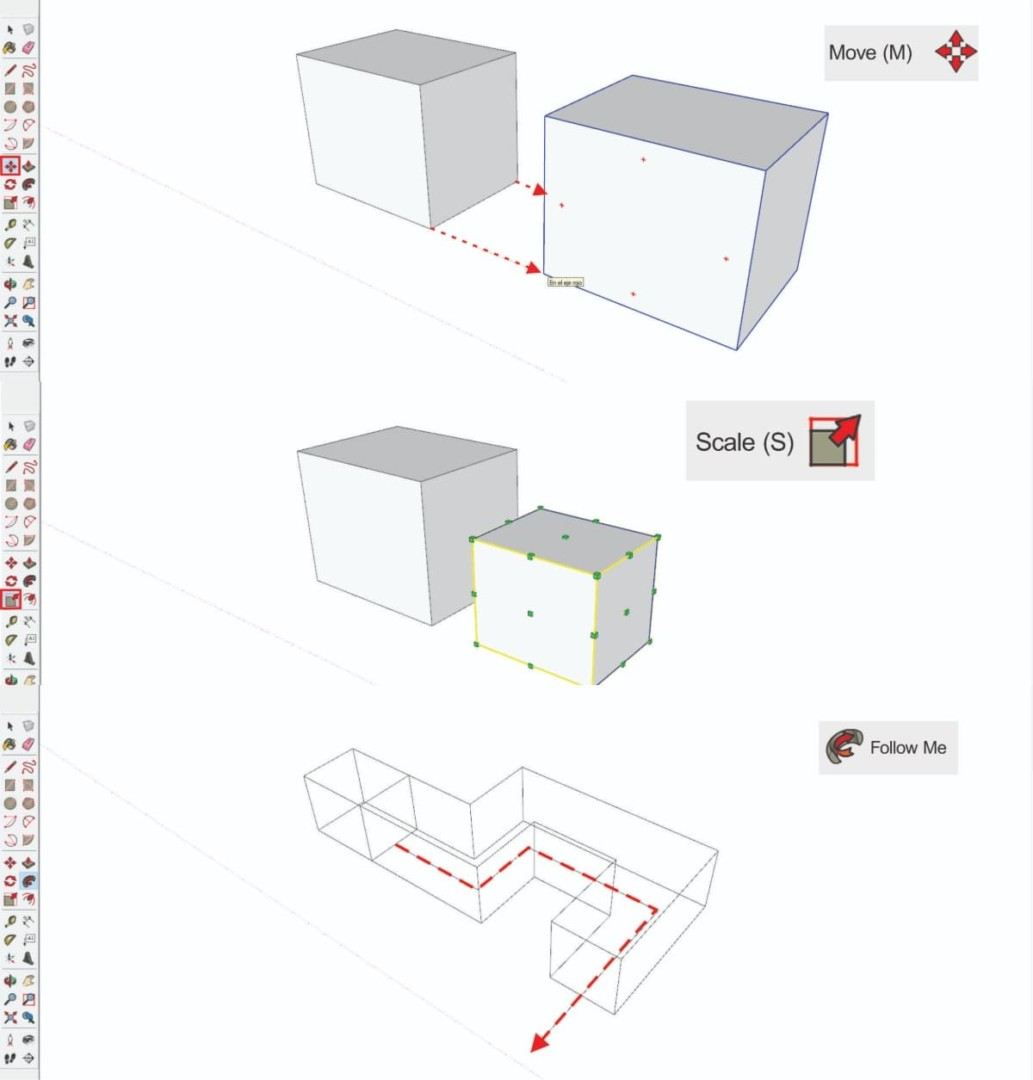
- Scale: This tool allows you to make any object selected bigger or smaller by using a bounding box with some grips. The only thing you have to do is to select one grip and move the cursor to scale your object. For a uniform scaling, always try to select the grips in the corners. You can easily access this tool by pressing the “S” key.
- Move: To use this tool you have to press the “M” key and select the object you want to move. The place you click in the object will be your moving point. This tool is mainly used to accommodate things in your model.
- Rotate: You can activate this tool by pressing the “Q” key and then clicking in the object you want to rotate. The point you click on your object will be your pivot point.
- Offset: What this tool does is generate an equidistant line of any face. The shortcut for using this tool is pressing the “F” button and positioning your cursor on the line or surface you want to offset. Then move the cursor outside or inside according to what you need, and finally give it a selected distance with the numeric pad.
- Follow Me: This is one of the most interesting tools SketchUp offers and that’s because it allows you to extrude a surface along any given Path. A Path is the guideline that the surface you want to extrude is going to follow. The easiest way to use this tool is by selecting the path you’re going to work with, then from the Edit toolbar, you select the “Follow me” tool. The surface you want to extrude has to be perpendicular to the selected guideline. After giving the double-click to the surface you’ll end up with an extruded shape that follows the path direction.
Extensions
SketchUp also has some native extensions you can activate from the Toolbars which you can access through the View menu.
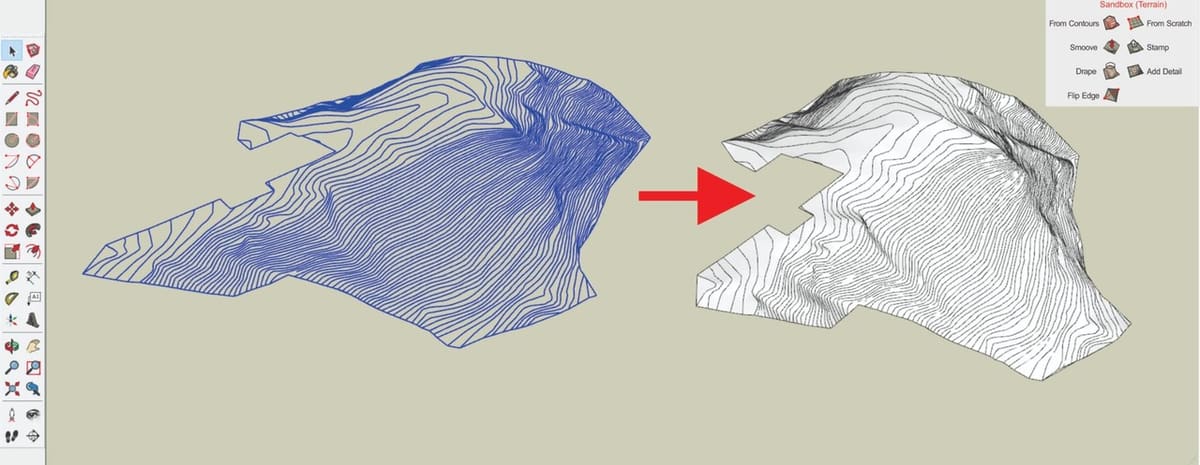
- Sandbox Tools: This set of tools is mainly used for terrain modeling from scratch or from given lines, like topographic curves for example. What it does is create a triangulated mesh that you can edit later according to the needs of your project. The way it works is very simple, but it needs more processing resources from your computer. This is because when it generates a terrain from existing contours, it completes the faces by taking those lines as reference or boundaries.
- Solid Tools: As its name implies, this tool set only work with solids. They can be groups or components, and what it does is use Boolean operations to combine, subtract, split, intersect or trim one shape from another. This allows you to create more complex and cleaner models. You can also activate it from the View menu in the toolbars section.
Example Plugins
Plugins are another essential part of SketchUp. That’s because they allow you to access to more powerful tools that simplify your work and make it faster. There’s a bunch of them in the Extension Warehouse, and most of them are completely free. The 3 plugins we mention here are just an example of what you can expect from this tools:
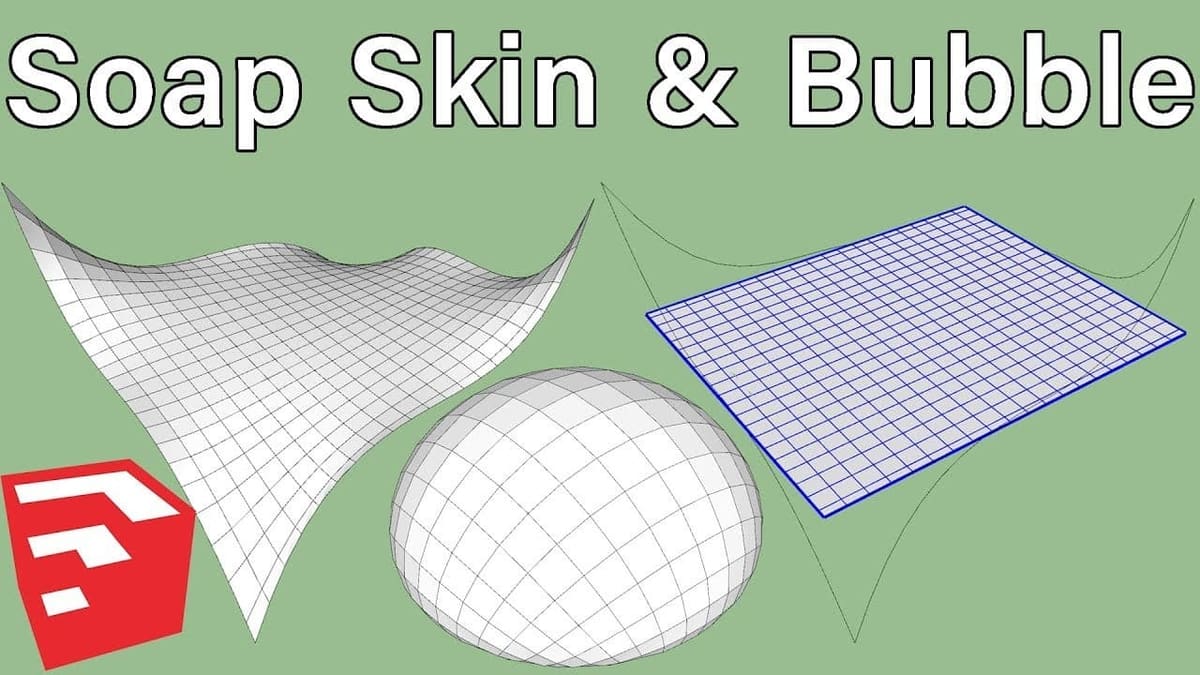
- Soap & Skin Bubble: Allows you to make organic complex shapes using edge loops, which you can draw with the “Line Tool”. The only thing you have to be aware of is that it has to be a closed loop. After selecting your edges you can press the “Generate Skin” button and then assign it a number of subdivisions, the higher the value the more complex the mesh will be. Now you can select your generated mesh and press “Bubble”. This option will ask you for a pressure value. Higher values will make a mess in your model, so try to start using small values to give the mesh the bubbled appearance you’re looking for.
- Tools on Surface: This is basically a set of tools that allow you to use all the traditional “drafting and edition tools” that SketchUp has, but on curved surfaces. This is very handy when you’re modeling organic shapes.
- Joint Push Pull: With this plugin you’ll be able to use the traditional “Push Pull” tool of SketchUp, but on a curved surface. What it really does is extrude (outwards or inwards) multiple faces at the same time and fill the spaces between in order to get a clean shape. You can manipulate this tool by giving it a selected value.
*Tip: To use the last two plugins you need to first install the shared library LibFredo6 Plugin. You can get it in the Extension Warehouse or in the SketchUcation Plugin Store.
Final Thoughts

SketchUp is one of the easiest 3D modeling software to learn. The main reason for that is the pretty simple user interface and the clear Sketchup tools it has, which are capable to grow along with the user’s skills.
The tools and plugins listed above are only the ones we believe are the most important or interesting to know for any user who wants to get started. However, SketchUp has many other useful native tools. This software can become even more powerful by installing multiple plugins and SketchUp tools which are developed by the SketchUp User’s Community, which is growing daily.
One thing is for sure: For whatever project you have in mind, there’s a SketchUp tool that can solve it in a highly efficient way.
Feature image source: geniusdv.com
License: The text of "17 Great SketchUp Tools You Should Know" by All3DP is licensed under a Creative Commons Attribution 4.0 International License.