DIY 3D Printer: How to Build Your Own 3D Printer

Building your own 3D printer is fun, though it does requires time. Read on to learn how to build a 3D printer from a kit or from scratch.
Since Charles W. Hull built the first 3D printer in the 1980s, these devices have become much more accessible and affordable. And though there are several different types of 3D printers, in this article, we’ll focus on fused deposition modeling (FDM), the dominant type for desktop use due to its low cost and ease of use.
You can find basic FDM printers starting at around $150, while professional-grade models can exceed $5,000. For immediate high-quality results, a fully assembled and calibrated printer is ideal. However, building your own printer can be a cost-effective and educational project.
There are two main methods to build a 3D printer: from a kit or from scratch. This article provides an overview of both approaches, with tips to ensure a smooth building process. Let’s get started!
From a Kit
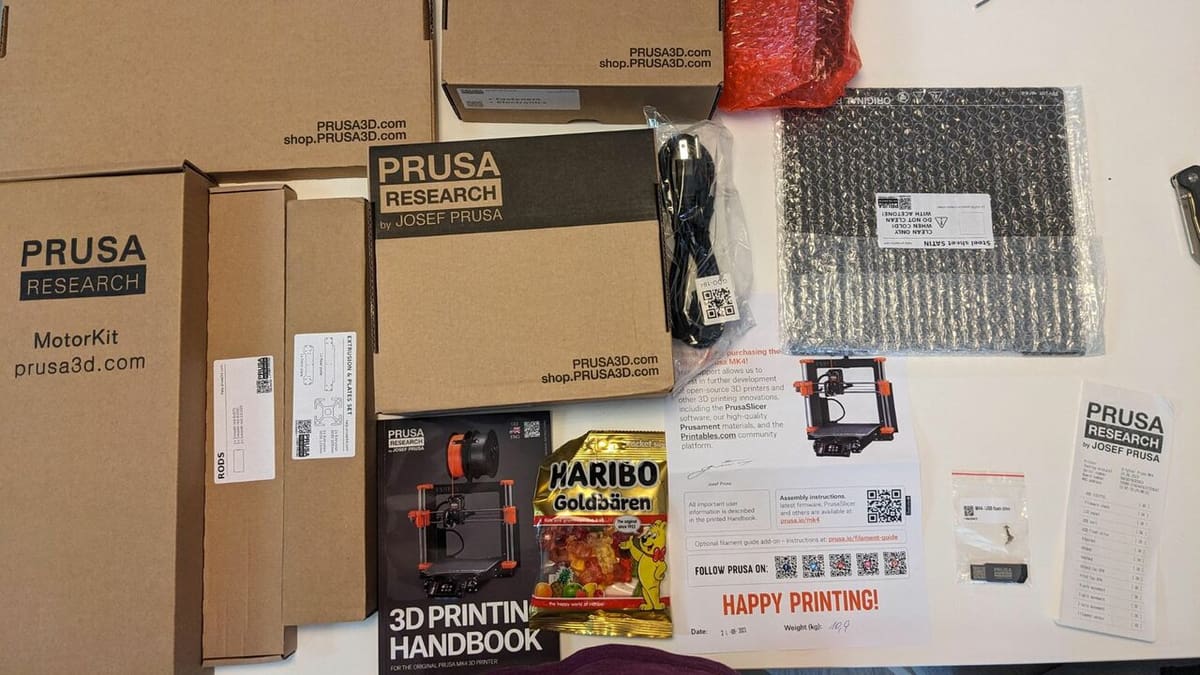
Building a 3D printer from a kit is an excellent way to learn about 3D printing technology while having a streamlined and supported assembly process. Kits are ideal for beginners and those who prefer a guided approach, as most (or all) components can be purchased together and there’s thorough instruction.
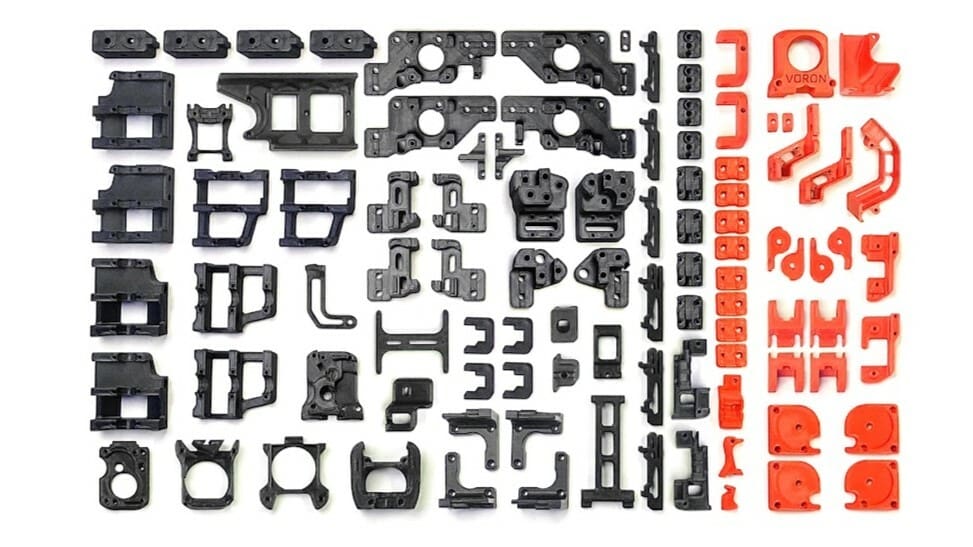
When selecting a 3D printer kit, popular options include the Voron 2.4, the Creality Ender 3 V2 Neo, and the Prusa MK4.
The Voron 2.4 is known for its high precision and customization options, making it ideal for advanced users. Its CoreXY design enables faster printing speeds and improved accuracy, making it perfect for those who want a highly customizable printer. Creality’s Ender 3 V2 Neo is one of the latest versions of the Ender 3 series, offering user-friendly features like auto-leveling, a silent motherboard, and a glass build plate for better adhesion and easier print removal. Its straightforward assembly and extensive online support make it an excellent choice for newcomers. Prusa’s MK4 is highly regarded for its build quality, reliability, and support community. It includes features such as auto-bed leveling, a removable PEI-coated print bed, and a filament sensor. The Prusa MK4 is suitable for both beginners and experienced users looking for a robust and reliable machine.
Of course, just because the components can be easily sourced and there’s plenty of information, doesn’t mean you shouldn’t keep a few things in mind.
Assembly Tips
- Organize your workspace: Keep all components and tools neatly arranged to avoid confusion.
- Check the parts: Verify that all parts are included and undamaged before starting.
- Take your time: Do not rush the assembly process; precision is key.
- Follow the instructions: Stick closely to the manufacturer’s assembly guide. Many provide detailed online tutorials and videos to supplement the manuals.
- Use online tutorials: Supplement the manual with video guides or tips from other makers for complex steps or for those that represent a bigger challenge.
Helpful Resources
Numerous online resources can assist in building and customizing your 3D printer kit.
CNC Kitchen has a very detailed tutorial on building the Voron 2.4, while Prusa Research has a thorough guide on setting up the MK4. There are also forums, like the ones hosted by Voron, Creality, and Prusa Research, where you can share any questions and advice.
Additionally, YouTube has plenty of channels, like Maker’s Muse and CNC Kitchen, which offer visual step-by-step tutorials for various kits, as well as troubleshooting tips, ensuring a smooth assembly process. And last but definitely not least, subreddits like Prusa MK4, Voron Design, Voron CoreXY, and Creality Ender 3 can be great sources to help when putting the kits together.
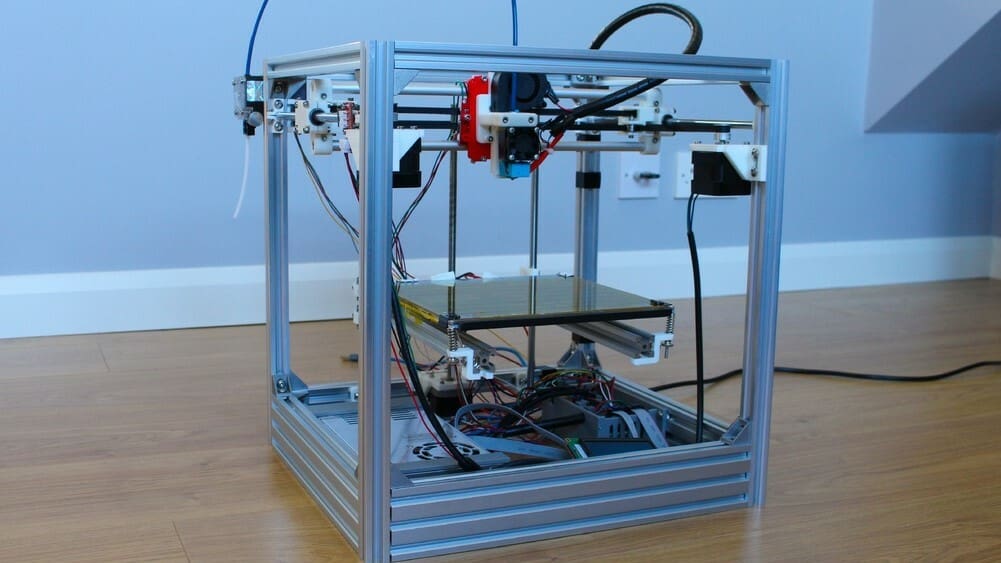
From Scratch
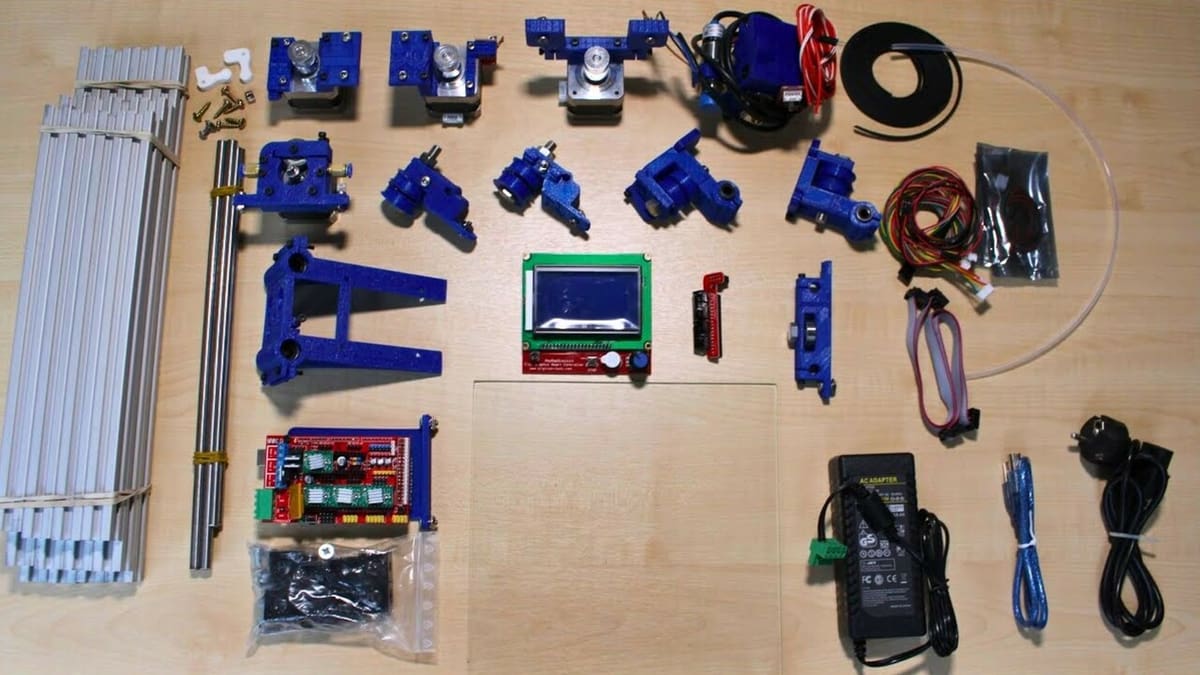
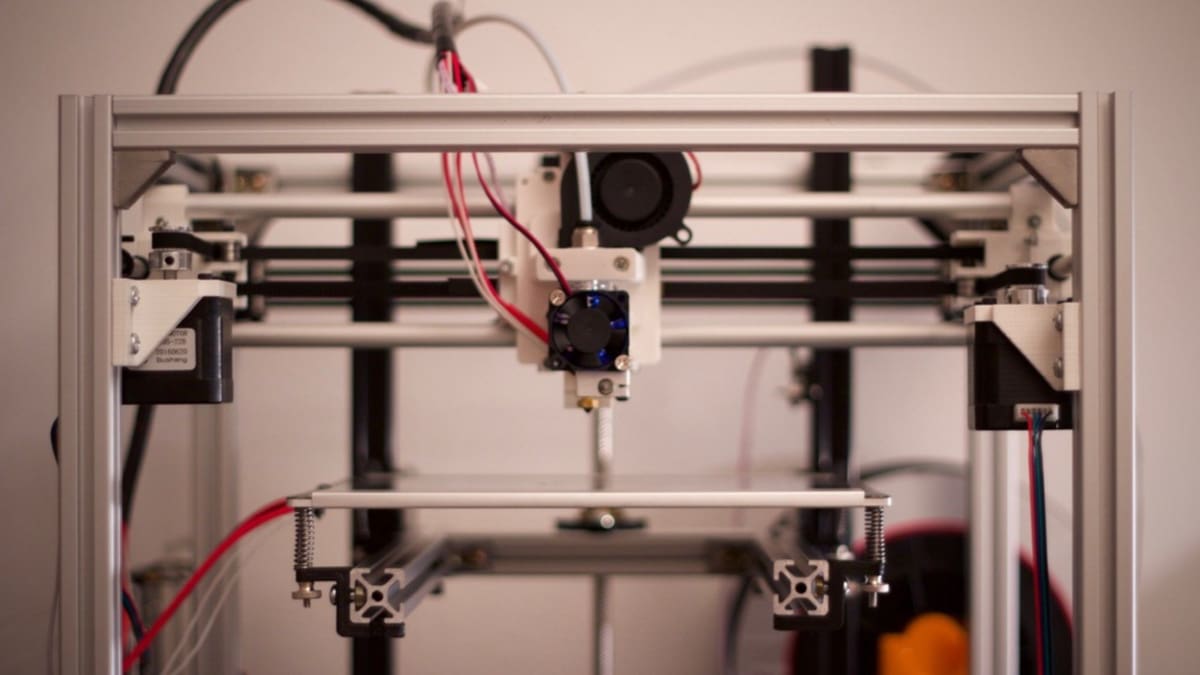
Building a 3D printer from scratch can be challenging but also more rewarding than assembling one from a kit. It does require some knowledge about how 3D printers work, including what parts you need and how to put them together. Depending on the particular project you decide to take on, it can be cheaper or more expensive than simply purchasing a kit, but the bragging rights of having built your own machine are priceless.
Before you decide on a particular project, there are a few things you’ll want to determine.
Considerations
- Type of printer: This will determine the movement of the bed and print head. Cartesian printers are common and have print heads that move on both the X- and Y-axes with a bed that moves on the Z-axis. Another option is the CoreXY design, which provides more stability and speed by reducing the weight on the moving parts.
- Printer size: You’ll need to decide the size of the printer you want, which will determine the type of frame you’ll need. Common options, like the 2020 or 2040 aluminum extrusions, are popular for their strength and ease of assembly.
- Type of nozzle: You’ll need to choose a nozzle size and material based on the desired print resolution and types of filaments you’ll want to print (e.g. more or less abrasive ones). Standard nozzles are 0.4 mm, but sizes can range from 0.1 mm to 1 mm depending on your needs.
- Number of extruders: Most printers have one extruder, but dual extruders are available if your control board supports them. These are ideal for ease of multi-material or multicolor printing.
3D Printer Parts
Once you’ve decided on the specifications for your 3D printer, you can start gathering the necessary parts. Here are the basic components you’ll need:
- Controller board: The controller board is the heart of your 3D printer. Popular choices include the Duet 3, which supports multiple extruders and offers both Wi-Fi and Ethernet connectivity, making it a top choice for advanced builds. The SKR V1.4 is a budget-friendly option that provides powerful performance and supports various stepper drivers. For those looking for a more traditional setup, the RAMPS 1.4, often paired with Arduino Mega, remains a reliable option.
- Stepper motors: Nema17 stepper motors are the standard for 3D printers, providing the necessary torque and precision. You’ll need at least four: one for each of the X- and Y-axes, two for the Z-axis, and additional motors for each extruder you plan to use. You’ll be very lucky if you can get all your motors working on your first try. You’ll usually need to adjust the potentiometer on the top of the motor driver to match the motor current. It’s also important to pair the wires for the motors.
- Print head (extruder, hot end, sensor, fan): You can choose either a direct extruder (motor on the extruder) or Bowden extruder (motor on the frame). For the extruder and hot end, popular choices include Bondtech’s BMG and E3D’s V6 and Hemera.
- End stops: The origin (0, 0, 0) or home position is the starting point for print head movement, and end stops are placed at the zero position of each axis so that the print head knows when the zero position is reached.
- Print bed: The print bed is crucial for first layer adhesion. Options include flexible smooth or textured PEI sheets, glass, and special textured PEY sheets.
- Power supply: The power supply unit (PSU) provides the necessary power for all the printer’s components, ensuring a stable operation and helping prevent issues related to power fluctuations. Generally, a 24-V power supply is preferred over 12-V because it heats the bed and hot end faster and provides more consistent power to the stepper motors, improving print quality and reliability.
- Printer frame: Aluminum extrusions like 2020 or 2040 profiles are ideal for building a stable and modular frame. These profiles are lightweight yet strong and are easy to assemble and customize.
Helpful Resources
Instructables includes a few guides by makers, like EdChamberlain’s and Dylan91’s. On YouTube, TechBuilder has a tutorial on how to build a high speed CoreXY, while OpenBuilds hosts a variety of projects that are worth checking out.
Repositories like Thingiverse, Printables, and Cults have many community creations, and makers are usually quite responsive and helpful when it comes to addressing others’ doubts. And, of course,
Safety Tips

Building a 3D printer from scratch involves dealing with various components and tools that can pose safety risks. Here are some essential safety tips to keep in mind during the assembly process:
- Avoid electrical shock: Always disconnect the power supply before working on the electrical components of your 3D printer. Use insulated tools to prevent accidental shocks and double-check all connections before powering up the printer.
- Check for exposed and loose wires: Make sure all wires are properly insulated and organized. Exposed wires can cause short circuits or electric shocks, while loose wires can get caught in gears or pulleys, causing mechanical failures or shorts. Use heat shrink tubing or electrical tape to cover any exposed wiring and cable ties to keep them neatly bundled and away from moving parts.
- Proper grounding: Ensure your 3D printer is properly grounded. This reduces the risk of electric shock and protects the components from power surges. Use a multimeter to verify proper grounding.
- Secure connections: Make sure all electrical connections are secure and free from corrosion. Loose connections can cause sparks and short circuits.
- Correct polarity: Double-check the polarity of all connections. Reversed connections can damage components and pose a safety risk.
- Handle heated components with care: The hot end and heated bed can reach extremely high temperatures. Allow sufficient cooling time after testing or using heated elements before handling them.
- Use heat-resistant materials: When assembling parts that will be exposed to high temperatures, ensure they are made from heat-resistant materials to prevent melting or deformation.
- Avoid overloading circuits: Ensure your power supply can handle the load of all components. Overloading circuits can lead to overheating and potential fires. Use power supplies with appropriate ratings and avoid using multiple high-power devices on the same circuit.
- Monitor the operation: Never leave your 3D printer unattended while testing it. Watch for signs of overheating or electrical faults. If you notice any unusual smells or sounds, turn off the power immediately and inspect the components.
- Keep a fire extinguisher ready: Have a fire extinguisher rated for electrical fires within easy reach of your workspace. Make sure everyone in the area knows how to use it.
General Safety Precautions
- Wear protective clothing: Wear appropriate clothing such as long sleeves, safety goggles, and gloves to protect against burns and electric shocks. Avoid wearing loose clothing that could get caught in moving parts.
- Keep your workspace clear: A cluttered workspace increases the risk of accidents and makes it harder to identify potential hazards.
- Follow manufacturer guidelines: Strictly follow the assembly instructions provided by the manufacturers of your components. These guidelines are designed to ensure both the functionality and safety of your 3D printer.
Software & Firmware
3D printing involves several stages, from designing your model to preparing it for printing and finally executing the print. You’ll need various software solutions, including CAD programs to design models, a slicer to convert those designs into G-code, and firmware to control your printer’s operations.
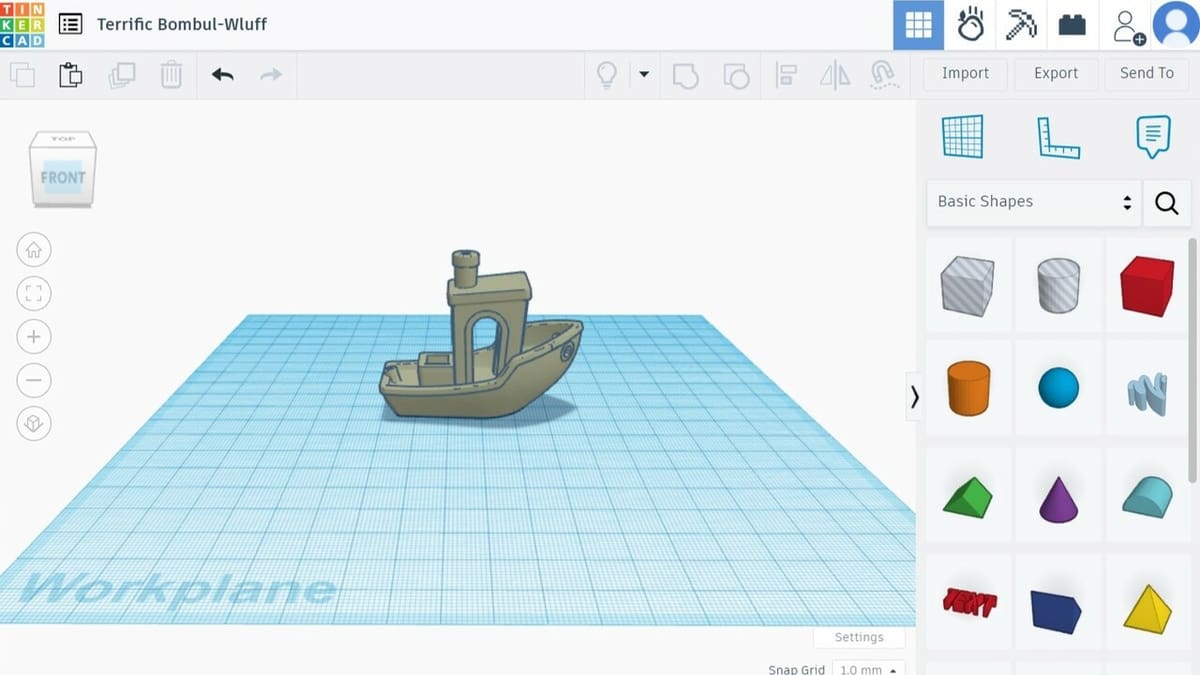
CAD Software
Computer-aided design (CAD) software is essential for creating detailed 3D models. There are many options out there, with a few standouts if you’re getting started.
Tinkercad is a free, web-based CAD software by Autodesk. It’s highly accessible and user-friendly, making it ideal for you if you’re a beginner or using it for educational purposes.
SketchUp Free is known for its simplicity and ease of use. You can start with basic geometric shapes and modify them to create detailed 3D models. Plus, it includes a vast library of pre-made models in the 3D Warehouse that you can integrate into your designs.
And Fusion, developed by Autodesk, is a comprehensive CAD, CAM, and CAE tool. This cloud-based software is suitable for you if you’re an advanced user, offering extensive tools for parametric modeling, mesh modeling, and generative design.
Slicer Software

Slicer software converts your 3D models into instructions that your 3D printer can understand. There are plenty options depending on what you’re after.
Developed by UltiMaker, Cura is a free, open-source slicer that supports a wide range of 3D printers and offers a user-friendly interface. You can extensively customize print settings, and it includes features like adaptive layers and a variety of support options.
Originally based on Slic3r, PrusaSlicer is developed by Prusa Research. It offers advanced features and is optimized for Prusa 3D printers, but you can use it with other printers as well. Its detailed settings and advanced features make it suitable for both beginners and experienced users.
Simplify3D is a premium slicer software known for its detailed control over print settings and high-quality support structures. While it’s not free, many users might find the investment worthwhile due to its comprehensive features and ability to optimize print quality and efficiency.
Firmware
Firmware runs on your 3D printer’s control board, managing its operations.
Marlin is arguably the most widely used firmware for 3D printers. It’s open source and highly customizable, supporting a vast range of features and hardware configurations. Marlin provides features like auto-bed leveling, thermal protection, and advanced motion control.
Klipper uses a host-based approach, relying on a single-board computer (like a Raspberry Pi) to perform the complex calculations required for 3D printing, offloading the work from the printer’s control board. This setup allows for smoother and faster prints. Klipper supports features like pressure advance, input shaping, and multi-microcontroller configurations.
Repetier-Firmware is known for its efficiency and advanced features. It supports multiple extruders, various bed leveling methods, and detailed print settings. Repetier-Firmware is optimized for high-speed printing and provides extensive customization options, making it suitable for both beginners and advanced users like you.
Join the Community
Building a 3D printer can help you to learn more about 3D printing technology, and it’s worthwhile to join some 3D printing communities to meet 3D printing enthusiasts just like you.
- Reddit: This massive platform is organized around communities with shared interests. You can share and discuss 3D printers with others in one of the thousands of forums.
- RepRap: RepRap is a very popular and well-established 3D printing community. You can buy 3D printing parts, meet other makers, and get lots of helpful information.
- 3D Print Forums: A great place to ask questions about 3D printers and find explanations from the experts.
- Instructables: There are loads of articles on this website teaching you about DIY 3D printers and other projects.
- Hackster: This site has many free training courses, webinars, and online conferences. Apart from 3D printing, you can also find many other interesting electronic projects.
- Discord: While there are individual Discord channels for a variety of topics and brands, the general 3D printing one is a great resource to seek help and provide it!
After You're Set Up
Once your 3D printer is up and running, you can add several peripherals to enhance your experience. These can improve print quality, ease of use, and maintenance.
DIY Peripherals
- OctoPrint: OctoPrint is open-source software that allows you to remotely control and monitor your 3D printer, as well as receive notifications about print status. It also supports plug-ins for added functionality. Setting up OctoPrint typically involves using a Raspberry Pi, making it a relatively straightforward and cost-effective upgrade.
- Enclosure: An enclosure for your 3D printer helps maintain a stable temperature, reduces fumes and noise, and provides a safer printing environment. This is particularly useful when printing with materials like ABS that are sensitive to temperature fluctuations. You can make enclosures from various materials and sources.
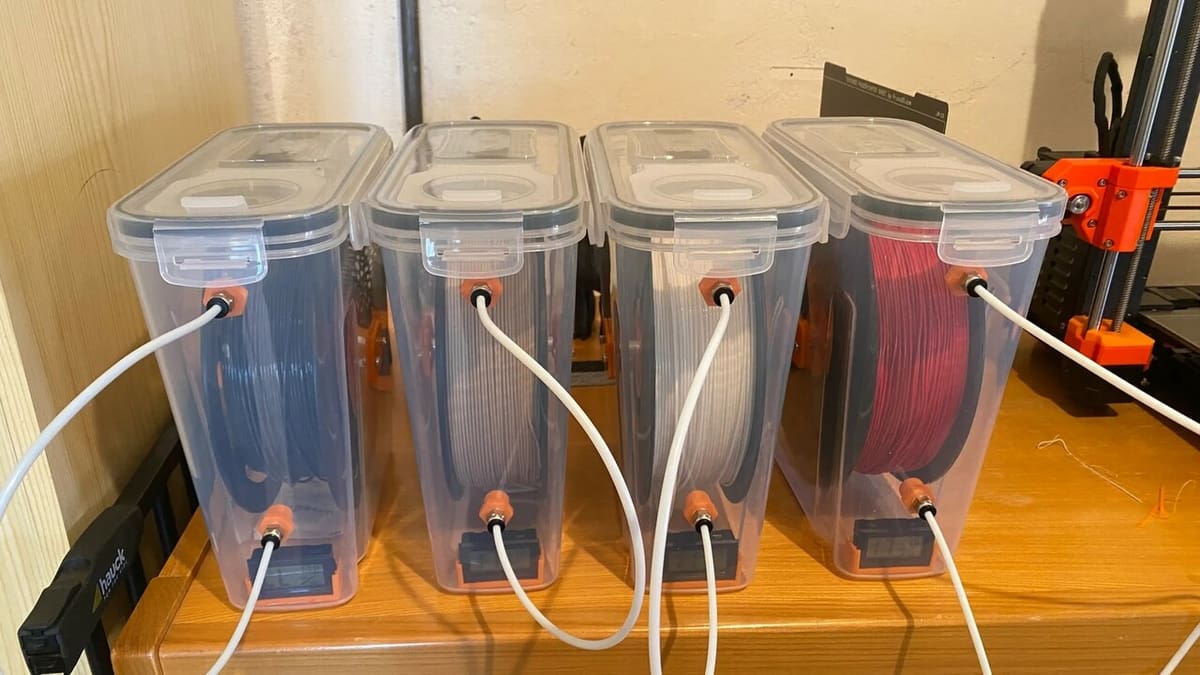
- Filament storage: Proper filament storage is crucial to prevent moisture absorption, which can degrade print quality. Filament dryers or dedicated filament storage boxes keep your materials dry and ready for use, ensuring consistent quality and prolonging the shelf life of your filaments.
Upgrades & Mods
There are numerous upgrades and modifications you can make to your 3D printer if they’re absent in your 3D Print.
- Auto-bed leveling sensor: Sensors like the BLTouch or the Pinda probe can automate the bed leveling process, ensuring a perfect first layer every time.
- Extruder: Upgrading to a dual-gear extruder like the Bondtech BMG can improve filament grip and reduce issues like under-extrusion.
- Hot end: Installing a higher-quality hot end, such as E3D’s V6 or Micro-Swiss’ all-metal hot end, allows you to print at higher temperatures and with a wider variety of materials.
License: The text of "DIY 3D Printer: How to Build Your Own 3D Printer" by All3DP is licensed under a Creative Commons Attribution 4.0 International License.