
How to Design a DIY Filament Dryer

By designing your own filament dryer, you can save money, dry multiple spools at once, and customize features. Read on to find out how!
In 3D printing, maintaining the quality of your filament is essential for achieving smooth, high-quality prints. Many types of filament, especially nylon, TPU, and polycarbonate, are highly hygroscopic, meaning they absorb moisture quickly from the air. Even though PLA, ABS, and PETG aren’t as quick to absorb moisture as nylon, they can still become wet in humid environments and may need drying from time to time.
Moisture-filled filament can lead to 3D printing problems and poor quality prints. To prevent these issues, a filament dryer becomes a key tool for makers. You can easily buy one, but commercial dryers do have their limitations, especially if you have multiple spools to manage. This guide explores why designing and building your own dryer can be a cost-effective and rewarding solution.
Using my own filament dryer design, AeroDry, as an example, I’ll walk you through the most important considerations to design your own filament dryer, from CAD modeling tips to assembling the components.
Why Do You Need One?
A filament dryer is a specialized device used to remove moisture from 3D printing filaments. The principle is relatively simple: It heats the filament just enough to evaporate the trapped moisture without exceeding the filament’s glass transition temperature, which is when the material softens or deforms.
For example, PLA dries best at around 40-50 °C (104-122 °F), while nylon needs higher temperatures, about 80-90 °C (176-194 °F). These devices typically take between 4 to 6 hours to dry a filament, depending on its moisture content and material.
When filament absorbs moisture, its diameter may swell by 20-40 microns, leading to inconsistent extrusion and nozzle clogs, making printing unreliable. Furthermore, wet filament produces steam when heated, creating bubbles in the material that weaken the print, compromising its structural integrity. You’re also likely to notice defects like stringing and weak layer adhesion.
Filament dryers are crucial because they help to mitigate these issues, ensuring that prints come out clean, strong, and without surface imperfections. While some people opt to modify appliances like food dehydrators to dry filament, specialized filament dryers are designed to regulate temperature more precisely, which is essential for avoiding filament damage.
Why Design Your Own?
Designing your own filament dryer is a cost-effective and flexible alternative, especially when compared to commercial dryers that can reach the high temperatures required for moisture-sensitive filaments like nylon and polycarbonate. These materials need to be dried at around 70 °C (158 °F), which many affordably priced commercial dryers struggle to achieve.
For high-performance drying solutions, products like the EIBOS Filament Dryer or PrintDry Pro are better suited for drying these advanced filaments. The EIBOS’ 3D Cyclopes, which costs around $130, offers temperature control up to 70 °C, making it ideal for materials like nylon. Another option is the PrintDry Pro 3, priced at about $200, which also reaches higher temperatures suitable for tougher filaments.
One of the primary reasons for designing and building your own filament dryer is cost savings. A DIY dryer, such as using a food dehydrator, can cost as little as $30, a substantial savings compared to the commercial filament dryers referenced above.
Customization is another key advantage of building your own dryer. With a DIY setup, you can design the dryer to accommodate multiple filament spools or incorporate additional features like humidity sensors or PTFE tubing for feeding filament directly to the printer. This flexibility allows you to tailor the dryer to your specific printing environment and needs.
Financial benefits aside, there’s also educational value in designing and building your own filament dryer. The process of designing your dryer gives you hands-on experience with 3D modeling, electronics, and problem-solving. This learning journey can boost your understanding of 3D printing technologies and materials. Additionally, there’s immense satisfaction in creating a functional, tailored piece of equipment that further enhances your DIY skills.
Doing it yourself is, however, not without perils. Homemade dryers may require more trial and error to fine-tune; improper setups can lead to overheating or inconsistent drying results. Commercial dryers offer precise temperature control, faster drying times, and can often dry filament while printing, which is harder to achieve with a DIY solution.

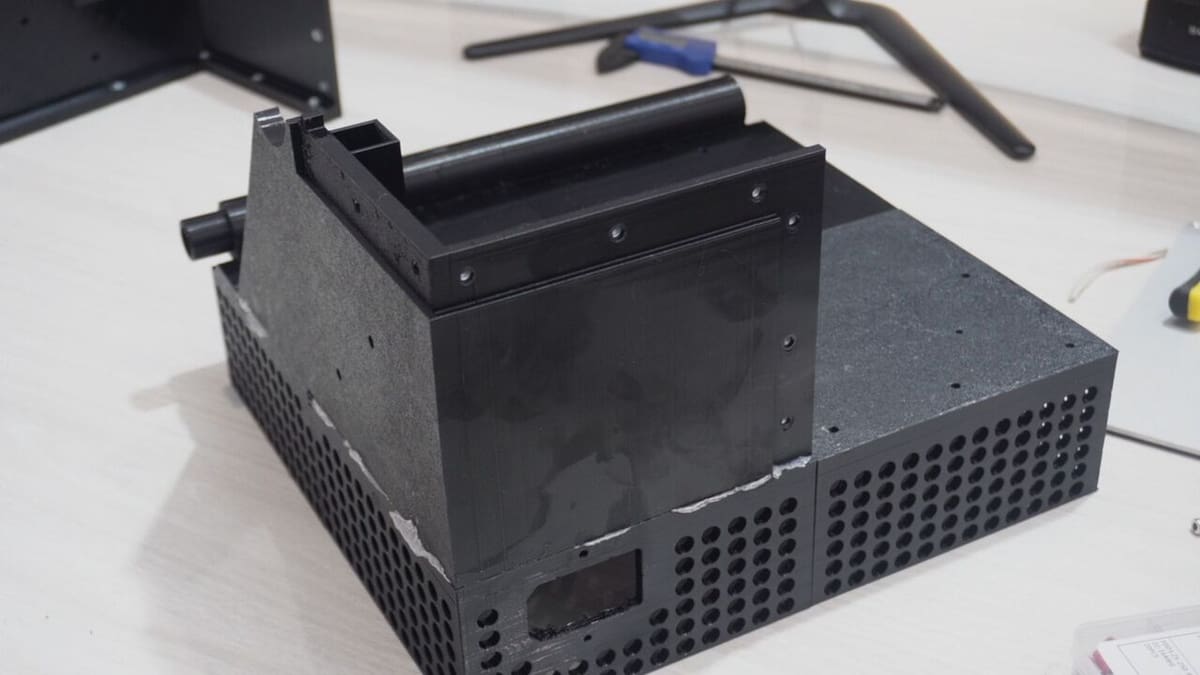
Example: AeroDry
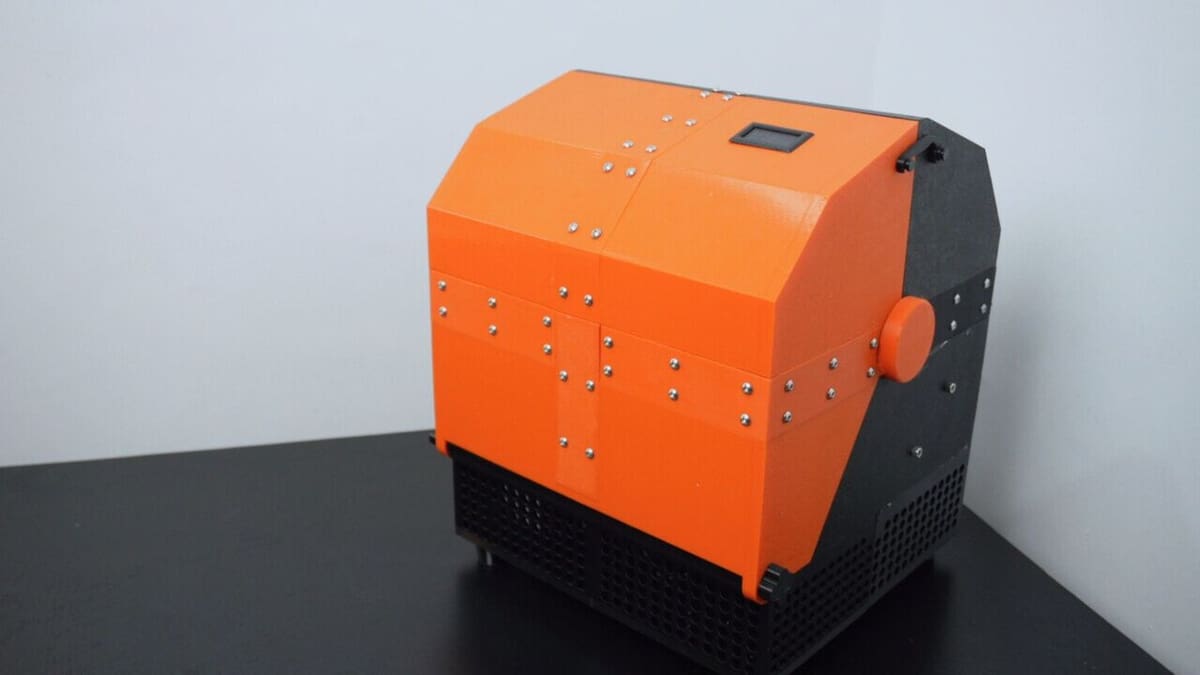
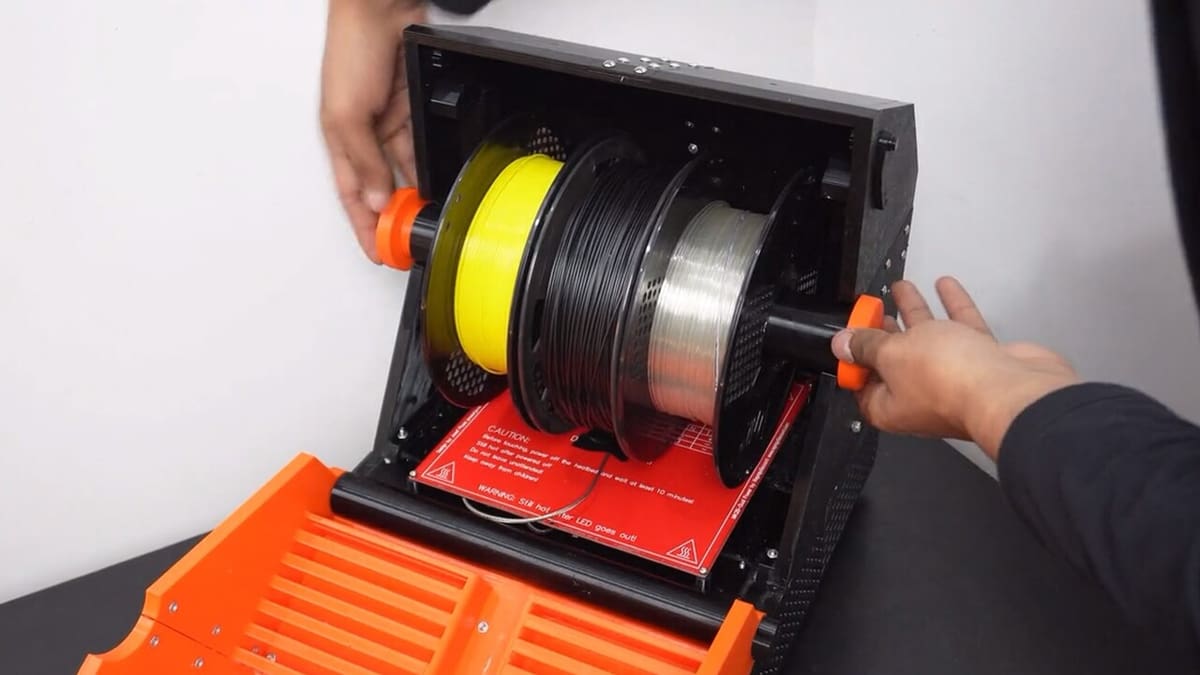
When I set out to design AeroDry, my primary goal was to create a 3D printable filament dryer that could truly compete with the refined commercial dryers available but at a significantly lower cost. I knew that many 3D printed dryers lacked the performance of commercial options, particularly in terms of drying efficiency and overall capacity. I wanted to solve this by offering a solution that not only performed well but was also accessible for makers, both in terms of affordability and ease of use.
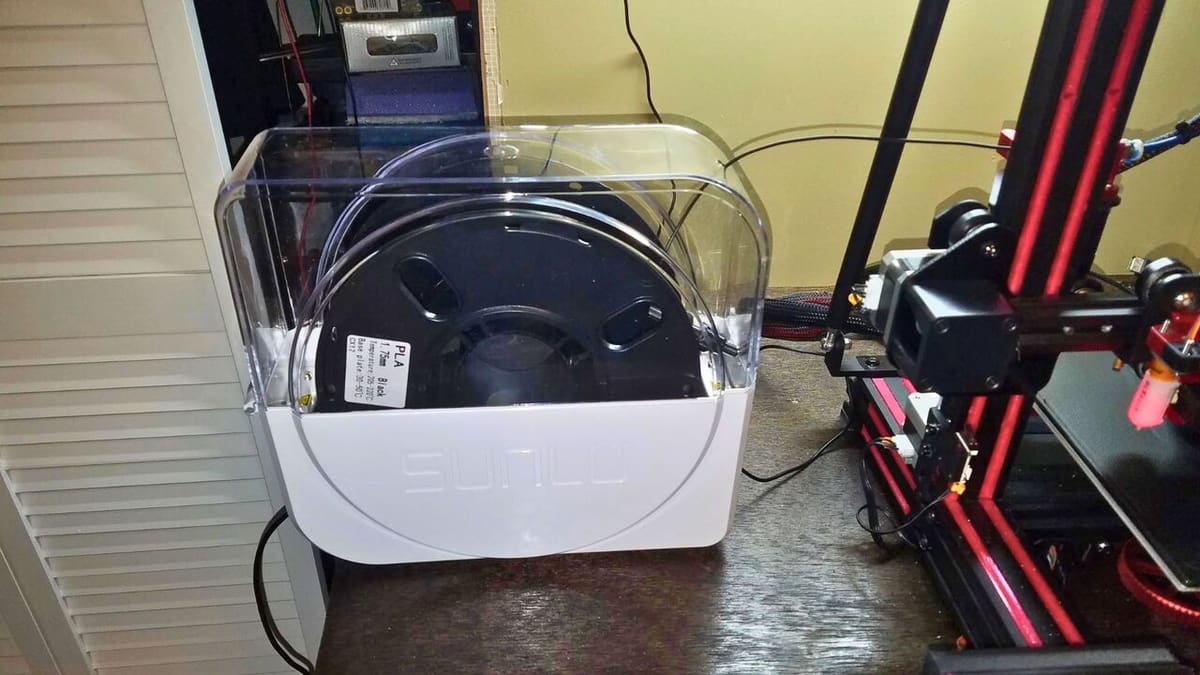
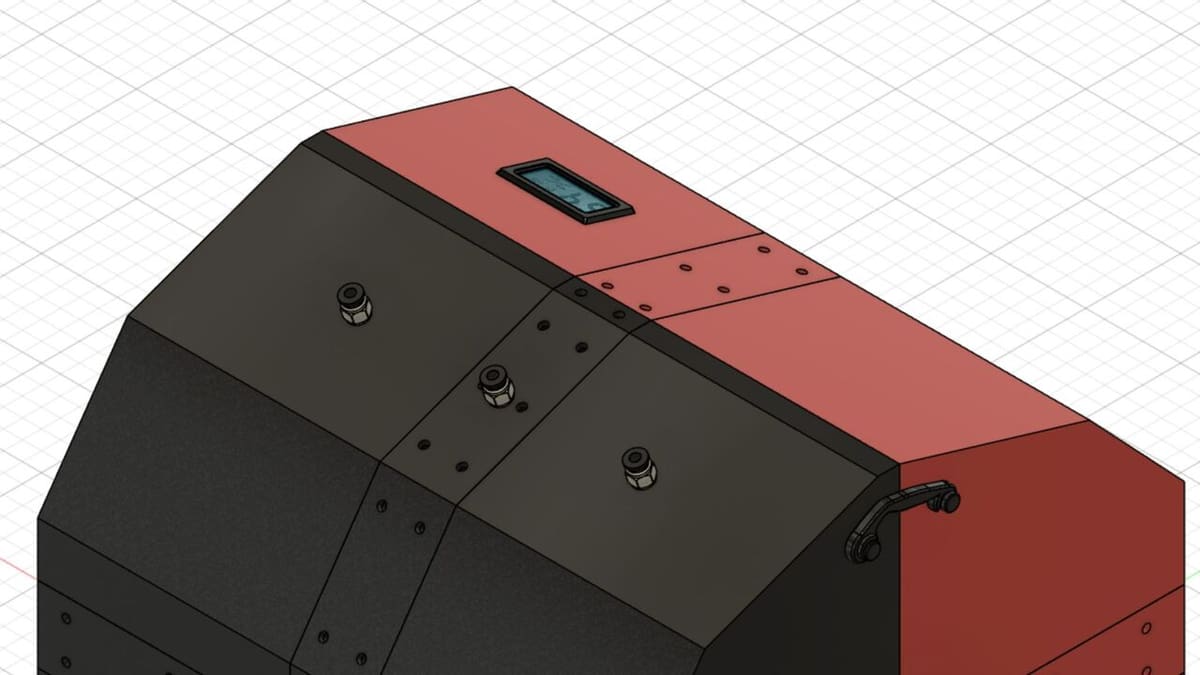
One of the first challenges I aimed to solve was capacity. Many filament dryers on the market are limited to drying one spool at a time. For those of us who work with multiple filaments and need them ready for various projects, that just isn’t efficient. That’s why I designed AeroDry to hold up to three 1-kg filament spools at once. It allows me to prepare multiple filaments simultaneously, saving time and avoiding delays caused by constantly swapping spools. Additionally, AeroDry includes three filament feed-through holes, allowing me to feed all three filaments directly into the printer without removing them from the dryer.
To address drying efficiency, I incorporated two 5015 blower fans in the design. These are positioned near the heated bed, which is a RepRap MK2B – a standard 3D printer heated bed that efficiently circulates hot air from the bottom to the upper part of the drying chamber through internal vents. The constant flow of air ensures that the filament dries evenly, preventing the moisture-related issues that often result in failed prints.
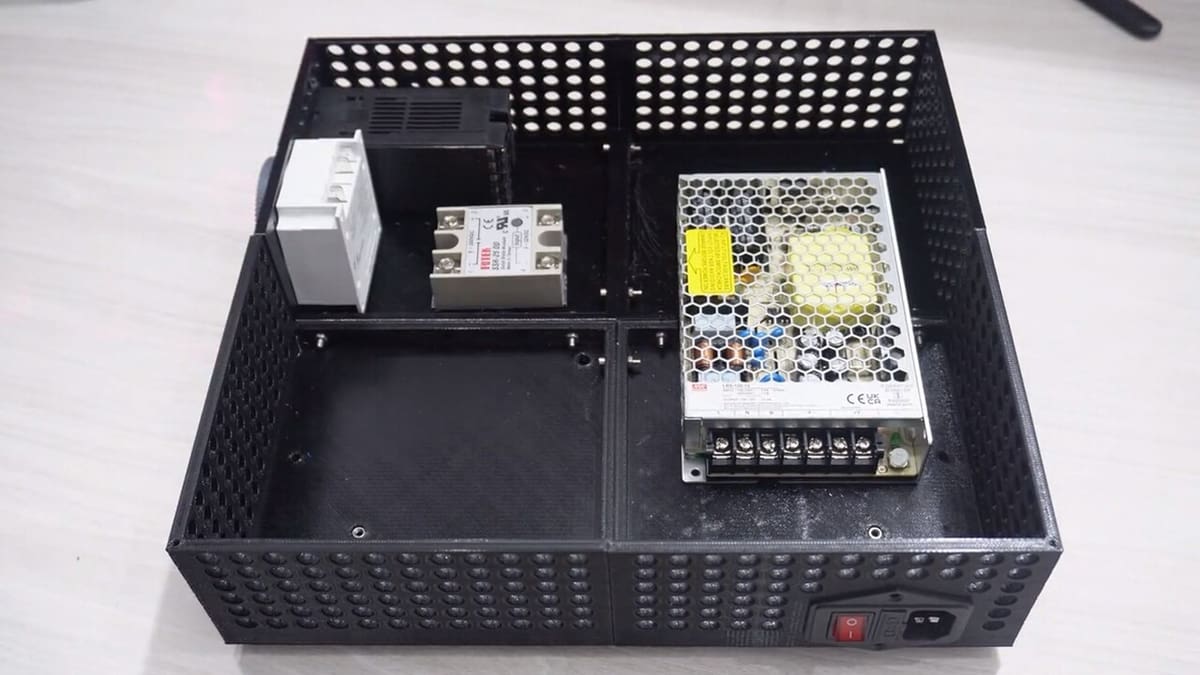
The electronics are simple but robust. With components like the Meanwell PSU, Rex C100 PID controller, and SSR (Solid State Relay), AeroDry offers precise and reliable control over the drying process, ensuring consistent temperatures. While commercial dryers also offer similar functionality, AeroDry provides these features at a fraction of the cost.
In addition to the active drying components, I recognized the need for passive drying capabilities because I may want to store my filament in the dryer without actively drying it. For this reason, I designed pockets within AeroDry that hold desiccant packs. This allows the dryer to function as a dry box when not in use, keeping filaments moisture-free even without the fans and heatbed running.
Designing Your Filament Dryer
As I’ve said above, one of the most significant advantages of creating a 3D printable filament dryer is the customization it offers. With the freedom to design and print your own dryer, you can tailor it to accommodate different spool sizes, filament types, and additional features. You can adapt the design for specific needs, such as airflow management, temperature control, or even dual-purpose functionality (i.e., a dryer and storage box combined).
From a cost-efficiency perspective, the DIY route saves you money. With commercial filament dryers costing anywhere up to $200, building your own can cut those costs significantly. Additionally, designing the dryer yourself means you can upgrade or modify the setup over time without needing to purchase a new system.
In the following sections, I’ll walk you through some of the most important things to keep in mind when designing your own filament dryer.
Materials & Hardware
For the enclosure of the dryer, it’s essential to use heat-resistant materials like ABS or PETG. These filaments can withstand higher temperatures, which are necessary when drying filament types like nylon or polycarbonate. ABS is particularly good for its rigidity and heat stability, while PETG is favored for its ease of use and resistance to warping.
In terms of hardware, a few key components are necessary:
- Heating element: You can use a PTC heater for controlled, consistent heating, or even a 3D printer heated bed (like the RepRap MK2B) for a cost-effective heating solution. The heater should be able to maintain temperatures between 40 °C and 120 °C, covering the drying range for all types of filaments.
- PID temperature controller: To ensure precise control of the drying temperature, a PID controller is essential. It allows you to regulate the heat with an SSR, ensuring stable drying conditions without overheating. This can handle the full range of filament drying temperatures.
- Desiccant packs: In addition to active drying, you should integrate desiccant packs to absorb residual moisture when the heater is off. These can be placed in pockets within the dryer to allow for passive moisture control, keeping filaments dry for longer periods.
- Fans: Using blower fans ensures the heated air circulates evenly throughout the chamber, providing consistent drying conditions for all spools. Positioning these near the heat source helps improve airflow.
- Moisture sensor module: Incorporating a humidity sensor lets you monitor the moisture levels inside the chamber. This is crucial for ensuring the filament is dry enough before use and allows for precise adjustments to the drying process.
Key Design Details
Designing an efficient 3D printable filament dryer requires careful consideration of several critical elements to ensure functionality, durability, and ease of use. Here are a few essential design aspects you need to focus on:
- Airtight enclosure: Maintaining an airtight seal is critical to prevent moisture ingress. Using heat-resistant silicone sealant along the edges of the enclosure ensures that there are no gaps, keeping moisture out. If the design is modular, make sure to screw the parts together securely to maintain this seal.
- Spool holders & filament guides: Customizable spool holders are essential for supporting multiple spool sizes, whether you’re using 1-kg or 3-kg filament spools. Designing these to accommodate various diameters ensures that different types of filament can be dried simultaneously. Additionally, filament guides can be integrated to smoothly feed the filament into your 3D printer while it remains inside the dryer.
- Mounts for electronics: Space planning for the electronic components (heating element, PID controller, fans, and the like) is necessary to ensure everything fits neatly within the dryer. Mounts for these electronics should provide enough ventilation to avoid overheating but also be compact enough to not interfere with filament placement.
3D Modeling
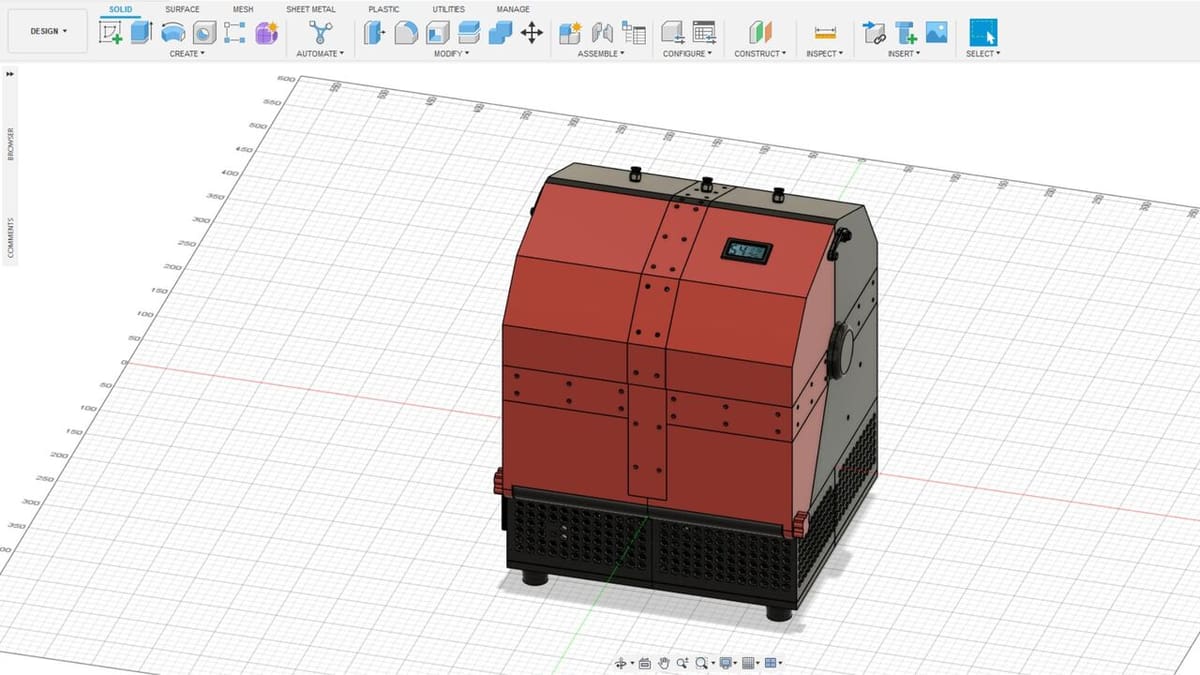
The success of designing a 3D printable filament dryer largely depends on the modeling software you choose. Advanced design tools like Fusion 360 or SolidWorks are ideal for creating precise, complex models. These platforms offer features such as parametric modeling, which allows you to make adjustments without losing accuracy. This supports the development of more intricate parts like spool holders, internal vent systems, and mounting areas for electronics.
While entry-level tools like Tinkercad are great for beginners, they may lack the functionality necessary to design highly complex models like a filament dryer. For instance, creating internal airflow channels, optimizing space for components, or adding features like moisture monitoring often requires more advanced features like those found in Fusion 360 or SolidWorks
One of the first considerations in designing a filament dryer is assembly. Ensure that the dryer can be easily assembled and disassembled, especially if it consists of multiple parts.

Incorporating proper screw holes is essential for connecting parts. Make sure to design the holes slightly oversized (usually 0.2 to 0.4 mm of clearance) to account for shrinkage during printing and to allow bolts to pass through smoothly. This also applies to 3D printed threads. Using appropriate tolerances ensures that screws and nuts fit snugly but not too tightly.
It’s also important to plan for electronics compartments. These compartments should be isolated to avoid direct exposure to heat from the drying chamber, which could affect the performance or lifespan of the electronics. Incorporating features like ventilation slots or cable management paths will help keep the electronics cool while maintaining functionality.
Finally, achieving the right fit and tolerance for all parts is key to ensuring a reliable, airtight filament dryer. Proper tolerances help avoid issues like gaps that could let moisture in, or parts that don’t fit together well.
Printing & Assembly
Print Settings
When printing parts for a filament dryer, achieving a balance between strength and detail is crucial. To ensure that the parts are durable, especially those that will handle heat and weight (such as spool holders or structural components), it’s recommended to use an infill density of at least 30%.
This level of infill provides enough strength without making the prints unnecessarily heavy or time-consuming to produce. You might also want to consider using a strong infill pattern.
Besides the infill settings, you’ll want to increase the number of walls for exterior components. For example, using three walls for the outer shell improves the parts’ overall rigidity and durability, especially in areas that experience regular handling or assembly stress.
Assembly
Once all the parts are printed, the assembly process begins. Here’s a general overview of an example assembly process:
- Assemble the frame: Start by connecting the main body components. If the dryer is designed in parts, ensure each piece fits snugly using the pre-designed screw holes. Use M3 or M4 screws and nuts to secure the parts together. The oversized holes (accounting for the 0.2-0.4-mm tolerance) should allow the screws to pass through smoothly, and tightening the nuts will create a strong, airtight seal.
- Install the electronics: Next, focus on the electronics compartment. Insert the heating element – whether it’s a PTC heater or a 3D printer heatbed – and secure it in place. Connect the PID controller and SSR for temperature control, ensuring they’re mounted in an isolated, well-ventilated space to avoid overheating. Cable management is key here to prevent clutter and ensure safe operation.
- Add fans and airflow system: Mount the blower fans in their designated positions near the heating source. Ensure they’re aligned with the internal airflow channels to evenly distribute hot air across the spools. The fans will circulate the warm air efficiently, preventing moisture pockets.
- Seal the enclosure: Once the major components are in place, ensure that all parts are securely sealed using heat-resistant silicone sealant. This step is vital for keeping the interior chamber airtight, preventing moisture from entering. Make sure to check for any gaps that might allow air or moisture leakage.
- Install spool holders and filament guide: Place the spool holders inside the dryer. These should be designed to accommodate different spool sizes. Attach the filament guide tubes leading from the spool holders to the outside feed ports. This allows you to print directly from the dryer without needing to remove the filament.
- Testing and calibration: After assembly, turn on the dryer and set the temperature using the PID controller. Allow the fans to circulate air and monitor the moisture sensor to ensure everything is functioning correctly. Adjust any settings as needed based on the type of filament being dried.
License: The text of "How to Design a DIY Filament Dryer" by All3DP is licensed under a Creative Commons Attribution 4.0 International License.