
How to Draw a House for Your Hamster with a 3D Pen

Using a 3D pen to create a DIY hamster house can be an enjoyable project. Learn how even your pet hamster can enjoy creations from a 3D pen!
Handcrafted Homes

A 3D pen is basically a handheld, mobile 3D printer, which lets you draw and create 3D models more or less in mid-air. Compared to a 3D printer, a 3D pen is a simple plug-and-play device, with little to no setup required.

Using a 3D pen doesn’t require advanced technical knowledge on 3D printing. However, it retains the same principle of melting plastic in order to reshape it into the desired form.
With the versatility of 3D pens, they can also be used to create small models. Here, we’ll explore one such fun possibility: hamster houses and hideouts for your hamster’s cage!
Hamster houses are the small shelters inside your hamster’s cage. As hamsters are nocturnal, these small hideouts serve as a sleeping area and a place where they can burrow. Hamsters naturally like places that keep them safe and protected, thus having more than one hideout in their cage is essential.
Advantages & Pointers
Instead of purchasing hamster houses, you can create one with a 3D pen. Typically, cheap materials such as popsicle sticks or wood are used to create DIY hamster houses. On the other hand, a 3D pen can be a more creative option, with fewer limits to your imagination!
With a 3D printed hamster house, you’re able to do various things, like creating themed houses, building hideouts molded in unconventional shapes, and incorporate various playful colors!
Here are several pointers to keep in mind before creating a hamster house:
- Don’t make a base: Hamsters love hiding and burrowing, therefore creating a hamster house with a floor isn’t necessary.
- Provide enough ventilation: Plastic, as compared to wood or other materials, tends to be more stifling. With that in mind, create a hamster house with windows to provide enough air.
- Create a solid house: When creating your house, make sure the plastic bonds really well with itself. This is to avoid cracking of the house, which could produce sharp edges that may harm your pet. Make sure that the house is also fairly solid to help prevent your rodent from chewing it.
- Avoid creating mesh or sharp features: Mesh-like parts in the cage are notorious for causing injury to hamsters. With small meshes, a hamster’s limbs can get stuck and cause injury.
With these items taken into consideration, you can now start creating your hamster house!
Basic Steps

Regardless of the house you make, the first steps are more-or-less the same:
- Choose a design. You can search for orthographic drawings of houses, or you can choose a house design from 3D pen sites, such as 3Doodler, Polaroid3D, or Colido. The design stencils from 3D pen sites also indicate how many parts of each pattern should be made.
- Scale and adjust your design. After you’ve have found a house that you’re happy with, you can download it and scale the parts to a proper size. Also, if you want to add features to the design, you can simply edit the template in most photo-editing programs or even Microsoft Paint. This is needed in cases where the patterns aren’t necessarily meant for hamster houses, so adjusting the openings could be needed. You can then print your desired pattern on regular paper.
- Trace the pattern with your 3D pen. You can use some clear 3D pen mats to trace, placing the paper under the clear mat. Otherwise, tracing the pattern straight on the paper also works well.
Tips for Creating a Hamster House

Having familiarized ourselves with the basic process of making a hamster house, let’s take a look at some specific details. This is where your own creativity really comes into play!
Make Sturdy Walls

Make sure to fill in each wall until it’s solid, and make sure you create enough copies of a wall for your given design.
After all the walls are made, bind them together by melting additional plastic into the corners. When binding the corners, you can use simple patterns in order to mask the joint with a pleasing design.
Mold Unique Shapes

One advantage of a 3D pen compared to 3D printers is the ability to trace melted plastic on a curved surface. When creating a 3D pen hamster house, you can take advantage of this.
To created curved and round objects, the shapes of household items such as bowls, balls, and pieces of fruit can be traced. For unconventional shapes, try using children’s toys; most have very smooth surfaces, which can easily be traced.
Print in Multiple Colors

Although it almost goes without saying, it’s a good idea to use multiple colors when creating designs for your walls.
Don’t be afraid to get creative with how you use the colors. You can create simple textures or things like brick-like patterns with two colors, or more!
Create Textures

Another interesting way to create texture for your walls is by drawing with different strokes, much like painting with plastic. This is a pen, and you’re free to draw in circular, zigzag, or curvy patterns. Play around a bit to try unique ways to create texture!
Upgrade Existing Houses

If you have an existing house for your pet, you can also spice it up with different colors. Maybe you want a sturdier house but with the candy-colors of filaments. In that case, opt for a wooden base structure and decorate it yourself!
Example Projects
There’s no limit to creativity with a 3D pen. To inspire you, here are some unique hamster houses made with a 3D pen.
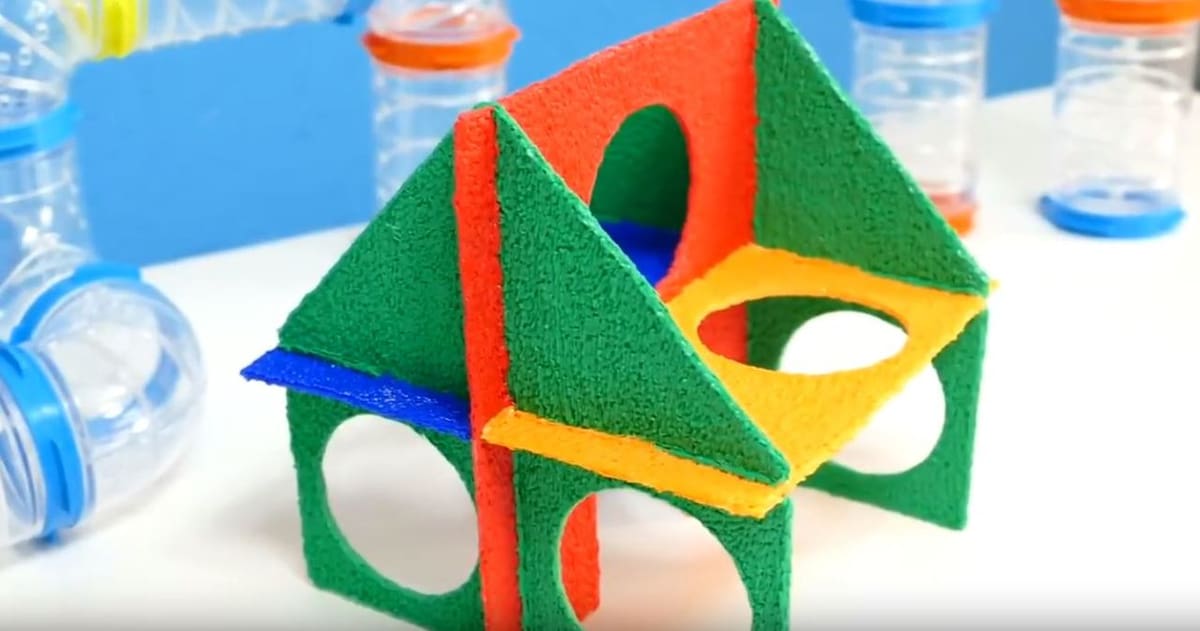
Polygonal Playground
In her video, Anna Chi EN shows us how to make an open-concept house put together from mostly 2D shapes. The design is made with holes in order to incorporate other structures.
A textbook example, this house was made by creating walls individually and then bonding them together with molten PLA. The walls were made with 2 layers to improve durability and stability.
Christmas Ball
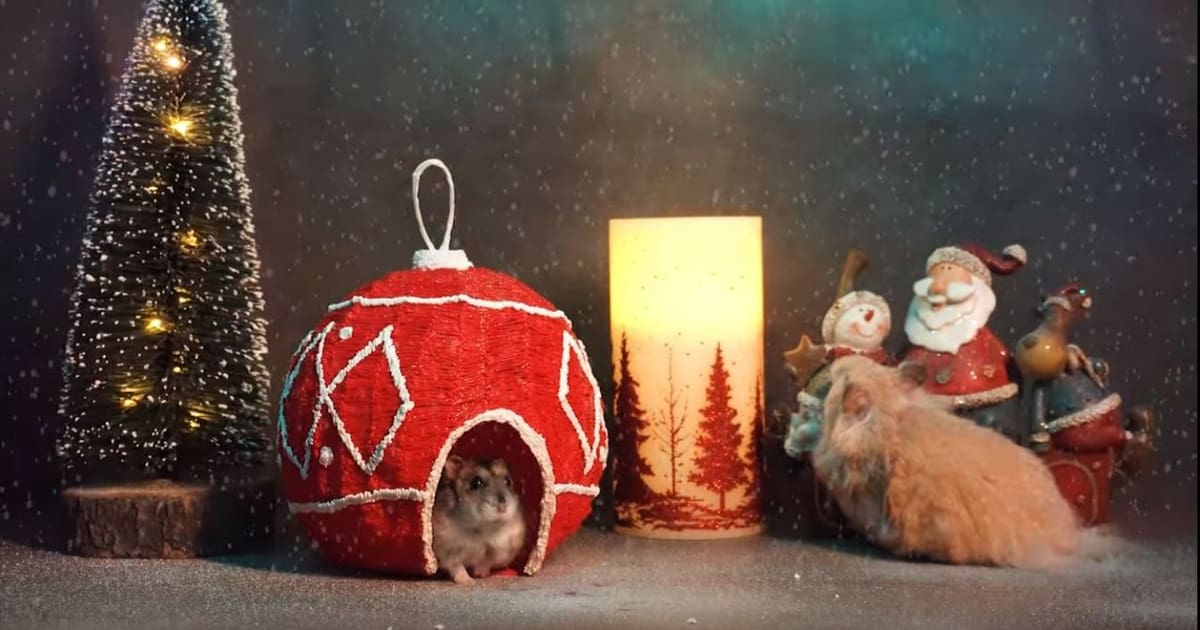
The holidays can also be enjoyed by your pets! The “Christmas Ball Hamster House” by Hamsters Show is a great showcase of a holiday-themed hideout for your pet hamster.
In the video, a large Christmas ball is used as the basis to mold the plastic sphere. The first layers done were lines along the latitude, then bonded together by equally-spaced longitudinal lines. Take note that you do not need to create a complete sphere, you can leave a flat area for the base of the house.
After creating the wireframe, slowly fill in the spaces in the sphere to strengthen it. You can then carefully cut a vertical line on one part of the sphere in order to detach it from the Christmas ball. Then, fuse the seam back together and fill in the remaining frame of the house. As a finishing touch, use a contrasting color to create the outlines of features, such as the door, and create wall designs.
Halloween Pumpkin
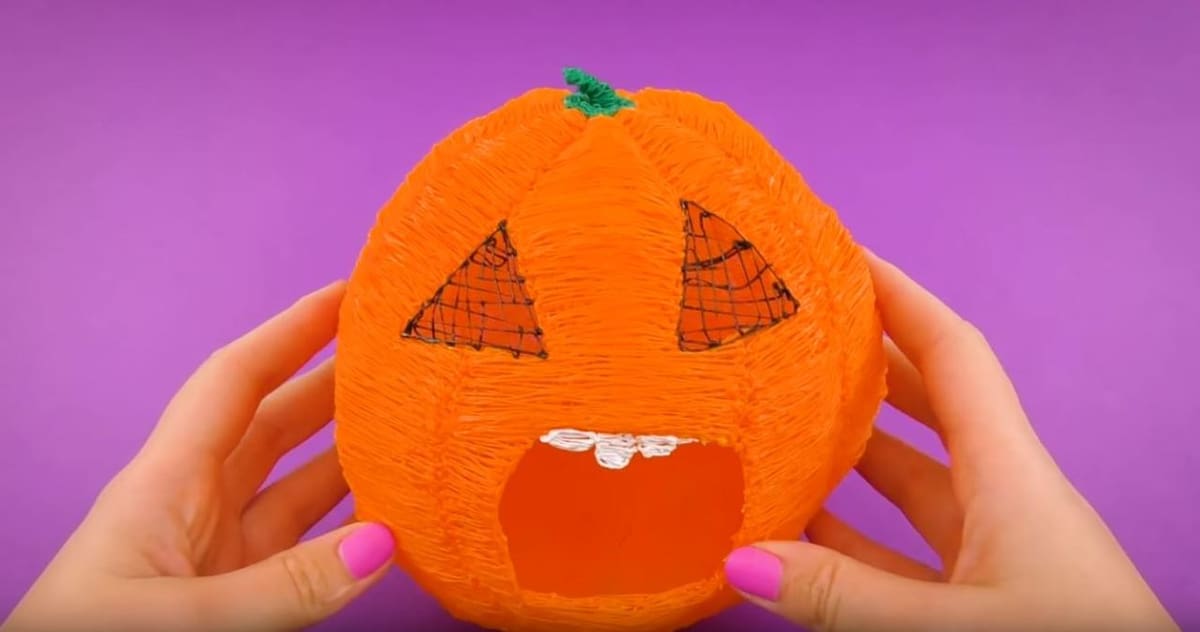
A slightly amusing detail, the “Halloween Pumpkin House” by YouTuber Kiwi Show is made from tracing a watermelon’s shape rather than a pumpkin, but hey, it works!
As with the previous house, the spherical shape is first traced using vertical and horizontal lines. Supplement the grid by filling in a layer of plastic into the frame, then cutting it from one side to break free from the fruit.
After defining the pumpkin shape a bit more and building the walls into a sturdy shell, different colors of PLA were used to create the Jack-o-Lantern’s eyes, stem, and teeth. Kiwi also made a base for the house, but this may not be necessary for hamsters, as they would probably like to be able to burrow in their new hideout.
Winter Cottage

Upgrading an old wooden house is also possible with a 3D pen, just like the “New Year House” by the Timon Show.
In the video, several other materials, such as colored cardboard and cotton, were used in decorating the house. The roof and some walls were covered with cardboard and then fastened at the border with the molten filament. The rest of the walls were then decorated with patterned strokes of the pen in different colors.
This project is a good example of how you can use plastic to fasten things together with the help of your 3D pen.
Hold Them Forever

In their YouTube video, Artist Ks shows us how to hide a hamster in… your hand!
Before creating this, make sure to have a protective glove on, as you will need it to safely create a mold from your hand. The glove is worn before tracing your hand and creating the frame of this unique hideout.
Begin by tracing your hand’s outline on the table, then creating a bridge from the outline and over your gloved hand. Next, create vertical lines parallel to your fingers, finishing the wireframe model of your hand. This requires you to have your hand steady, but you can remove your hand after creating the wireframe, as you’ll just be filling in the gaps of the modeled hand from this point on.
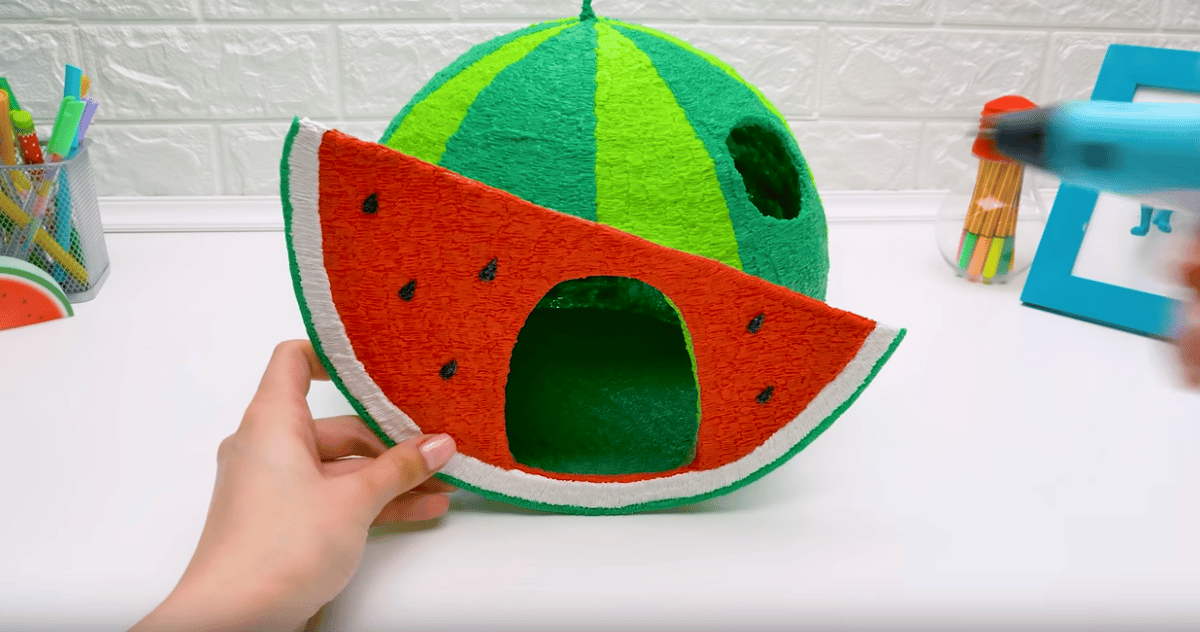
Tropical Paradise

This watermelon house by Slick Slime Sam looks delicious, but don’t tell your hamster that. Here, a basketball is used as a stencil for creating the curves. Otherwise, the same procedure seen in the previous spherical models applies.
After creating the spherical form, the door and windows are cut, and the gaps in the walls are filled using two shades of green to emphasize the watermelon aesthetic.
A notable technique in this build is the use of hand-drawn patterns as a reference for things you’re trying to build. In the video, the watermelon slice is drawn on paper and then traced with the 3D pen. This is a technique that can be used to create almost any two-dimensional design.
Wrapping Up

It may take some time to get used to a 3D pen, and not all 3D pens are the same. Some pens have different speeds, sizes, and shapes, so you should select one which suits your needs best.
In the above projects, most of the houses were made in PLA, which is easier to use and generally not toxic to animals or humans.
Working with 3D pens can take some practice. A quick-start guide can help when starting with 3D pens to show the best methods in handling the device. To get a better grasp of 3D pens, you can read more about them in our article on how they work and their applications.
(Lead image source: Happy Pen via YouTube)