Whether it’s the ones on your fridge or in your bag, everyone’s familiar with magnets. They’re also essential in everyday devices such as electric motors, microphones, and hard disks where billions of tiny magnets are used to store data.
Magnets also have many applications in your 3D printing projects. Not only can they be used for fun or decorative applications, but they can also be useful for quick, swappable modular designs or even for mesh bed probing. Of course, it’s also important to figure out convenient yet secure ways to incorporate magnets into your printed parts.
In this article, we’ll explore some possible uses of magnets in your 3D printed parts and projects, then go through several effective methods to seamlessly insert them into your prints.
Let’s dive in!

Applications
Magnets are low-cost, simple to obtain, and versatile – perfect characteristics for all sorts of applications. Below, we’ll look at fun and decorative uses before moving on to more functional and engineering uses.
Fun & Decorative
First and foremost, magnets are fun! Do you recall your fascination with them when you first discovered them as a child? It’s only natural that we would come up with fun applications for them. The following are a few examples.
Fridge Magnets
Want to print your custom fridge magnets? Of course, magnets are a must here.
Makers have been prolific in producing fridge magnet designs. You can find an array of options on 3D model repositories. From useful designs like this note toggle, nostalgia-inducing examples such as this Tetris set, to the silliness of this articulated slug, there’s a fridge magnet for everyone.
Fidget Toys
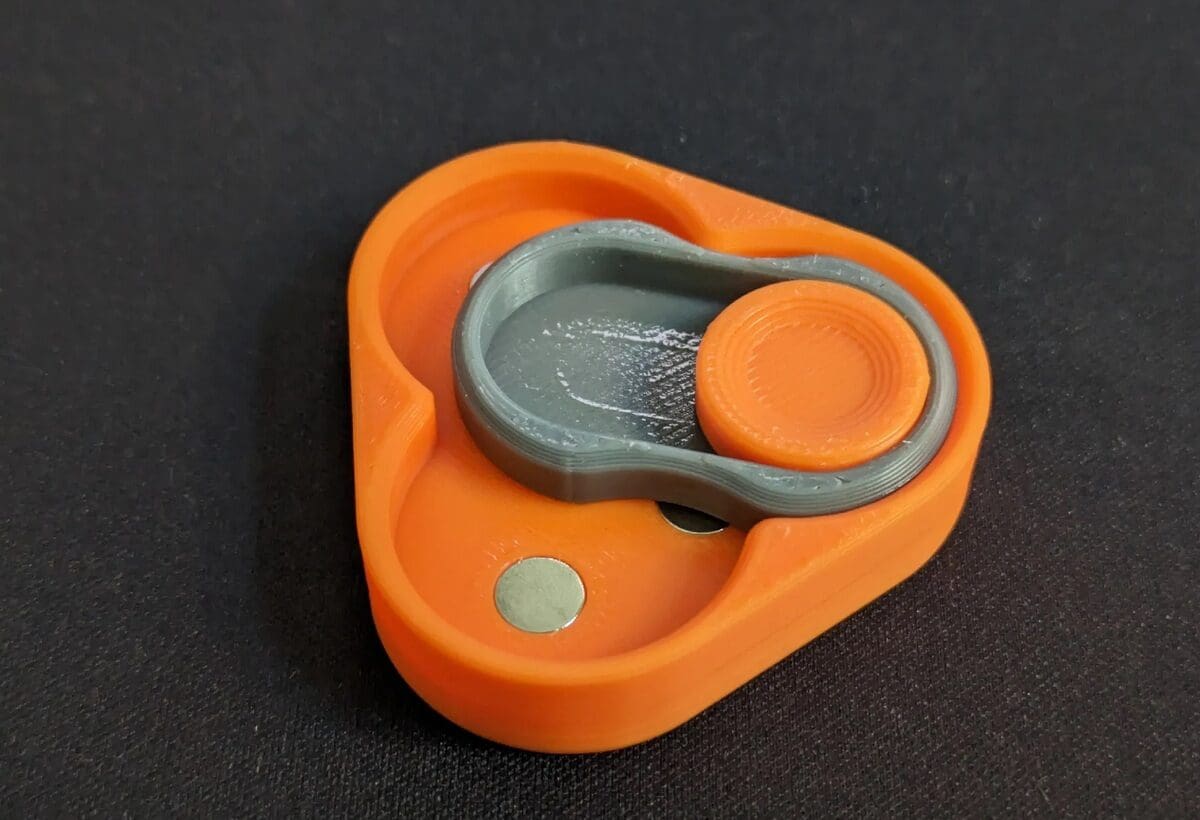
Magnets last virtually forever, and their properties of attraction and repulsion suit a great range of fidget toys. For example, this fidget switch uses magnets that repel each other to achieve consistent and satisfying clicks. Another wonderful toy is this magnetic sliding fidget.
There are many more of these with a quick search on repositories like Printables or Thingiverse.
Chess
If you print chess pieces or other board games, magnets make it really convenient to keep pieces in place. This travel-friendly set is a great example.
Functional & Engineering Uses
Magnets can also be used functionally in your 3D printing projects.
Modular Assemblies
Thanks to magnets, you can quickly customize or swap out modular components in your functional designs. For example, this design is a convenient, customizable dust collection coupling method.
As you might expect, they can also be used for cases and latches that satisfyingly snap shut.
Bed Probes
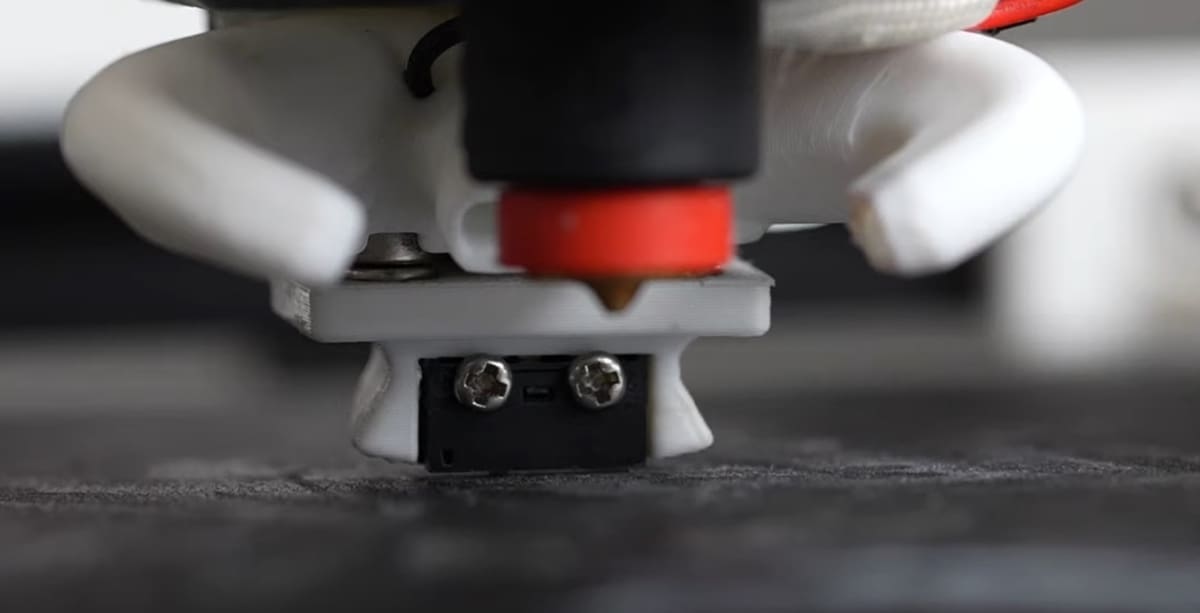
A magnet-based microswitch probe, such as the Klicky Probe and others, cleverly uses magnets as conductors of electricity. It’s a low-cost, mechanical bed probing method that’s highly repeatable, accurate, and not dependent on specific build surfaces. In contrast to inductive probes, a Klicky Probe can mechanically probe and detect all build surface materials. Here’s how it works:
- The toolhead “picks up” (attracts) the probe from a “dock” using its magnets.
- Magnets are used as conductors, and they’re connected to pins on a microswitch. When the microswitch is pressed or released, the circuit is closed or open.
- The magnets on the toolhead are connected to the ports of the mainboard. By detecting whether the circuit is closed or open, the firmware can effectively probe points on the bed.
To see this process, ModBot has a quick video!
Hall Effect Sensors
Instead of using microswitches or sensorless homing, some printers use Hall effect switches, which are activated by a magnetic field. A magnet is placed on the toolhead or gantry for homing, and as the magnet draws closer to the sensor, the magnetic field it senses becomes stronger and will switch into an active state.
How Do I Do It?
There are many ways to incoporate magnets into your 3D printed (or any other) part. Here, we’ll go through four effective methods, ranging from less to more secure mounting:
- Glued fit: The magnet is glued into an oversized hole.
- Compliant press fit: The magnet is held in the hole using friction.
- Screwed: A (usually) countersunk magnet is screwed onto the part.
- Embedded: A magnet is permanently held inside the part.
Depending on your desired application, you can choose the best method for your project.
Considerations
Before beginning to use magnets, which one do you choose? The following are some things you might want to consider:
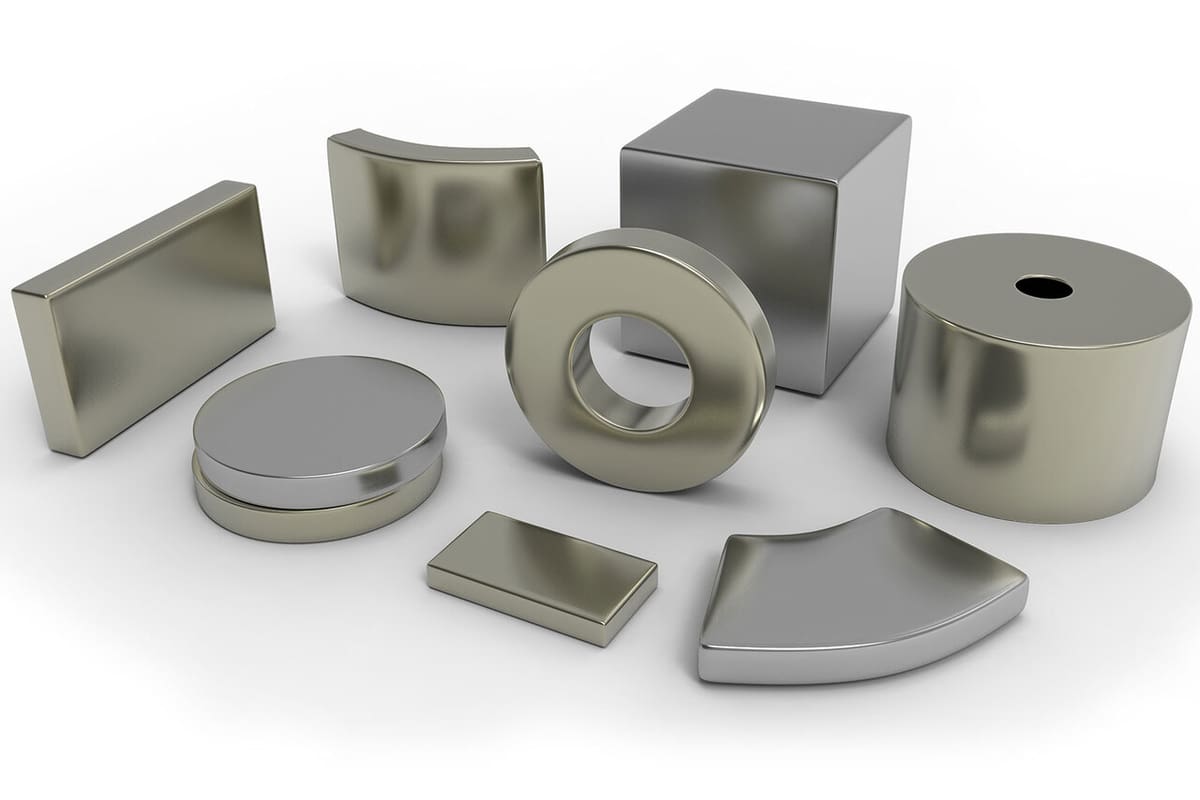
- Shape: Magnets come generally in cylindrical or rectangular formats. Cylindrical magnets are far more popular, as they’re easy to incoporate – as they allow for a more convenient press fit – and are unidirectional. They also come in ring or countersunk formats for a screwed fit, which we’ll discuss more below. Of course, there are also many other shapes that you can use depending on your application.
- Size: Depending on the strength needed for your magnet, choose an appropriate size. Larger magnets will clearly be stronger because they have a stronger magnetic field. Of course, you’ll have to choose the size and shape that fits your desired application. For example, if your part is thin but needs a strong magnet, choose one that has a large diameter but small height (i.e. a thin and wide magnet).
- Material: Neodymium magnets are very popular because they’re very strong (relative to their size and weight) and can withstand quite high temperatures depending on the exact type. Generally, you’ll want to keep a generic magnet below 70 °C long term to preserve its magnetism.
And of course, make sure to insert your magnets with the correct polarity!
Glued Fit
A glued fit is the simplest and most convenient method of magnet mounting. You simply use superglue, epoxy, or something similar to fix a magnet into an oversized hole. Despite being the least secure method of mounting, it’s still plenty strong enough for most applications.
If you choose to glue magnets into your project, it’s essential that you design the holes to be slightly oversized. For example, if you’re using a circular magnet with a diameter of 6.00 mm and height 3.00 mm, considering modeling the hole diameter to be 6.30 mm and height of 3.30 mm.
Of course, you should adjust this value depending on the tolerances of your 3D printer. If your printer has tight tolerances, consider decreasing the value; for looser tolerances, increase the value. This ensures that the magnet can slip in and out of the hole easily.
After printing, dap a drop of glue and press the magnet down firmly. Then, after the glue dries, your part is ready for use.
Compliant Press Fit
A compliant press fit uses the slight flexibility of plastic as well as compliant design features to “grip” the magnet. This is a secure and simple method of mounting that doesn’t require any glue. However, for added security, it’s recommended to also use a drop of glue.
In your design, model the hole the exact size or slightly larger, or smaller, than the magnet depending on the tolerances for your 3D printer. You’ll want to model the hole’s height slightly larger than that of the magnet, though.
Then, add fins or other compliant features so that the hole can expand very slightly. For a more secure hold, use fewer and stiffer fins. The hole will expand less and have a stronger grip on the magnet. However, this also depends on printer tolerances. For example, if the hole is too small, you might not be able to fit the magnet in at all.
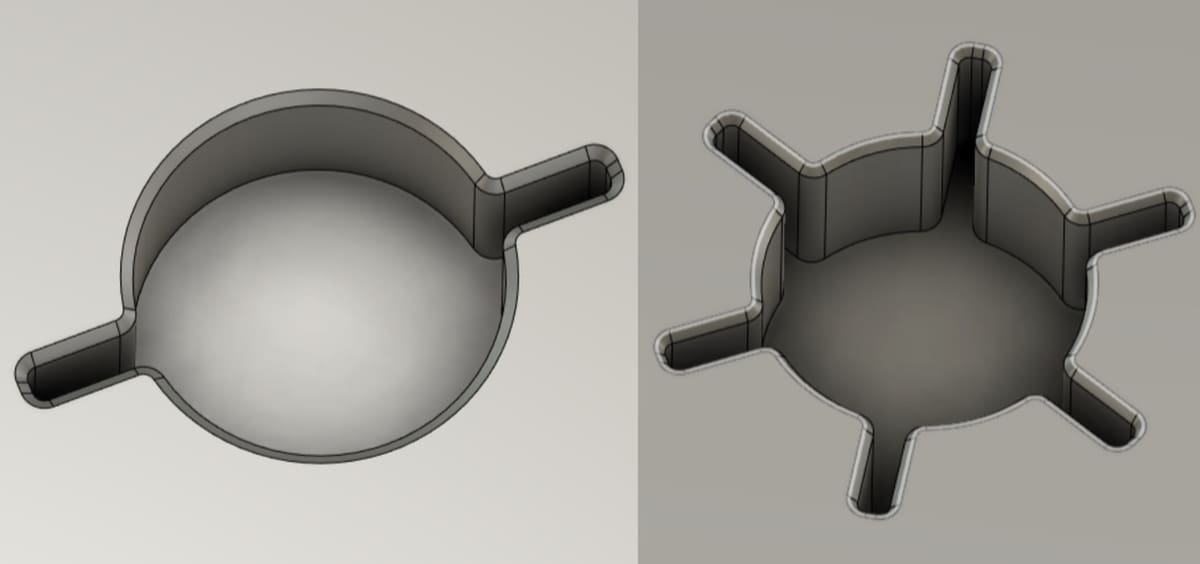
Alternatively, you can model the hole so that the magnet fits into it easily. Simply add more flexible fins, which will allow the hole to flex more. However, this means that the hold will be less secure.
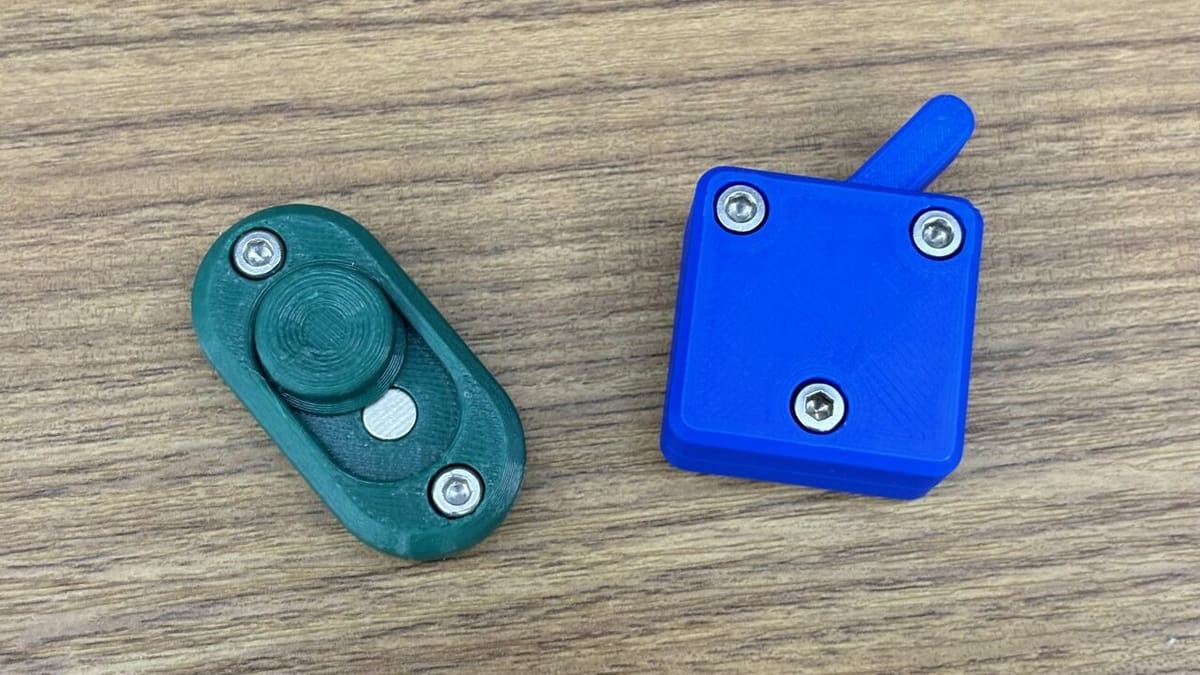
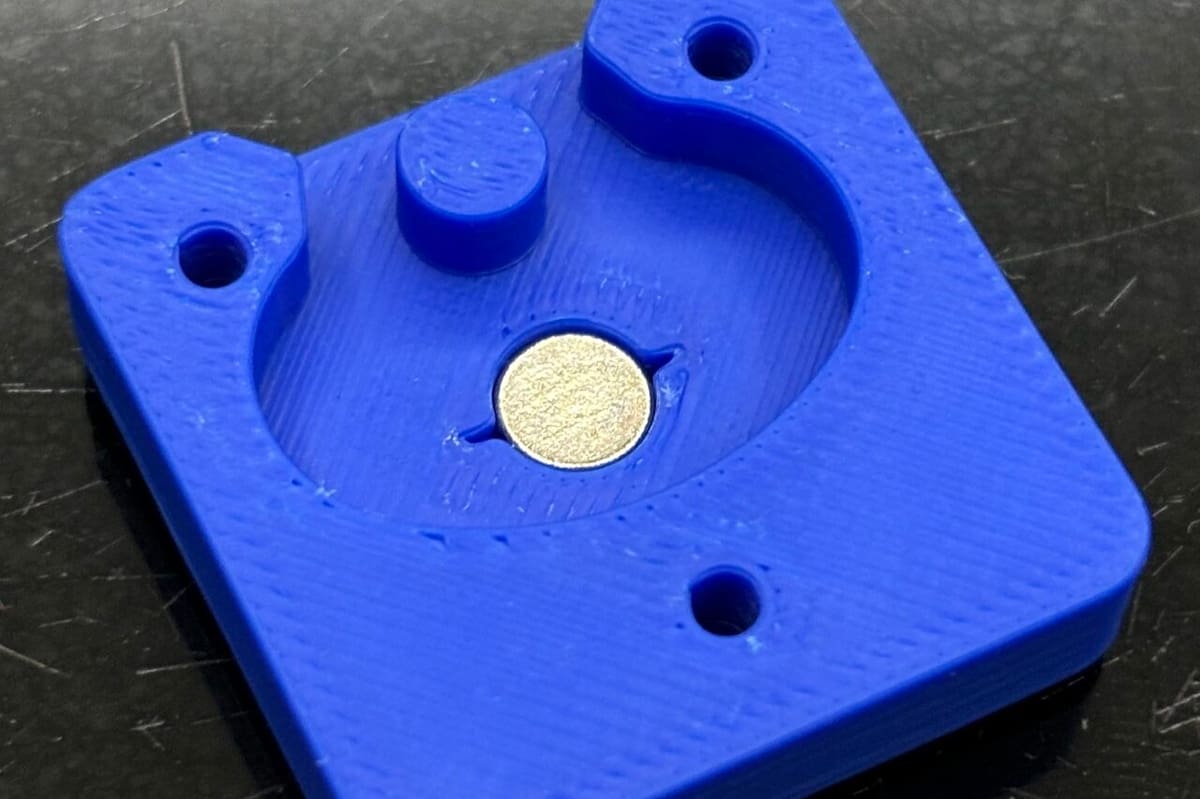
An example of the designs can be found in the picture above. The design on the left shows a more secure and less compliant fit, while the design on the right shows a more flexible and compliant fit. Feel free to play around with other fin styles for compliant holes to get your desired outcome.
After printing, firmly press the magnet into your compliant hole – with a drop of glue if you’d like.
Screwed
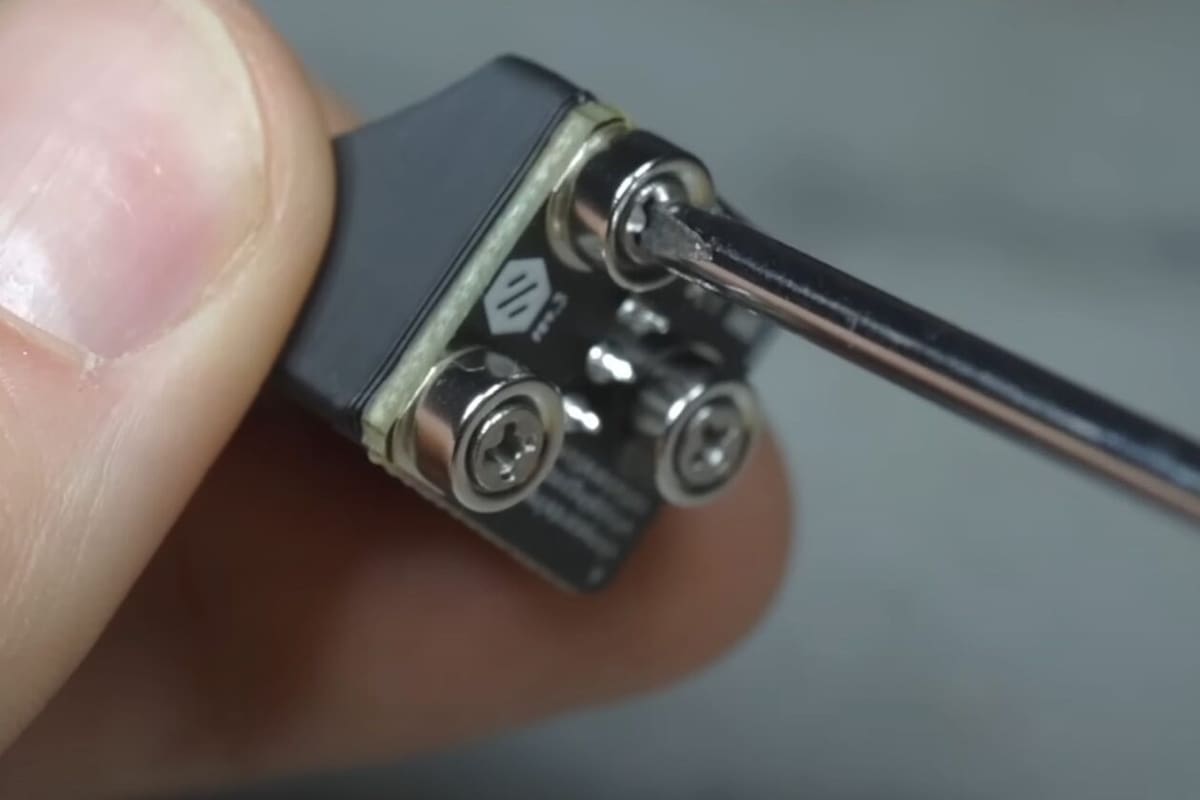
A screwed fit is a very secure method of mounting. Countersunk screws are used to very securely mount countersunk magnets onto the desired part. This method is used when the magnet should be exposed outside of the part (i.e. either for electrical conductivity or otherwise).
For example, the PCB Klicky Probe uses screwed magnets for reliability, security, and electrical conductivity. The YouTuber YGK3D has a great video showing the entire build.
To design a screwed magnet, create holes or other features for the screw in your part. This can be done through many methods, such as a hole for the screw to self-tap into, a hole for a heatset insert, or a slot for a nut.
After printing, screw the magnet into the part. Then, it’s ready for use.
Embedded
Here, magnets are fully embedded into a printed part and cannot be removed or modified post insertion. This prevents them from ever coming loose, but this also means the magnets will be weaker because plastic will be in between the magnet and attracted surface. As such, this method is particularly useful for parts requiring the magnet to be insulated.
To embed a magnet, you’ll have to pause the print at a specific height. We’ve shared guidance on how to do it in Cura, but all modern slicers allow for this setting. Alternatively, you could monitor the print layer heights and pause the print manually at the specific height.
The following is an overview of how to design and print a hole for embedded magnets:
- Model a hollow hole inside your part for the magnet. Similar to the glued fit, the hole should be slightly oversized in all dimensions – for example, diameter and height for a cylindrical magnet – so that it can fit easily.
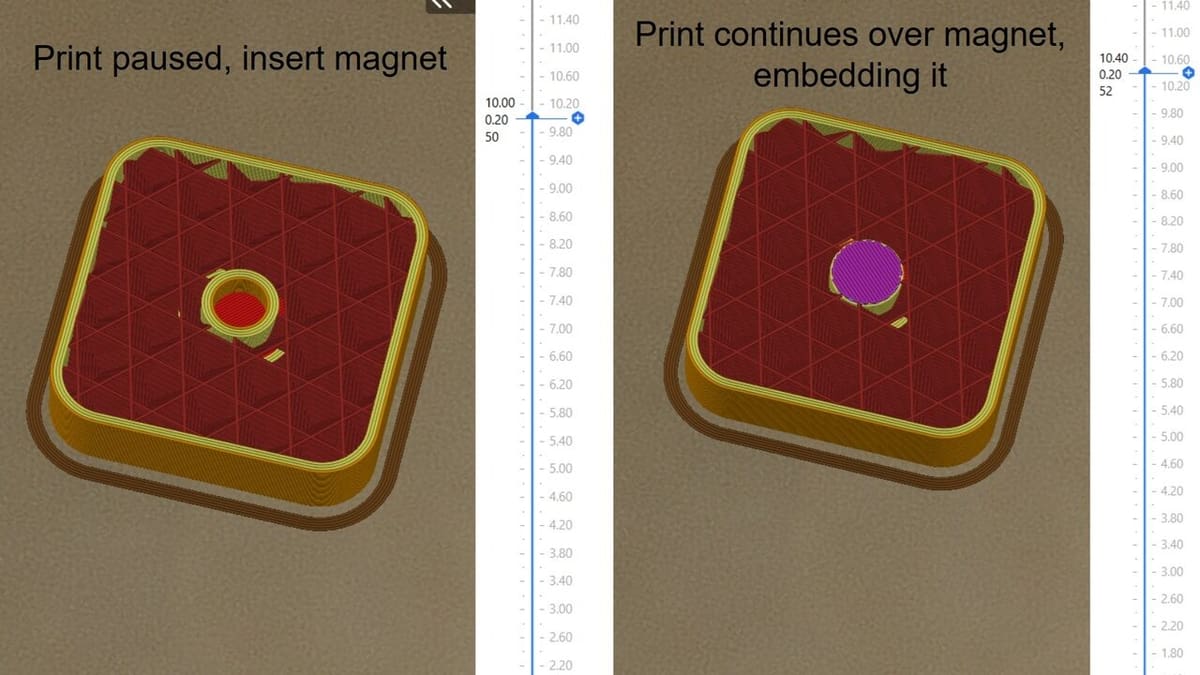
- When slicing, set a height where the print will pause. This height is the layer where the hole has finished printing completely. For example, in the above image, all the layers of the hole have been printed at Z = 10.00 mm. At 10.20 mm, a layer will be printed above the hole. Therefore, we’ll pause the print after finishing layer 10.00 mm.
- After the print is paused, insert the magnets with the correct polarity into the holes.
- After insertion of magnets, resume the print, which will continue over the magnets you have inserted.
You now have a finished part with an embedded magnet, hidden from the outside.
License: The text of "How to Use Magnets in Your 3D Printing Projects" by All3DP is licensed under a Creative Commons Attribution 4.0 International License.