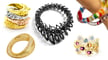
3D printing is a great method for producing one-of-a-kind and personalized pieces. With it, you can make exclusive jewelry and earrings especially tailored for someone else, for yourself, or to mark a special event or occasion.
Many companies create earring models specifically designed for 3D printing, such as Nervous System and Ola. In such cases, not only polymers but also precious metals, such as gold and silver, are used to manufacture the pieces. While these stunning designs have a uniqueness to them that can’t be denied, they may not be exactly what you’re after.
In this article we’ll cover how to make 3D printed earrings at a hobbyist level, using fused deposition modeling (FDM) 3D printers. We’ll present a mini-tutorial with a very straightforward workflow on how to make your first pair of earrings using Tinkercad, a free and easy-to-use CAD tool.
If you want to take the next step and print in a more advanced material, consider outsourcing the production to Craftcloud. With a variety of technologies and hundreds of materials available on demand, your 3D printed earrings will have a professional quality at an accessible price delivered right to your doorstep.
Design Considerations

3D printing usually allows for great geometric complexity and creative freedom. In our case, we will be covering FDM 3D printing, so it’s important to understand the characteristics and limitations of the process, as they’ll also shape the design.
Models that are meant to be 3D printed with an FDM setup have to take into consideration the challenge of printing very thin walls and small details, as well as steep slopes and overhangs. In addition to this, unconnected pieces would need some strategy for assembly. This can be done by printing the parts individually and then looping together, adding extra hardware such as small hoops, or designing with a chainmail technique.
The use of supports can also impact the finishing of a piece, so in general, while they’re a helpful resource, it’s best to try to avoid them as much as possible.
And it’s not just the limitations; a good design should understand the process’ characteristics to make the most of them. When it comes to 3D printing, for example, infill patterns can yield unique designs.
Of course, behind the process, you have to consider how the earrings will be worn. If you’re going for stud instead of dangling ones, then the designing stage needs to take into consideration the space needed for the pad to be glued to it and should avoid adding the top loop.
Along with the above, the material intended for the piece can influence the result. For example, transparent filament can reveal the infill pattern, leading to unique outcomes. Let’s see a bit more on material choices.
Material Considerations

One might choose to manufacture earrings using gold or silver by outsourcing production to a 3D printing service. Many times, the parts aren’t 3D printed straight in the specific metal; lost wax casting is used. With it, in a nutshell, a model is printed in casting wax using an SLA or other resin-based process, and it’s then used to make a mold to cast the metal.
Other polymers, such as nylon, can also be used to 3D print earrings when working with technologies like selective laser sintering (SLS). Because of the process, very fine details can be printed.
While these technologies offer more professional-looking and more detailed results, as well as a wide range of material options, they are also, understandably, more expensive.
Home or hobbyist setups can also include resin-based printers, which can also offer better aesthetic results when compared to FDM – in general. But it’s also a more expensive and involved process altogether.

FDM shines in the range of materials, such as PLA, ABS, and PETG. PLA has many metallic colors, such as copper, silver, and gold, all of which would achieve interesting effects, besides the regular colors that can be applied to make a variety of pieces. ABS, although more common for prototyping and functional parts, can produce reliable and durable accessories. PETG can provide long-lasting prints, and the transparent options can look very interesting. Other material choices can make earrings pop, like glow-in-the-dark as used in this design, dual-color filament as exemplified here, and let’s not forget silk and marble filaments.
Regarding safety considerations, we haven’t come across any reports or official information warning against any particular filament (at a hobbyist level), but countless makers report using PLA, PETG, and ABS on their creations.
Still related to understanding the FDM process characteristics and making the best use of them, filament changes can lead to colorful creations and fun designs. This can be added via a layer change or with a multicolor setup. And more uniqueness can be added to earrings with the help of the variety of ways to post-process FDM 3D prints.
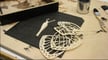
Post-Processing

While standard FDM out-of-the-printer finish works well in many ways, sometimes a more thorough refinement might be welcome.
In general, FDM 3D printers can reach a minimum layer height of 0.1 mm, with some going even lower than this. Even though this can yield impressive results, depending on the particular design, an even cleaner look or a different effect might be wanted.
Besides ABS, which can be vapor smoothed, post-processing would encompass sanding and painting. This includes careful support removal (if the use is unavoidable), gluing parts together, applying a good coat of primer to make the geometry pop, and finally painting. To learn better how to do it, check our article on painting 3D prints.
Other post-processing techniques that can provide stunning effects are hydro dipping and electroplating.
Having gone over general design considerations, possible materials that can be used, and what post-processing methods are available, we’ll dive into the tutorial on how to design a simple pair of earrings in a few steps steps.
How to Make 3D Printed Earrings
Next, we’ll show how you can start making your own 3D printed earrings with a simple technique. We’ll make a heart-shaped pair of earrings using Tinkercad.
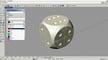
Tinkercad is a free easy-to-use and beginner-friendly 3D modeling online program.
- To start with, you’ll want to create an account and log in.
- On Home, click on Create (top right) and then select “3D Design” from the drop-down menu that will appear. The 3D design interface will open with a new file.
Create the Base Shape

Let’s create a basic shape for our earring.
Here, we’ll model starting from a basic shape, but you can start with an SVG design as a base. If you go this way, keep in mind that some designs might be copyrighted. So always check this, especially if you intend to sell the earrings you create. Good sources for SVG files include Pixabay and Freepik.
- On the right side panel, select Basic Shapes (1) from the drop-down menu.
- Roll down the shape options until you find the Heart shape (2).
- Click and drag the shape to the modeling area; a heart shape will be created and a pop-up menu will appear at the top right. Confirm that the Solid option is selected (3).
- Adjust the size of the shape either by clicking and dragging the squared white handles (4) or by double-clicking the dimensions (5) and typing the desired value. For our tutorial, we’re defining 35 mm as width, 30 mm as length, and 4 mm as height.
Create a Hollow Area

Now let’s create a hollow area in the base shape.
- Add another heart shape, but now choose the Hole (1) option in the pop-up menu.
- Adjust the size of the hole shape so that it’s smaller than the first one but not shorter, and position it in the middle of the base shape.
- Select both shapes by holding the Shift key and use the Align tool (2) (shortcut ‘L’) to align both shapes. Black circle handles show up to align the shapes by the left, right, or center, for the three directions. We’ll align the shapes by the width (3).
- Now, with both shapes selected, click the Group tool (shortcut “Control + G”). The shapes will be joined together, leaving a hollow heart as a result.
Create a Holding Ring

Let’s use the Tube shape to create a ring for the earring hook.
- Click and drag to add a Tube (1) to the modeling area. On the pop-up menu (2), notice that the Tube shape has more editing options than the Heart. These include: Radius, Wall Thickness, Sides, Bevel, and Bevel Segments.
- Adjust the size of the Tube either by the white handles or by the Radius parameter. For example, we’ll set the Radius to 3 mm, the Height as 4 mm (the same as the hollow heart), and we’ll adjust the wall thickness to 2 mm. The Sides option configures how many line segments form the Tube. We’ll increase Sides to 50, so we have a more detailed ring. We’ll also set the Bevel as 1.5 mm and the Bevel Segments to 10. We’ll end up with a tube with rounded external edges.
- Position the ring and the heart overlapping their edges. You can rotate the shape by the curved arrow icon (3). Makers should keep in mind the angle of the loop for the earring itself and the design, so while worn the earring could face forward or to the side.
- Select both the ring and the heart and merge them with the Group tool.
- Once finished, select the model and click Export (4). In the pop-up window choose “STL”, and the model will then download to your hard drive.
- From here, you just have to open the STL file in your preferred slicer and prepare it for 3D printing.
General 3D Printing Tips

When 3D printing earrings, a few key considerations can improve print quality and simplify post-processing.
Model orientation on the build plate affects layer visibility and strength. Laying earrings flat minimizes visible layer lines, while angling them can enhance detail resolution. If using color changes at height or embedding metal loops, ensure the paused layer aligns with a clean transition point. And for a smoother surface on your top layers, you might want to enable ironing in your slicer.
Fine details can be challenging with FDM 3D printing, but slowing the print speed, ideally below 45 mm/s, can improve surface quality and prevent wobbling, especially for thin or intricate parts. In particular, this can be necessary for materials like silk PLA, which generally needs slower printing speeds than standard PLA.
Bed adhesion helpers, like a brim, can help depending on the shape and size of the design, but can be difficult to remove from small contact points. If using a material that adheres well, such as PLA, opting for a skirt can reduce post-processing.
And it’s also important to consider hardware integration when designing earrings. Holes or loops should be well-sized for hooks or rings. While loops are easier to print flat, they can also be printed perpendicularly without supports if designed carefully.
By keeping these factors in mind, you can optimize your prints for durability, aesthetics, and ease of wear.
License: The text of "It’s Surprisingly Easy to 3D Print Earrings!" by All3DP is licensed under a Creative Commons Attribution 4.0 International License.