How to Set Up Marlin & BLTouch for Auto-Bed Leveling

Get Marlin and the BLTouch working together! Check out this detailed guide on setting up Marlin auto-bed leveling.
Hands Off
One of the more tedious tasks of preparing a 3D print job is leveling the bed. Manual leveling is no fun, requiring repeated adjustments in close proximity to all the hot parts of a printer. That’s probably why automatic bed leveling (ABL) became such a popular feature so quickly: With a sensor installed and configured, the nozzle automatically starts at the perfect height across the entire bed, with no manual intervention necessary.
If you’re using Marlin firmware, configuring it for auto-bed leveling can be a twisted and confusing path.
For anyone who’s unfamiliar with modifying and flashing firmware, we’ve got a solid, in-depth tutorial on the subject. In the meantime, one particularly relevant takeaway is that much of the configuration process has to do with comments:
- A commented line in the Marlin code begins with two slashes: //
- A line that begins with two slashes will be ignored. In other words, no attempt will be made to execute it.
- A line is active code when there are no slashes.
Now that we know a little bit about what awaits when adjusting firmware, let’s get started! In this article, we’ll walk you through adjusting Marlin to work with your ABL sensor, using the BLTouch as the example sensor. (If you’re using another device, there may be slight differences.)
Before We Begin
As a general disclaimer: Any changes to your firmware can result in unforeseen and unfortunate consequences, potentially including hardware damage. For this reason, always make a copy of a working configuration and proceed with understanding and caution.
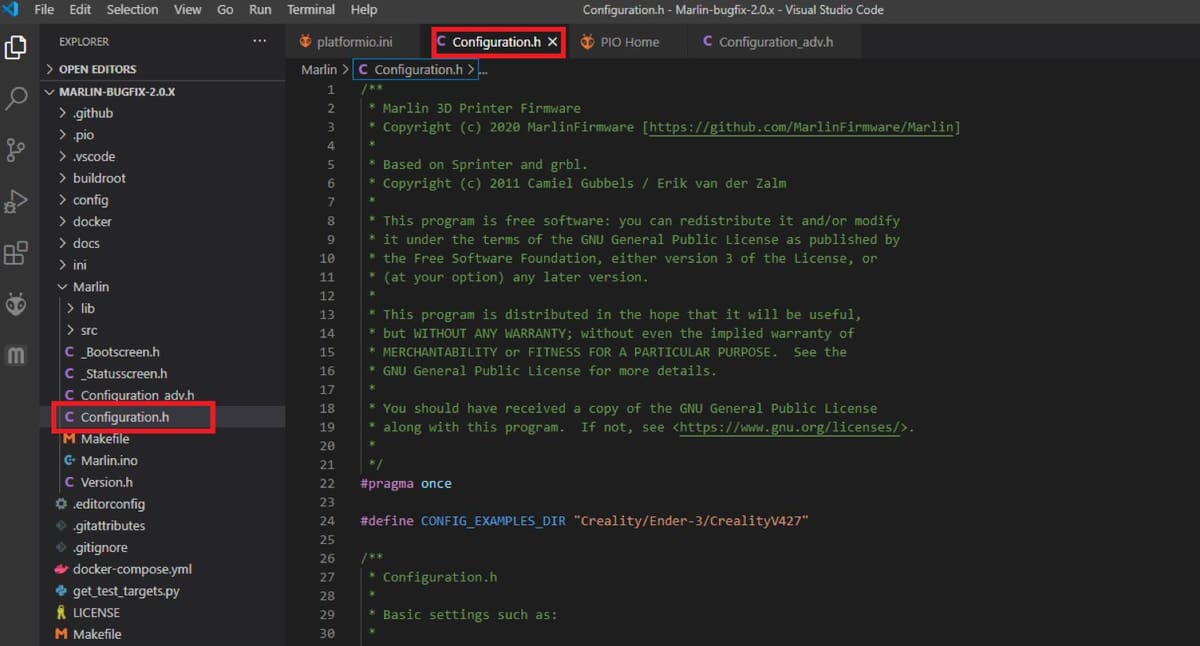
The changes will be made in Marlin’s “Configuration.h”. In case you need a starting point, the firmware package includes a folder with example configurations for many popular 3D printers.
Auto-bed leveling in Marlin spans roughly a quarter of the configuration file and wanders through several sections while skipping others. There can be some extensive gaps between the important sections, but we’ll point out landmarks along the way so that you can stay oriented.
Electrical Settings
Endstops
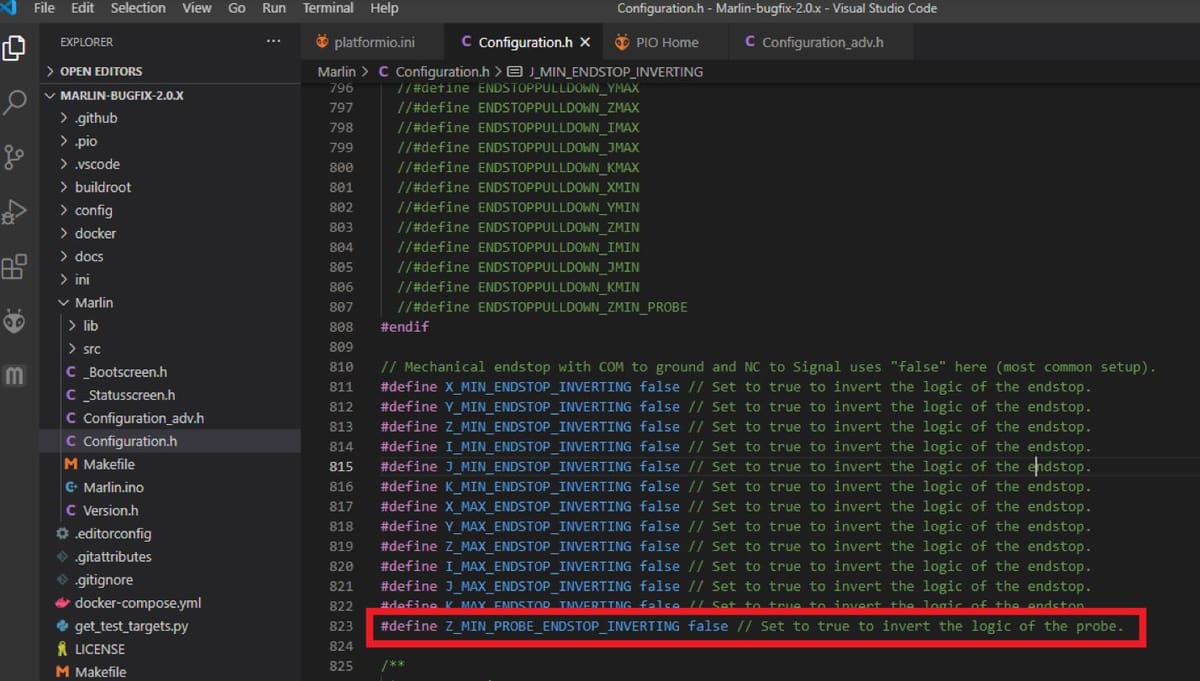
Our journey begins about a quarter of the way through Configuration.h under “Endstop Settings”. What we want to do here is set some electrical characteristics of the Z sensor.
Since the microcontrollers typically used for 3D printers have internal pull-up resistors, you probably don’t need to concern yourself with these “ENDSTOPPULLUP” lines unless you’re having sensing issues. If so, you can try uncommenting them.
The “ENDSTOPINVERTING” lines configure whether the triggered sensor sets a high or low signal. The rule of thumb here is that, if you have an NPN-type sensor, set “Z_MIN_PROBE_ENDSTOP_INVERTING” to true. And for a PNP-type sensor, set both “Z_MIN_PROBE_ENDSTOP_INVERTING” and “Z_MIN_ENDSTOP_INVERTING” to false. For example, a moving pin probe like a BLTouch would be set to false.
Whatever you do, be sure to test that your sensor actually senses proximity before you start moving your bed or extruder assembly. That way, if you get any of it wrong, it shouldn’t cause any problems.
The Z Probe
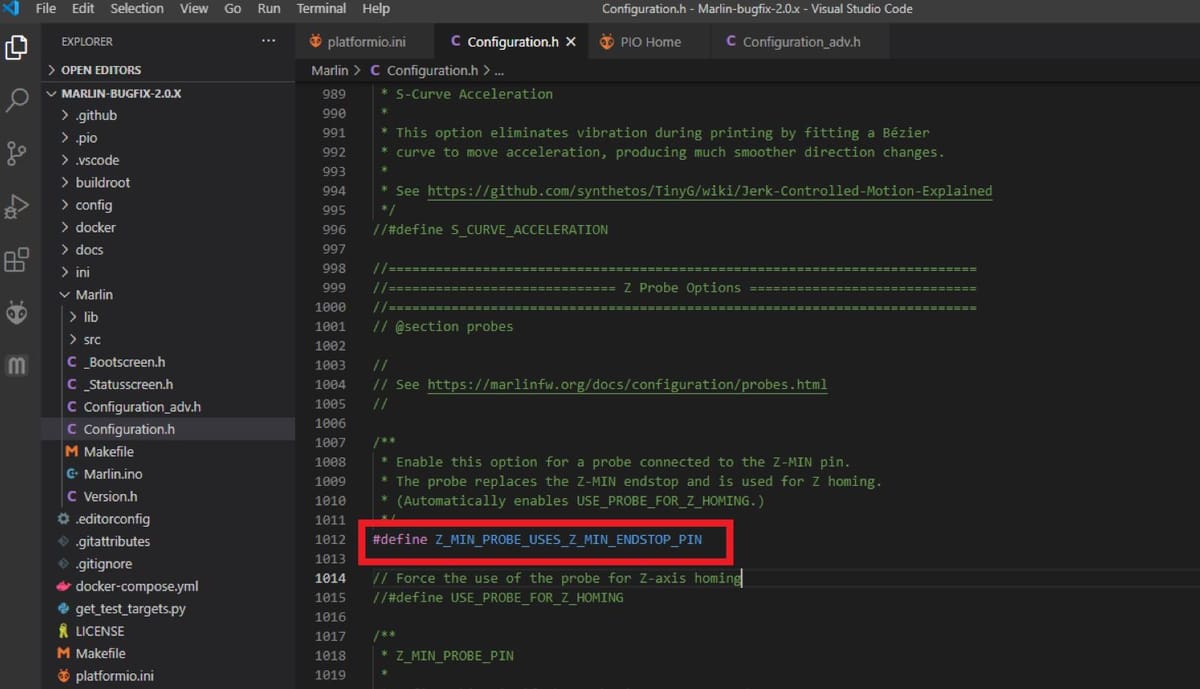
Next, we’re going to skip quite a bit until we get to the Z probe options. This is where we define a few more electrical and some mechanical aspects of the sensor.
First, we need to indicate where the probe is connected. If the sensor has its own dedicated port, we would uncomment “Z_MIN_PROBE_USES_Z_MIN_ENDSTOP_PIN” and add the pin number at the end of that line. If it replaces an endstop, then that line would be commented and we would uncomment “Z_MIN_PROBE_ENDSTOP” instead.
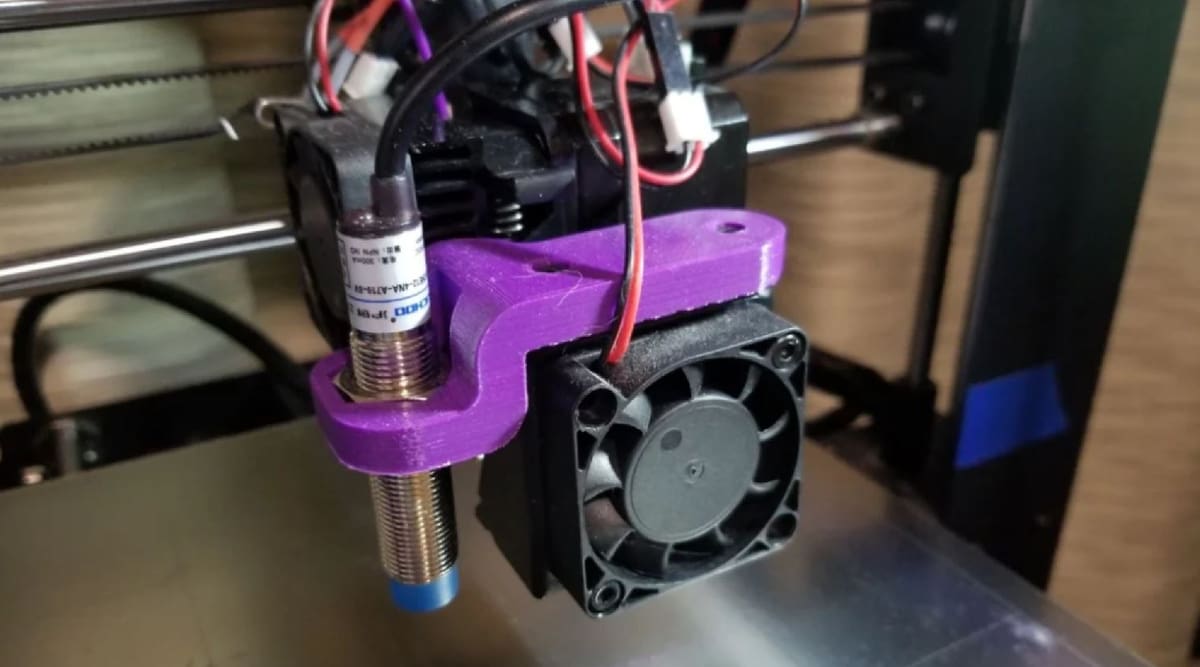
If the sensor has no moving parts, then “FIX_MOUNTED_PROBE” is uncommented a bit further down. On the other hand, if your probe has some sort of servo mechanism which swings an arm, the servo port and Deploy and Stow angles are the next options to uncomment and set.
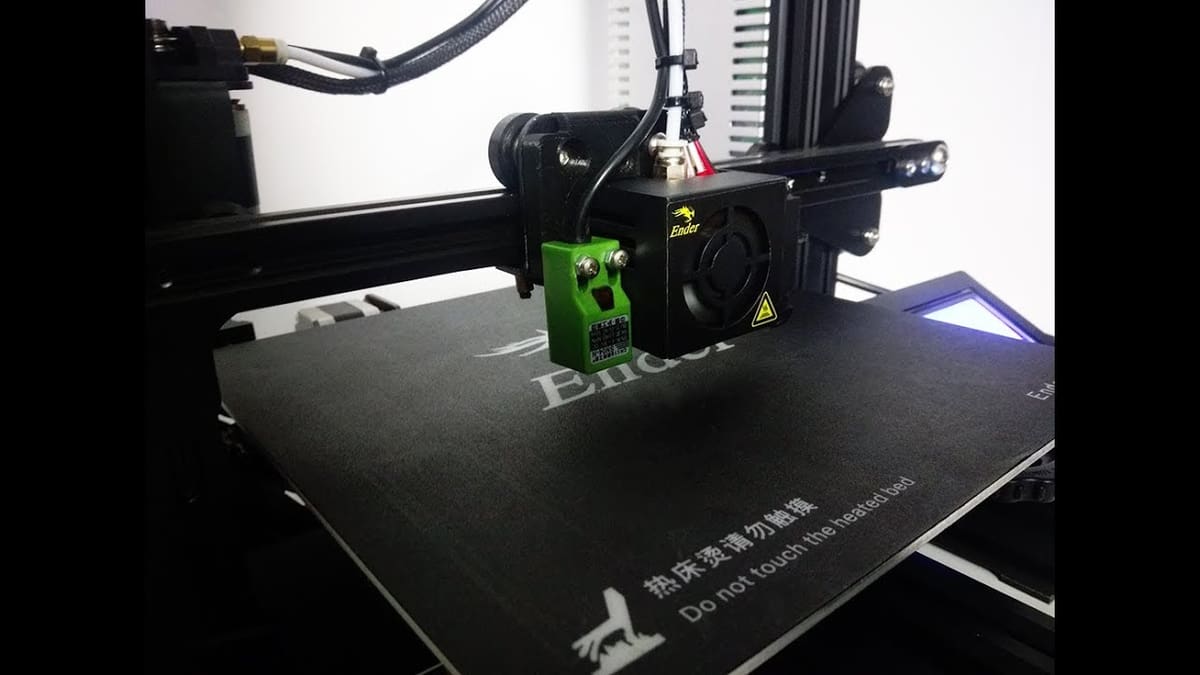
The settings for a BLTouch are nice and easy. Just uncomment the BLTouch line. You don’t have to change the delay unless you’re having issues with the pin getting caught or being inconsistent.
And finally, starting with the probing heaters line, we come to an area that’s for troubleshooting things like vibration issues and configuring somewhat exotic hardware. As a rule of thumb, if you don’t know why you need to go there, you probably shouldn’t.
Everything in Its Place
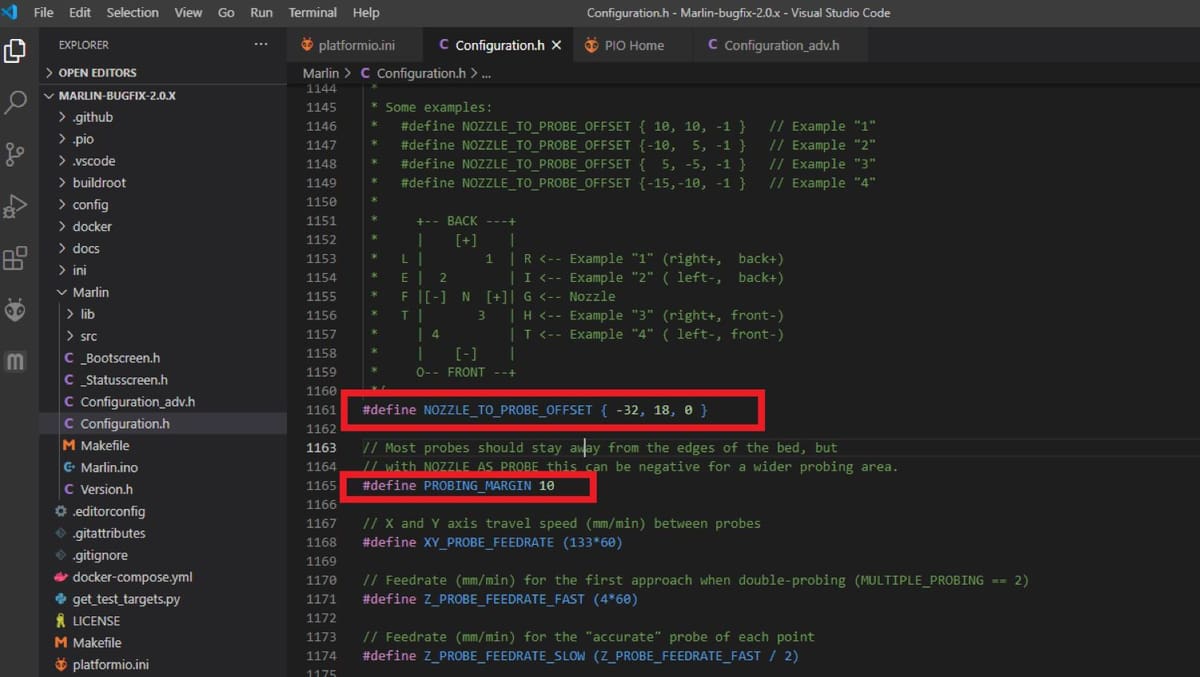
We’re still under “Probe Options”, but there’s a special landmark to check out next. One of the things we need to examine in Marlin auto-bed leveling is some ASCII art that defines how to describe where the nozzle and sensor are in relation to each other. The takeaway here is that, if your sensor is in front or to the left of the printer’s nozzle, then the X and Y offset values will be negative.
For the X and Y values, measure from the point of the nozzle to the center of the sensor. Try to be as accurate as possible. Alternatively, you can set Z to 0 for now and fill it in later or leave it at 0 and save the value to your controller’s memory after setting the Z offset.
We also need to examine “PROBING_MARGIN 10”. It should already be uncommented, but you’ll want to check that 10 mm gives you enough clearance from the edge of your bed. (Lowering this value will level more of the bed’s area.)
Then, we skip a few lines (about the speed of probing and how many times the sensor probes a spot). There should be some default position rest positions, stepper motor and servo defaults, and other defaults that work fine in typical situations. You can adjust these later if you please, but none of it needs to be addressed at this time.
There’s also a repeatability test that you don’t need to keep enabled on your LCD display.
Note: As you go through Configuration.h in your Marlin auto-bed leveling journey, examine the comments along the way and decide if they apply to your situation. In most cases, defaults are where you need to be.
And with that, we’re finally out of the probe options. Nothing else concerns us until we get to “Bed Leveling”.
Bed Leveling Settings
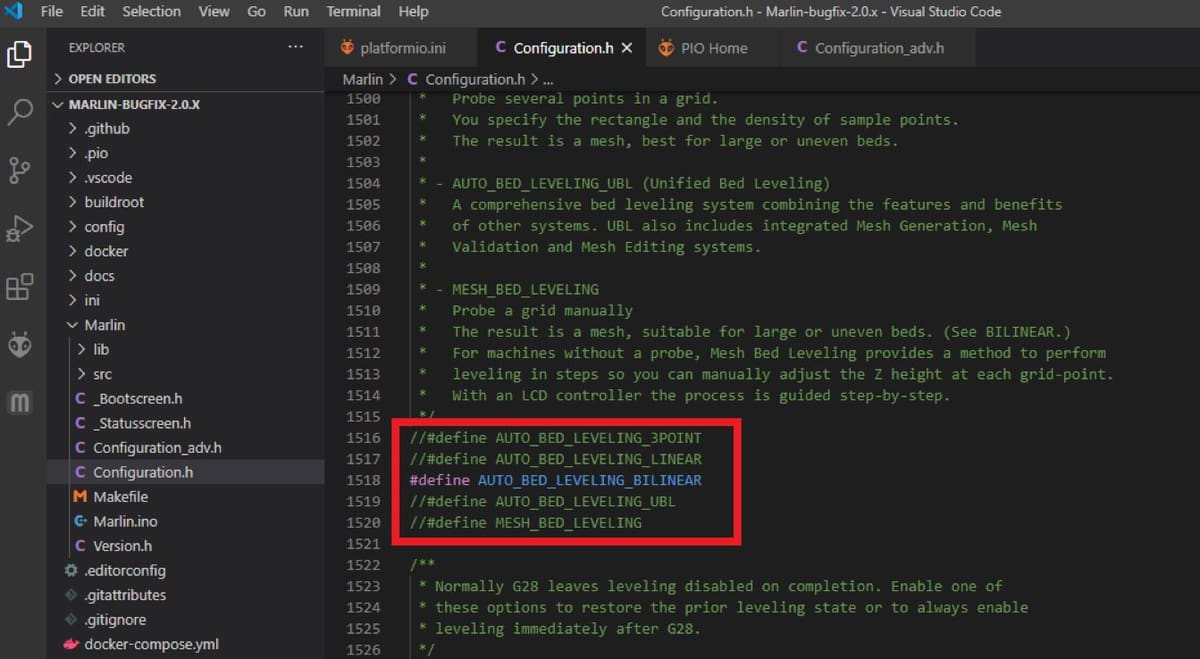
Next, let’s set the pattern and protocol for the bed leveling process.
You could choose “AUTO_BED_LEVELING_3POINT” or “AUTO_BED_LEVELING_LINEAR” if you’re certain that your bed is absolutely flat with no warps or uneven spots. If you’re not so sure, Marlin auto-bed leveling lets you compensate with “AUTO_BED_LEVELING_BILINEAR”. Meanwhile, “AUTO_BED_LEVELING_UBL” is similar but more advanced, letting you create a mesh diagram of the high and low sections of your bed.
For most, linear and bilinear would be good choices. (Check out this video on the manual mesh bed leveling process.) Be sure to uncomment your method of choice.
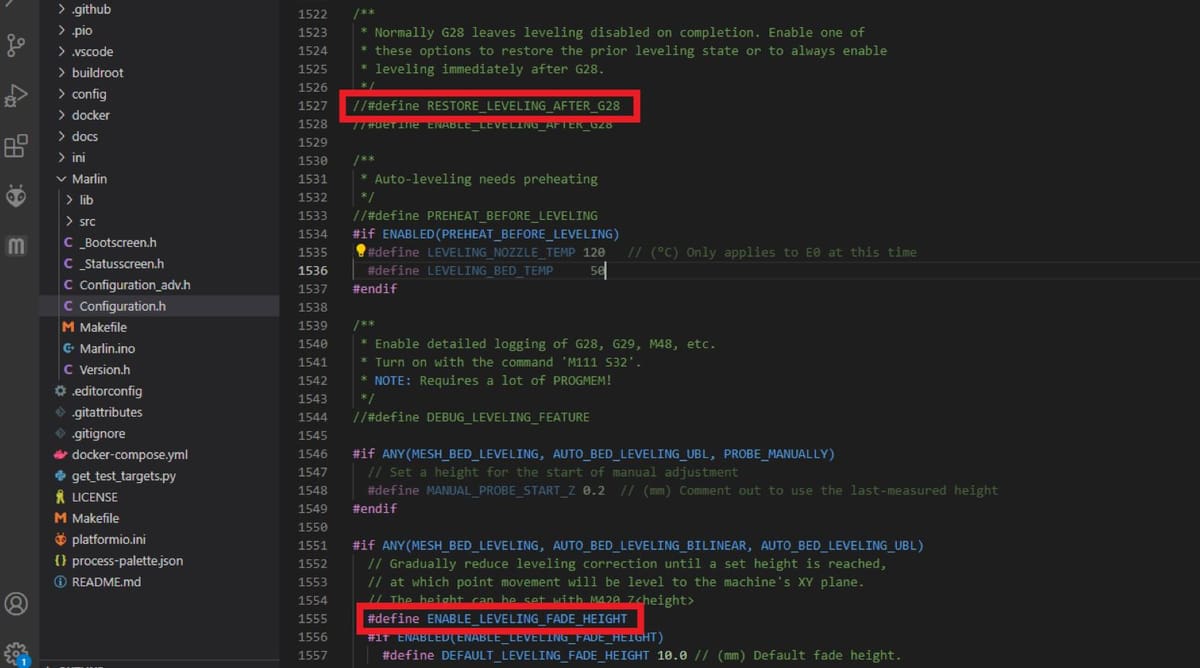
The G28 command sets your printer’s carriage to the home position, which is the last thing that happens before printing starts. The problem is that issuing a G28 clears the leveling information that’s been collected. So we have to uncomment “#define RESTORE_LEVELING_AFTER_G28”.
After the first layer or two, your bed shouldn’t affect the layers of your model. That’s why “ENABLE_LEVELING_FADE_HEIGHT” is uncommented. The default value is 10, and this should work well. (A lower value might be more noticeable with small prints.)
The “Mesh Validation Tool” is a bed test that prints a grid of squares across your bed. Enabling it puts the option in your LCD display. If you use it, you’ll also have to set the layer height, nozzle diameter, and temperature settings for your filament.
Deeper Bed Settings
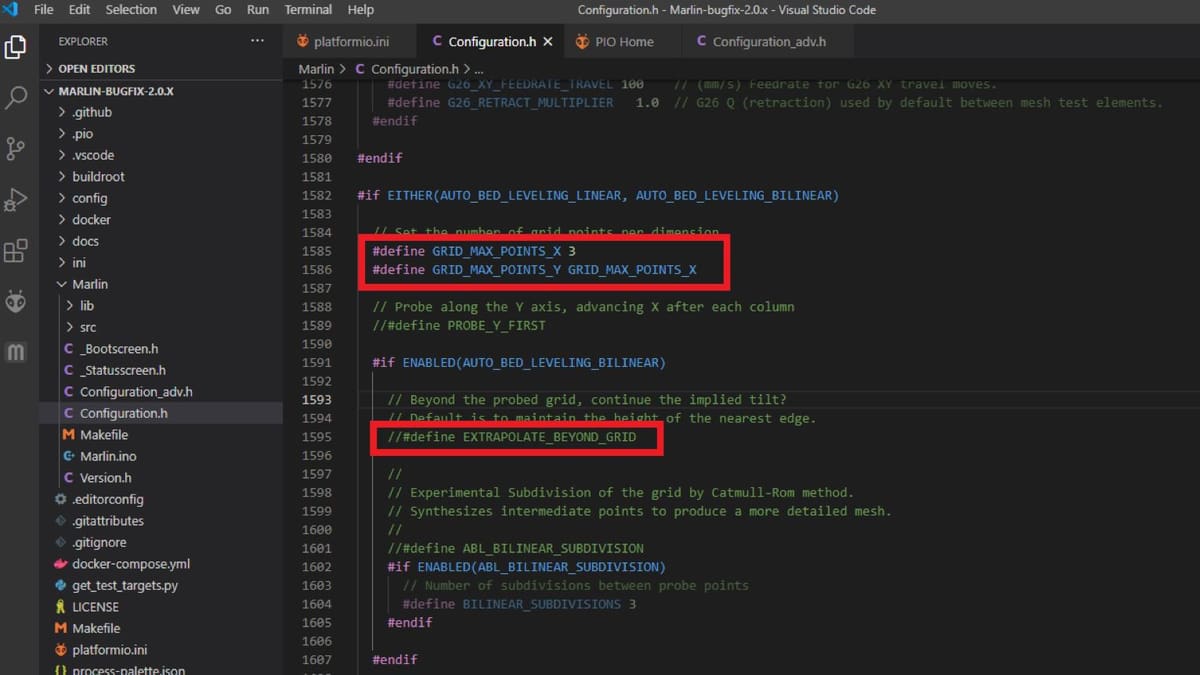
Next, we define the grid by the number of X and Y points. A 3 x 3 grid is standard for a square bed, but you could add a row or column for a rectangular grid. By default, the Y value (rows) is set to the X value (columns), but you could also define each separately with different numbers. Just note that increasing the number of points increases the size of the program your controller needs to run, which could potentially result in a crash.
Now, we set the restrictions for where our probe is actually able to reach without running over the edge or slamming into something. Each line should be uncommented and the X or Y values for minimum and maximum positions entered here.
An offset probe can’t make it all the way from front to back or end to end, so if you’re using bilinear leveling, you’ll probably want to uncomment “EXTRAPOLATE_BEYOND_GRID”. The next section enables a more advanced variation of bilinear probing that you can experiment with if you choose.
Finishing & Final Thoughts
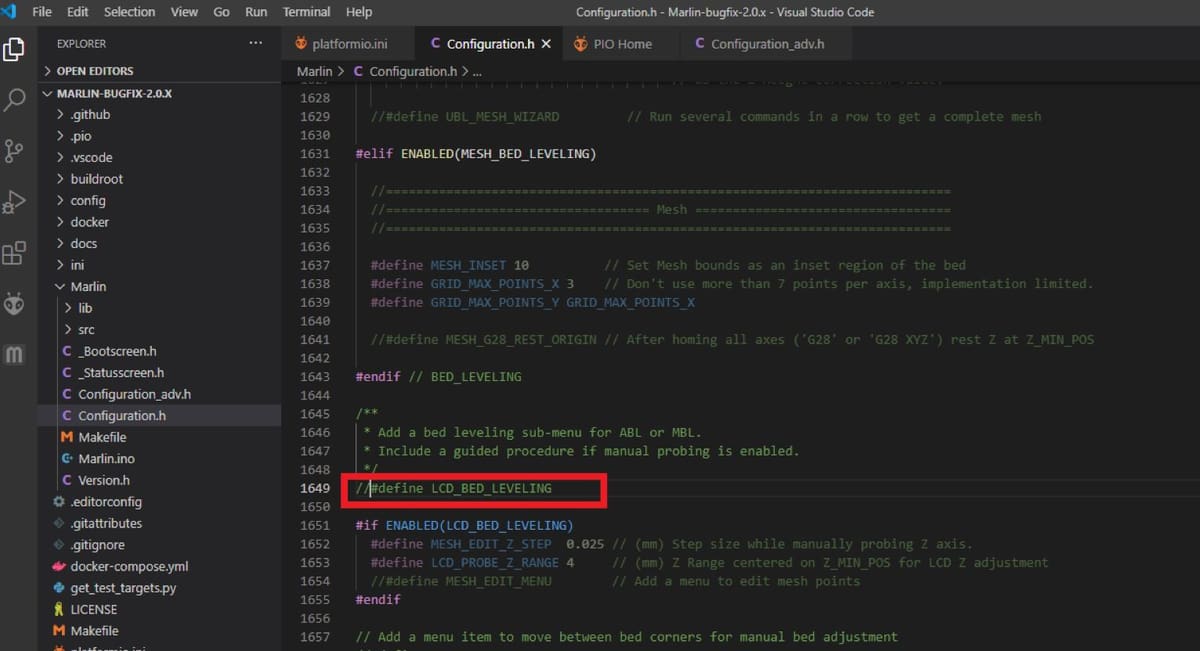
Thankfully, there’s not much left to do at this stage. If you’re using universal bed leveling, things can stay pretty much as they are in that section. Mesh leveling, as stated earlier, is not an automatic process. The only thing left to decide is if you want more advanced leveling options on your LCD menu. If so, then uncomment “#define LCD_BED_LEVELING”.
Lastly, as a sort of aside, consider activating the “BABYSTEP_Z_PROBE_OFFSET” setting in “Configuration_adv.h”. This will allow you to set your Z-offset in micro-steps, which is more precise.
And so we finish our journey of Marlin auto-bed leveling configuration at roughly the half-way point of the Configuration.h file.
Like many things related to Marlin and 3D printers in general, there are a lot of options to account for the variations between printers, probing methods, and probe hardware. But you only need concern yourself with the sections that apply to your situation. If you understand your equipment and make your way carefully through the options while heeding the advice in the comments, configuring Marlin for auto-bed leveling is a straightforward task.
Lead image source: funylilman via Thingiverse
License: The text of "How to Set Up Marlin & BLTouch for Auto-Bed Leveling" by All3DP is licensed under a Creative Commons Attribution 4.0 International License.