
HueForge: What Is It & How to Use It to Create 3D Prints?

Bring 2D images to life with HueForge 3D prints! Read about HueForge's features, slicing steps, and calibration tips for stunning creations.
By now, you’re probably accustomed to the gorgeous, highly detailed, sculpture-like models you see all the time in the 3D printing community. There’s no shortage of artistic and creative design in all categories. You can find just about anything, from D&D figurines and miniatures to aesthetic decor pieces and functional designs that’ll make your life easier.
But you may have yet to be introduced to the art of using of 3D printing to magnify the beauty of the humble 2D image, and that’s where HueForge comes in. This powerful software can turn almost any 3D printer into a multicolor printing powerhouse – and we’re here to guide you through it!
In this article, we’ll go over what HueForge is, a few things you might want to keep in mind before you get started, how to add the program to your setup, how to create a print, and we’ll wrap things up with a few tips and tricks. Ready to add depth and color to your prints?
What Is It & How Does It Work?
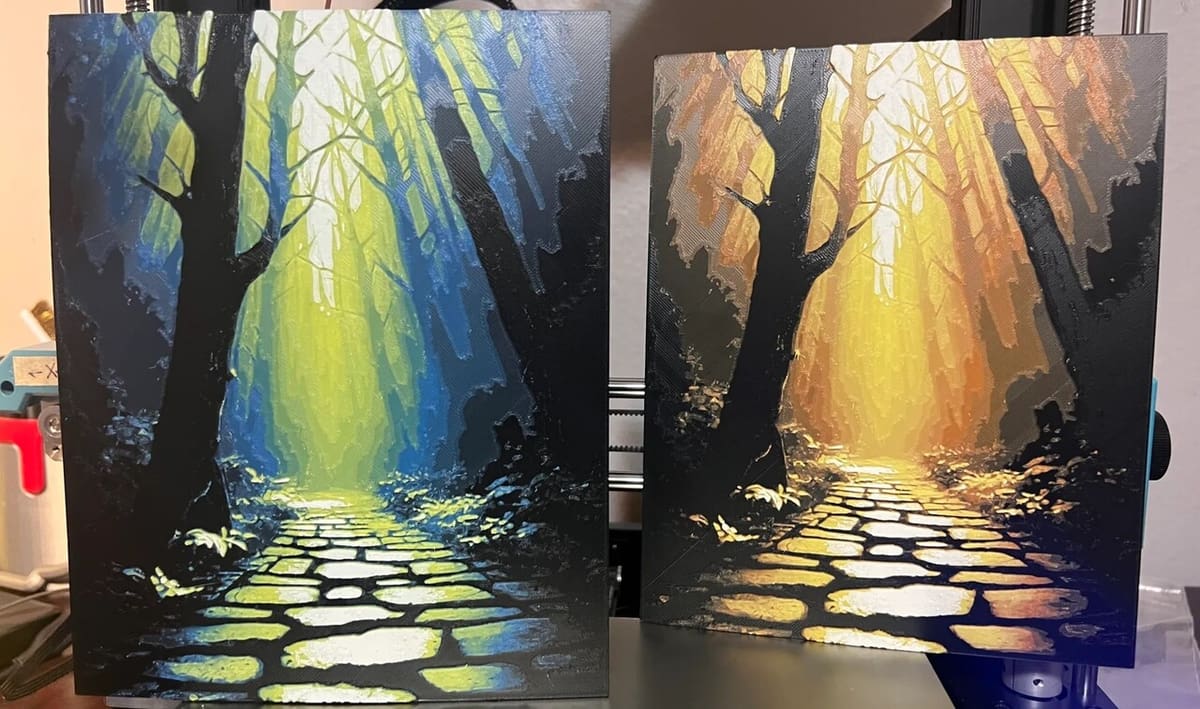
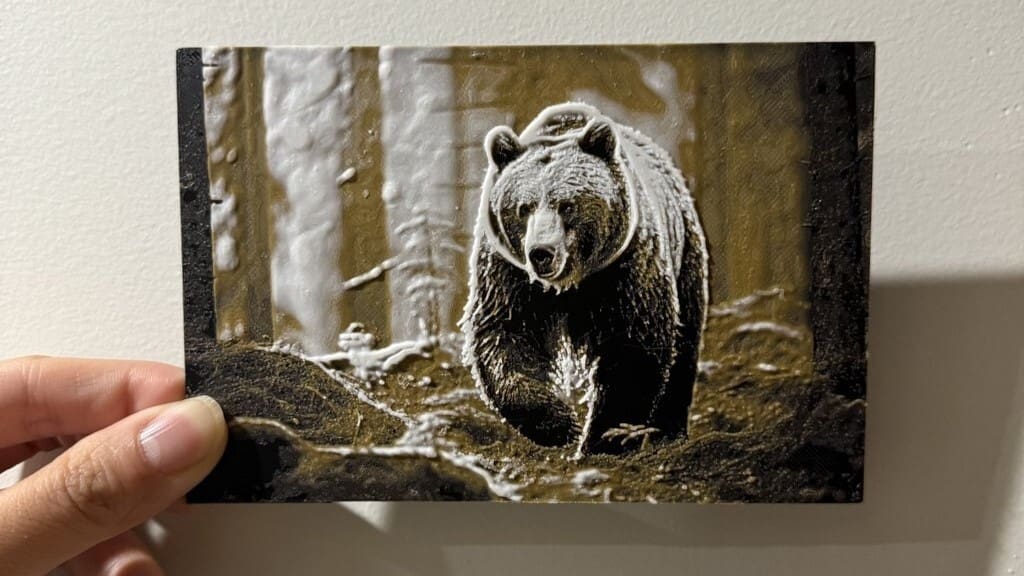
In simple terms, HueForge converts 2D images into multicolor 3D printed objects without the use of multicolor printers or setups. How do you create color complexity without extruding multiple colors? By stacking different color layers of filament on top of one another. Due to the inherent translucence of filament, the stacked layers combine to form different gradients and blends where the light passes through. Within this stacking, the magical illusion takes shape.
HueForge calculates the precise thickness and blending needed to produce the correct color gradients and ensure everything blends seamlessly to form a detailed image. The result is a 3D printed object that looks far more complex and refined than its 2D counterpart, without needing to melt and mix filament (and requiring a setup that can do this).
It starts with a 2D graphic, of course. The software turns it into a black-and-white image to help it better distinguish between light and dark areas. If you increased the layer height it would make that layer darker (and vice versa if you decreased it), because of the filament’s transparency. Plus, you can specify the colors you want to use and HueForge will calculate how to blend them for optimal results.
The software then generates a text file with the color changes and filament swap instructions. This allows the printer to pause and prompt you to change filaments at the appropriate layers, ensuring that the final print looks as intended.
Before Getting Started
While HueForge can work with just about any 3D printer, there are a few important prerequisites to note:
- Filament change capability: Your 3D printer needs to be able to pause so you can change filaments. Most printers with a filament run-out sensor are already set up for this, and you can enable it in Marlin by uncommenting specific features. For printers using Klipper, sample macros are available to facilitate this process. Of course, if you’ve got a multicolor setup, this will work as well. We’ll go over how to 3D print with both an automatic and a manual setup.
- Slicer access: You need to be able to modify basic slicer settings (nothing too crazy – we’ll go through these further on in the article).
- Filament characteristics: HueForge has a large library of filaments for you to select from, but you can also add your own with a simple calibration print. Be sure that your materials match those included in the program for best results.
Getting Started
Having gone over the prerequisites, you’re almost ready to start creating your own filament paints. Let’s take a look at how to get started with HueForge.
Purchasing & Installing
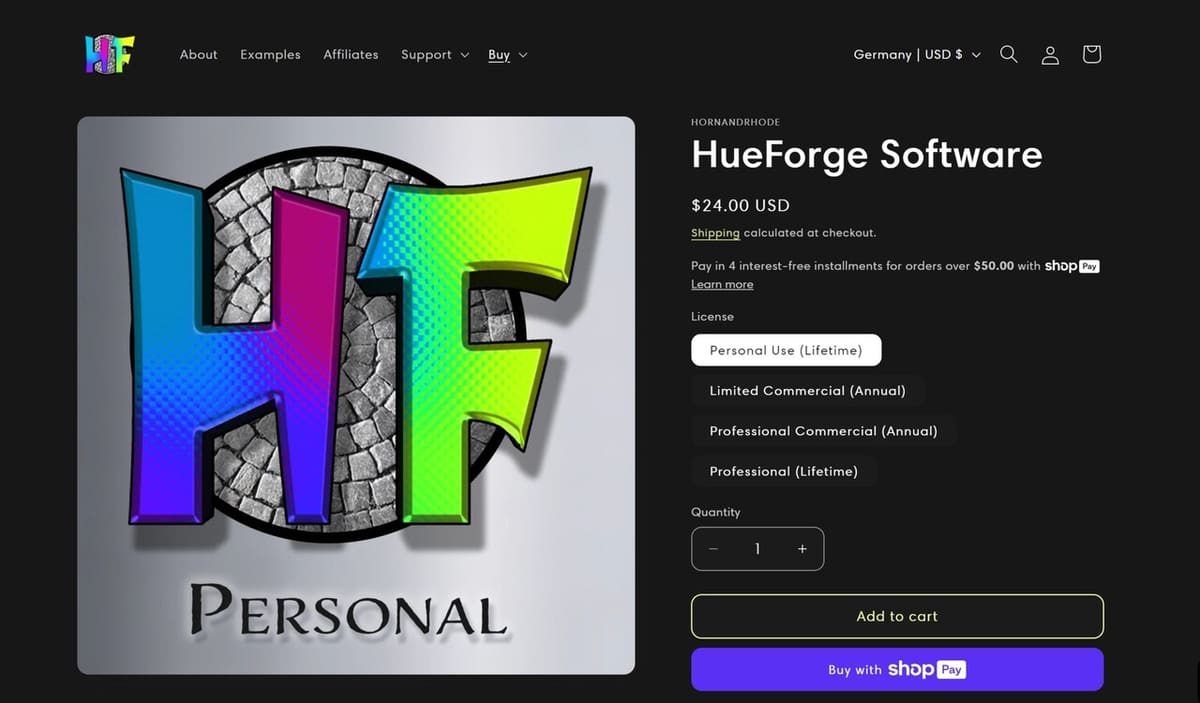
HueForge is available for purchase with a lifetime hobbyist license of ~$30 – however, this doesn’t allow you to sell any prints or models made using the software. For this, you’ll need a professional license, with either an annual (~$150) or a lifetime (~$500) subscription. There’s also a Limited Commercial option, with an annual subscription (~$75), but you can only sell 3D prints (not digital files).
HueForge is compatible with Windows 10 or 11, MacOS 11+, and Linux (considered to be in beta).
After purchasing your license of choice, you can download the ZIP file. From here, you can extract the files and start to familiarize yourself with the contents, including various sample projects and tools for calibration.
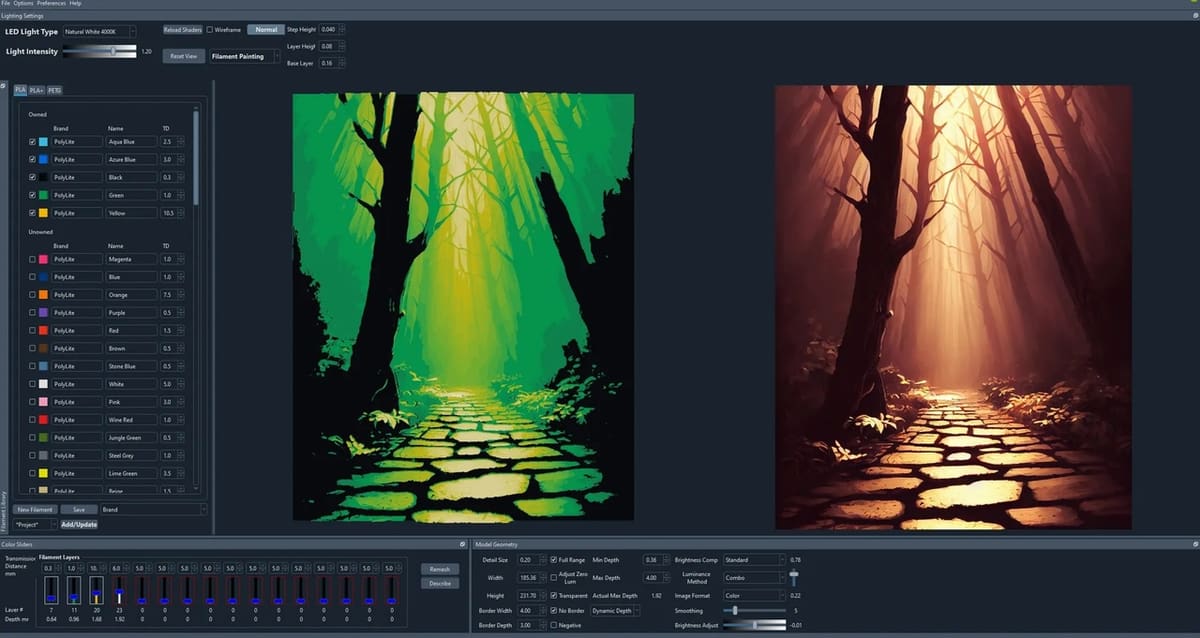
Interface & Workflow Overview
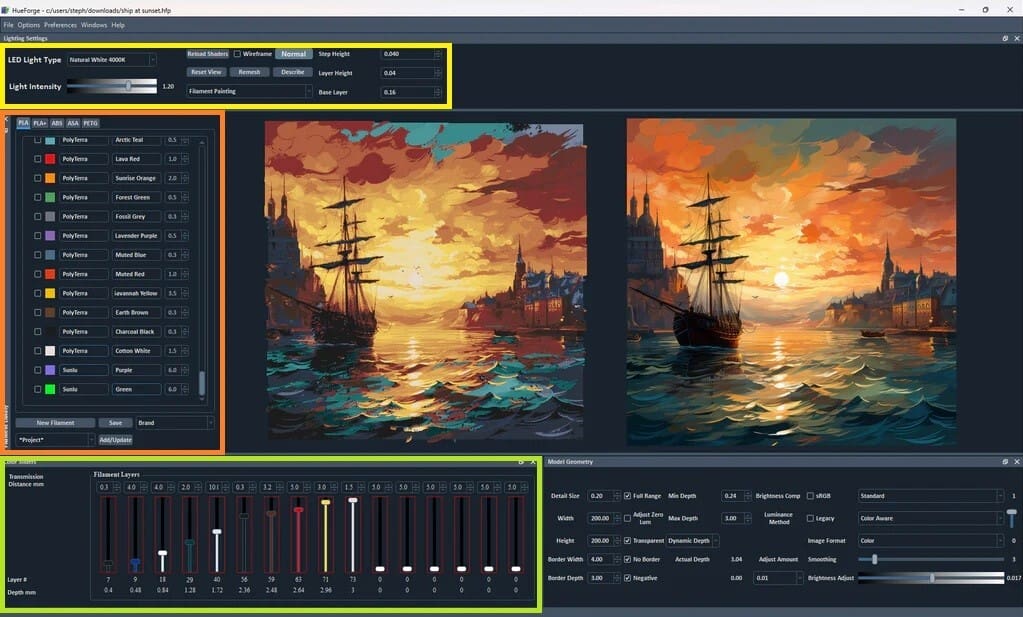
When you first open HueForge, the interface might seem overwhelming. Don’t worry too much about all the settings at first, as many are advanced and you won’t need them for basic use. The more you begin to work with HueForge, the more you may learn about and use the rest of the settings, but for now, the key areas you’ll need to use include:
- General Options & Operations Tab (yellow): Here you can adjust and set the layer height, base layer height, and detail size (usually set to half the width of your nozzle). The width and height control the size of your STL, so adjusting these to fit your printer’s build plate is important.
- Filament Library (orange): Here you can choose from a vast selection of pre-calibrated filaments or add your own (see below for calibrating a new filament).
- Color Sliders (green): These control which colors are used in your print and their blending. The numbers specify up to which layer the color will print, so basically if the slider is on 0, this means the color isn’t being used. If the number is 10, the color will be used up to layer 10 (starting from the layer where the previous color ended). You can add different colors to the sliders by dragging a color from the filament library.
The especially noteworthy part of HueForge is that you can see how your changes within the slider affect your image in real time, so you can play with the sliders until the image looks the way you want it to.
Working in HueForge
Now that you’re all set up and familiar with the interface, it’s time to choose the image you want to see come to life in the form of a ready-to-print STL. The steps are as simple and straightforward as it gets:
- Import the image of your choosing.
- Set it’s size in the General Options tab.
- Drag down the filaments you want to use from the Filament Library.
- Adjust the color sliders until you achieve the desired appearance.
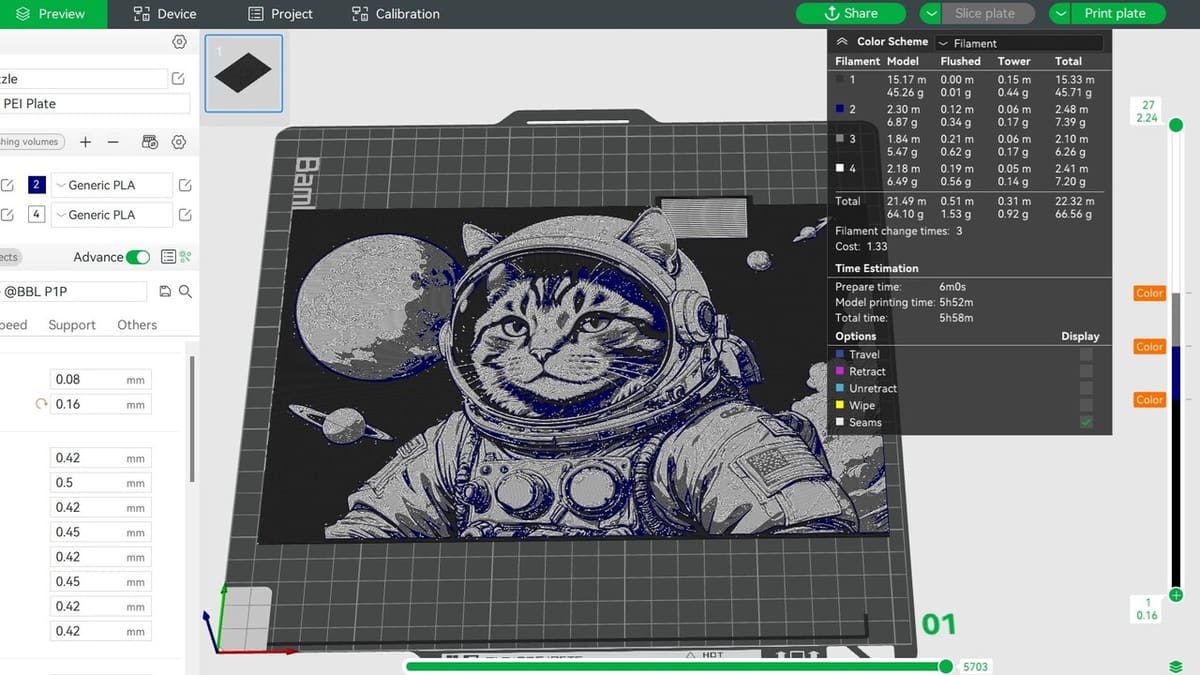
- Save the project, which includes the STL, the original image, and a text file with filament change instructions.
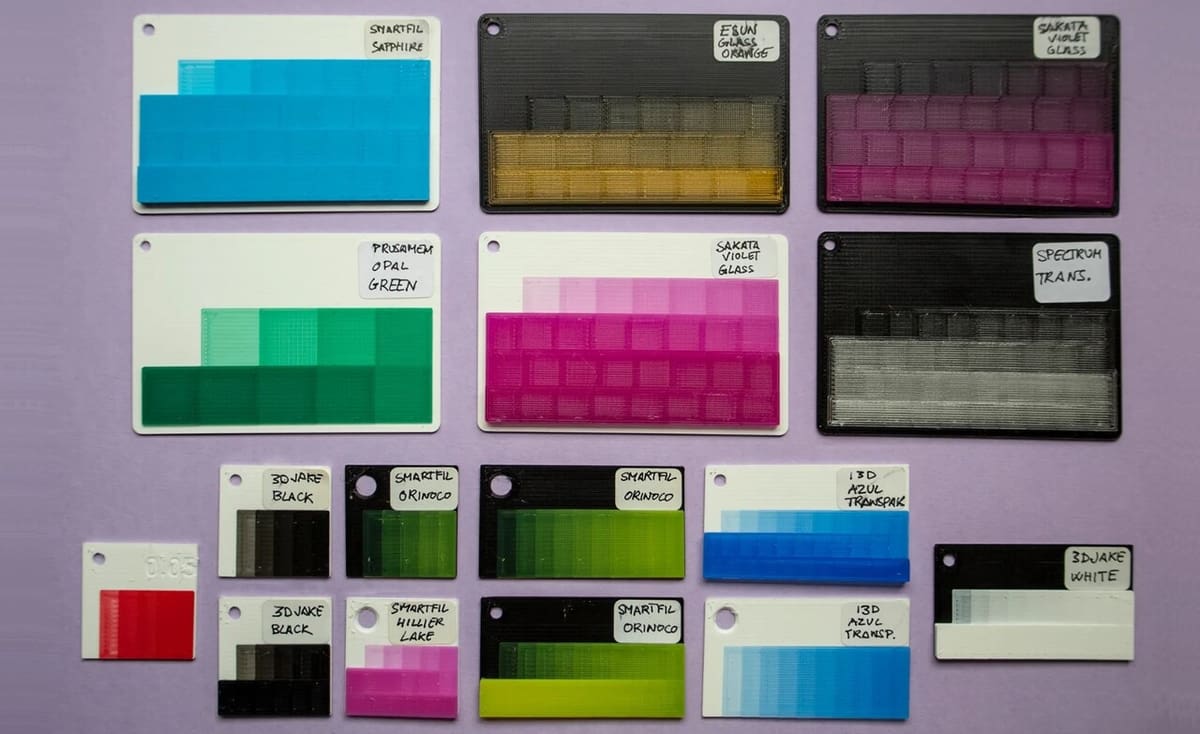
If the default filaments don’t meet your needs or setup, your process will start with adding a new filament. To do this, select a color close to your filament and adjust its RGB values for accuracy. Next, perform a calibration print using a step test square STL provided in the HueForge tools folder. Print this with the new filament and adjust the Transmission Distance in HueForge until the preview matches the real-life print.
Slicing
Once you have the STL exported from HueForge, it’s time to import it to your slicer of choice.
- Start your slicer. For reference, we’ll be working with Bambu Studio.
- Import the STL. Depending on the size and layer height, it might take a few minutes to load, so be patient.
- From the settings, ensure that no supports are enabled and that infill is set to 100%. For multicolor setups (such as Prusa’s MMU), decide whether you want to include a purge tower or not. You can also choose to enable a draft shield, which can help verify the color change and also promote consistent cooling – something especially important if the design is a large flat print which might warp.
- Slice the STL. Again, because of the settings, it might take a few minutes.
The next steps will depend on whether you’ve got a multicolor setup (e.g. Bambu Lab AMS) or you’re doing a manual filament change. Both methods will be explained in Bambu Studio.
Multicolor Setup
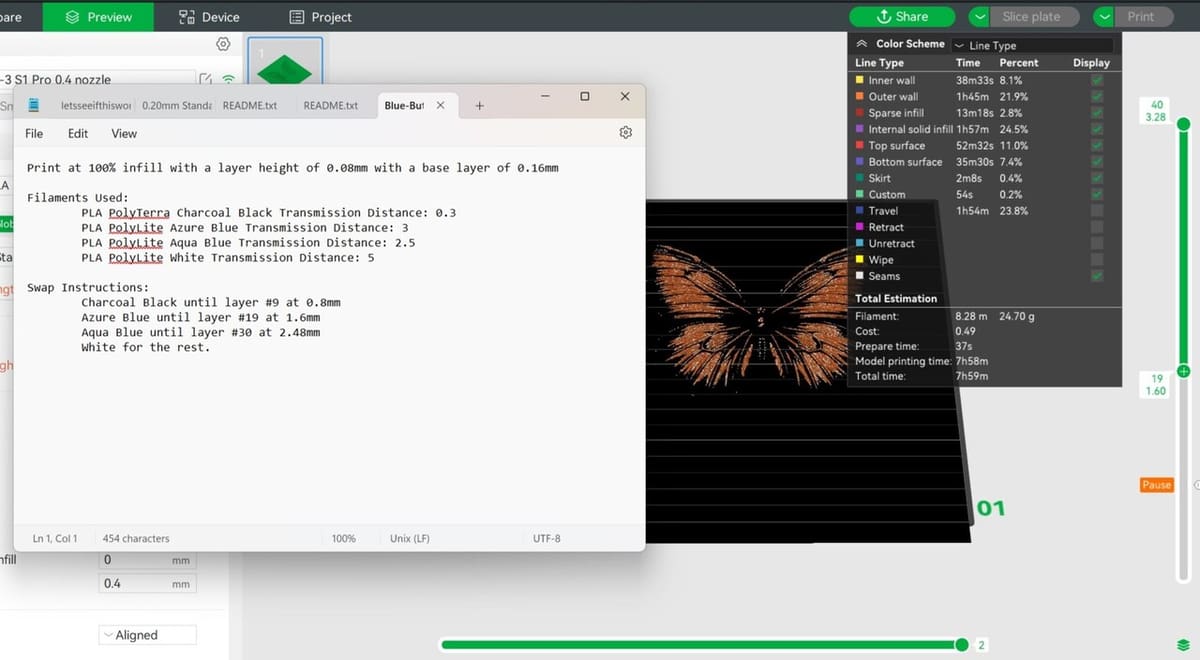
- Open the text file included in the exported project from HueForge.
- Ensure that the correct filament colors are selected for the specific spools in the AMS. If you need to make any changes, you have to slice the STL again.
- Move the slider on the right of the UI, which details the specific layers, to the first one listed in the text file. (Be sure that it’s the exact same layer and not a different number.)
- Right click on the ‘+’ and select “Change Filament”. From the drop-down options, choose the one that should start at the corresponding layer.
- Slice the model again.
Repeat steps 3-5 for each filament change. The preview will differ from HueForge’s because the slicer can’t interpret how the varying colors will affect each other, so don’t worry if you think something’s off. Slice the model one last time, send it to your printer, and watch the magic happen.
Manual Filament Change
Depending on the slicer, the following steps might be slightly different. But if you’re in Bambu Studio…
- Open the text file included in the exported project from HueForge.
- Move the slider, which details the specific layers, to the first one listed in the text file.
- Right click on the ‘+’ and select “Add Pause”.
- Slice the model.
Repeat steps 2-4 and add as many pauses as there are filament changes.
Once you’ve sliced the final model and you’ve sent it to your printer, be sure to stand by to make the necessary manual change of filament without risking the print cooling down too much. Because there won’t be an automatic purge, you might want to extrude a bit more filament to confirm that the previous color has been fully removed from the nozzle.
If you’ve got Cura, you can take a look at our dedicated tutorial on pausing at height.
Tips & Tricks
Because HueForge is still in Early Access, you might come across a few bugs. And, of course, as with any new undertaking, as you’re getting your bearings and learning the ins and outs of the program, you might also find a few challenges.
A general recommendation would be to avoid combining different filaments, such as PLA and PETG, given that this can cause issues due to their different melting points and properties. Sticking to one filament type per print and cleaning the nozzle thoroughly when switching filaments will help you get the best possible results.
And if you’d like to get your bearings on the slicing and 3D printing side of things, before you start working on your own projects in HueForge, there are many designs available in Printables, Thingiverse, MakerWorld, and more.
If you run into any issues during the different stages of printing your images, HueForge has a YouTube channel with plenty of tutorials and topics to learn from. There are also FAQs and a Devlog, and you can always reach out to the creators.
For more community-based support, there’s a HueForge subreddit and a Discord channel you’ll have access to once you purchase a license.
License: The text of "HueForge: What Is It & How to Use It to Create 3D Prints?" by All3DP is licensed under a Creative Commons Attribution 4.0 International License.