
Incredible Prints: Can You 3D Print a Functional Kayak?

Technology is ever expanding, with much to explore. Let's take a trip off the beaten path and into the water on a 3D printed kayak!
Sink or Swim?

The first question that most people might ask when presented with the possibility of a 3D printed kayak is, “Will it actually work?”
Although it’s certainly not happening on a large scale, a few folks in the world have been taking on this interesting engineering challenge. In particular, Jim Smith of Grassroots Engineering has made a name for himself by 3D printing the first fully functional kayak.
Printing a kayak is not an easy task, and those interested in this challenge would have to solve various problems, including waterproofing, printing large parts without warping or cracking, and making sure the finished boat is both lightweight and strong.
In this article, we’ll be exploring behind-the-scenes of Jim Smith’s fantastic project and then look at how a company called Melker of Sweden is using 3D printing and recycled wood and fiber to achieve a similar result. Let’s get in the water!
Jim Smith: The World's First
Jim Smith is a man who decided to challenge the limits of his ingenuity and has become known as the first man to build his own functional 3D printed kayak.
However, this definitely took some skill and uncommon resources, meaning that this isn’t going to be a project anybody can just print over the weekend.
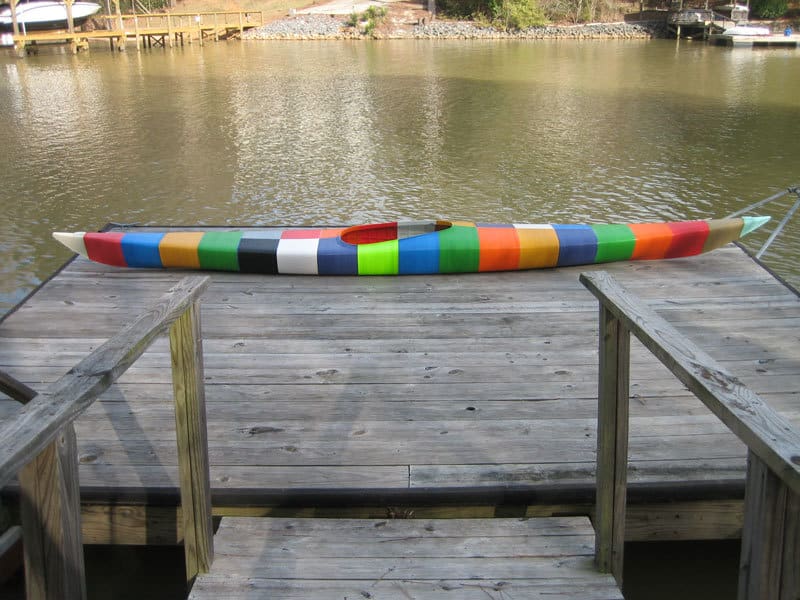
In its entirety, the kayak is 16.7 ft (~5 m) long by 1.7 ft (~ 0.5 m) wide, and weighs 64.58 lb (29.29 kg). It’s composed of 28 different sections of ABS, and the only other parts used to put it together are machine screws, brass threaded inserts, and some silicone caulking.
The design was initially based on the Siskiwit Bay kayak by Bryan Hansel, but it was heavily modified to work with 3D printing.
Jim also decided to go with a “technicolor” approach, printing all the sections in different colored ABS, and the result looks pretty groovy!
The Hardware
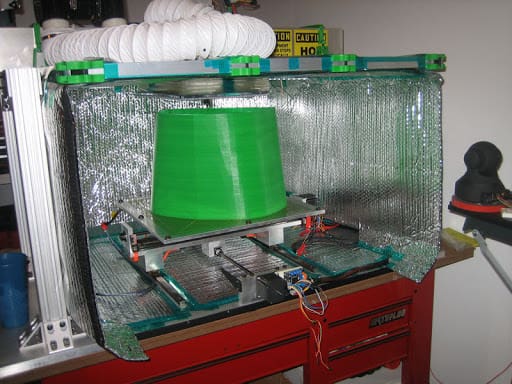
The most important piece of equipment for this project was the 3D printer.
Luckily, Smith works as an engineer at 3D Systems, so he was able to modify his own custom-built, large-scale 3D printer in order to complete the project: adding an enclosed build chamber.
As you might know, one of the major issues with printing large parts in ABS is that an inconsistent ambient temperature and drafts of air through a workshop can lead to cracks or warping. Plus, the bigger the part, the worse the cracks or warps can get. To counter this, the enclosed chamber was passively heated by the build surface while printing, reaching stable temperatures from 65 to 70 °C (149-158 °F).
To make printing possible, the original design had to be sliced into pieces, which were printed one at a time. The prints were done at a layer height of 0.65 mm to reduce printing time, but it still took approximately 42 days to finish printing all of the parts!
Sealed Up Tight
As daunting of a task as it may have seemed, putting all the pieces together turned out to be a fairly simple matter of assembling them using machine screws. Each section was fitted with brass threaded inserts, allowing the next section to be attached. It seems this was all the hardware that was needed to keep the parts together!
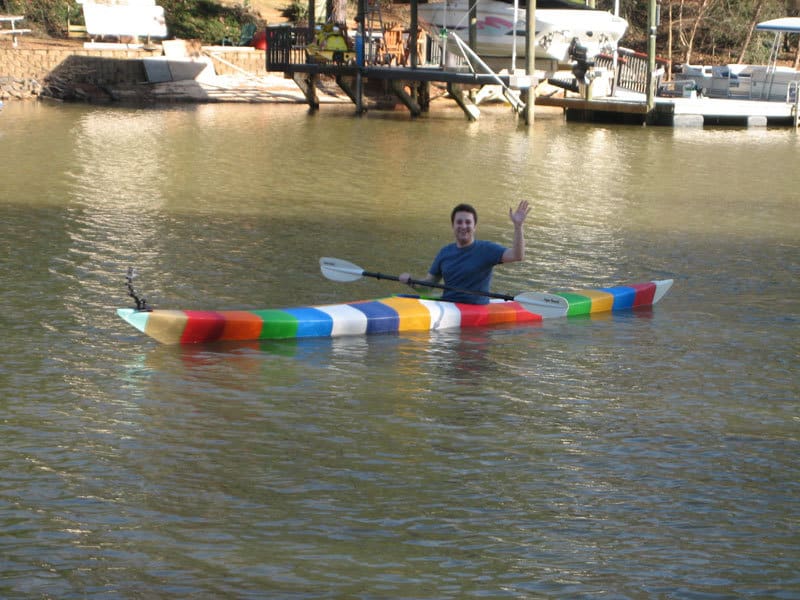
Surprisingly, Jim only needed to use silicone caulking in between the sections to create a water-tight seal. While home 3D printers aren’t known for making completely water-tight structures, Jim’s custom-built machine was clearly up for the task.
When it was all assembled and sealed, the only thing left to do was see if it floats. And, believe it or not, it did! It’s amazing what a little bit (or a lot) of ingenuity and perseverance can accomplish.
Melker of Sweden: Recycled Materials
Beyond personal projects, one company in Sweden has approached kayak manufacturing with the novel method of fiber- and wood-based 3D printing.
Melker has been in the business since 2015 and was created with innovation in mind. Striving for a balance between economy, environmentalism, and design, they’ve developed a robust process for producing strong and reliable kayaks.
To do this, they use large-scale 3D printing processes that typically run on wood and corn pellets, however, it seems they also recycle old coffee sacks!
Although there aren’t many details available on the exact specifications of the prints, it’s known that they’re printed using a honeycomb pattern and they primarily use flax fiber fabrics (such as coffee sacks), which have been turned in to bio-composites using bio-polymer technologies. In other words, they transform wood and fiber into recycled 3D printable material by converting some of the organic compounds into thermoplastics.
In the eyes of Melker, all-natural is the way to go! Besides the kayaks themselves, Melker also sells a variety of other kayaking equipment.
Happy paddling!
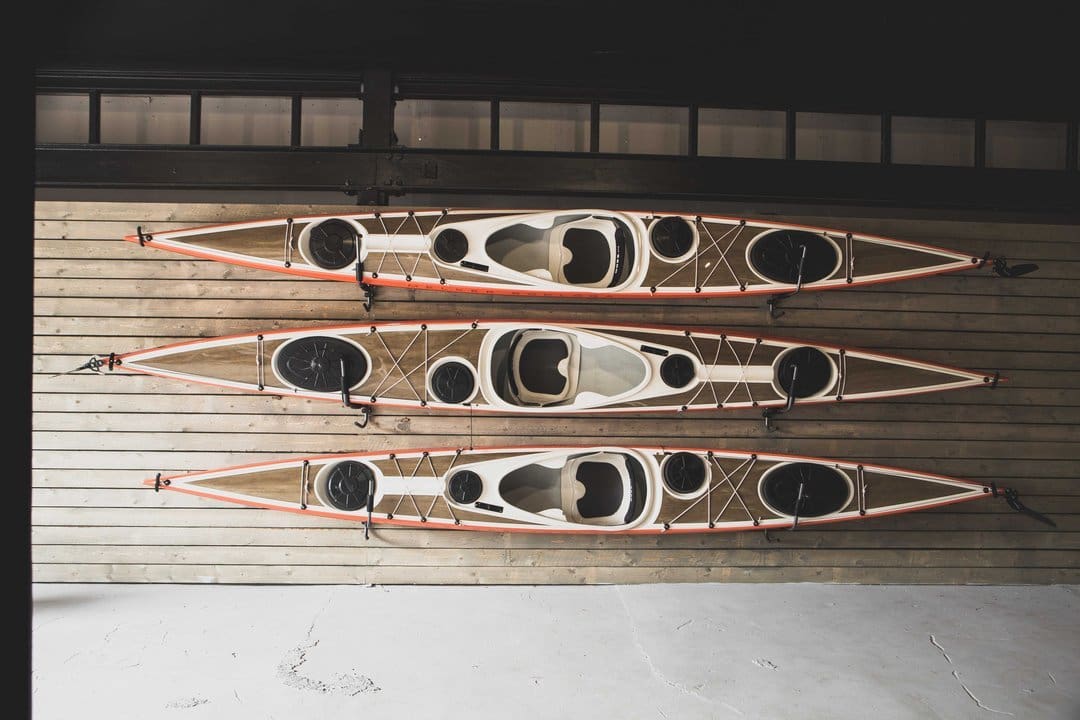
Lead image source: Pexels
License: The text of "Incredible Prints: Can You 3D Print a Functional Kayak?" by All3DP is licensed under a Creative Commons Attribution 4.0 International License.