Marlin: Input Shaping – Simply Explained

Move over Klipper and Prusa input shaping, Marlin has joined the fray. Read on to learn how it works and how to give it a try.
As 3D printer’s motion systems continue to improve, manufacturers are able to push the out-of-the-box printing speeds to greater and greater heights. The latest crop of high end consumer 3D printers, such as the Bambu Labs X1 Carbon and the Creality K1, boast printing speeds up to and over 500 mm/s. Acceptable print quality at these speeds would not be achievable without the help of input shaping.
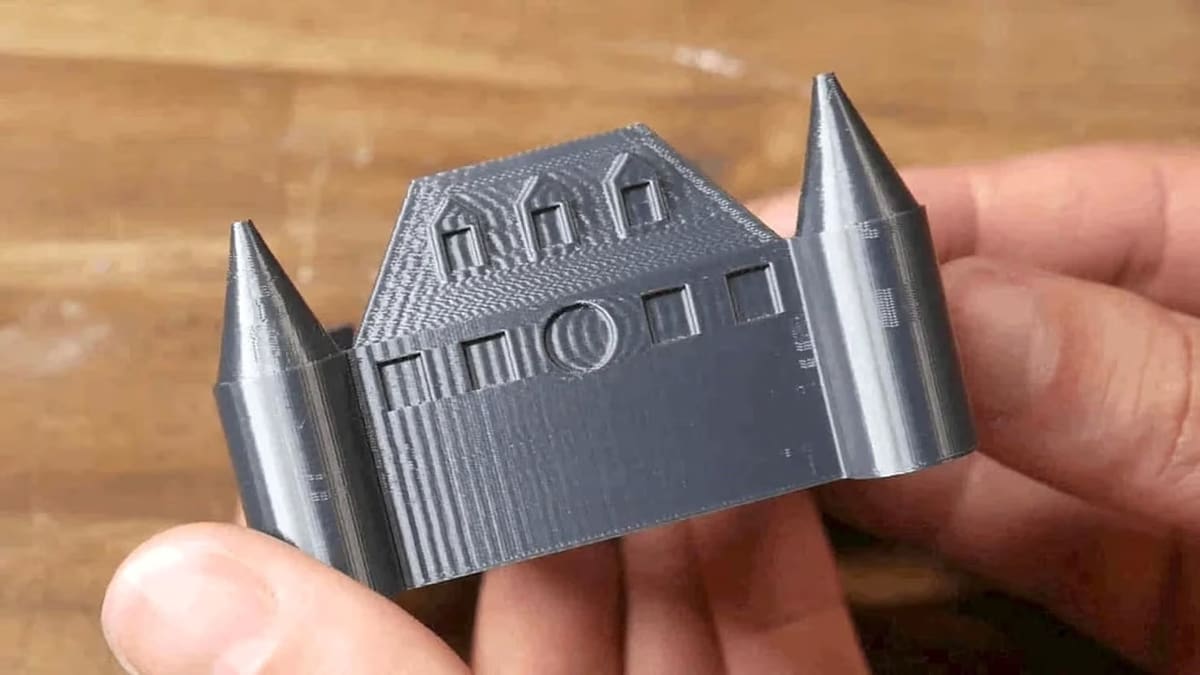
As the printhead accelerates it carries with it a lot of momentum, which needs to go somewhere when it slows back down. This results in vibrations that ring throughout the structure of the 3D printer, directly after any sharp movement. Since these vibrations are not commanded movements, it results in an “echo” of the previous shape and appears in the print.
By countering these uncommanded motions, input shaping can greatly reduce or even eliminate ghosting (also known as ringing) in 3D prints. In this article, we’ll discuss input shaping in Marlin firmware, one of the most popular firmware packages in the 3D printing world. We’ll talk about Marlin’s implementation of the feature, how it compares with Klipper, and how to set it up.
Input Shaping 101
Input shaping uses fancy math to calculate what frequencies are needed to cancel out the specific frequencies your printer vibrates at – a bit like the noise cancellation technology found in headphones. By countering these uncommanded motions, input shaping can greatly reduce or even eliminate ghosting in 3D prints.
In order to implement input shaping, you must first tune it for the specific resonance frequencies that affect your 3D printer. There are a few ways to do this: the first being through the use of an accelerometer to measure the movement of the printer directly and the second through the printing of a tuning tower. The latter is done by running through different input shaper settings while the tower is printing, then inspecting the layers afterwards to see which setting dampened the ringing frequencies the best.
One thing to consider is whether or not it’s worth trying out input shaping on your machine. If you’re happy with your prints and don’t feel the need to push your printer’s speed to the maximum, it may make sense to just forgo the feature altogether. However if you’re experiencing especially bad ringing or are just looking to push your printer as fast as it can go, it’s definitely worth the time and effort to go through the tuning process.
Marlin's Implementation
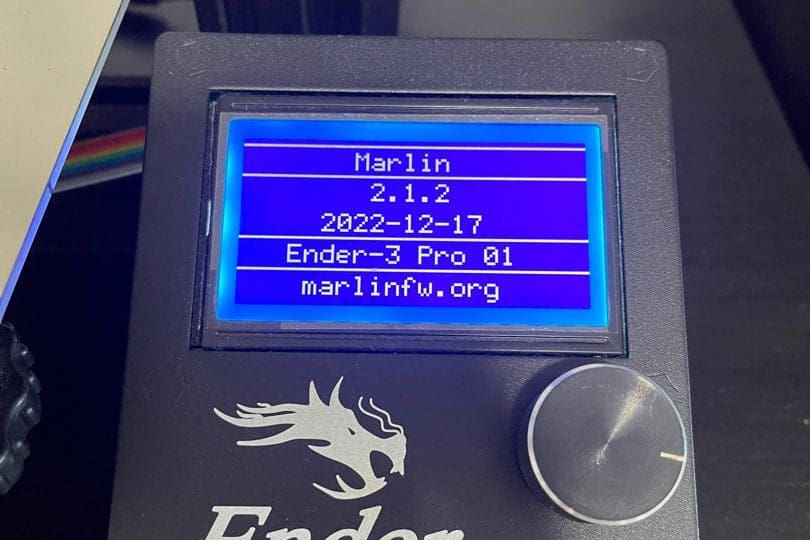
Marlin firmware is most commonly found on consumer-grade 3D printers and is known for its simplicity and ease of use. In the past, those who ran the stock Marlin firmware on their printers weren’t able to reap the benefits provided by input shaping without switching to another firmware ecosystem like Klipper. In December of 2022, that changed when Marlin introduced input shaping as a feature in their 2.1.2 firmware update.
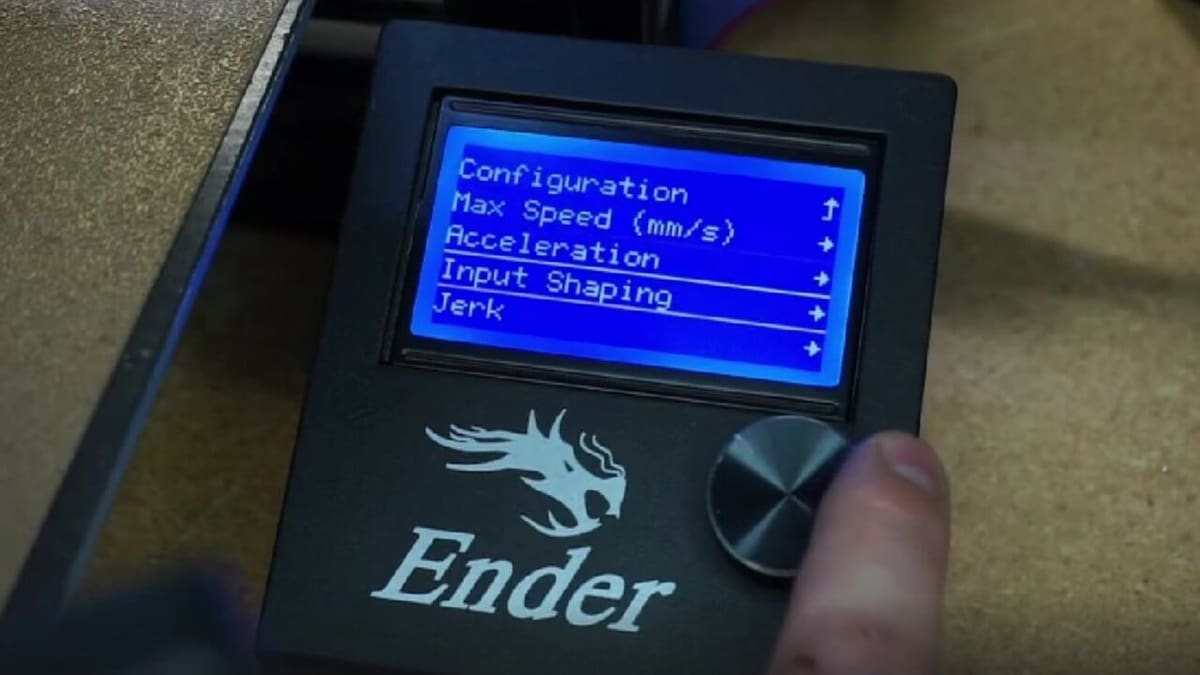
The way that Marlin firmware implements input shaping is geared toward users who don’t want to tinker too much to get the feature working on their machine. It requires no special configuration and can be turned on without rebuilding the firmware of your printer – as long as it’s running Marlin 2.1.2 or later.
The feature can be turned on through one G-Code command: M593. It can also be enabled permanently in firmware, but that would require rebuilding the firmware.
Marlin’s input shaper runs directly on the 3D printer mainboard, which has somewhat limited processing power. The way it handles the computation is very basic and stripped of features in order to not overtax the mainboard’s processor. For some, this could be beneficial, especially those who want it to “just work” in the background without any intervention from the user.
This allows you to start using input shaping without any extra hardware, like a more powerful Raspberry Pi or an external accelerometer board. This goes with Marlin’s overall ethos, which aims to be as adaptable as possible – allowing for small builds for modest hardware.
Marlin vs Klipper
The Marlin developers certainly deserve massive props for bringing the game-changing technology that is input shaping to a huge portion of the 3D printing community. That being said, Marlin’s input shaper is very basic compared to Klipper’s.
No fancy graphs and no automated settings, just a manual tuning process using only your printer and a calibrated eyeball in order to spot the best results. This doesn’t mean that Marlin’s input shaper cannot work as well as Klipper’s, only that the process is a bit more imprecise and may involve more guesswork as well as some trial and error in order to dial in.
Accelerometer Support
The lack of accelerometer support is touted as a simplicity feature by the Marlin developers, but it’s also one of the biggest differences between Marlin’s and Klipper’s respective implementations. One of the main reasons cited in Marlin’s documentation for not supporting accelerometers is the complexity in connecting the sensor to your mainboard.
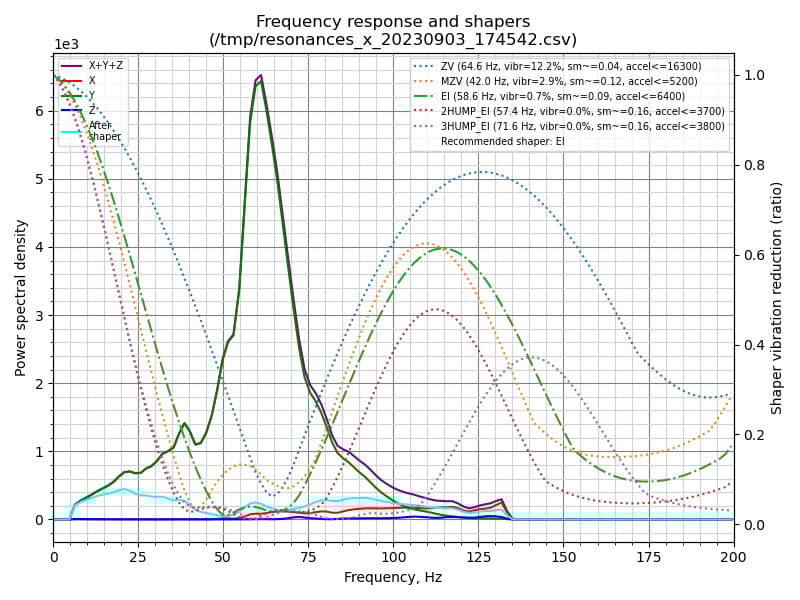
The way Klipper accomplishes this is by connecting the accelerometer to a Raspberry Pi instead of the mainboard. The Raspberry Pi has a much more robust IO compared to most 3D printer mainboards and is usually connected through SPI, I2C, or USB. The Pi also has the processing power to handle all of the data that the sensor can dump into it, then turn all that data into lovely and colorful graphs that the data nerds among us will certainly appreciate.
Algorithms
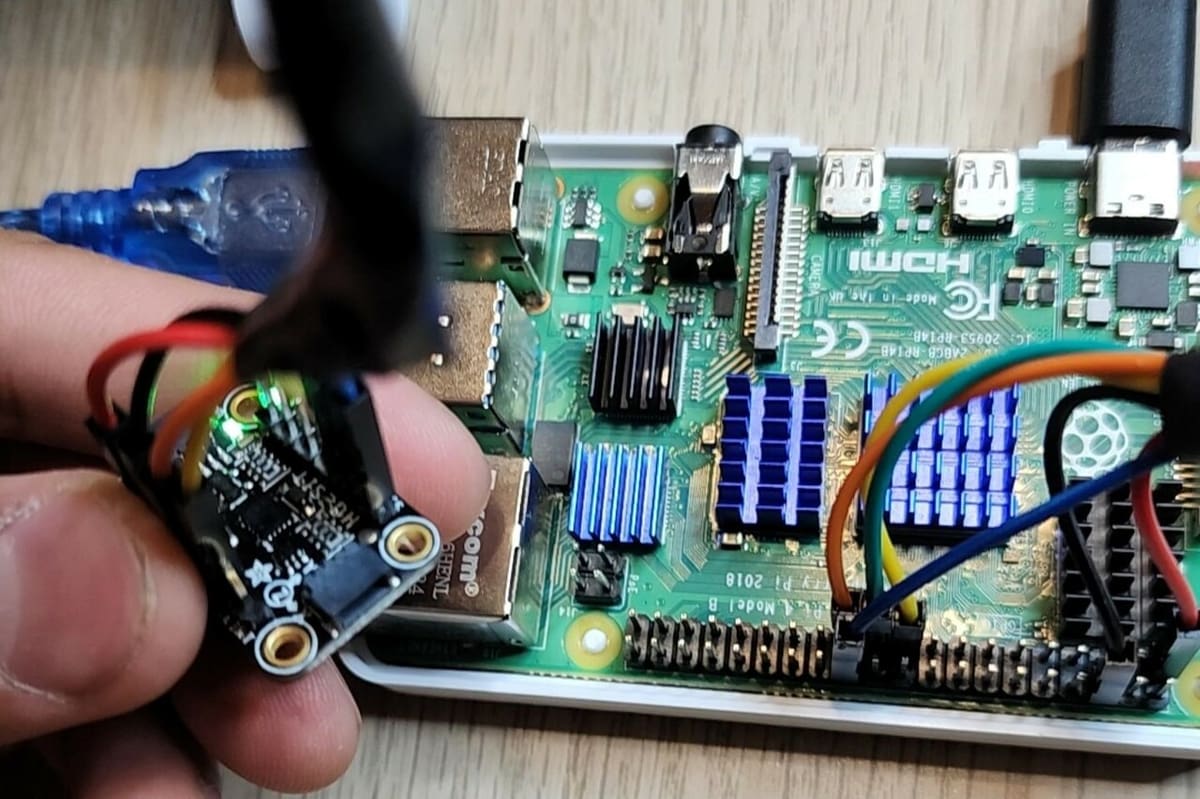
There are some fundamental differences in the way that each firmware does the input shaping math. Specifically, the type and number of algorithms, or “sensitivity curves”, differ between Marlin and Klipper. Klipper tests out five different input shaping algorithms and chooses the one that does the best job of reducing resonance based on the recorded data from the accelerometer.
Marlin, on the other hand, only uses one type of input shaping algorithm (ZV or Zero-Vibration) to dampen frequencies. You can also configure a second type of algorithm to work alongside Marlin’s baked-in input shaper, but this is an add-on from a company called Ulendo and is not free to use.
How to Set It Up
The process involved in setting up input shaping on Marlin is fairly straightforward and should only need to be done one time. The only time you may need to retune input shaping is when you make a significant change to the weight of the printhead, say by changing to a new hot end or extruder.
Marlin’s official input shaping documentation is fairly detailed and includes an STL file for the ringing tower (direct download) needed for tuning as well as instructions for preparing the file on common slicers, including Cura and Prusa Slicer. One thing to keep in mind is that custom G-Code macros are required to inject the input shaper setting changes throughout the print. Prusa Slicer supports this by default, but with Cura, you’ll need to install a separate plug-in to gain this functionality.
Setup Overview
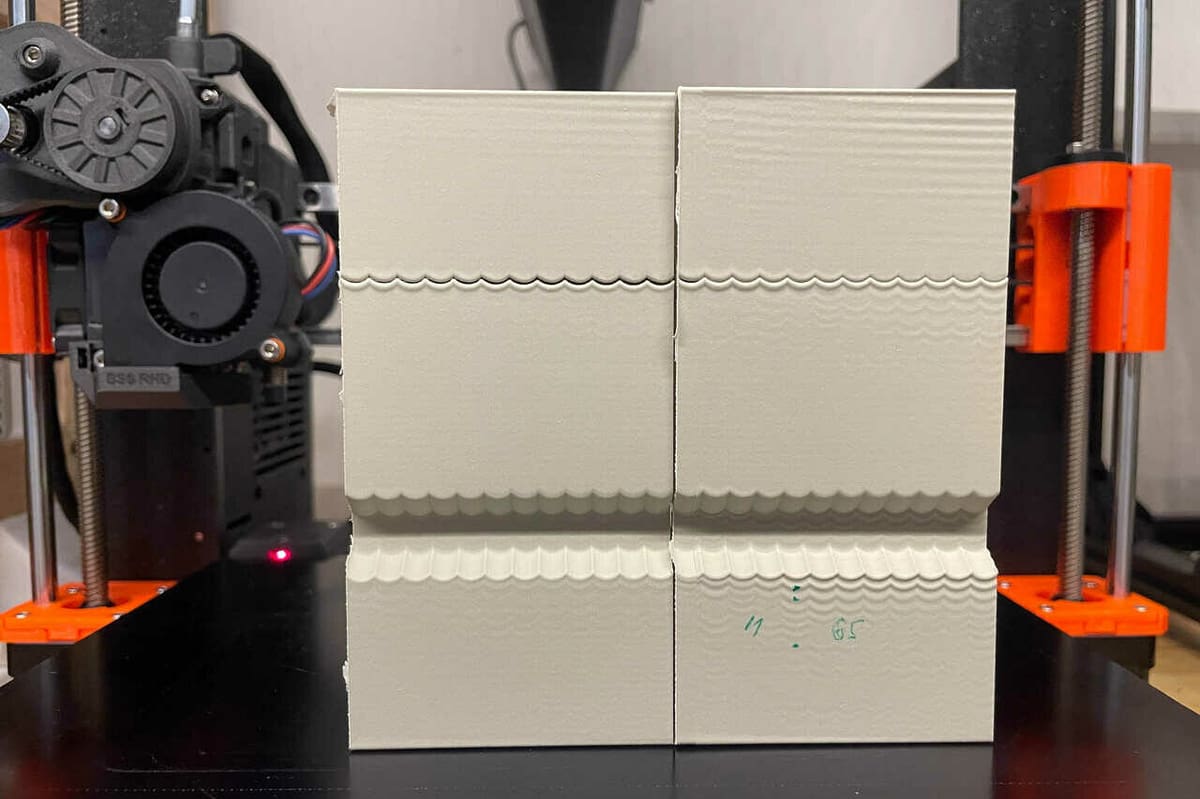
The first step is to slice the ringing tower with some slicer specific settings, adding the input shaper frequency changes periodically throughout the print, starting at 15 Hz and going up to 60 Hz. This is a somewhat limited frequency range compared to Klipper, which tests a smooth curve from 0-200 Hz. To be fair, though, the lowest resonant frequency of your 3D printer will have the most impact on print quality, and that’s where the input shaper should really be targeting its efforts.
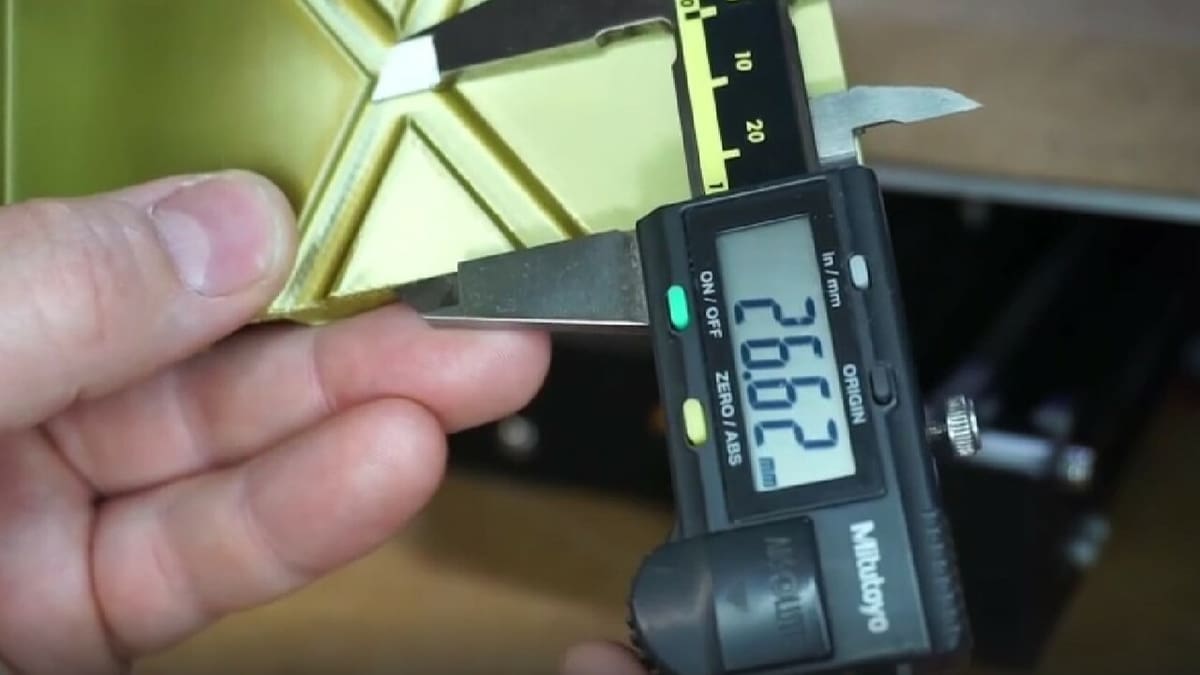
Then, after printing the ringing tower, it needs to be visually inspected for ringing, looking for the bands that show the least pronounced ringing on both the X- and Y-axes. The resonance will likely be different for each axis, especially so with an I3 or “bed-slinger” style 3D printer, as the heavy bed adds a lot of inertia to the movement of the Y-axis.
After deciding which layer looks best to you, use the formula in Marlin’s documentation to calculate the frequency from the height in mm where you see the best results. Once you’ve calculated the frequency, you’ll enter the G-code M593, followed by F and the frequency in Hz, then enter M500 to save the settings to EEPROM. You can specify the X- or Y-axis as well to tune each separately. There is also a damping factor “D” that you can adjust, but it’s recommended to leave it at default unless you really know what you’re doing.
Alternative
That’s the manual way to tune input shaping, but there are also online tools available to make the process even easier, including one from TH3D. Here, you slice the STL as before, but there’s a built-in calculator that will give you the correct frequency based on the height of the best looking layer.
TH3D also provides pre-sliced G-code for the ringing tower to simplify things even further. However, the G-code file assumes that your printer has a bed larger than 200 mm x 200 mm and an ABL probe installed, so only use it if your printer meets those parameters. They do have separate files for .4-mm and .6-mm nozzles, as well as a choice between PLA and ABS filament.
Potential Problems
There’s really not much that can go wrong with input shaping, especially in the form that Marlin has implemented it. If you’re experiencing especially bad ringing and have tried mechanical means of solving it to no avail, it’s certainly worth a try. And for anyone looking to increase the speed of their 3D printer without sacrificing quality, the small amount of effort it takes to set up input shaping is often well worth it.
That being said, there are certain cases in which input shaping can cause issues or just not work at all.
Complexity
The first and most obvious downside of using input shaping is unnecessary added complexity. Whenever you add more variables to the already complex mix of software and hardware that is a 3D printer, there’s a chance that it can manifest issues that weren’t present before. The old adage, “if it ain’t broke, don’t fix it” is appropriate here. If you’re happy with the results you’re getting from your printer, there’s no need to make any changes that may alter those results.
Dimensional Accuracy
The main way that input shaping can have a negative impact on print quality is through smoothing. The method that input shaping uses to do its job is through smoothing the acceleration and deceleration commands given to the printer. When input shaping is “over-tuned”, it can cause corners that are meant to be sharp to become rounded off. At best, this is just visually unappealing, and at worst, it can cause parts that are meant to fit together with fairly tight tolerances to not fit at all, as the shape has been altered too much.
Incompatible Slicer Settings
One thing to consider when tuning input shaping is your slicer settings, namely how your slicer handles acceleration. If you have your slicer set to control acceleration, it can override the commands that the input shaper is trying to give, thereby not allowing input shaping to work properly.
If you have tuned on input shaping and aren’t seeing the results come through on your prints, make sure that you have your slicer’s acceleration control turned off.
License: The text of "Marlin: Input Shaping – Simply Explained" by All3DP is licensed under a Creative Commons Attribution 4.0 International License.