Bambu Lab Scraper: How to Install It?

The Bambu Lab scraper is designed to remove models from your 3D printer's build plate. Read on to learn how to make your own!
Released in 2022, the Bambu Lab X1 was Bambu Lab’s first offering, and every box included parts to a scraper tool. This easy-to-build scraper is a valuable accessory that can prolong the life of your build plate while making print removal easier.
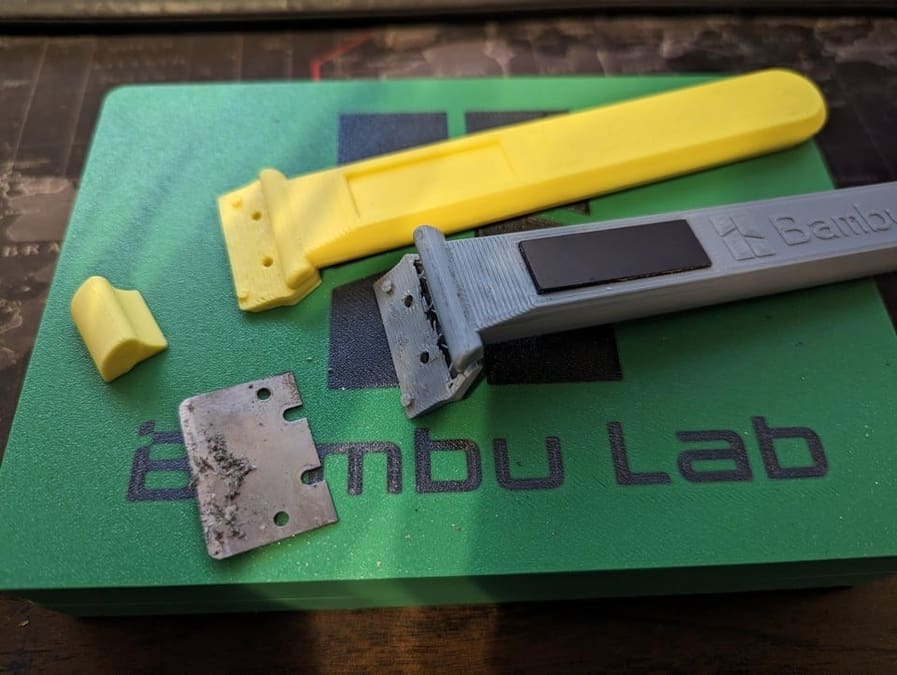
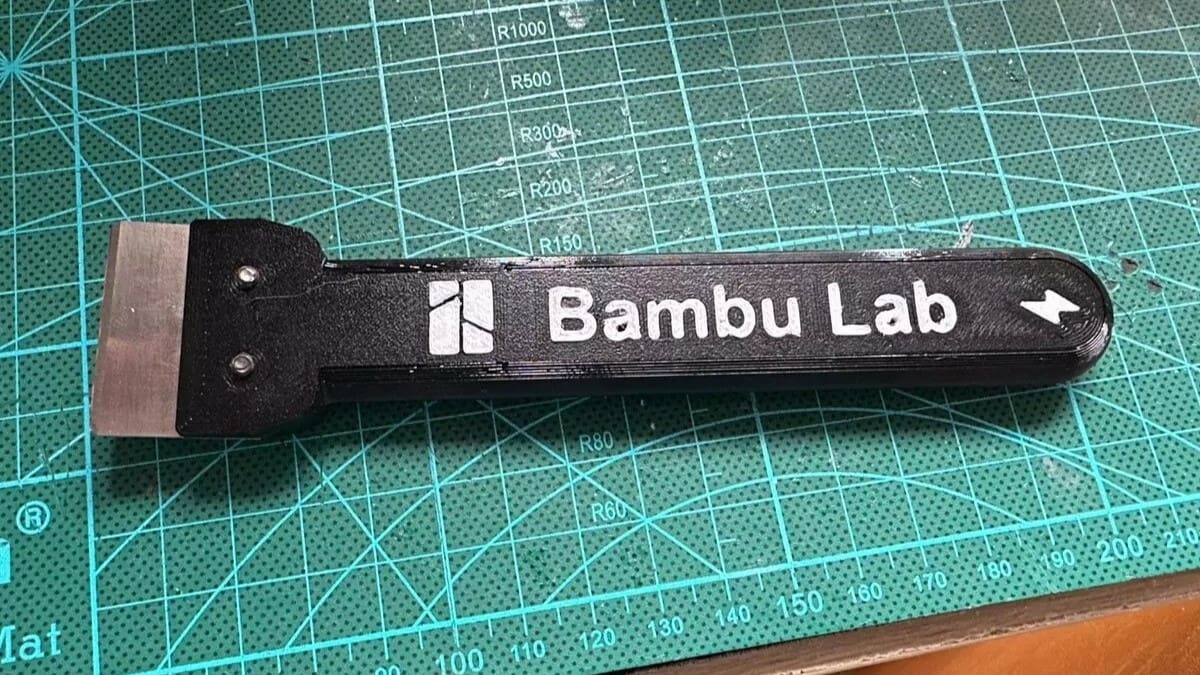
A scraper is an important tool for safely prying up and removing prints, and Bambu Lab’s design features a 3D printed handle with replaceable scraper blade. This metal blade has a sharp beveled edge that easily reaches spots a plastic scraper could not; it slides under the corners of prints and gently loosens them instead of any violent pulling, which is ideal as outright pulling can destroy a print bed, like PETG delaminating glass, for example. While a scraper comes in handy especially when dealing with PETG, any filament can stick too well under a variety of conditions.
Bambu Lab’s scraper can be a valuable addition to your 3D printing setup. In this article, we’ll take a look at how to print and assemble it, as well as some considerations to keep in mind when using it. Let’s get scraping!
Considerations
While a convenient addition, the Bambu Lab scraper is not without its flaws. Before firing up your 3D printer, it’s worth considering if this scraper is right for you.
The first thing to keep in mind is that the scraper comes with a holder that, while convenient, doesn’t have strong magnets. This means that placement on your printer can be an issue. Especially for the P1S and its aluminum frame, the included magnets aren’t strong enough to stay on the front or sides – the magnets only get a good hold on the steel back plate. The magnets work fine on the exposed steel of the P1P, but Reddit user prp1960 recommends just using Command strips for a more permanent solution.
Another issue, and perhaps more important, is the potential for damage to your 3D printer. For many scrapers, the metal edge can actually be a problem, as the sharp metal easily gouges beds when pried at too sharp an angle. The scraper does have a slight bump on the bottom, which creates a resting point that allows the edge to make a shallow angle that prevents any inadvertent damage. However, Reddit users like memphis10_901 have reported in the comments that it destroyed their surface. The metal scraper makes it very easy to accidently damage or destroy the bed, and in many cases a plastic scraper may be a safer option that works just as well.
Step 1: Find the Files & Start Printing
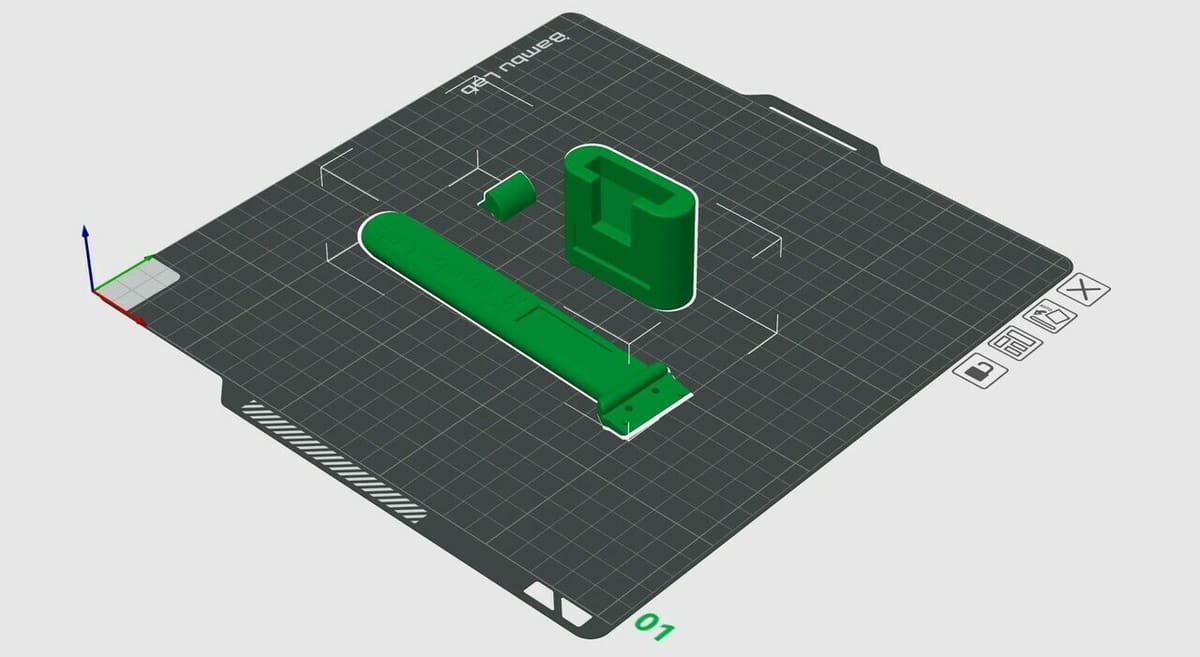
On every Bambu Lab printer, the file for the scraper is pre-downloaded. The file includes pieces for the handle and the holder for the scraper.
To locate the STL file, first go to internal prints and ensure the filament is loaded. From there, select “Scraper grip,” ensure all calibration options are checked, and press “Print now.” All the other settings for infill and speed have already been determined, and the print will take roughly 1 hour and 20 minutes. As for the filament, the preset temperatures call for PLA, which works well because the metal blade will be taking all the force – the PLA is absorbing comparatively little stress.
Step 2: Assembling the Scraper
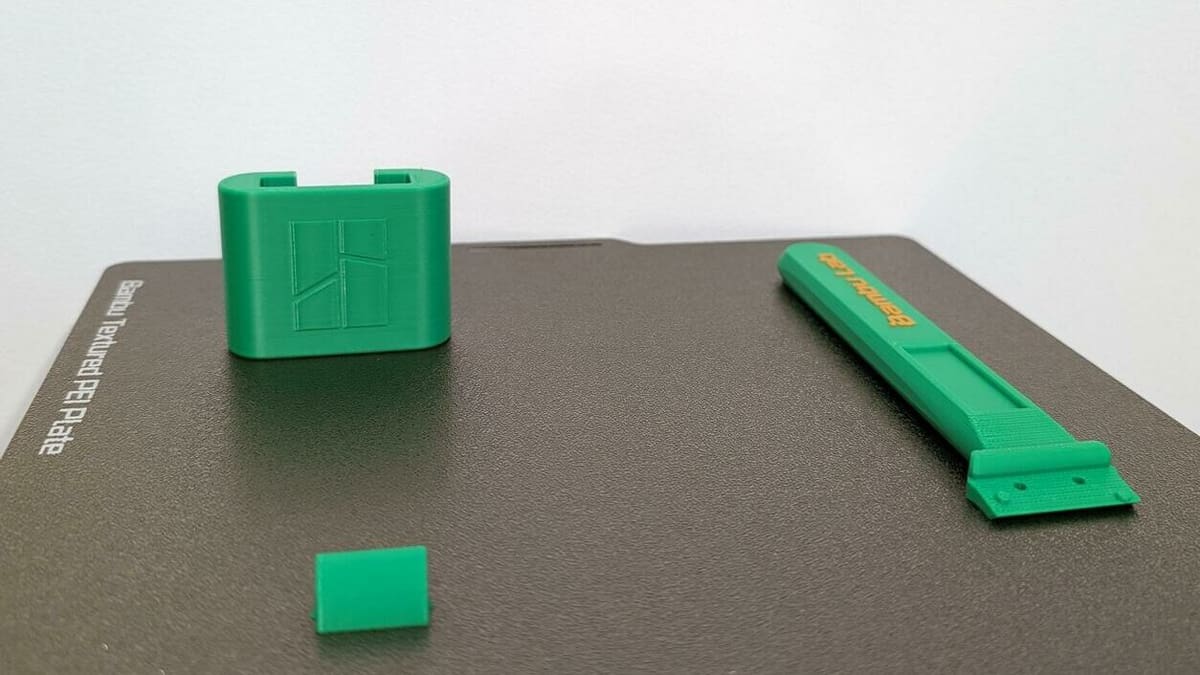
Once the print has finished, remove the plate and allow it to cool. This will make it easy to remove the pieces. Once all the pieces are removed, place the smallest component on the back of the handle and align it with the screw holes.
Next, place the razor on the top so it also aligns with the screw holes and use an Allen key to tighten both screws on top of the razor. Be careful not to overtighten.
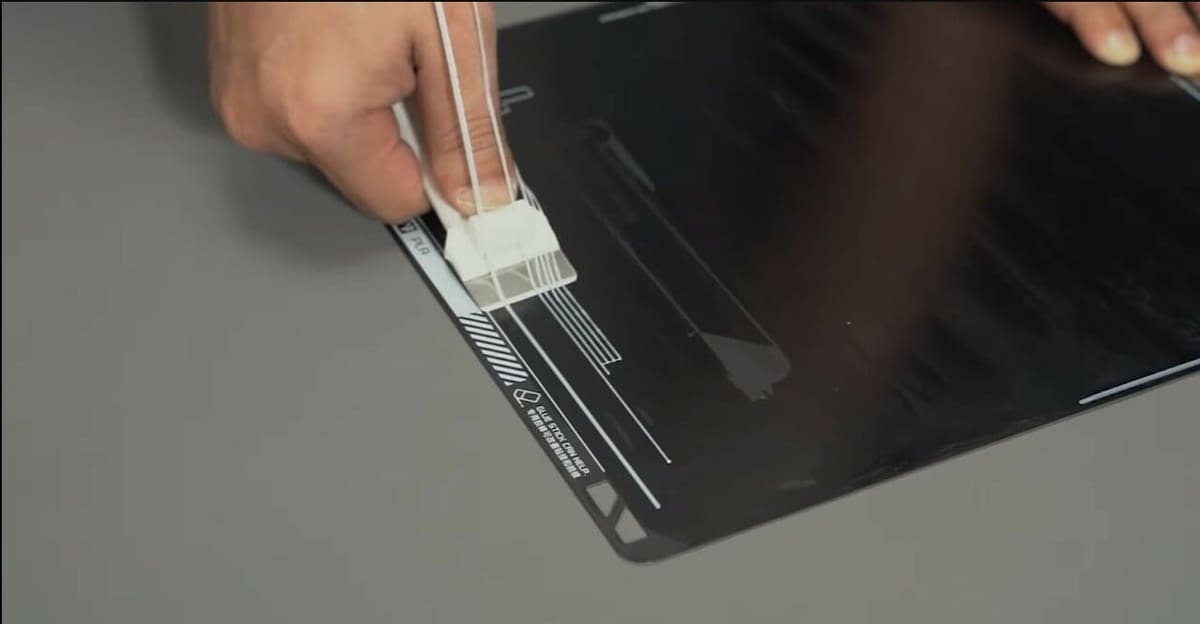
Third, peel off the magnet adhesive and place it on the scraper holder. You then have the option to attach the second magnet strip to the printer itself or the handle of the scraper. Placing the magnet on the printer is only necessary if the frame doesn’t stick to magnets well.
With the magnets applied, the scraper is now good to go. You have successfully assembled Bambu Lab’s scraper tool! If you need a visual overview of the process, check out the guide from Bambu Lab on YouTube.
Alternatives
Not a fan of Bambu Lab’s default model? Check out these alternatives for some different scraper options.
Scraper 2.0
The Bambu Lab Scraper 2.0 by TheLightSpeed on Printables is an alternative design that fixes a few annoying problems associated with the standard scraper.
The design is nearly identical, except that it includes slots for neodymium magnets. The magnets fix the common problem of the default adhesive magnetic strips not being strong enough to stick together. This design also flips the side with the logo, as the original design hides the logo when it’s in the holder.
Plastic Scraper
Are you worried about using a metal scraper on your print bed? This is understandable, as the potential for damage can be very high, especially for beginners or those new to 3D printing.
A solution to this problem is using a plastic scraper. With replaceable plastic blades, a plastic scraper still produces the sharp edges necessary for removing prints. However, it should be too soft to cause damage to the bed. This 2-pack plastic scraper set recommended by Reddit user cerebralvision comes in at just ~$9 and provides 60 razor refills. As the plastic razor dulls or breaks, it can be easily and quickly swapped out.
License: The text of "Bambu Lab Scraper: How to Install It?" by All3DP is licensed under a Creative Commons Attribution 4.0 International License.