
Klipper on Ender 3 V3 SE: How to Install It

Looking to have your Ender 3 V3 SE with Klipper? Here's the step-by-step guide to turbocharge your 3D printer by installing Klipper in it.
Klipper is powerful firmware for 3D printers that prioritizes speed, flexibility, and precision. It breaks traditional boundaries by running core control calculations on a more powerful device like a Raspberry Pi, allowing your printer’s onboard hardware to focus solely on executing movements.
Among its features, input shaping and pressure advance are standouts, but the firmware also has plenty more to offer, from time-lapses to sensorless homing.
If you own a Creality Ender 3 V3 SE and are looking to enhance your 3D printing experience, this guide will walk you through the step-by-step process of installing Klipper on your printer. We’ll get into configuring all the necessary components and get you printing smoother, faster, and with greater control than ever before.
For those seeking a plug-and-play Klipper experience, Creality’s Sonic Pad offers a streamlined solution. While it can be a bit pricier than going the DIY way (~$160), if you’re not into tinkering or want a change that’s as quick to apply as Klipper running your printer, the device might be a more suitable solution.
This guide will walk you through the step-by-step process of installing Klipper on your Ender 3 V3 SE printer. If you’ve got other printers, we’ve got dedicated articles for the Ender 3 V2 (with FluiddPi, which we’ll address further below) and Ender 3 S1 (Pro). That said, Klipper’s installation process is almost the same for all 3D printers. The main differences are the configuration file (printer.cfg) and the processor model in the bootloader menu, which depend on the mainboard in your 3D printer.
Keep in mind that in this guide, we’ll assume you have some basic understanding of computers and 3D printing terminology.

Requirements
Before we look at what we’ll need for our setup, a head’s up is warranted.
Always ensure safety for yourself and the components. To do this, disconnect your printer from power before going ahead with any modifications. Different steps are required, and you don’t want to rush through the process, as this might lead to hardware or software issues that may take longer to troubleshoot. Be prepared to invest a few hours for the entire process. And for the hardware components, keep in mind that, while cheaper options might be better for your wallet, if they’re not good quality, in the long run they might represent a problem.
With that out of the way, let’s take a look at what you’ll need to run Klipper on the Ender 3 V3 SE:
Hardware
- Ender 3 V3 SE 3D printer
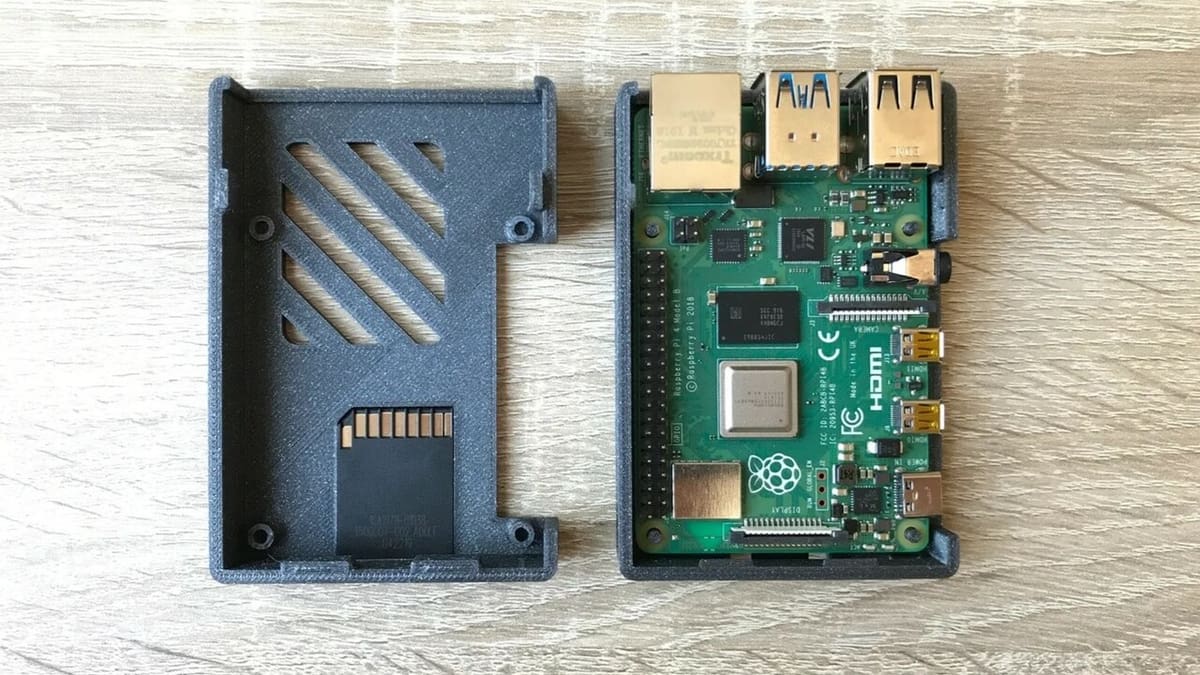
- Raspberry Pi (2 GB or 4 GB Raspberry Pi 4 is recommended)
- 2x MicroSD card (at least 8 GB) (one for the Raspberry Pi and the other to install Klipper in the 3D printer’s mainboard)
- USB cable (A-male to B-male) to connect the Raspberry Pi and printer
Software
- Raspberry Pi Imager
- PuTTY
- WinSCP (Windows Secure Copy)
Note: In this guide, we’ll be using MainsailOS as the web interface for Klipper. Another option, FluiddPi, is still available but no longer being developed.
Set Up the Raspberry Pi

With the requirements out of the way, we’ll install Mainsail OS onto the MicroSD card, transforming the Raspberry Pi into the control center for your Klipper-powered 3D printer.
- Download the Raspberry Pi Imager from the official website.
- Insert the MicroSD card into your computer’s card reader.
- Launch the Raspberry Pi Imager and select your Raspberry Pi device from the list that will appear after you click on “Choose Device”.
- Then, select “Choose OS > Other specific-purpose OS > 3D printing > Mainsail OS”. Choose the version compatible with your Raspberry Pi model (32-bit for older models, 64-bit for Raspberry Pi 4).
- Select “Choose Storage” and choose your MicroSD card.
- Then click on “Next”. A pop-up window will appear asking, “Would you like to apply OS Customization settings?” Select “Edit Settings” and configure the Wi-Fi settings according to your requirements in the “Configure wireless LAN” section. Then go to the “Services” tab and enable SSH. Finally, click on “Save”. When prompted, “Are you sure you want to continue?”, click on “Yes” and it will start installing Mainsail on the selected storage. Note that the contents of your MicroSD card will be deleted.
- Once the image is written, safely eject the MicroSD card from your computer.
Configure Wi-Fi on Raspberry Pi (Optional)
This next step allows you to connect to your Raspberry Pi wirelessly. If you prefer a wired connection, skip to the third step below.
- With the MicroSD card inserted in your computer, locate the boot folder on the card.
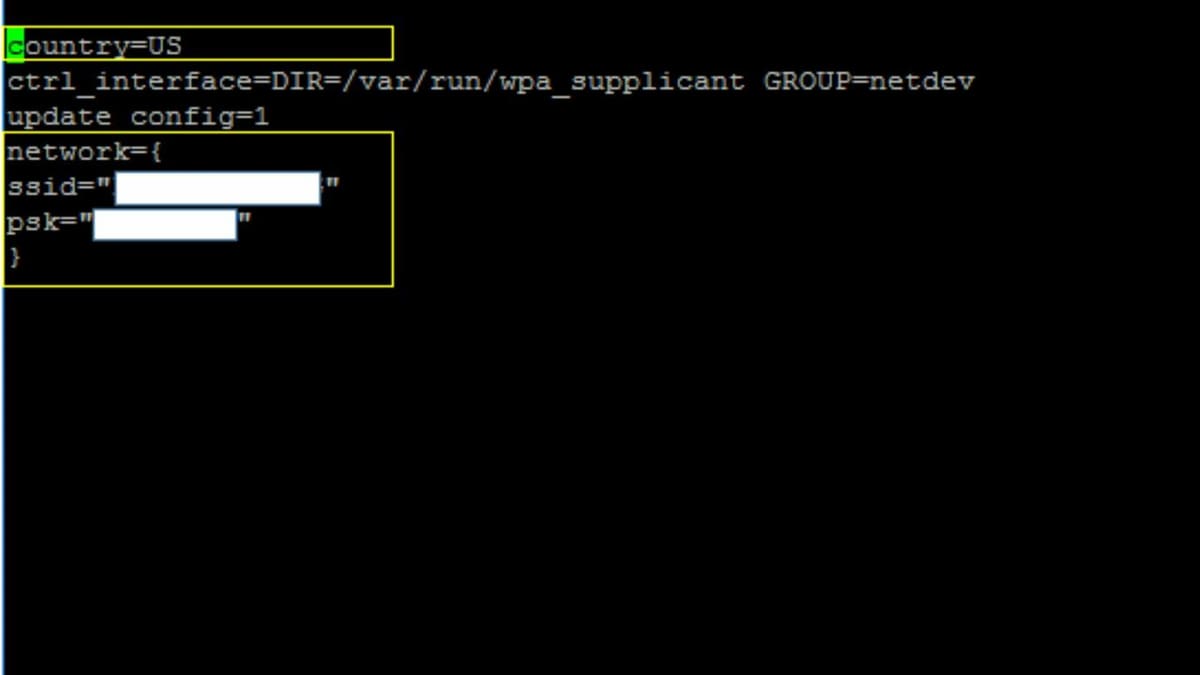
- Open the file named “wpa_supplicant.conf” inside the boot folder.
- Open the file with a text editor and add the following lines, replacing <your_country_code> (for example, US: US, India: IN) <your_wifi_SSID> and <your_wifi_password> with your actual Wi-Fi network details:
country=<your_country_code>

ctrl_interface=DIR=/var/run/wpa_supplicant GROUP=netdev

update_config=1

network={

ssid="<your_wifi_SSID>"

psk="<your_wifi_password>"

}
Boot Up & Find the Raspberry Pi’s IP Address
Once your Raspberry Pi board is ready, it’s time to take it to the next step.
- Insert the MicroSD card into your Raspberry Pi.
- Connect the Raspberry Pi to your Ender 3 V3 SE using the USB cable (one end to the USB-A port on the Raspberry Pi, the other to the USB-B port on the printer).
- Connect the Raspberry Pi to a power source using a Micro-USB cable and power adapter. The Raspberry Pi will automatically boot up.
Finding the IP Address
We’ll need the Raspberry Pi’s IP address to access the Mainsail web interface. There are two ways to find the Raspberry Pi’s IP address on your network:
Method 1: Using Your Router
- Access your router’s configuration page by opening a web browser and entering your router’s IP address (usually 192.168.1.1 or check your router’s manual).
- Log in to your router using your router’s admin credentials.
- Locate the section that shows connected devices. You should see the Raspberry Pi listed with its IP address.
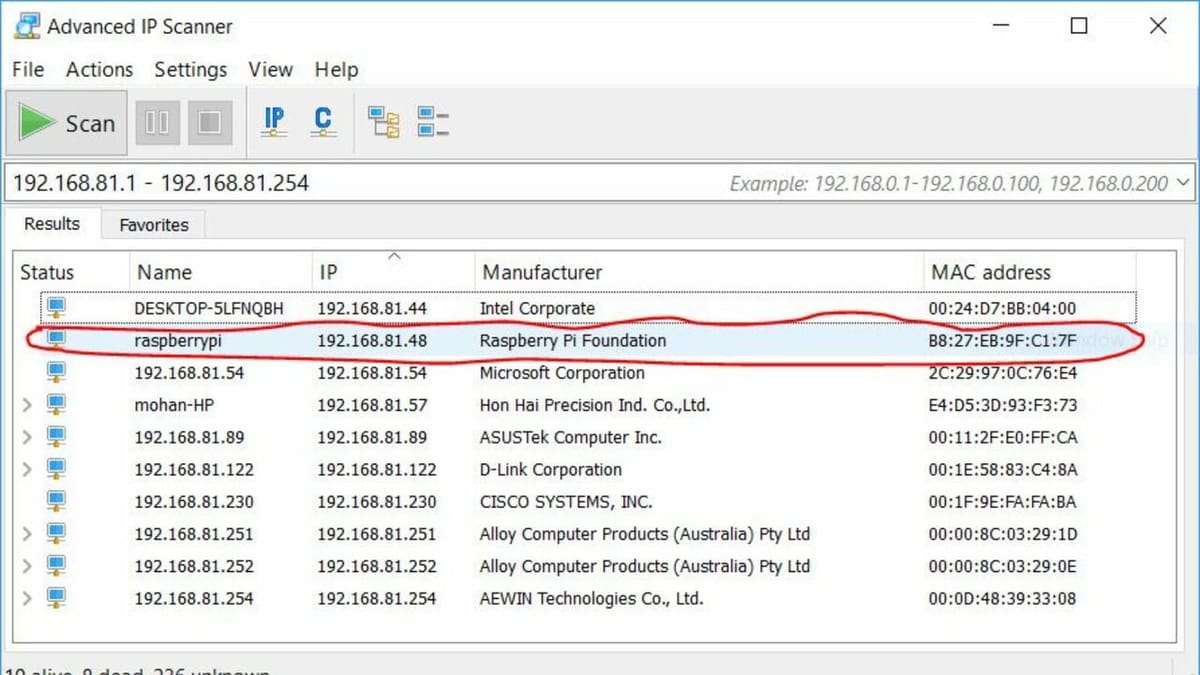
Method 2: Using a Network Scanner
- Download and install a network scanner software like Advanced IP Scanner on your computer.
- Run the scanner and it will list all devices connected to your network, including the Raspberry Pi, displaying its IP address.
Access Mainsail
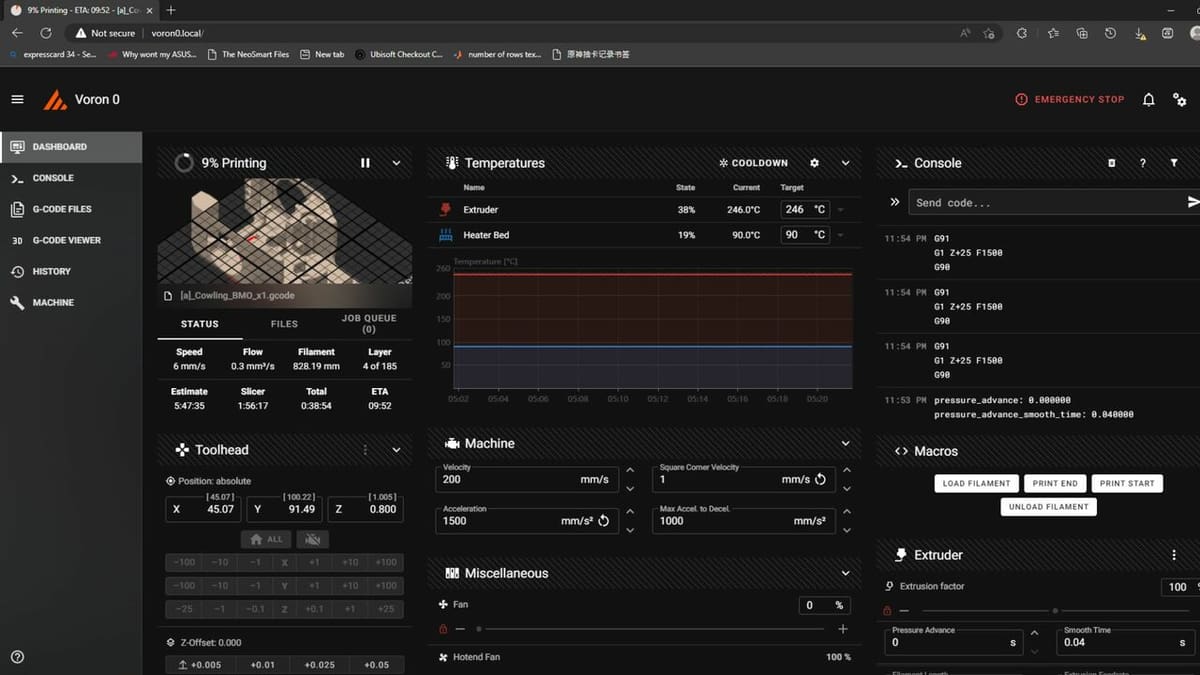
Time to open a web browser and connect to the Mainsail interface on the Raspberry Pi! This is where the magic of controlling your printer will happen.
- Open a web browser on your computer.
- In the address bar, type the IP address of your Raspberry Pi followed by “:8080” (e.g. http://192.168.1.100:8080).
- You should now see the Mainsail web interface.
Configure Klipper
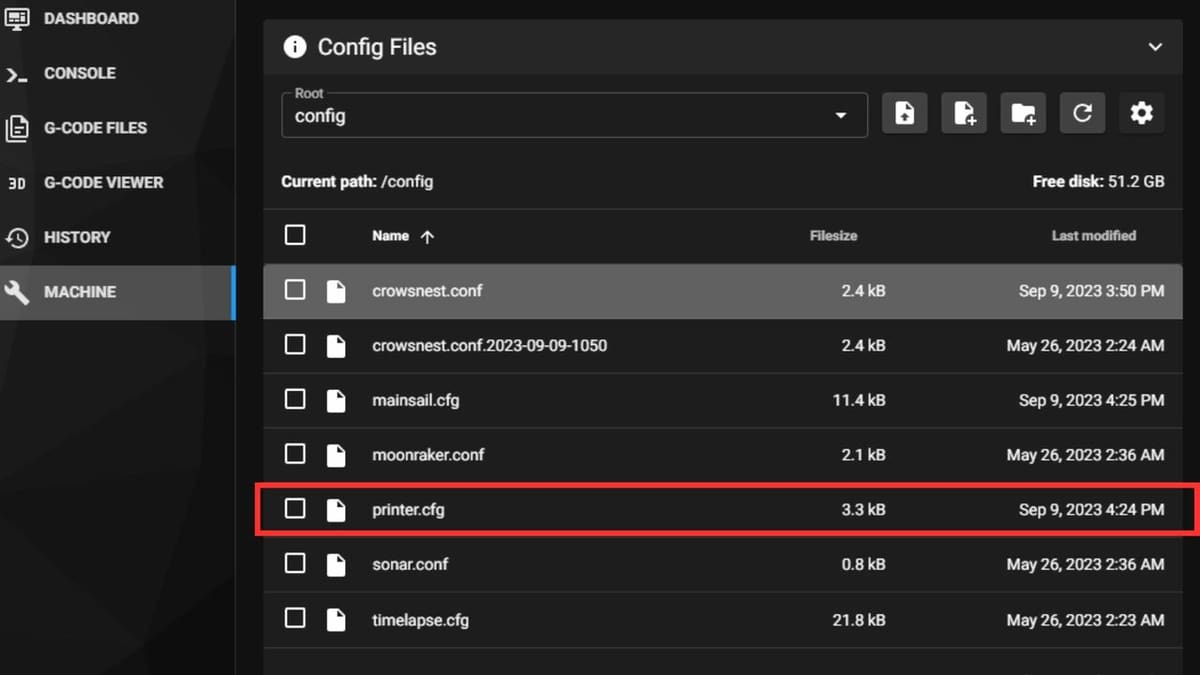
We’ll now customize the Klipper configuration file (printer.cfg) with all the specific settings tailored to your Ender 3 V3 SE setup.
- Access your Mainsail interface by entering the IP address of your Raspberry Pi in your web browser.
- Click on the “Machine” tab. You’ll see a large blank text box called “printer.cfg”. This is where you’ll create the Klipper configuration file specific to your Ender 3 V3 SE.
- Next, you can look for a pre-configured file and download the printer.cfg file from repositories or forums. For example, GitHub has an Ender 3 V3 SE Klipper config file.
- Once you’ve got the pre-configured file, paste the contents of the Ender 3 V3 SE printer.cfg file from GitHub into the “printer.cfg” text box on Mainsail.
- Last but definitely not least, save the configuration. Click “SAVE & RESTART” for the changes to take effect.
Flash Klipper Using PuTTY
This step utilizes PuTTY to compile the unique Klipper firmware and then transfer it to your printer’s mainboard for installation. To get started:
- Locate the compiled firmware. On your Raspberry Pi, navigate to the directory where Klipper stores compiled .bin files. This is usually located within the ~/klipper/out/ directory.
- Connect to the Raspberry Pi via SSH using PuTTY:
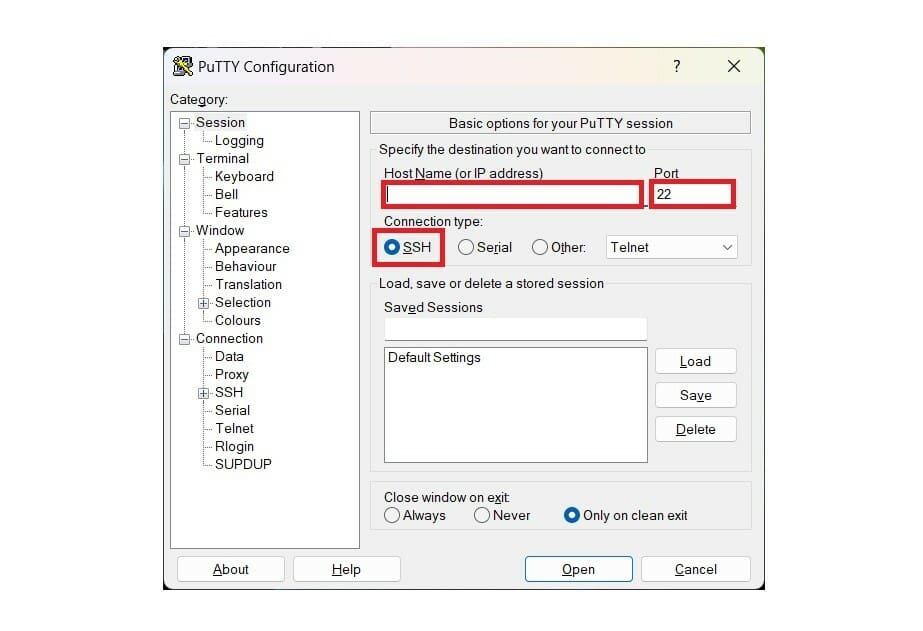
- Download and open PuTTY.
- Under “Host Name (or IP address)”, enter the IP address of your Raspberry Pi.
- Set the “Port” to 22.
- Ensure the “Connection type” is set to “SSH”.
- Click “Open” to connect.
- Enter your Raspberry Pi login credentials in the pop-up command window.
- After receiving the password prompt, enter the password and press enter. Upon successful entry, a prompt ending with a $ will appear.
- Once the previous download finishes, input the command
cd ~/klipper/followed bymake menuconfig. - Ensure to activate advanced options by navigating to the top of the prompt using the up and down keys and pressing the spacebar to enable them.
- Navigate the pop-up menu using your device’s arrow and enter keys to access the “Micro-Controller Architecture” section. For the Ender 3 V3 SE, opt for “STMicroelectronics STM32” as it has a 32-bit board.
- In the “Processor model” category, select “STM32F103” and select “28 KiB” in the “Bootloader” option.
- Navigate back to the home menu and select “Communication interface”, choosing USB on PA.
- Exit the menu by pressing the escape key and confirm saving changes by selecting ‘Y’ when prompted.
- Return to the main terminal and input the make command.
Upload New Firmware
In this step, we’ll go over how to transfer the firmware file from the Raspberry Pi file center to your computer and then to the MicroSD. This MicroSD card will next be used to install Klipper onto your Ender 3 V3 SE’s mainboard.
- Download and launch WinSCP.
- Create a new connection by clicking on “New Site”. Include the following information:
- Protocol: Select “SFTP (Secure File Transfer Protocol)”.
- Hostname: Enter your Raspberry Pi’s IP address.
- Port number: Leave the default port number as 22.
- Username: Enter your Raspberry Pi username (typically ‘pi’).
- Password: Enter your Raspberry Pi password.
- Optional: Click “Save” to store this connection for future use.
- Click “Login”; this establishes the connection to your Raspberry Pi.
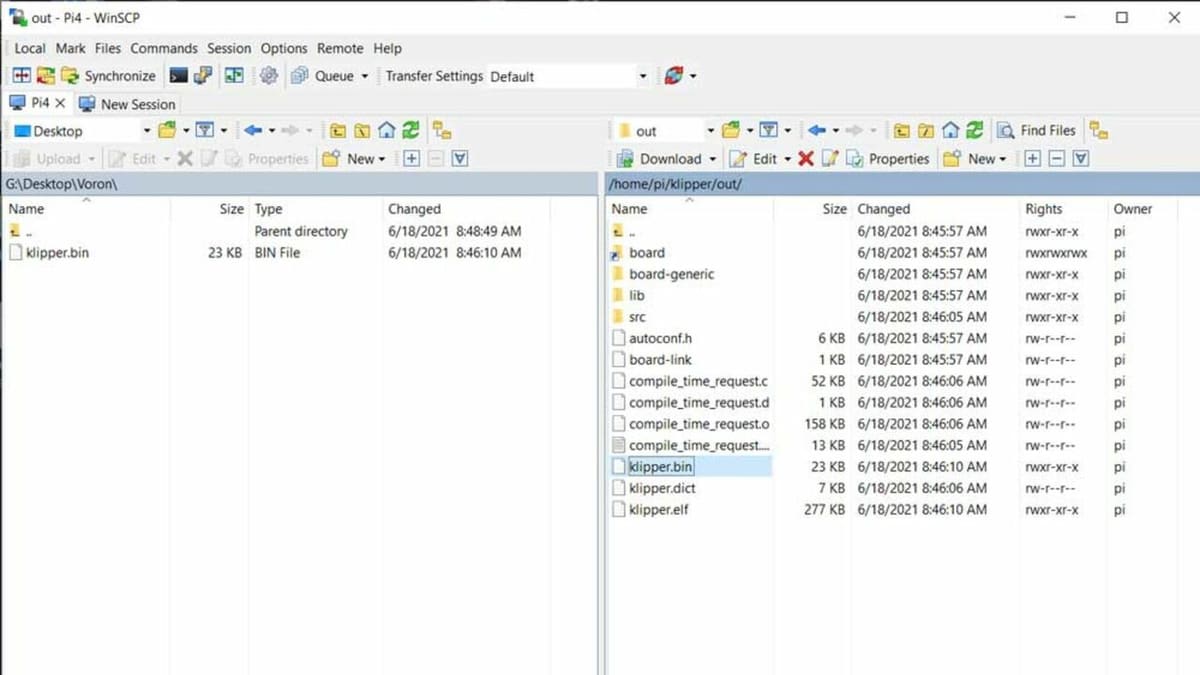
- In the left pane of WinSCP, you’ll see your Raspberry Pi’s file system. Navigate to the folder where the compiled firmware .bin file is located (this is usually within the ~/klipper/out/ directory).
- In the right pane of WinSCP, your SD card should be visible. Open the root directory of the SD card.
- To transfer the firmware, locate the klipper.bin file in the Raspberry Pi pane, drag and drop the file to the SD card pane in WinSCP, and rename the copied file to firmware.bin directly on the SD card.
- Safely eject the MicroSD card from your computer.
- To flash the firmware, insert the MicroSD card into your powered-off Ender 3 V3 SE.
- Power on your Ender 3 V3 SE. The firmware will flash automatically. Wait a few minutes, then power cycle the printer again.
- Remove the SD card.
Verify the Installation
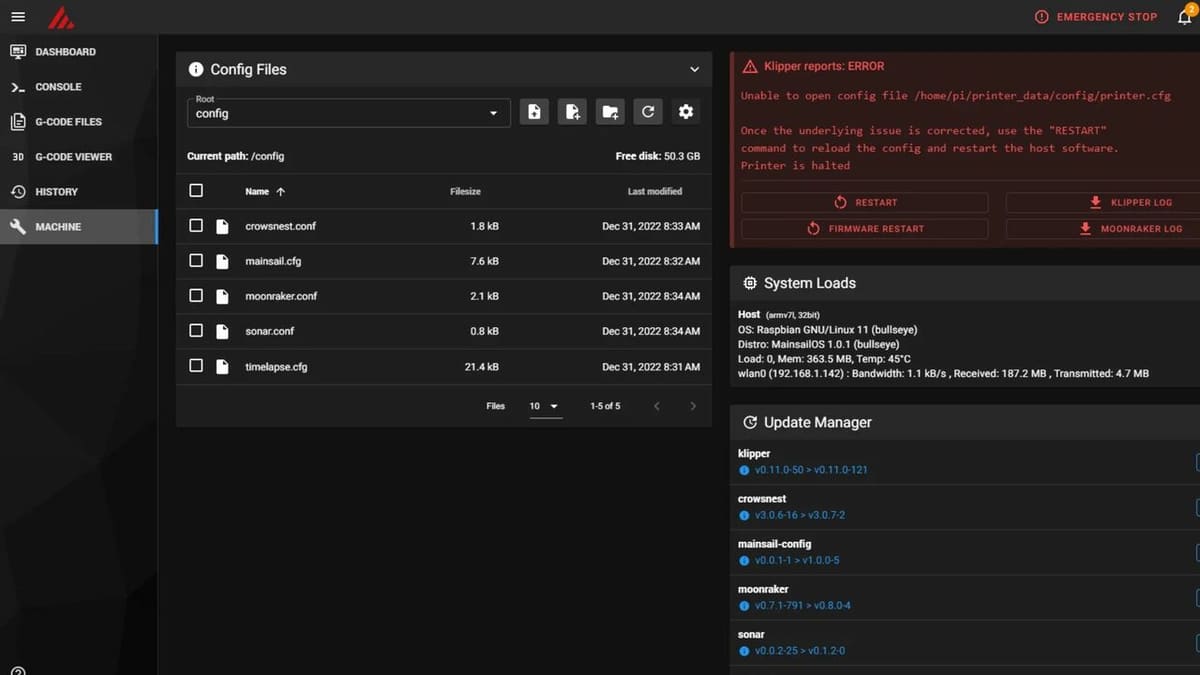
After successfully flashing the firmware, we’ll make sure your Ender 3 V3 SE running Klipper is visible and controllable through the Mainsail interface.
- If you haven’t already, power on your Ender 3 V3 SE.
- Go back to the Mainsail web interface in your browser. Mainsail should automatically detect the printer and connect to the Klipper firmware.
- If not, re-check the USB connection and restart Klipper from the “Machine” tab.
Calibration & Testing
We’ll fine-tune the printer with initial calibrations through Mainsail and run some test prints to ensure Klipper is running smoothly with your Ender 3 V3 SE.
- Perform initial calibrations on the printer, guided by the Mainsail interface:
- Bed leveling: Use the tools available in Mainsail.
- Z Offset: Set the correct distance between your nozzle and the bed.
- E-steps: Calibrate the amount of filament extruded.
- Run test prints to ensure everything works as expected.
Congratulations! You’ve successfully installed Klipper on your Ender 3 V3 SE and are using Mainsail as the control interface.
Tips & Tricks

Now, let’s get into a few tips and tricks that can assist you throughout the entire process of installing Klipper.
- USB cable for initial setup: A direct USB connection between the Raspberry Pi and printer during the first setup and configuration avoids potential issues with Wi-Fi connectivity. This guarantees reliable communication when flashing firmware and troubleshooting.
- Ender 3 V3 SE configuration check: Double-checking your Klipper configuration file (printer.cfg) is crucial. Ensure all settings are accurate for your specific Ender 3 V3 SE board (e.g. board pin assignments, stepper directions, etc.). Incorrect configurations lead to printing and homing problems.
- Add support for original LCD: While Klipper primarily uses a web interface like Mainsail, you might want to retain functionality of the original Ender 3 V3 SE’s LCD. This may require additional configuration.
- Look at others’ experiences: Checking out how others have fared both when setting up and when running Klipper on the Ender 3 V3 SE can help give you pointers before, during, and after you’re doing the same. Redditors 0xD34D, Competitive_Drama385, iamozone206, and HalfBakedColt are just a few of the makers who are sharing their different takes.
Troubleshooting
Here are some problems you might encounter, and you can follow these steps to fix them.
- No IP address: If your Raspberry Pi isn’t found on the network, verify that your router settings aren’t blocking the Pi, check your Wi-Fi credentials (if you configured Wi-Fi) on the Pi, and ensure the Ethernet cable is secure if using a wired connection.
- Raspberry Pi undervoltage errors: A Klipper setup increases the workload on your Raspberry Pi. Address the undervoltage by using a high-quality power supply rated for your Raspberry Pi model or opting for a thick and short USB power cable to minimize voltage drop.
- Double-check wiring: Loose connections or incorrect wiring are common sources of issues. Pay close attention to the wiring diagrams for your Ender 3 V3 SE board and double-check the stepper motor wires, endstop wiring, and thermistor connections (both hot end and heated bed).
- Klipper log files: Klipper keeps excellent logs. Access these through Mainsail to search for specific error messages that might guide you to the root cause of problems.
- Baud rate matching: Klipper on the Raspberry Pi and your printer’s firmware must communicate at the same speed (baud rate). Make sure this setting matches in your printer.cfg and in the printer’s firmware.
License: The text of "Klipper on Ender 3 V3 SE: How to Install It" by All3DP is licensed under a Creative Commons Attribution 4.0 International License.