Klipper (3D Printer Firmware): What Is It & How to Use It?

Klipper firmware is a powerful tool to improve the smarts of your printer, and by extension the performance! Here's what you need to know.
The mainboard is the heart of your 3D printer. It controls all mechanical movement and timing, from stepper motors to heaters to fans, and has to get that timing precisely to avoid your part becoming spaghetti.
Traditionally, this mainboard has also had to decode G-code output from the slicer, schedule the next set of moves, read all the sensors, and control any connected displays or user interface buttons, switches, click wheels, and more. Considering that the mainboard is often an 8- or 32-bit microcontroller (only slightly more powerful than the Apollo guidance computer), this can be a big ask.
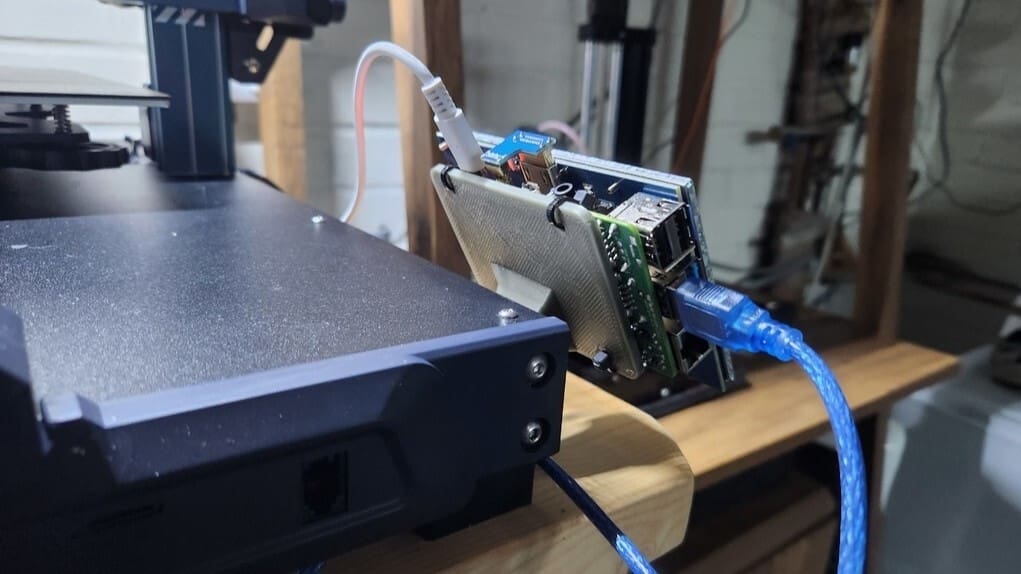
To that end, Kevin O’Connor developed Klipper, a program that lets the mainboard do what it’s good at (controlling motors and sensors very precisely) and which adds a brain in the form of a single-board computer (SBC), such as a Raspberry Pi, to do the more processor-heavy operations, like decoding G-code files.
Let’s take a closer look at what Klipper is, its different features and functions, how you can get started with it, the community’s take on it, and a popular alternative in case it’s not right for you. Let’s get to it!
How It Works
Klipper claims to make your printer faster and more accurate. It does this by ensuring that the hardware is performing in its “sweet spot” through two clever tricks. The first trick is psychological. By making your printer way easier to tune, you’re more likely to actually tune it! The second trick is processing power. Adding an SBC provides a significant boost in computing power that means your printer isn’t struggling for clock cycles on those trickier prints.
All 3D printers, and indeed most other machines these days, run a specific program that connects the hardware and software, known as firmware. For 3D printers, the firmware is stored on the machine’s mainboard. As mentioned, the firmware controls the connected electronics, like stepper motors and sensors, using G-code instructions from slicing software to print a model. Klipper is actually a suite of software for the SBC and firmware that’s written to your printer’s mainboard.
Klipper utilizes the extra computing power to essentially make a pre-developed plan for G-code commands, so your printer only needs to carry out the commands, not process them. This is possible because stepper motors move small amounts in individual steps. Klipper uses the extra computing power and built-in algorithms to better calculate step movement times for motor actions, achieving much higher precision.
With a clearer understanding of what Klipper is and how it works, let’s take a closer look at what it has to offer.
Features & Functions
As mentioned, Klipper uses additional computing power provided by an additional SBC to offer more accurate motion control to the printer in which it is installed. Because there’s an SBC providing oversight of the printer, there are a lot of additional features present that leverage the extra processing power available. While you can find the complete list on Klipper’s Features page, here’s a quick rundown of what you can expect.
Wide Hardware Compatibility
Klipper claims to be hardware agnostic, which is to say that you can run any type of printer control board and kinematics and it will support it. While this expansive statement probably overreaches when considering research printers running custom hardware, it is true that Klipper will support just about any printer that has already been tried. That includes support for kinematics as rare as “Deltesian” and “Polar“, as well as the more common types (it was designed with CoreXY in mind). Plus, if you have a peripheral that provides a digital output of some kind, chances are Klipper can read it and you can tell the program how to react.
The other trick up Klipper’s sleeve in regards to compatibility is for running printers with multiple microcontrollers, such as CAN BUS or USB toolheads (yes, that is plural with full multiple independent extruder or tool changer support). Of course, you have to be up to the challenge of setting up the software to talk over your chosen bus, which is no easy feat, but in theory, a Klipper and CAN BUS system can greatly simplify your machine’s wiring, reduce its power consumption, and increase its accuracy.
Print Quality

Klipper is also known for the quality of prints it can produce. It achieves this through some clever features such as endstop phasing, pressure advance, and input shaping. Endstop phasing leads to a more consistent first layer by improving the accuracy of endstop switches (particularly in the Z-axis). This is done by checking the set of windings that an endstop is normally triggered on. Pressure advance changes the volume of extrusion when printing sharp corners, and input shaping essentially adds a set of inverted vibrations to the printer motion systems that cancel out any structural resonances (significantly reducing ringing).
Klipper further achieves better print quality by conducting continuous motion planning, interpreting G-code from the slicer, and applying its other features to make sure that plastic is deposited where needed in sufficient quantity and only where needed.
Print Speed
These print quality improvements also increase the speed at which you can print. While no printer can go past its volumetric flow rate, Klipper ensures that the hot end is really the only limiting factor by forward planning accelerations, the aforementioned input shaping, and anticipating “zigzag” moves and adjusting print motions accordingly.
Quality of Life
Otherwise known as “ease of use”, these features make using the printer far more intuitive and enjoyable than older systems. Instead of reflashing your firmware hundreds of times to tune your printer’s motions, you can simply edit a text file in the printer’s web interface – which you can also choose.
If you don’t like the interface you start with, there are three officially supported options (Mainsail, Fluidd, and OctoPrint). These are accessed via a web browser over your local network. Loading a print to the printer is as simple as dragging and dropping a file (no more SD cards or USB sticks).
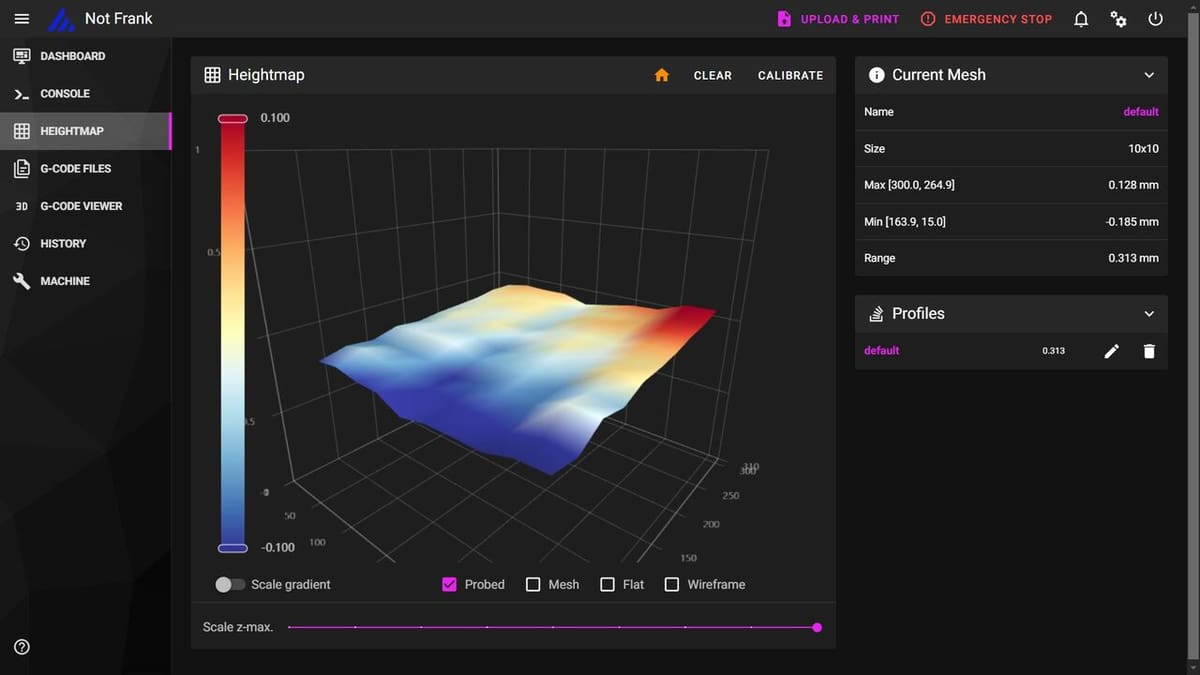
Using that same interface, you can also program your printer to react in certain ways. For example, say you want the printer to park somewhere after homing, it’s as simple as editing the same text file for tuning. These “macros” (which are specific blocks in your printer.cfg file) also extend to assisting with automatic bed leveling and Delta calibrations.
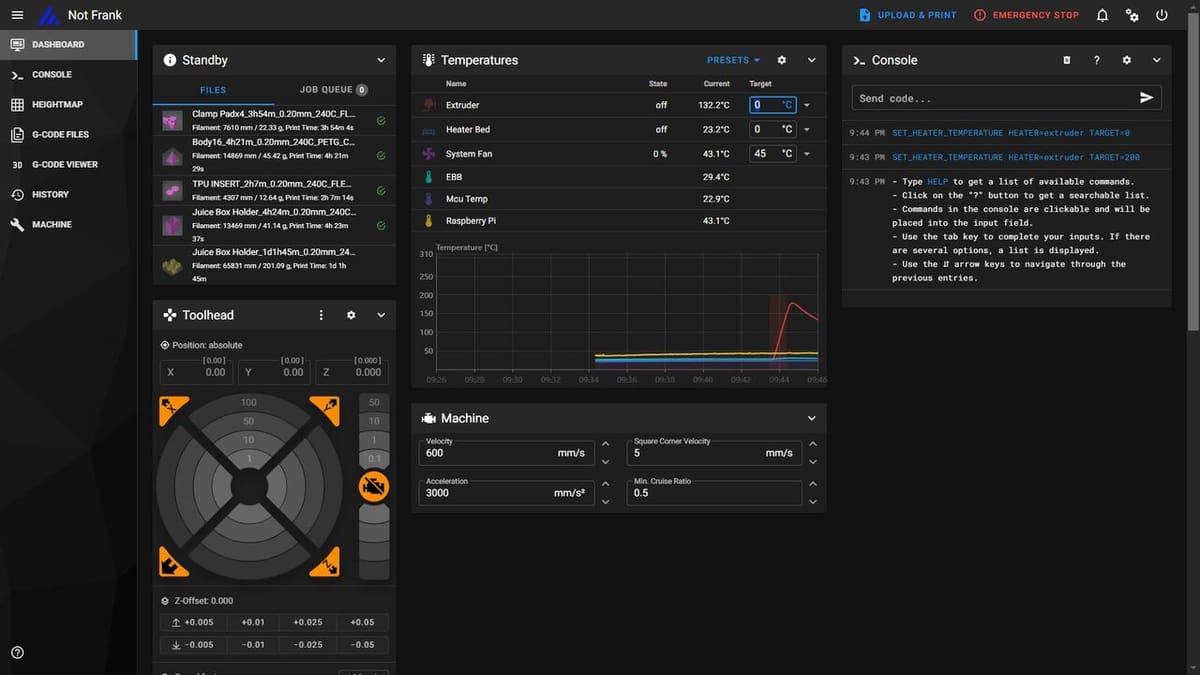
Klipper also allows you to check your printer’s status and any connected cameras, as well as to update temperatures and speeds during printing, from anywhere on your local network. If you’re particularly tech savvy, you can do this over the internet without submitting to someone’s cloud service conditions (beware of security risks). If you notice an issue, Klipper can also cancel parts of a print (rather than the whole print) using it’s “Exclude Objects” feature.
So, if we’ve sold you on Klipper and its features, read on to see how to install it.
Getting Set Up
While we’ll give a general overview of what’s needed to get started to “Klipperise” your printer, you can check out our deeper dive in our step-by-step guide.
To start with, grab your favorite SBC. We recommend a Raspberry Pi 3B+ or better, though Klipper can run on a Raspberry Pi 2 if you don’t get too fancy – many have also run Klipper on a Pi Zero, Orange Pi, and even old laptops (which can run multiple printers)!
Next, you’ll need to decide between one of the three interfaces: OctoPi, Fluidd, or Mainsail. Don’t worry too much about choosing the right one, as you can change to another in as little as an hour. If you’re using an SBC made specifically for Klipper (like a BTT-Pi), you should check out the manufacturer’s software.
Once you’ve picked an interface, you’ll need to put that software on your SBC by writing the image using Raspberry Pi Imager, Balena Etcher, or another similar disc image writer to an SD card that will live in your SBC. Don’t forget to enter your Wi-Fi settings (following the guide for the interface you’ve chosen) before you plug the SD card into your SBC, connect it to your printer, and power it up.
Klipper has a web interface, but it doesn’t have a desktop environment. This means that connecting a display and keyboard to your Klipper SBC will only show you a command line interface, and a mouse will be useless. Since the next parts of the setup need your SBC to be connected to your printer mainboard via USB, and most of Klipper’s best features are unlocked using the web interface anyway, we suggest using a protocol known as SSH or “Secure Shell”.
SSH is extremely easy to work with, but if you haven’t used it before, it might make you feel a bit like a hacker. In a nutshell, you’ll need a telnet program like PuTTY, you’ll then have to find the IP address of your Klipper SBC, and open a connection to it using that telnet program. Once you’re logged in, you’ll be greeted with a Command Line Interface (CLI).
Note that, beyond this point, you’ll be modifying the firmware installed in your printer. Reverting these changes may be difficult or impossible. Don’t be scared – just pause for a marching pace to think about it. If you’ve spent time tuning your printer, we recommend writing down those settings because they will help tune your Klipper install.
Now you need to determine what mainboard your printer is running. The Klipper GitHub page has a configuration and guide for most popular printers, but in a nutshell you’re going to use the command “make menuconfig” described in the Klipper installation guide to build custom firmware for your machine. You’ll then use a few additional commands to flash this new firmware to your printer’s mainboard. You may need to press a button or set some jumpers on your printer’s mainboard in order to have it receive the firmware.
Once the firmware is flashed to your mainboard, you should start seeing information about your printer on the Klipper web interface. If so, we’re ready to move on to configuring your install and getting on with first prints.
Configuration & Macros
Configuring your printer is extremely easy and all done through the “printer.cfg” file available in your Klipper web interface.
Your first step will be to see if there is a pre-written configuration file for your printer. Don’t panic if there isn’t, just pick a generic configuration file from the Klipper GitHub page. You can even start with a blank file and write the whole thing yourself (we recommend against that unless you have some spare time that you’d like to spend coding… Here are some examples to help you get started!). It’s as simple as entering information about your printer into relevant code sections. The format of the Klipper config files is very consistent, which makes it easier to pick up than other firmware configurations.
We recommend organizing your configuration, and there are a few options to achieve this. You can add a separate file and use the “include” command at the start of the “printer.cfg” file to identify each file. However, Klipper can only write things like PID values or input shaping resonances to the “printer.cfg” file, and you’ll need sections for these variables in the main config.
Another option to organize your config is to use headings. For example, we can have only the “printer.cfg” file and use headings for each section. We use a heading in the same style as macros to provide an easily noticeable delineation between sections. However you organize your file (or even if you don’t), you’ll at least have a “macros” heading.

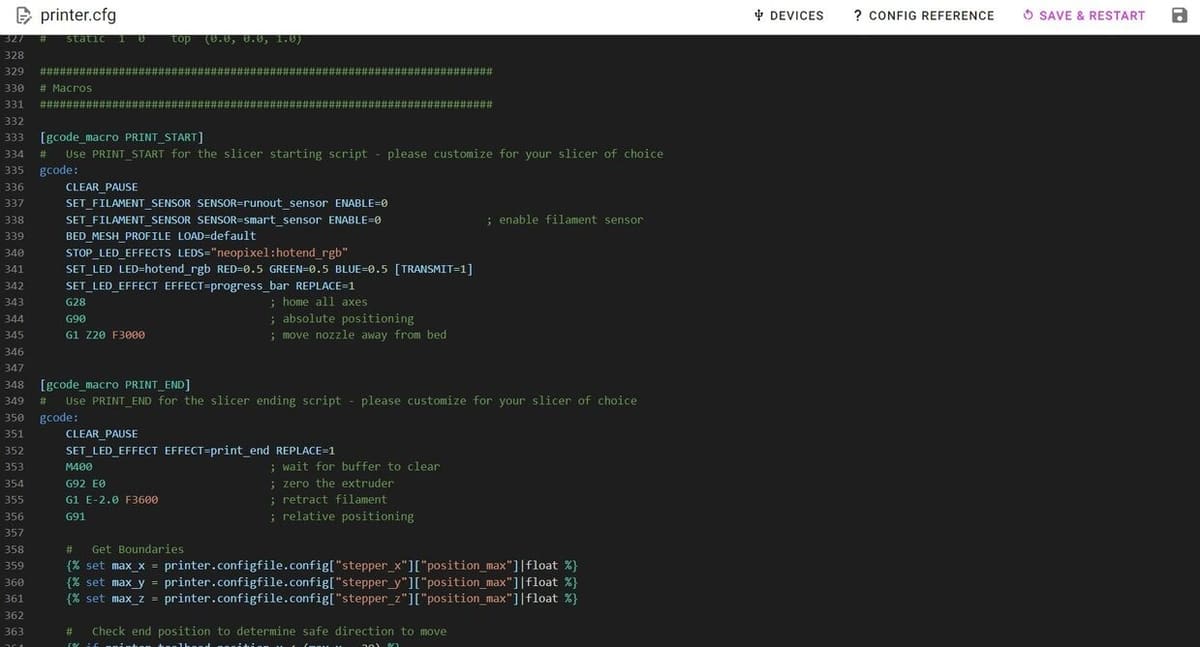
As mentioned, macros are small pieces of code that can be called out easily to achieve a certain function. For example, you may have a macro for loading filament, another for unloading, one for print start, pause, and end (these are recommended by the Klipper documentation). In the pictured example, you can see our macros for loading and unloading filament, as well as homing and a few different types of pause we use.
There’s another heading right at the bottom of the file that only appears after you start tuning and tells you not to edit it. This is where Klipper stores its variable parameters – don’t touch it, you can really mess things up!
Now that you’ve got a configuration loaded, you should start by confirming your configuration using the Klipper configuration check guide. If everything is ticking correctly, you can start tuning your printer. We recommend the excellent print tuning guide by Ellis, although you’ll want to make sure to read the Setting Expectations section first.
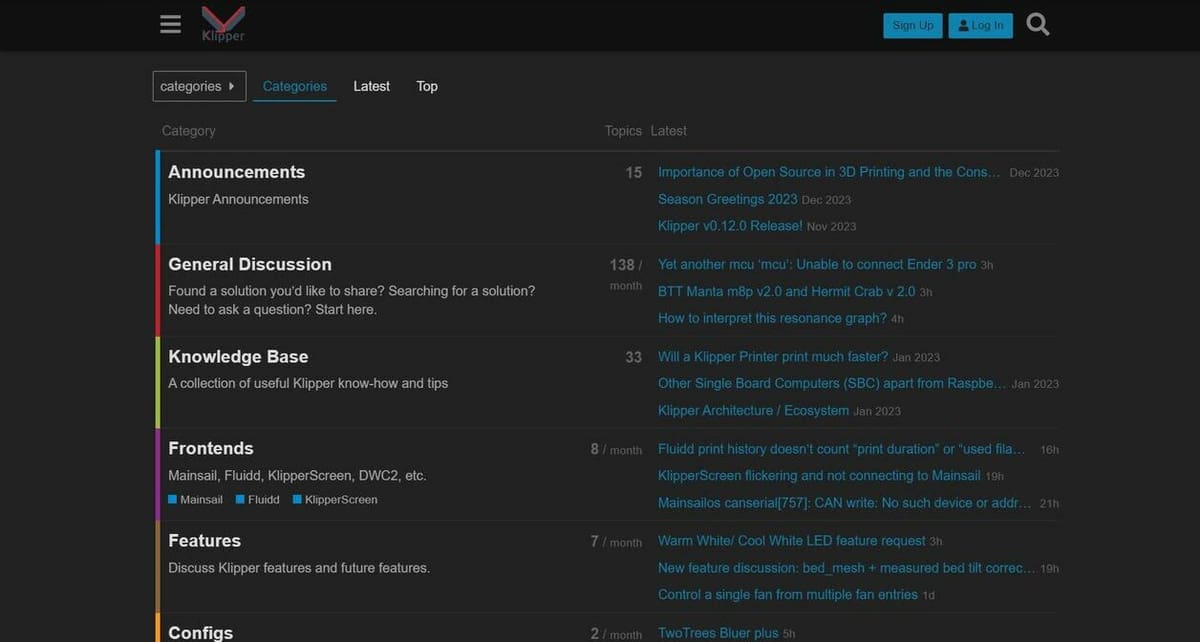
If it all goes wrong, don’t despair! There’s a whole internet of support to get you back up and running. Klipper has a Subreddit, Discord, and Discourse, and there are also several maker guides and blogs dedicated to Klipper. Speaking of community…
Community Experience
It seems that most people on 3D printing forums recognize a significant difference in using Klipper over other options. Some users noted that they saw print quality differences between Klipper and Marlin even when using a more powerful 32-bit mainboard. Moreover, other users were able to use higher print speeds when running Klipper firmware.
Klipper receives broad praise from nearly everyone in the 3D printing community; however, it isn’t without its downsides. You’ll need to learn to program it and add at least one component (an SBC), which can be quite expensive depending on where you live.
Furthermore, while the community is quick to lend a hand if you ask for help, you may need to spend considerable time and energy finding problems if the installation doesn’t go smoothly. If you’re not into tinkering with your printer, we recommend sticking with the stock setup.
Alternatives
Despite the praises sung about Klipper here, other programs to run your printer have their own advantages! Smoothieware, Marlin, and Duet are examples of other options that you might like to try (though if you’re reading this guide, you’re probably using Marlin).
Marlin
Marlin is still the most common printer firmware. Most guides are written for it and most printers start on it. If you’ve used a printer (other than closed ecosystems like Flashforge, Raise3D, or Bambu Lab), you’ve probably been using Marlin. It’s very easy to use and there are a lot of how-to guides, help forums, and support for it.
Smoothieware
Smoothieware was designed specifically for the Smoothieboard, but a few other compatible boards are now available. This firmware is super configurable and can run other types of machine, meaning that you can turn your printer into a 5-axis waterjet cutter (if you’re so inclined). The real drawback is its limited compatibility.
Duet
Duet boards are high-quality and highly expandable boards. Wait, weren’t we talking about software? Yes. Okay, so the Duet ecosystem is a bit funky. It would still be quite an upgrade to your 3D printer, but unless you’re building a custom multi-extruder monster (in which case Duet may write custom kinematics for you), it may be overkill.
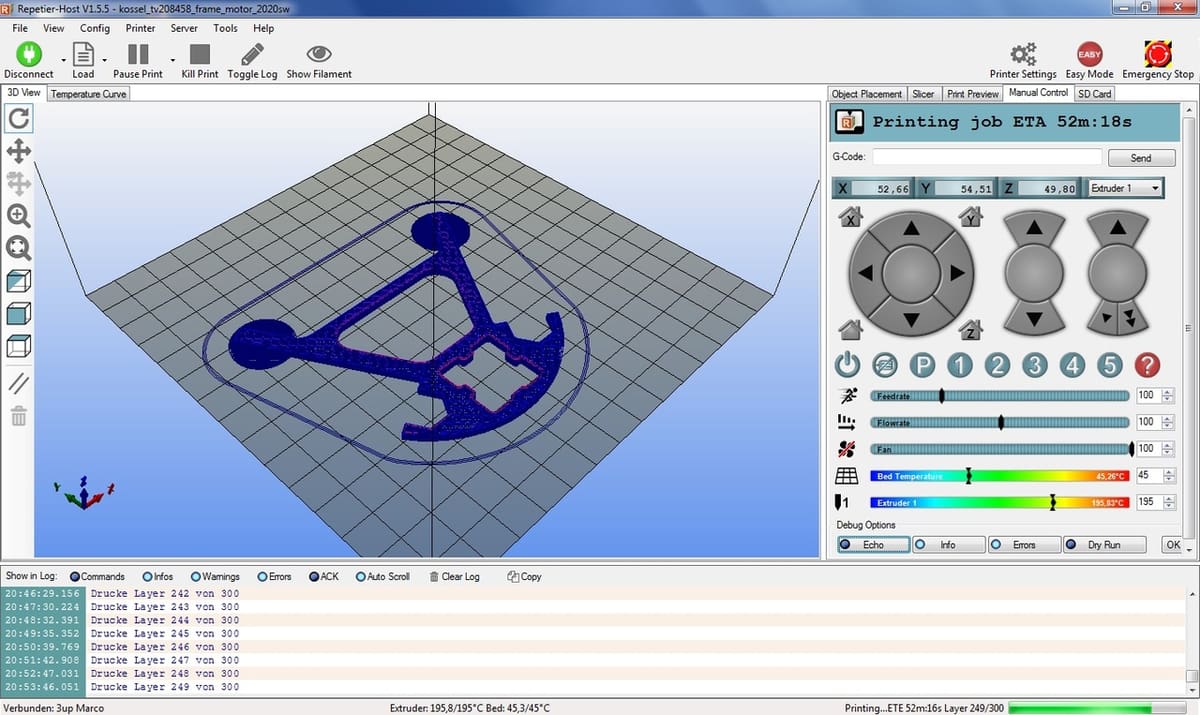
Repetier
Repetier is mostly compatible with 8-bit boards such as RAMPS or RADDS, but strangely, also Duet boards (go figure). If you use it with Repetier Host, you can really get a lot out of an older printer or any CNC machine. For example, Repetier offers a plug-in for Inkscape to convert images directly to G-code.
RepRap
RepRap was one of the first hobbyist 3D printing firmware options, and has a similar wide compatibility as Repetier, but has been updated to be geared towards 32-bit boards. Again, it’s compatible with Duet boards, and when used with these, it leverages their distributed processing power to deliver impressive capability.
All that being said, Klipper offers a very economical and user-friendly way to try different firmware in your machine. It boasts very easy installation with lots of community support and a low barrier to entry for the hardware. Plus, if you don’t like it, you can always use the SBC in another project!
License: The text of "Klipper (3D Printer Firmware): What Is It & How to Use It?" by All3DP is licensed under a Creative Commons Attribution 4.0 International License.