Laser Cutting Design: How to Get Started

Laser cutting design is easier than you may think. Learn how to design, cut, create, and release your creativity with our beginner's guide.
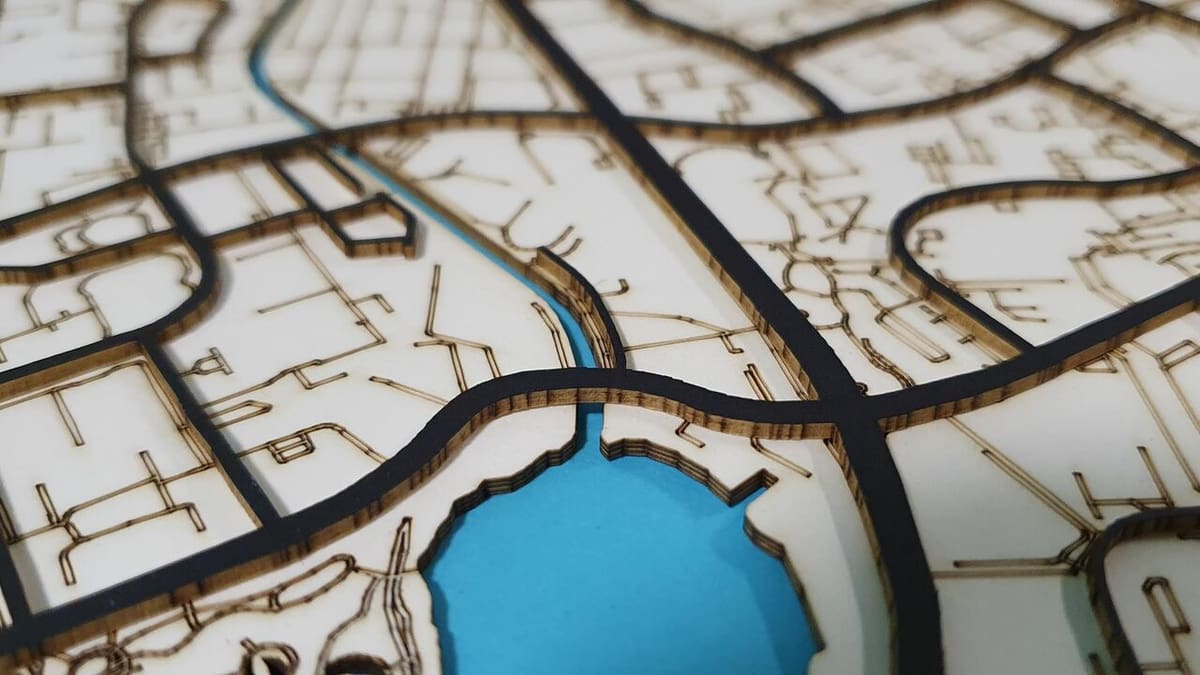
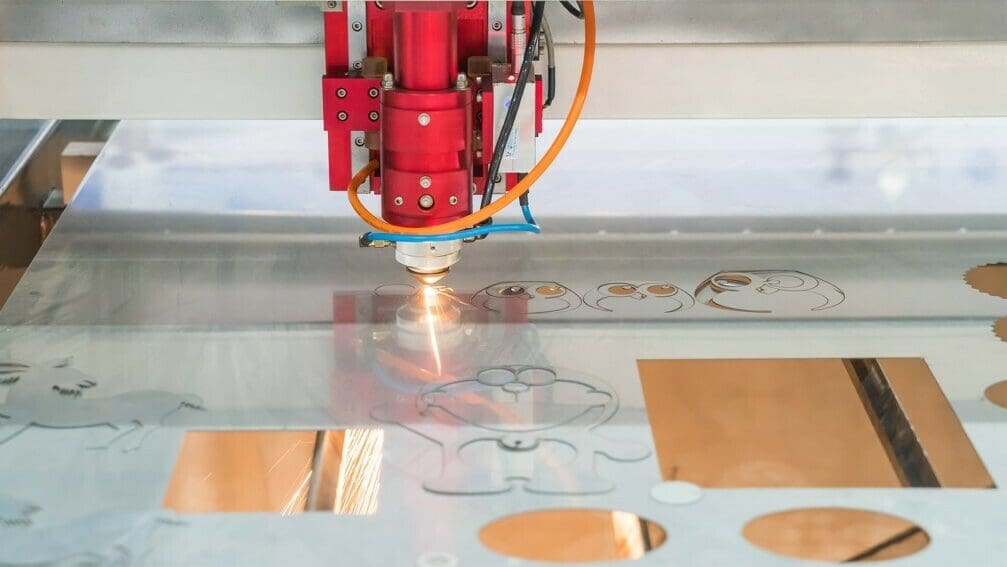
Laser cutting is a manufacturing process that uses a high-powered laser beam to cut, engrave, or etch materials such as wood, metal, plastic, fabric, and others with precision and accuracy.
The laser beam melts or vaporizes the material, leaving a clean and precise edge, resulting in highly intricate and detailed designs. Laser cutting has many applications in various industries, including architecture, fashion, automotive, and electronics.
In this article, we’ll address the more common kinds of laser cutters, software suitable for laser cutting design, file generators that can speed up the design process, the most used materials for laser cutters, and the process of cutting your design. Let’s get started!
Laser Cutting vs. Laser Engraving

Laser cutting and laser engraving are similar processes that use a high-powered laser beam to manipulate materials, but they have distinct differences.
Laser cutting involves cutting through materials by melting or vaporizing them along a pre-determined path, resulting in a precise and clean edge. This process is ideal for creating intricate shapes and designs, and is commonly used for creating signage, jewelry, and architectural models.
Laser engraving, on the other hand, involves using the laser beam to etch designs, patterns, or text onto the surface of a material. This process doesn’t cut through the material, but rather burns away a thin layer of the material’s surface to create a permanent mark. Laser engraving is commonly used for adding designs or logos to products such as trophies, plaques, and promotional items.
In summary, laser cutting cuts through materials, while laser engraving marks the surface of a material without cutting through it.
Makerspaces

To produce a laser cutting design, you’ll first need to have access to a laser cutter. This can be a big investment if you’re just starting to play around with the process. To solve this problem, a makerspace can be a convenient option.
Makerspaces are communal workspaces that provide access to various tools, including laser cutters. These spaces are often shared by individuals or groups who are interested in designing, creating, and prototyping their own projects. Laser cutters in makerspaces allow makers to bring their designs to life quickly and accurately, without the need for expensive equipment or specialized knowledge.
Makerspaces typically have a range of laser cutters available, from smaller machines suitable for hobbyists to larger industrial-sized machines for professional use. They also provide training on how to use the equipment safely and effectively, making laser cutting accessible to a wider range of people.
By providing access to laser cutters, makerspaces are helping to democratize the manufacturing process and promote creativity and innovation.
There are usually available one of two kinds of laser cutters available in makerspaces:
- CO2 laser cutters: The most common type, used for cutting and engraving a wide range of materials like MDF, plywood, and acrylic.
- Diode laser cutters: These are lower-powered, suitable for cutting thinner materials such as paper and cardboard.
The type of laser cutter chosen depends on the material and thickness of the material being cut, and these, in turn, affect the design software requirements.

Choosing Design Software

When choosing design software for laser cutting design, it’s important to look for features that enable the creation of vector graphics, which are necessary for laser cutting.
Vector graphics are digital graphics made up of points, lines, and curves, which are based on mathematical equations rather than pixels. Vector graphics are resolution-independent and can be scaled up or down without losing quality, making them ideal for laser cutting designs. They are commonly used in software such as Adobe Illustrator, Inkscape, and CorelDraw.
While many design software options can create vector graphics that are suitable for laser cutting, some programs may not be ideal for this purpose.
For example, software that primarily focuses on raster graphics (such as Adobe Photoshop) may not be ideal for laser cutting because raster graphics are composed of pixels and don’t scale well. Similarly, 3D modeling software such as Autodesk’s Maya or Blender may not be suitable for creating 2D designs for laser cutting. This is because they’re mostly intended for animation design and can’t make very precise computer-aided design (CAD) files.
However, some 3D modeling software, such as Fusion 360, can also create 2D vector graphics suitable for laser cutting. It’s important to check the capabilities of your software and ensure that it’s suitable for your specific laser cutting needs.
Another important aspect to consider is file compatibility. Check what kind of file your laser cutter needs, as different machines may require different file formats. A common file extension is the drawing exchange format (DXF). DXF files contain information such as lines, arcs, circles, and text, and can be read by a variety of software for laser cutting, CNC machining, and other manufacturing processes. Because of its vector nature, there are no issues with scalability.
Options

As you may have gathered, design software is an essential tool for creating files for laser cutting. The right software can make the difference between a successful project and wasted time and materials. From free online tools to powerful commercial software, there are many options available for laser cutting design.
Here’s a brief selection of some of the most popular software for laser cutting:
- Inkscape is popular free and open-source vector graphics software that is great for laser cutting design. It’s user-friendly and has a range of features that make it suitable for creating complex designs. However, it may not be as powerful as some other paid software options.
- CorelDraw is well-established software that is popular among graphic designers. It’s professional-grade software that has been around for a long time and has many features that make it great for laser cutting design. However, it can be quite expensive, with the Essentials version starting at around $130.
- Rhinoceros, also known as Rhino3D, is primarily 3D modeling software, but it can also be used for 2D design. It has a powerful set of tools for creating complex 3D designs, which can be great for creating intricate laser cutting designs. However, it may have a steeper learning curve than some of the other software options.
- Fusion 360 is software that combines both 2D and 3D design capabilities. It’s great for creating parametric designs, which can be useful for laser cutting. It also has a range of tools for designing 3D models that can be flattened and used for laser cutting. However, it’s professional-grade software and can be quite expensive.
Overall, each software has its own strengths and weaknesses when it comes to laser cutting design. It’s important to evaluate the specific needs of your project and choose the software that best meets those needs.

Online File Generators
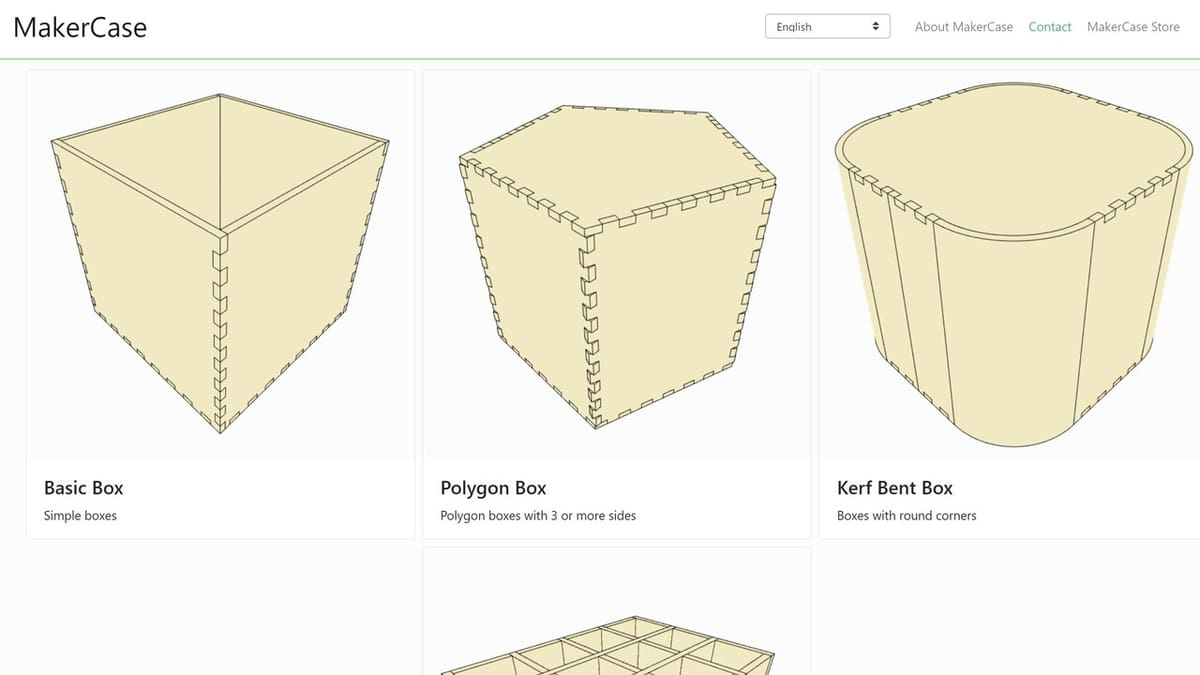
If you’d rather skip the designing and opt for ready-made designs, there are tools that can speed up the process.
Online file generators can be a time-saving option for laser cutting design, and some popular choices include Makercase, Boxes.py, Cuttle, and Templatemaker. These tools provide templates and pre-designed files that can be edited and personalized to suit your needs.
However, it’s important to keep in mind that the generated files may not always be perfectly suited to your project and may require some adjustments or modifications in design software. Additionally, some generators may have limitations in terms of the complexity of designs that can be created.
Overall, online file generators can be a useful resource for laser cutting design, but it’s important to use them alongside robust design software and to be prepared to make adjustments as needed.
And last but not least, you can always leave the designing to the experts if you’d rather get to laser cutting right away.
Materials
Laser cutting is a versatile technique that can be used with a wide range of materials. So let’s take a look at some of the most common options:
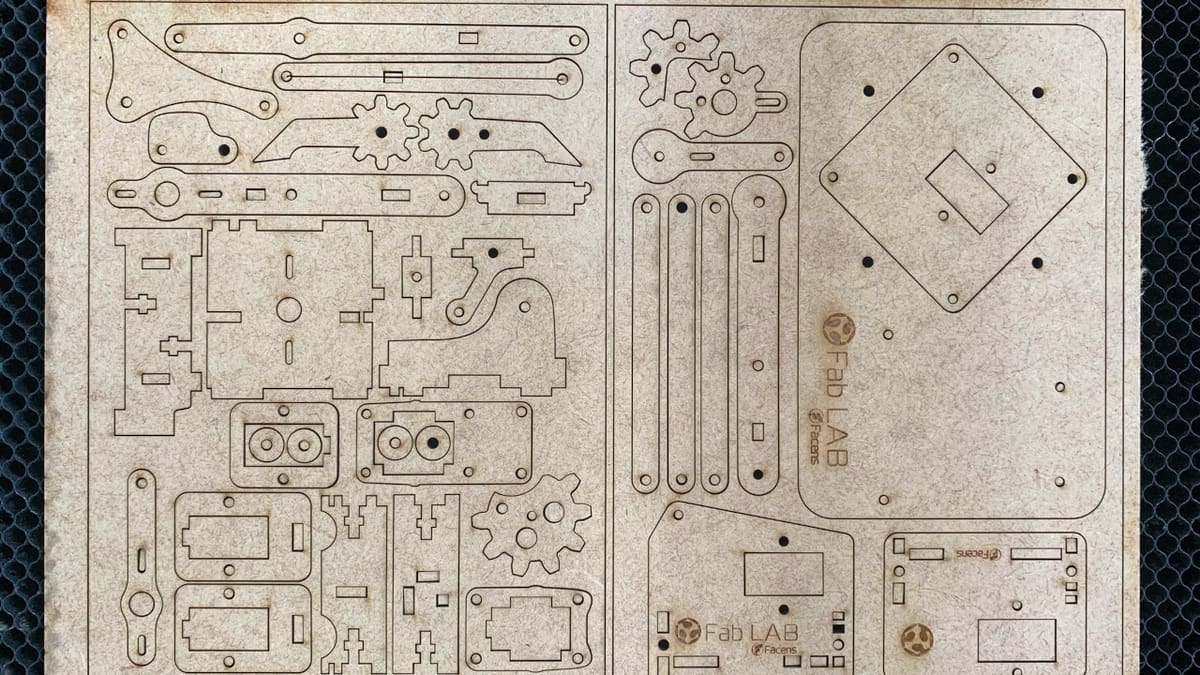
- MDF: Medium-density fiberboard is a wood-based material that is inexpensive and easy to work with. It’s suitable for a wide range of applications, such as furniture, decorative pieces, mechanical prototypes, and storage cases, and can also be painted if you want a different finish.
- Plywood: Like MDF, plywood is a wood-based material. It’s available in a range of thicknesses and is suitable for about the same applications of MDF, but you have a natural wood finish.
- Acrylic: Acrylic is a type of plastic that is widely used in laser cutting. It’s available in a range of colors and thicknesses, and can be used to create many different products, including ones that will get wet or require a translucent part. It’s important to keep in mind that acrylic is brittle.
- Paper: Paper is a versatile material that’s suitable for a range of applications, from paper art to packaging.
- Cardboard: Cardboard is a low-cost material that’s widely used for packaging. It’s ideal for a range of applications, such as architectural models and packaging.
- EVA: Ethylene-vinyl acetate is a type of foam material popular for making shoe insoles, mats, and other products. It’s great for having a protective layer on a storage case.
- Fabric: Laser cutting is also suitable for cutting fabrics like cotton, silk, and polyester. It can be used for creating textile art, clothing, and other fabric-based products.
It’s important to consider the girth of the material when designing for laser cutting, as thicker materials may require a high-power laser or multiple passes to cut cleanly.
Laser Cutting Your Design
Laser cutting your design involves several steps to ensure a successful outcome.
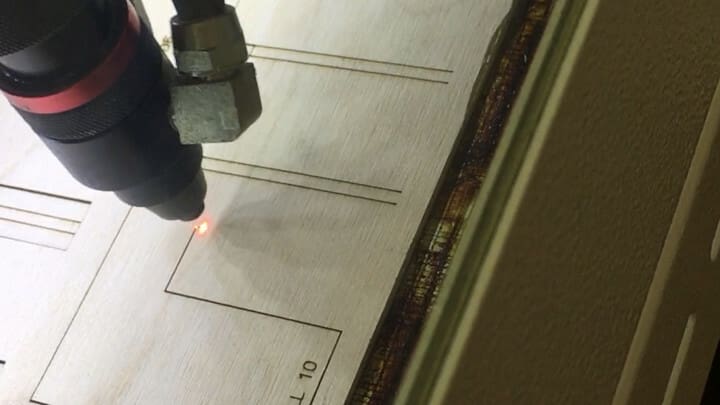
Set Up Your Laser Cutter
Before cutting your design, it’s crucial to ensure that the laser cutter is properly set up. Different materials require different settings, so it’s important to know the specific parameters for your chosen material.
Start by adjusting the focus of the laser according to the thickness of the material you’ll be using. This is usually done by raising or lowering the bed of the laser cutter until the distance between the laser and the material is optimal.
Then, select the appropriate power and speed settings. The power and speed settings will depend on the type and thickness of the material, as well as the intricacy of your design. It’s important to note that cutting too quickly can result in incomplete cuts or may even damage the material. On the other hand, cutting too slowly can cause excess burning and melting.
Finally, make sure to properly ventilate the area to avoid the buildup of fumes that can be harmful to your health. Consult your laser cutter’s user manual for specific ventilation requirements.
By carefully adjusting the settings to your design and material, you’ll be able to achieve the desired results while avoiding potential damage to your material or laser cutter.
Test Your Design
Before cutting your entire design, it’s important to test it first. You can create a small sample file to test the settings and make sure that the laser cutter is cutting correctly. This will help you identify any issues with the design or settings before you cut your final piece.
Cut Your Design
To cut your design with a laser cutter, you first need to load your material onto the laser cutter bed. Make sure that the material is flat and secure to prevent any shifting during the cutting process.
Next, send the design file to the laser cutter using the software provided by the manufacturer or the software you’ve chosen to work with. Double-check that the laser cutter is set to the correct settings for the material you’re using.
Once you’ve sent the file, keep an eye on the laser cutter while it’s in operation. This will allow you to identify any potential issues and make adjustments if necessary.
When the cutting process is complete, carefully remove the finished piece from the laser cutter bed. Be sure to wear protective gloves and handle the piece with care, as it may still be hot.
Final Thoughts
After you have finished your laser cutting project, there are a few final steps you should take to ensure a successful and safe experience.
- Always prioritize safety when using a laser cutter: Laser cutters can be dangerous if not used properly. Follow all safety guidelines and protocols when operating the machine. Always wear protective gear, including safety glasses and gloves, and never leave the laser cutter unattended while in use.
- Clean the laser cutter and work area: It’s important to keep the laser cutter and work area clean to prevent any debris from interfering with future projects. Remove any scraps and debris from the machine and the surrounding area.
- Store your materials properly: Store your materials in a dry, cool place to avoid damage or warping. Keep materials organized and labeled for easy access.
- Evaluate the final product and make adjustments for next time: Design is an iterative process that often involves trial and error. Don’t be afraid to make mistakes and use them as learning opportunities for future projects. It’s common to discover design mistakes or areas for improvement after producing the final product. Use this insight to refine your skills and enhance future designs. One of the benefits of digital manufacturing is the ability to produce a design once and then evaluate and improve it for future use. Take advantage of this capability to continually enhance your designs.
And finally, remember to have fun and enjoy the creative process of laser cutting!
License: The text of "Laser Cutting Design: How to Get Started" by All3DP is licensed under a Creative Commons Attribution 4.0 International License.