Laser Marking vs Engraving vs Etching: The Differences

Wondering what the differences between laser marking vs. laser engraving vs. laser etching are? Keep reading to find out!
It’s been a little over a decade since laser cutters became a commonplace in maker toolboxes. And it’s no wonder! A laser beam is like a Swiss Army knife that can work wood, glass, metal, and more. It opens the door to custom projects for the home, decorations, custom cosplay pieces, and much more. Recently, tools like diode laser cutters, entry-level desktop laser cutters, and laser engravers have brought these tools inside makers’ home workshops.
You can perform different operations with the help of a laser, such as laser marking, engraving, and etching. These are three processes that sound similar, but they’re very different when it comes to how they work and what they do.
Before we jump into their differences, there are a couple of things to keep in mind about the different types of laser machines. Diode laser cutters can engrave and etch any material as long as the wavelength of their beam is not absorbed by that material or can interact with it. Fiber laser cutters are optimized for marking and engraving metal and ceramics-like materials. And CO2 laser cutters can engrave pretty much anything as long as it’s not metal or going to absorb a lot of heat.
In this article, we’ll cover everything you need to know about these processes, their similarities and differences, the machines involved, and the best materials to use for each process. Let’s get started!
Laser Marking
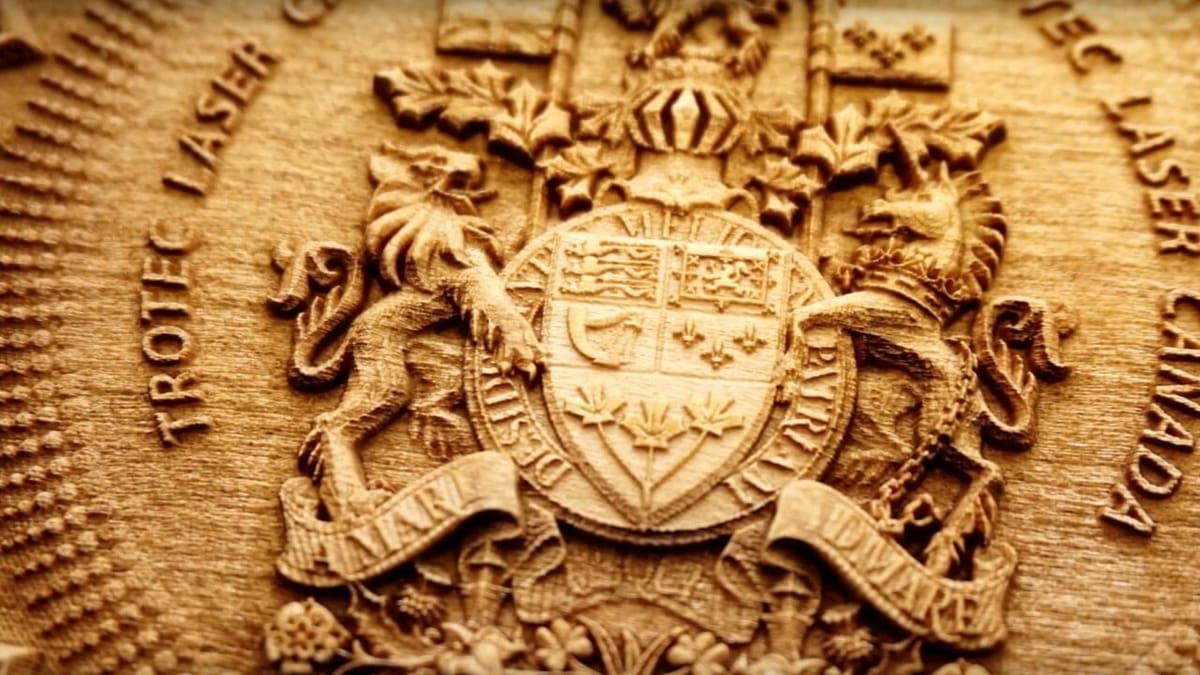
Laser marking relies on a chemical reaction in which the laser beam hits the surface of a workpiece to oxidize it, making it lose electrons. This might not sound like much, but the chemical change gives the material a darker color where the laser hits. This new mark is permanent and resistant to wear. The laser beam doesn’t alter any grip or decoration, making laser marking a great tool for the automotive, medical, and aerospace industries. But what about hobbyists?
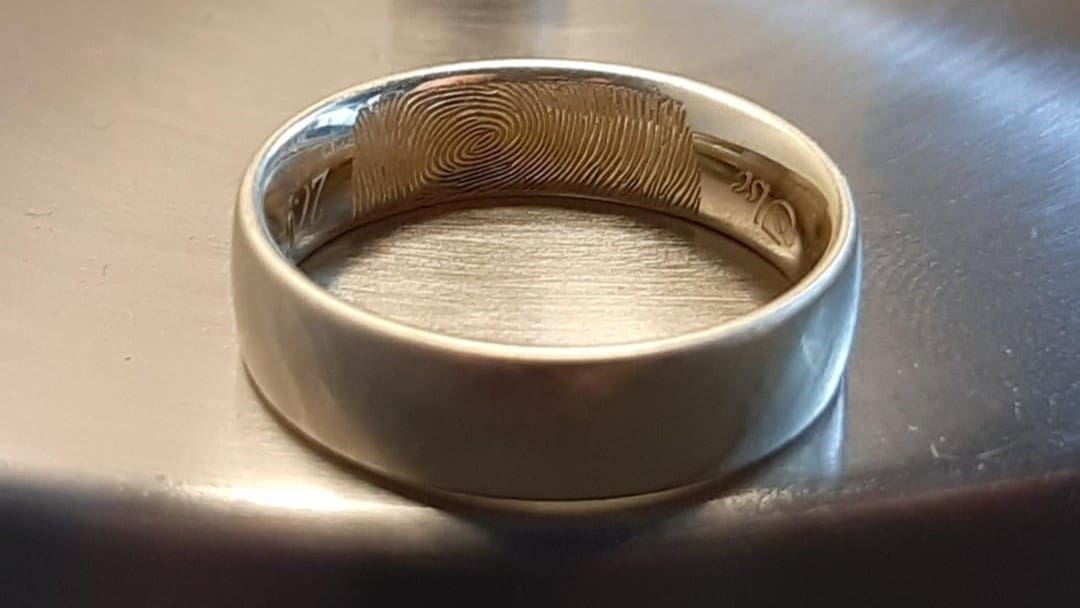
For makers at home, laser marking is perfect for customizing anything made of metal, including jewelry and cosplay items to kitchen utensils and camping gear! The catch is that, because it’s less famous and often mistaken for engraving, it’s a little difficult to find examples of how hobbyists use laser marking in practice.
Hobbyists have two ways to try laser marking at home. The first option is a specialized fiber laser marking engraver. These machines remain pricy and, given how powerful they are, can engrave more than they mark, depending on the settings used. The second option is a diode or CO2 laser cutter, coupled with laser marking compounds.
Both methods work the same. The heat of the laser beam changes the composition of the material on a chemical level – oxidation in the case of diode and CO2 laser cutters, with the added help of a laser marking compound activated by the heat. The metal’s new chemical composition makes it darker where the laser engraver hits, leaving behind a durable, custom mark.
Laser Engraving
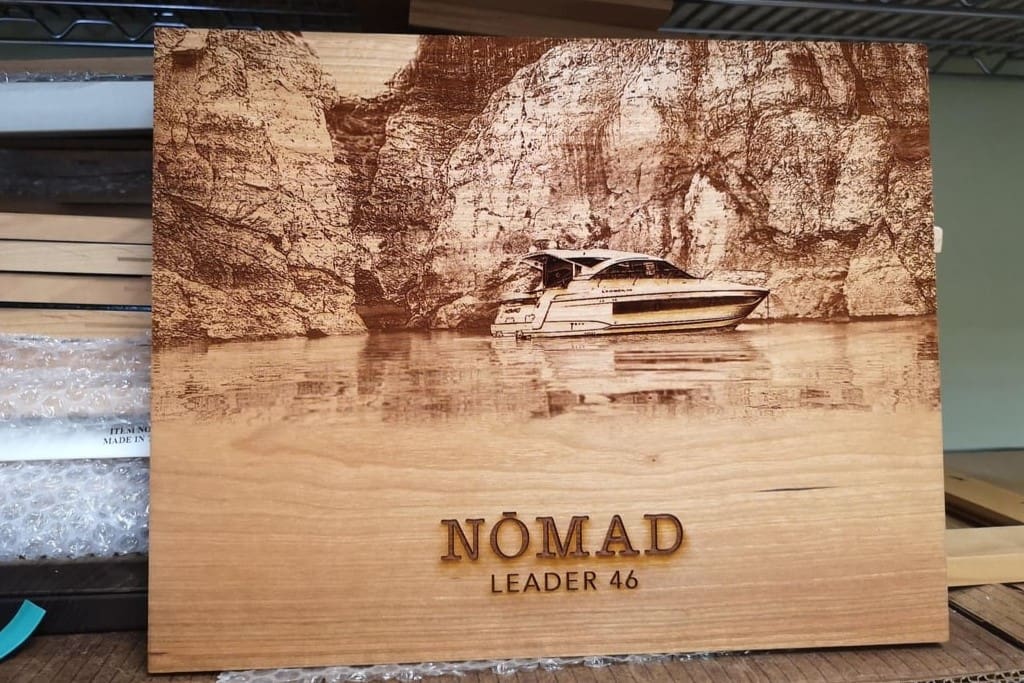
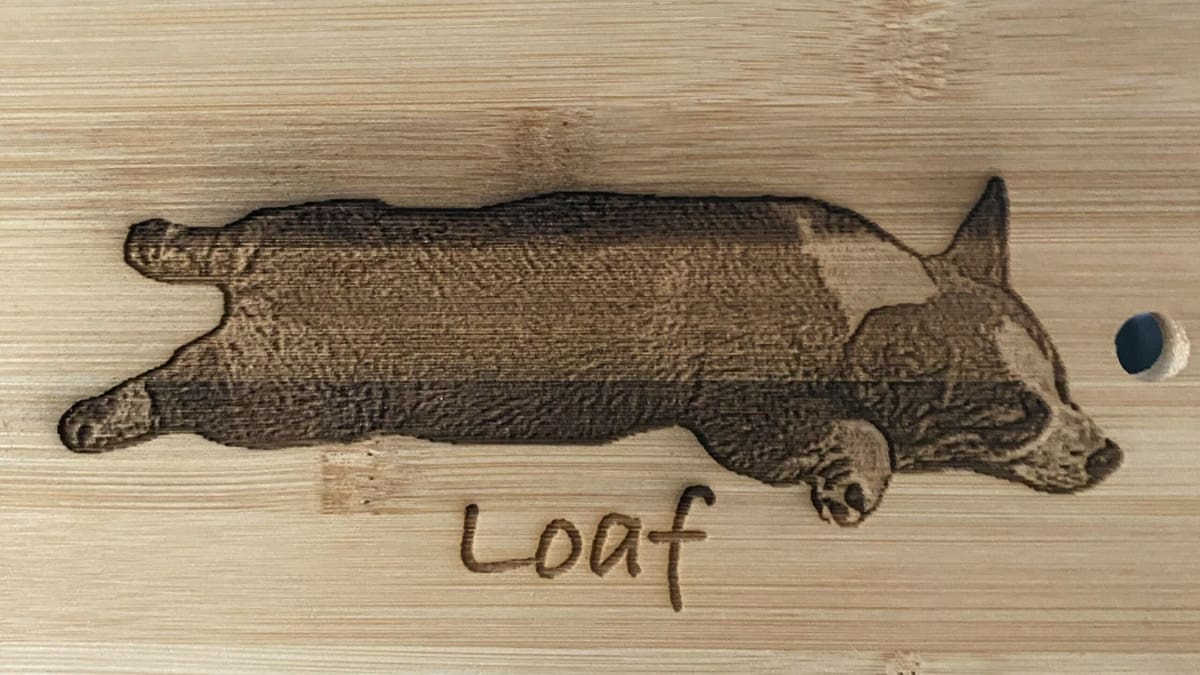
Laser engraving shoots a laser beam at your material’s surface to vaporize it. This process leaves a darker or lighter mark depending on your material, as well as a texture you can feel by touch. This combination makes laser engraving ideal for decorating and texturing wood-based materials or removing coatings and finishes from premade products.
Laser engraving is the most versatile of all the processes we’re looking at in this article. It can be very fast or very slow, very detailed or just detailed enough, and is suitable for a variety of materials.
Engraving wood is very popular, but acrylic, multi-layered HDPE sheets, painted metal, and even stone will all work as well. Thanks to engraving’s flexibility in terms of speed and detail, anything from simple text to intricate graphics is possible. Some software tools use 3D files and depth maps for a special engraving effect called relief engraving.
Unlike laser marking, you don’t need any specific equipment in addition to your laser cutter or engraver of choice. CO2 or diode lasers will work as long as the material you’re using interacts with the wavelength of your laser beam. The only catch is power, of course. A less powerful laser beam means longer engraving jobs. For engraving metals, you’ll need a fiber laser engraver.
Laser Etching
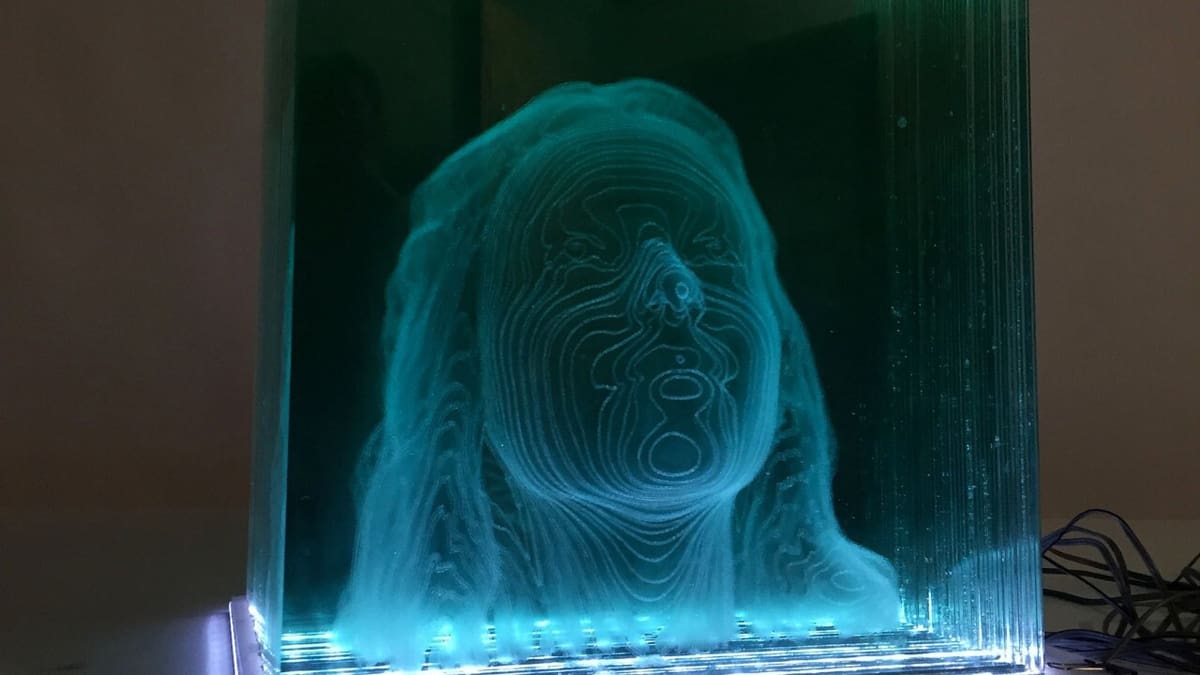
Now that we’ve covered laser marking and laser engraving, you might be wondering what is laser etching? Laser etching changes the optical properties of a material, similar to the way frosted glass diffuses light instead of the way plain glass lets it through.
You probably guessed that laser etching is great for customizing anything transparent. Etched colored, transparent acrylic sheets will be stunning, but etching glass is where this process really shines. The same techniques used to laser engrave material can be applied almost directly here, with the same speed and detail you can get with other materials.
Again, you won’t need anything special to do laser etching at home. If you have a CO2 laser cutter, the world is your oyster. It will be able to etch glass or transparent acrylics without a problem. You might need to do some masking with tape or dish soap and some clean up later, but nothing you wouldn’t do for any other engraving process with other materials.
Etching transparent materials with a diode laser engraver or fiber laser engraver is a little more complicated. Since the wavelength of the laser beam on these laser cutters doesn’t get absorbed much by glass or transparent acrylics, your material will need some amount of prep work with another material that will absorb the wavelength of the laser beam.
A common prep technique is to apply black tempera paint to glass or acrylic. However, this can result in uneven results. We recommend checking out NirL’s Instructables on how to engrave glass with a diode laser cutter. They condense the whole process into a series of repeatable steps that will give you the best chances of getting consistent etching.
Similarities & Differences
By now, you’ve probably noticed that each process has its unique pros and cons.
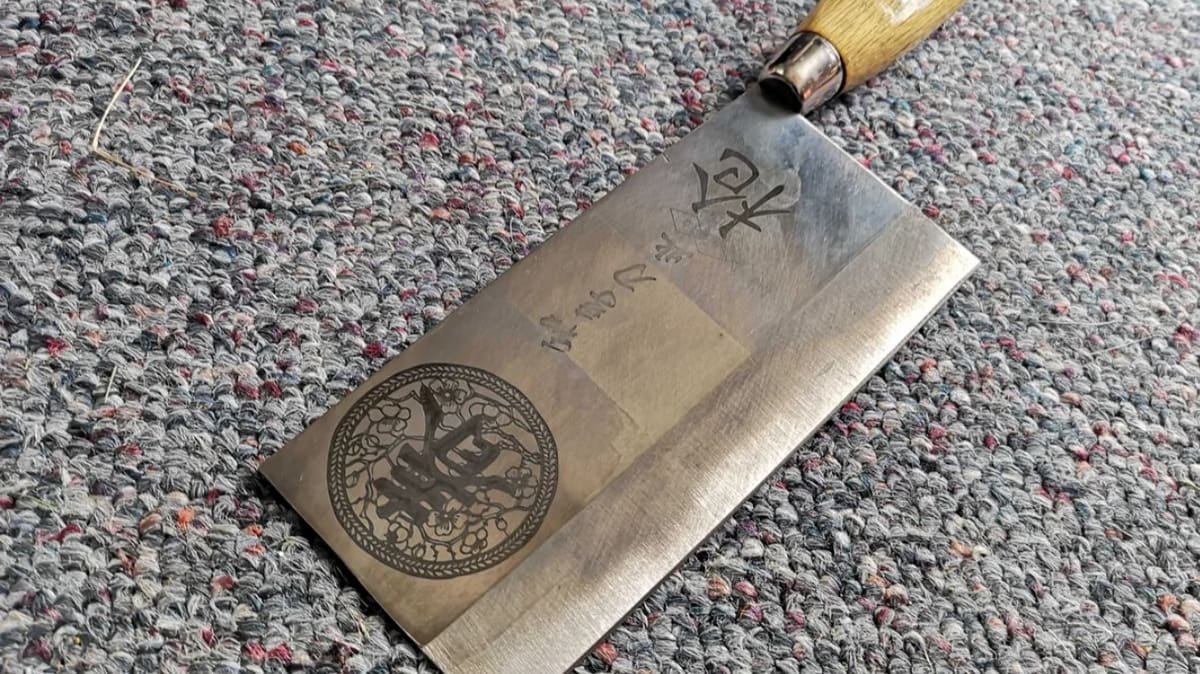
Laser marking changes the chemical qualities of your material. This is the go-to method for metals when you don’t have access to a fiber laser cutter for metal engraving. By oxidizing the material where the laser hits, either on its own or with the help of a marking agent, the laser provides a durable contrast to the surface.
Laser marking doesn’t remove material in the same the way laser engraving and etching does, but it relies on changing the physical properties of your material. Even if it uses less power than laser engraving, laser marking is permanent.
Laser engraving vaporizes some of your material wherever your laser beam hits. The exposed surface will be a darker color than the untouched surface. This method usually provides the best contrast compared to laser marking and laser etching. Also, laser engraving uses more power than laser marking in order to remove as much material as possible.
Speed
When it comes to speed, for laser marking, the laser beam still needs to travel across the surface of your material to mark it, but it’s not trying to remove any of the material. It’s faster than laser engraving in this respect.
For laser etching, the laser needs to travel across the surface of your material several times to burn it away and create the etch. This means the process can be much slower than laser marking or engraving. It also means that the contrast of your design might be much stronger, thanks to the time spent burning contrast into the material and the added texture.
Laser engraving strikes a good balance between laser marking and laser etching in terms of time. It still needs to travel across the surface of your material, requiring several passes to remove material and change the optical properties of your material.
Preparation
In terms of preperation, all of the three processes are fairly similar. If your laser can create the reaction needed for laser marking, you’re fine. Otherwise, a laser marking agent can be spread on the surface of your material to help prepare it.
When laser engraving, the vaporized material needs to go somewhere, so it’s going to deposit everywhere in the form of dust. Preparation for laser engraving usually involves masking your material with tape or a finish to easily wipe down the dust.
Laser etching doesn’t need specific preparation to be successful, but masking your material with tape will help make clean-up easier. For acrylic sheets, you’ll be cutting complex objects out of a thin layer of dish soap applied before engraving. Cleanup is easy, as you can just rinse if off later. As for glass, laser etching will leave some texture that can feel sharp to the touch. Test your settings until it’s not a problem (usually by bringing etching speed up and power down).
Materials
Materials that turn darker when hit by a source of heat are usually best for laser cutting. For example, light woods like pine or fir, dark woods like walnut, and thick white cardstock usually give the best results. One exception is colored acrylic sheets. These will often engrave white, which means the darker your material, the higher the contrast.
Another exception is metal engraved with fiber laser engravers. The metal shouldn’t change color as you engrave it, only gaining texture in the process.
Unlike laser marking, laser engraving actively removes material. This leaves behind a textured groove that will last for a long, long time. Of course, the side effect is that it will change any feature that was already there, like texture or color. If your material was especially thin, such as a veneer, it will weaken it greatly, sometimes to the point of being able to see through it.
Laser etching transforms the optical properties of your material. It will turn frosted or opaque wherever the laser beam hits. It’s about as slow and detailed as laser engraving, and will leave a small amount of vaporized material that can easily be washed off.
Glass and light colored or transparent acrylics are the most popular materials for laser etching, as long as the laser beam you’re using can interact with the material itself. Fiber laser etchers and diode laser etchers will have different wavelengths and will only interact with specific materials. Sometimes, these will be unable to interact with these materials at all. CO2 laser cutters can usually etch any of these materials without problems.
For a deeper dive into specific materials, check out our material guide below.
Creating & Producing Designs
Just like for 3D printers, designs for laser marking, etching, or engraving can be downloaded for free, bought from maker marketplaces online, or made from scratch. Here are a few suggestions for getting started!
Raster vs. Vector Designs
Raster designs, with file extensions ending in .BMP, .JPG, or .PNG, are files that can be highly detailed. As a trade-off, they look best at a specific fixed size. Vector designs, which include popular file formats such as DXF and SVG, are entirely described by math and will resize without any problems. However, they might not be as detailed or visible as raster designs.
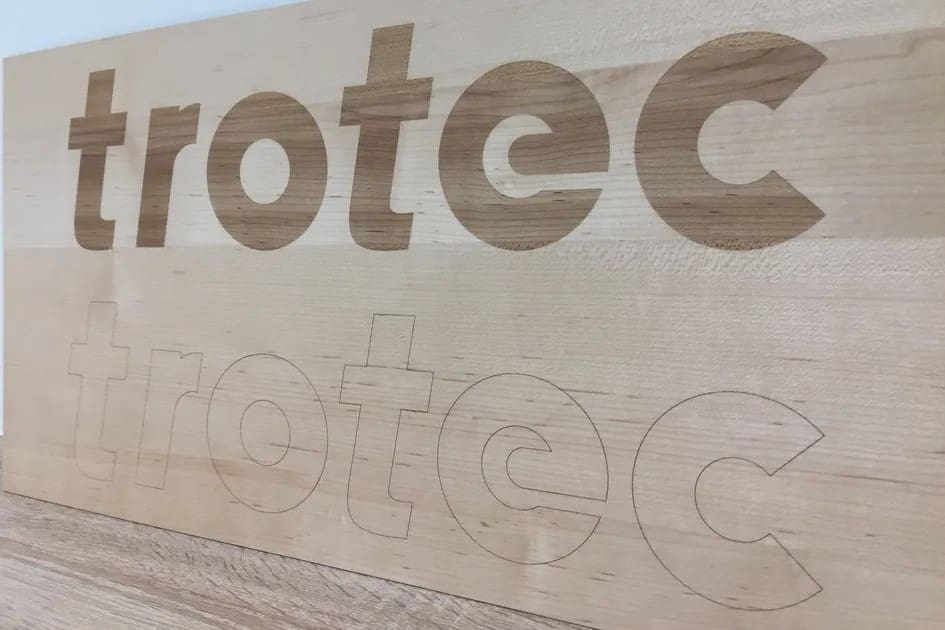
These two design types require different approaches to laser processing. Raster engraving reproduces a raster design pixel by pixel, whereas vector engraving traces the outline of the design. The image above illustrates the difference, and Trotec provides a great overview of the types approaches.
Raster and vector designs with thick shapes are much more visible than thinner vector marks, but they’ll take longer to engrave. There are workarounds of course, such as laser cutting software Lightburn’s offset fill. Ultimately, experience with design and laser cutting software will help you pick the right design features for the results that matter to you.
Sourcing Designs
Creating your own designs for laser marking, engraving, or etching is a great learning experience and tons of fun. Check out our guide to laser cutting design to help get you started. And if you’re looking for a free, powerful vector design tool, check out our guide to Inkscape laser cutting design to continue your journey!
Creating your own designs can take a while, especially as you’re waiting for inspiration and building up your skills. If that’s your case, take a look at our guide to the best sites for free laser cutting and engraving files. Our top picks should give you plenty of things to experiment with and figure out what you like best about a laser engraving design. For free files, take a look at Thingiverse (historically a platform for 3D printing files that opened up to digital manufacturing in general) and Ponoko (a laser cutting service that also offers free files for digital designers).
On-Demand Laser Services
If you don’t want to invest in a laser engraver or cutter but still want to cut your own designs, no problem! Just like there are remote 3D printing services, there are also laser cutting services that will let you upload your files, get quotes almost instantly, and receive your designs cut in the material of your choice in the mail.
A couple popular services stand out, including Ponoko and SendCutSend. They both offer a similar quality of experience and service, and serve similar areas. You can find more on-demand laser cutting service in our guide to laser engraving wood.
Material Guide
Just like every type of laser has its own quirks, each material has its own protocol for preparation and post-processing. The following sections will go a little deeper into popular materials for laser marking, engraving, and etching.
For a quick reference, though, the table below overviews the best methods for each material.
When it comes to preparing a material for laser processing, as a rule of thumb, all you’re trying to do is to protect your material from deposited dust, flares, and resins that might get vaporized from the laser engraving and etching process.
At the other end of the engraving or etching job, post-processing is all about removing by-products (like dust and resins) and cleaning up your material. You’ll also want to remove any tape or product you might have used to protect your material during its time in the laser cutter.
Wood
Laser marking (changing the chemical properties of the wood) and laser etching (changing the optical properties of the wood) are not really a thing for most users. Laser engraving is the primary method used to work with wood.
Prior to engraving, it’s recommended to sand the surface of the wood. You’ll also want to complete any painting, staining, or finishing you have in mind.
Laser engraving wood will result in a slightly darkened surface compared to the surrounding material. Engraving might burn off your material if the laser beam is too powerful, so experiment with your settings on test pieces.
Since wood is a natural product, no two pieces will yield the exact same results. This notwithstanding, it’s possible to give a few hints on how certain kinds of woods will behave. Softwoods (e.g. pine, larch, and spruce) can be engraved, but additional measures must be put in place to prevent the part from burning or backflash marks when the laser meets the grid supporting your material. Marking tape or painter’s tape make a very simple, easy to remove and affordable protection for your materials. Hardwoods (e.g. walnut, mahogany, and maple) produce especially good results.
Leather
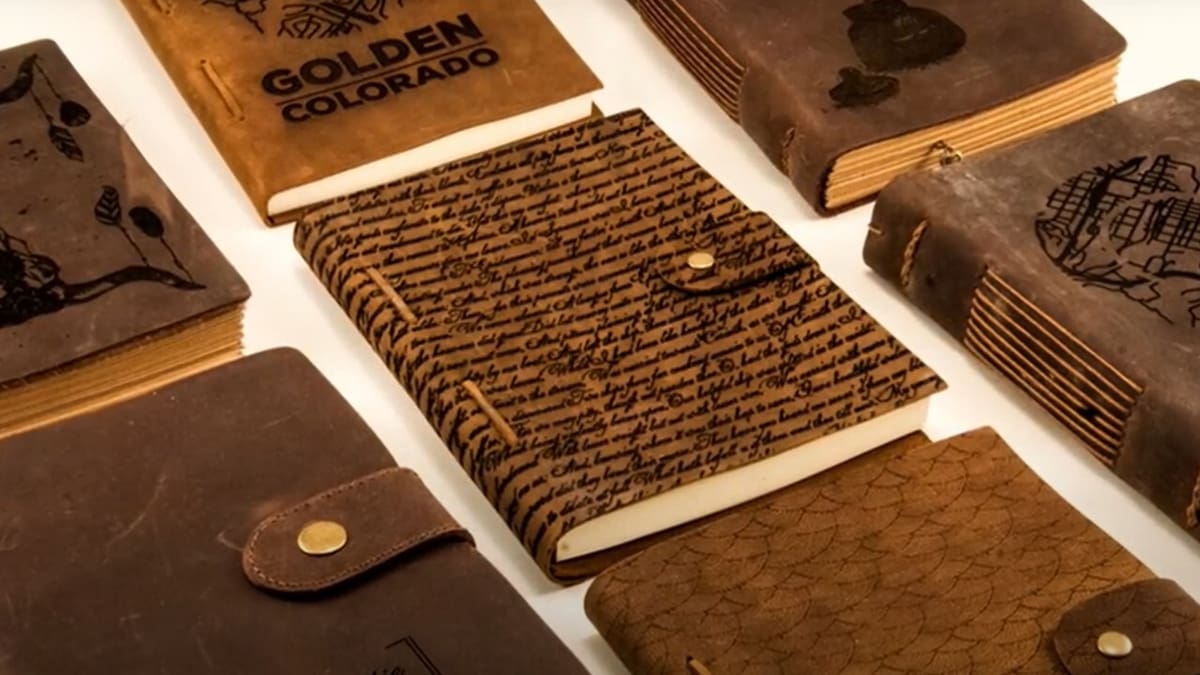
It’s possible to laser engrave finished leather, producing a look similar to hot-branding. However, hair-on hide leather and furs cannot be engraved.
You’ll want to avoid raster engraving large surfaces, since the leather will turn powdery. Therefore, vector engraving is recommended. If your engraver’s laser beam is too powerful, it could burn off your material. So, definitely experiment with your settings on test scraps before engraving your project.
It’s also advised to clean the leather’s surface, then mask it with tape prior to engraving. After engraving, you can wipe up any residue with a microfiber cloth, then remove the tape.
Plastics
Each plastic has been developed with very distinctive applications in mind. Hence, no two kinds will behave exactly the same way underneath a laser. Some plastics generate unwanted chemical modifications when irradiated by a laser. The following observations can be made for the most popular plastics:
- ABS is favored for its strength and rigidity. If you’ve ever played with Lego bricks, you know exactly what we’re talking about. Today, many consumer items are made from this material using the injection-molding process. When ABS melts, it can emit toxic fumes. It’s suitable for laser marking, engraving, and etching.
- Acrylic is especially well suited to raster engraving because this methods lends a beautiful frosted finish with a distinct contrast to the material. It’s not suitable for vector engraving, since the melted outline is only faintly visible.
- Delrin is suitable for laser marking, engraving, and etching. However, when laser engraving, the material doesn’t provide the same range of contrast as, for instance, acrylic.
- PEEK is a high-performance plastic that’s famous for its outstanding mechanical, chemical, and thermal properties. Plastics of this family are highly resistant to stress, temperature, and chemicals. But that’s not all, parts made from PEEK can be exposed to X-ray and gamma radiation. In spite of its robustness, the material is easy to machine and fabricate. It’s suitable for laser marking, engraving, and etching.
- PETG is a variant of PET that has been combined with glycol to achieve a number of desirable effects such as high transparency. PETG components are weather-resistant and are thus often used for garden appliances. However, the material has a low melting point, making it an unsuitable material for laser engraving. Also, you should avoid raster engraving and small details, as these will not come out well. Vector engraving is the preferred method with this material.
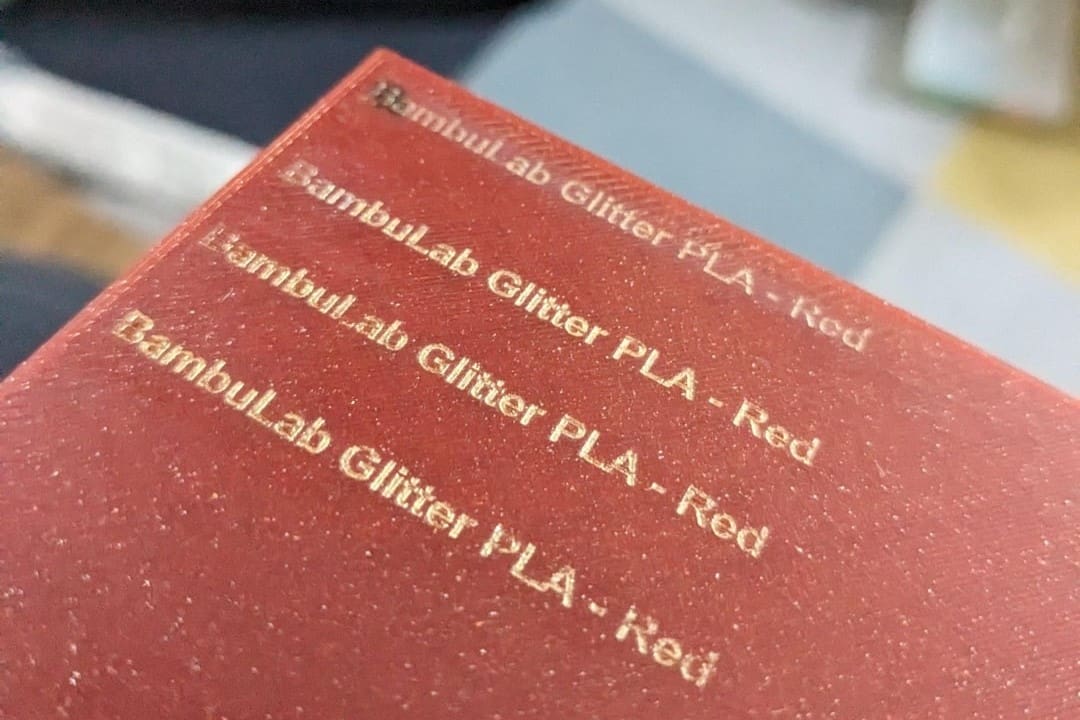
- PLA is a plastic that’s favored by some people as an alternative to ABS, since it’s made from renewable plant resources and is biodegrable, albeit under industrial conditions. Moreover, it can be food safe and emits a harmless sweet fragrance when heated. This material isn’t suitable to laser marking, since no contrasting mark is created.
- Styrene needs special attention when working it with a laser, since it has a low melting point. It works best with simple shapes. Also, you should avoid raster engraving and small details, as these won’t come out well. Vector engraving is the preferred method with this material.
Prior to laser processing, you can apply a thin layer of dish soap across the surface as an additional protection measure. This is especially recommended for acrylic. After marking, engraving, or etching the plastic, simply wipe off the soap and any material residue.
Metals

In general, a fiber laser engraver can both mark and engrave metals. CO2 and diode laser engravers can mark metals, albeit with the application of marking compounds across the metal’s surface. They can also engrave some metals, but again, only in tandem with application of metal marking compounds.
- Aluminum is a versatile material that can be both laser marked and engraved, yielding clean, dramatic details. The high power of the laser exposes the bright substrate of the material. Hence, black anodized aluminum produces the most impressive results in terms of contrast. If you only have a CO2 or blue light diode laser engraver, it can engrave aluminum as long as you apply a marking compound to the workpiece’s surface.
- Brass is a favored material, thanks to its gold-like appearance. It used to be a difficult metal to laser mark or engrave, due to its high reflectivity. However, modern fiber laser engravers can apply intricate patterns in a breeze.
- Stainless Steel has an added component of least 10.5% chromium that protects the iron from rusting. Laser marking stainless steel creates high contrasts. The material can also be laser engraved, even with a CO2 or blue light diode laser engraver, albeit with the application of a marking compound.
- Titanium is often used in high-performance applications, thanks to its unparalleled strength-to-density ratio. It’s suitable for laser marking and engraving.
Stone, Ceramics, & Glass
Stone, ceramic parts, and glass under a laser all react very differently from most other kinds of materials. Hence, they’re traditionally worked using sandblasting or cutting – either with diamonds or a water jet. None of these materials turn to their gaseous state. Instead, small grains are exposed that quickly expand in size.
For all of them, you’ll want to avoid raster designs on large surfaces, since the end results may be visually uneven. Also keep in mind that materials with flaws might crack and shatter. So, it’s highly recommended to wear protective equipment.
Stone and ceramics can be laser engraved with either a fiber laser engraver or a CO2 laser engraver. As a rule of thumb, you’ll achieve the best results on dark stone, because it has the highest contrast to the laser engraved areas.
Laser marking and etching are the primary methods for working on glass. Prior to any laser processing, applying a thin layer of dish soap would provide an additional layer of protection. Also, make sure to experiment with your settings to prevent the laser from etching the glass too deeply.
License: The text of "Laser Marking vs Engraving vs Etching: The Differences" by All3DP is licensed under a Creative Commons Attribution 4.0 International License.