LaserGRBL vs LightBurn: The Differences

The right laser cutting and engraving software can take your projects to new heights. Check out how LaserGRBL vs LightBurn compare!
Choosing the right software for your laser cutter is important for making sure your projects come out perfectly. The software you choose will control your laser’s movement, intensity, and duration, ideally resulting in an immaculate, detailed engraving.
As you become more comfortable with your laser cutter or engraver, you’ll probably want to find software that works best for your projects. In this article, we’ll introduce you to two great options with plenty of community and professional support available. The first is LaserGRBL, a free, multi-purpose application with great plug-and-play capabilities. The second is LightBurn, premium laser cutting and engraving software that’s great for customizing designs and nailing every last detail.
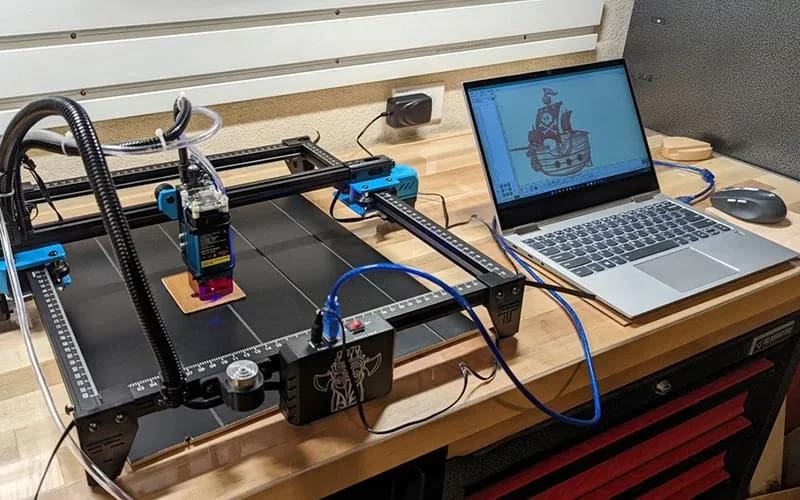
LaserGRBL and LightBurn are both fully compatible with G-code-based laser cutters and engravers, and offer direct connection and control to your machine. However, each offers unique advantages and disadvantages.
Without further ado, let’s take a closer look at how these two options compare!
Prices & Licensing
Licensing is simple for LaserGRBL, as it’s free and available as a single download. If you find yourself using it in a professional setting, please consider donating to the official LaserGRBL team through their PayPal.
As for LightBurn, you’ll have to pay to access the software. The good news is that you can get started with a 30-day free trial. Before spending anything, you can make sure your laser engraver is properly connecting and that the exported files are being properly read by your machine.
Once the trial expires, the program will remain on your computer with limited functionality. It’s more than likely you’ll want to purchase the G-code enabling license, which works for most hobbyist laser cutters and engravers and starts at $60. This unlocks all of the customization features and is ideal for most users of varying experience levels. To give yourself direct controller capability, consider the Bridge Kit, which connects your computer to your machine and costs around $120.
Some of the other LightBurn licensing options include:
- DSP: You’ll need this if you have a Ruida, Trocen, LightObject, or TopWisdom-based controller. (~$120)
- Galvo: This will unlock software for most fiber, CO2, and UV lasers. (~$150)
- Combination: This unlocks the features of the two options mentioned above. (~$210)
System Requirements
To use LaserGRBL, you’ll need Windows with a 64-bit OS (anything from XP to Windows 11 will do) and either an appropriate SD card or USB adapting capable for your machine. While LaserGRBL is intended for Windows, Linux users can install it in PlayOnLinux with a script. Mac users can try to run LaserGRBL with a Windows emulator.
You’ll need 2 GB of RAM to use the program, but if you’re exporting larger images with a high level of detail, you’ll want 8 to 16 GB of RAM to complete the render in a few minutes. If you’re choosing LaserGRBL for its superior image engraving quality, be prepared with some extra RAM or to sacrifice some time.
LightBurn can be used with a PC (Windows 7 or later, 32- or 64-bit), Linux (64-bit), or MacOS (10.11 or later) operating system. You’ll need a connector, such as the LightBridge, or a compatible memory card. Most LightBurn users opt for a direct connection, as LightBurn has more direct control and live testing features. In addition, you’ll need at least 8 GB of RAM.
For both applications, advanced graphics cards can help speed up the program when it’s working on high-detail images.
UI & Layout
We’ll now take a look at how the UI and layout compare for each program.
LaserGRBL
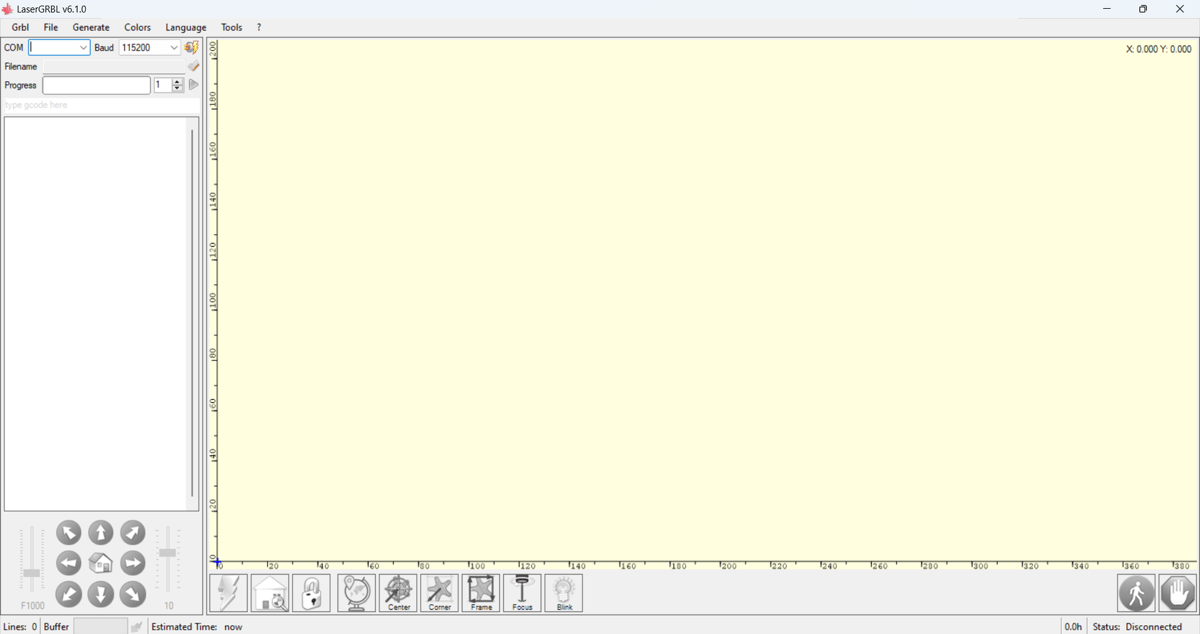
LaserGRBL keeps things simple from the time you open the program to when you send your code. The main menus are located on the left side of the top bar and include the following:
- Grbl is used to initiate the connection with a machine, keep track of your laser’s lifespan, and access other settings.
- File is for uploading, saving, and exporting images.
- Generate has options for power vs speed, accuracy, and cutting tests.
- Colors is for selecting the wavelength of light the laser operates at and choosing your preferred color theme.
- Language sets the interface readout.
- Tools allows machine-specific drivers and firmware to be activated.
- ? allows you to access debug logs, set auto-updates, and find helpful FAQ pages and community websites.
The remainder of the user interface controls are located on hotbars on the bottom and left side. The icons in the bottom left corner let you perform the following actions:
- Directional arrows: The multi-directional arrows surrounding the symbol of a house give you the ability to manually orient the laser into the position of your choice. This is helpful when lining up an engraving.
- Home: This icon returns the laser to its default position.
- Sliders: These control the movement speed (left) and step size or distance (right) of the sent movements.
Alternate commands are found along the bottom bar and allow the user to command default motions and laser-specific actions. From left to right, these tools are as follows:
- Lightning bolt: Resets the software after being hung or looped by an error.
- Magnifying glass on house: Allows you to return to the zero or initial point of the design.
- Lock: Toggles the ability to make changes to the current design.
- Globe: Moves the laser to the design starting point.
- Center: Moves the laser to the center of the design space.
- Corner: Moves the laser to the bottom left corner of the current design.
- Frame: Outlines the perimeter of where the current image will be engraved.
- Focus: Allows you to adjust the focal length of the laser to accommodate different surface heights.
- Blink: Flashes the laser to show where its current position would engrave relative to your surface.
- Walk: Starts or resumes the current script to the laser and starts engraving.
- Stop: Immediately pauses the current program and turns off the laser.
Users familiar with G-code can also open a direct editor to make changes or include additional commands. You can also add a custom button to the bottom bar for specific actions, such as tracing a frame around an image or toggling the laser on and off.
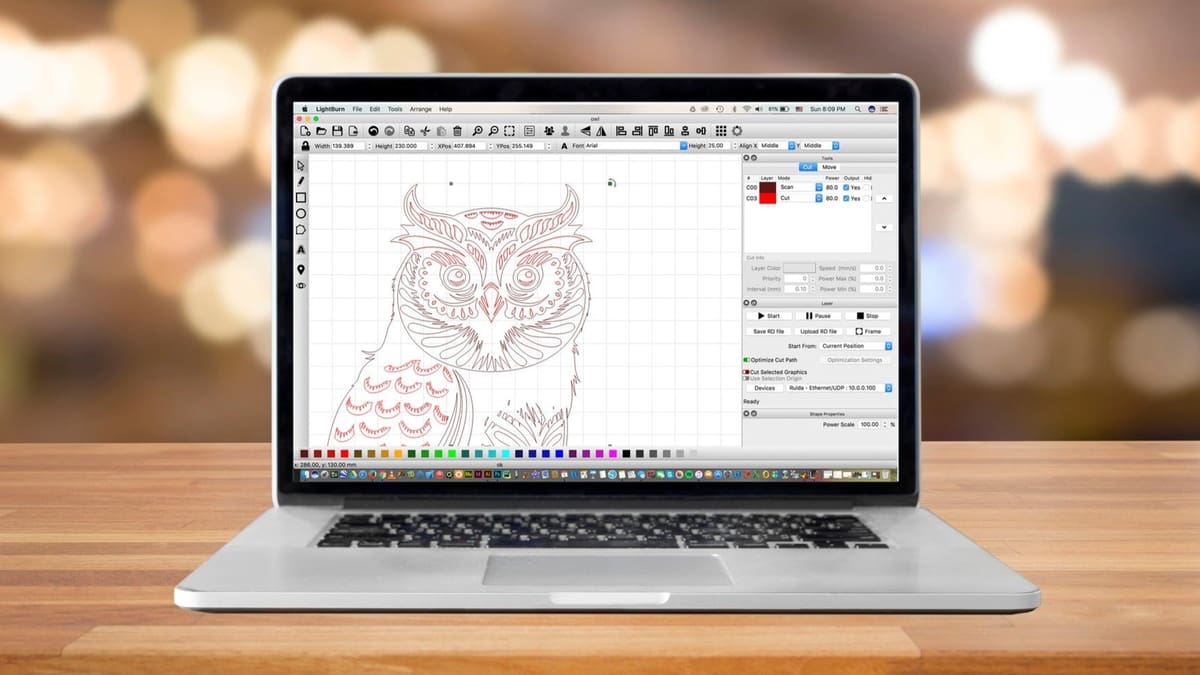
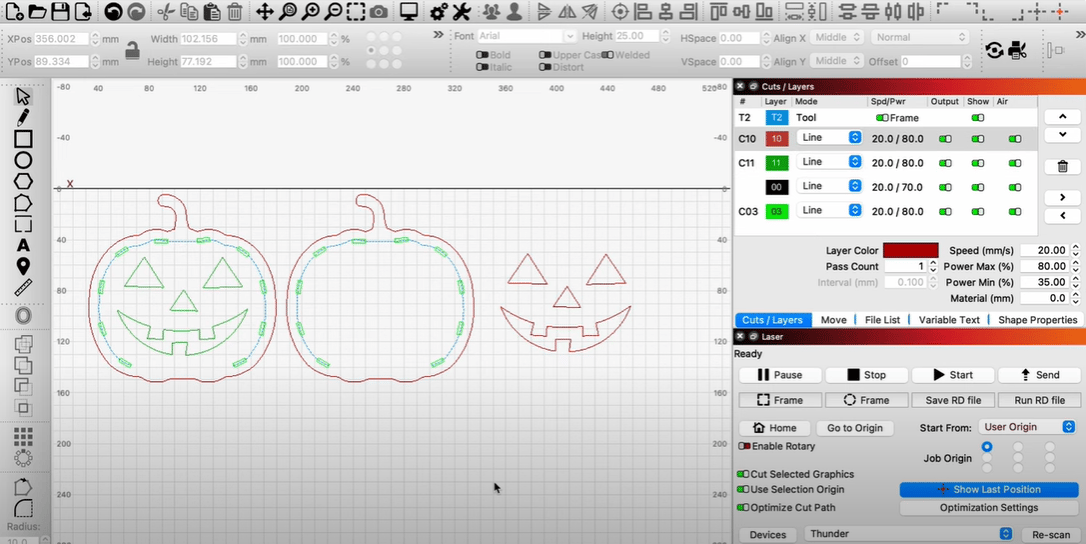
LightBurn
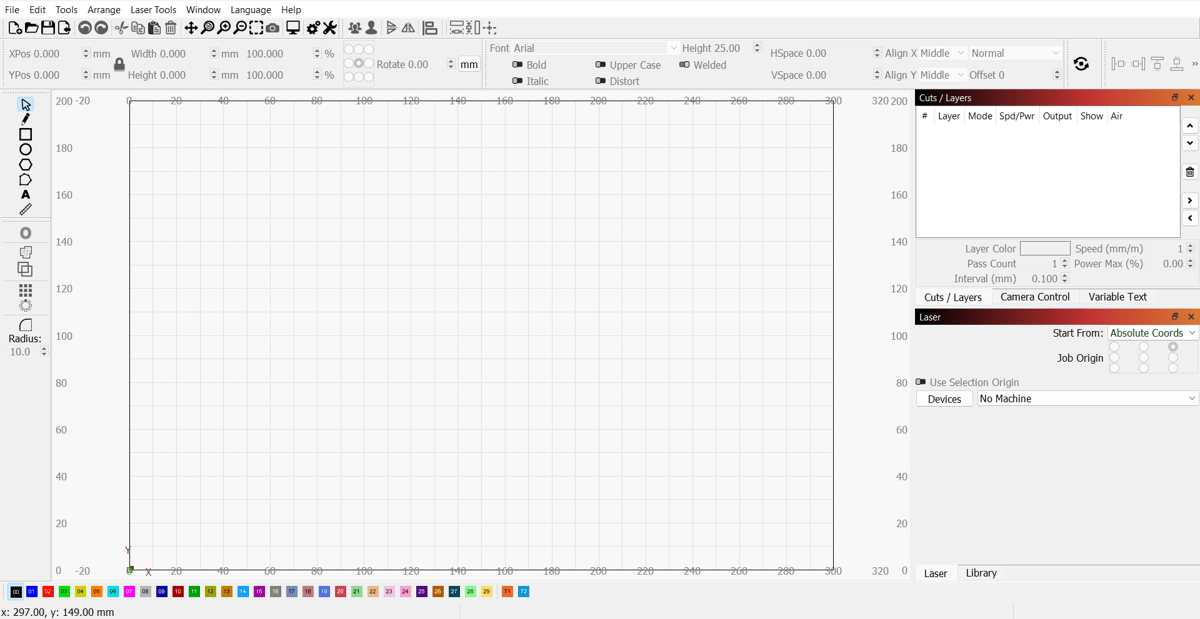
While the LightBurn interface may look more complicated at first glance, once you get the hang of it, you can access all of the program’s powerful editing capabilities. If you’re purchasing LightBurn, it’s well worth watching their online introductory videos to get the most out of the displayed options.
The default menus on the top and left sides are primarily focused on editing options, while the menus on the right are for layering, laser color, engraver connection, and commands.
Along the top menu, you’ll find various icons for preview, mirroring, copy and paste, importing, creating a new file, opening a file, and saving. For a complete overview of these tools, check out this walkthrough video from LightBurn.
Here are some of the main aspects of the program:
- Shape creation toolbar: Located on the left side, this toolbar includes the different shapes, lines, and variations you can use to create your own design. For example, the pen tool lets you draw lines. The text tool is also located here, which allows you to modify the text size and appearance.
- Sizing and positioning toolbar: Located along the top under the icons, this bar allows you to precisely size and move your design with numerical control.
- Cuts/layers bar: Located on the top right side, this tool shows the list of operations you have in your design. Layers will be cut in this order, but you can always change it if desired. If you select a layer, you can edit the speed, power, number of passes, and more.
The Laser panel, located in the bottom right under the cuts/layers bar, allows direct control of the laser once connected and includes the following basic functions:
- Pause: Stops the current program and turns off the laser with the ability to resume from the place it was stopped.
- Stop: Immediately ends the program and turns off the laser.
- Frame: Turns on the laser and moves the point around the perimeter of your current design onto your surface.
- Save GCode: The method for saving or exporting a program onto a save device or a place it can be stored until later.
- Home: Moves the laser to the default position.
- Go to Origin: Moves the laser to the center of the design space.
- Starting Coordinates: Moves the laser to the point where it would begin the laser engraving program as it appears in the current design space.
- Show Last Position: Moves the laser back to the last point it engraved.
- Optimization Settings: Allows you to change the focal length, power settings, and engraving speed.
- Devices: Allows a device connection to be initiated, or if there are multiple devices, a specific laser engraver to be selected.
Features & Functions
LaserGRBL and LightBurn both offer several different features that are worth mentioning. These features will make your experience better, whether they shorten how long it takes to reach an end result or enhance how small details appear in your engraving. Let’s take a look!
LaserGRBL
In its default setup, LaserGRBL’s features are rather slim. You can access commands through GitHub that can be enabled as custom buttons and added to your default screen. If your machine is connected and capable of receiving commands, you can use the program to control the laser position, move in certain patterns for your material reference and alignment, as well as focus and blink the laser. Once you become familiar with G-code, you can experiment with some of the more complicated commands.
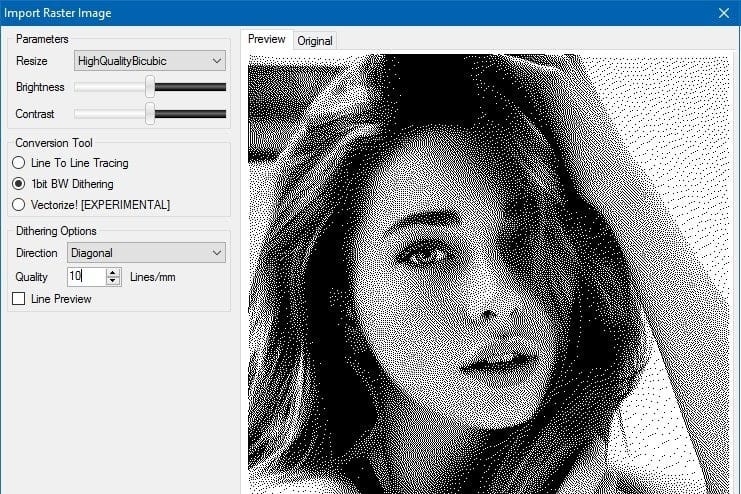
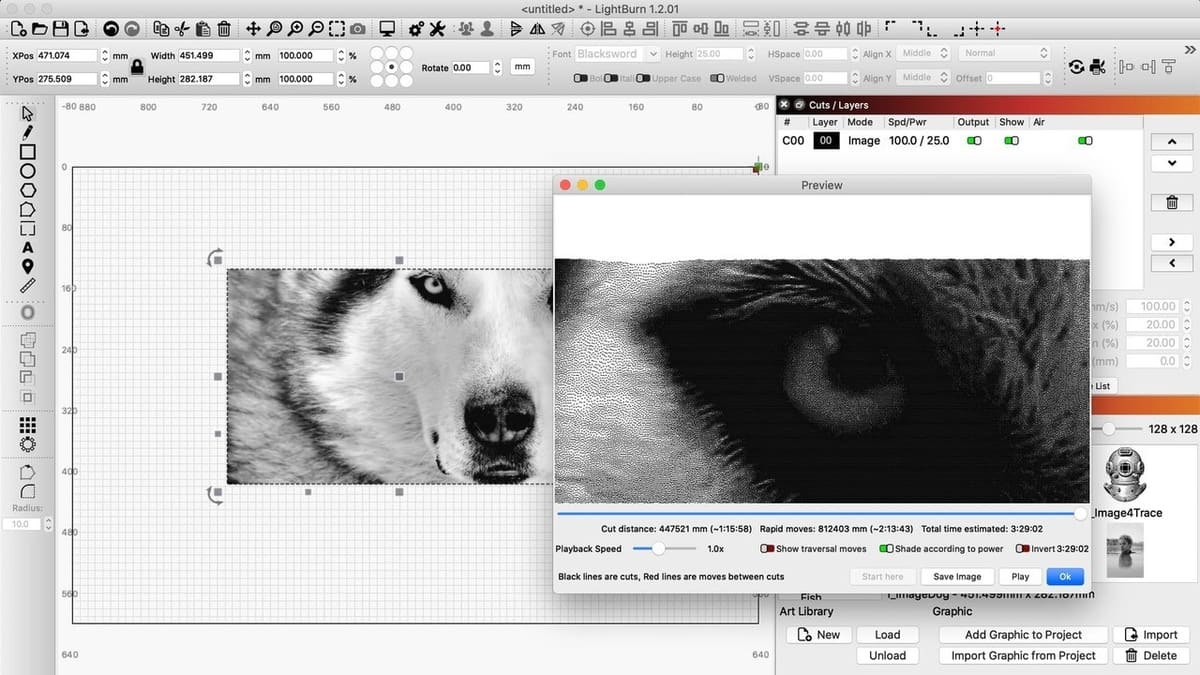
Image Rasterizer
A main feature of LaserGRBL is the raster image import. This lets you import any type of image into the program and visualize how it will be engraved. The feature includes a number of useful tools, including the vectorization tool for opening any logo downloaded from the internet and cleaning it up to achieve the best quality.
When it comes to editing images, LaserGRBL has several options to change their appearance. These options include line-to-line tracing, dithering, rotating, mirroring, cropping, auto-trimming, flood fill, and invert color, among others.
G-code Direct Edit
Editing your G-code may not be for beginners, but having the ability to precisely modify an issue you observed in your last engraving is an advantage for more advanced users. Whether you want your laser to perform a specific operation at the beginning or end of an engraving or want a small section to get a repeated pass, editing G-code directly can be helpful.
For more information about editing G-code in LaserGRBL, you can check out a YouTube tutorial, such as this one from Anthony Baltazar.
LightBurn
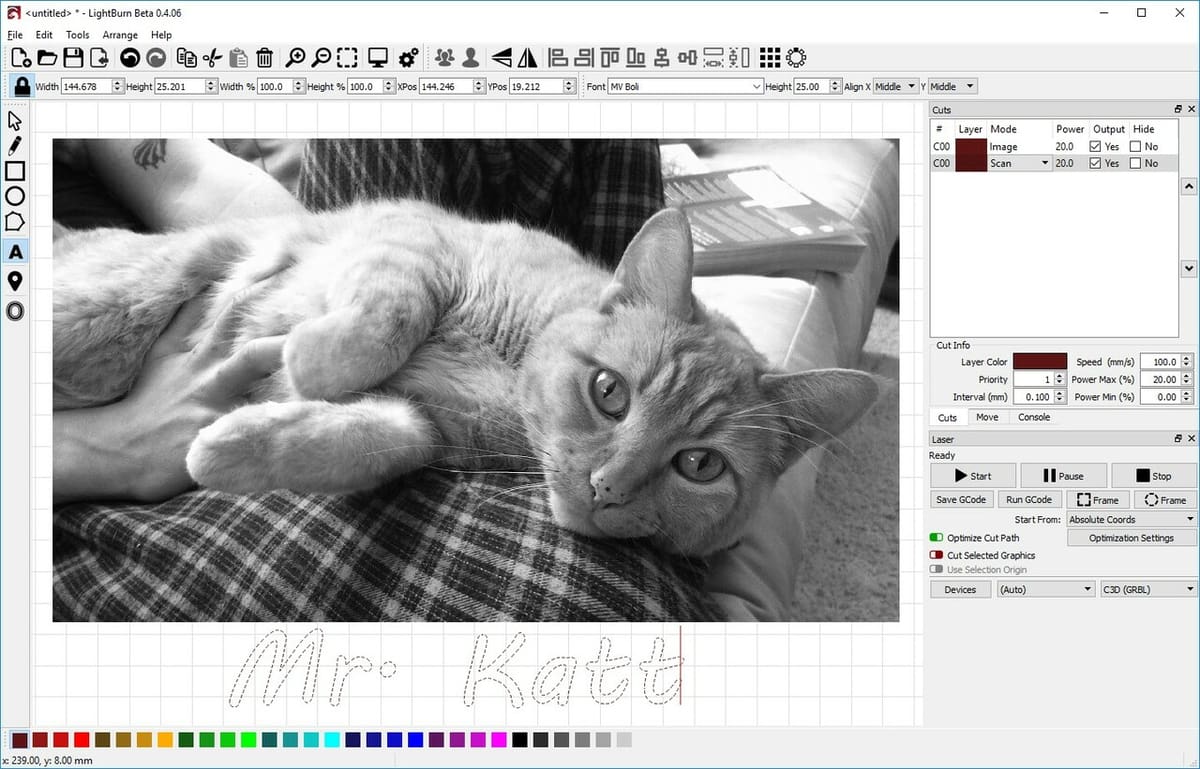
LightBurn allows you to immediately begin drawing shapes, text, and complex angles from the opening window. The powerful setup provides plenty of customization and editing opportunities. Here are some of the standout features:
Taper Warp
Under the “Laser Tools” menu, you’ll find the “Taper Warp” tool. This is designed to compensate for the difference in diameter between the top and the bottom of a tumbler or similar object. You can set the warp from the top or the bottom and adjust the top and bottom diameters in mm, as well as the total length of the engraving area. After inputting your measurements, hit “OK” and the design will be automatically adjusted.
Shape Creation
The long list of scalable shapes and lines available in LightBurn makes it the choice for anyone who doesn’t use a photo editing app. With these features, you can design an entire image from scratch and easily scale it with great detail. Shapes can be drawn from scratch, but nodes and smoothing can also be added to create something more to your liking.
Font Selection
LightBurn has the ability to pull from the wide selection of fonts used by your operating system. One of the most popular trends in laser engraving is making custom souvenirs and gifts, so this feature simplifies what is otherwise a lengthy process in most other laser engraving software. You can simply choose one of the unique fonts in LightBurn, and create a beautiful-looking present in minutes!
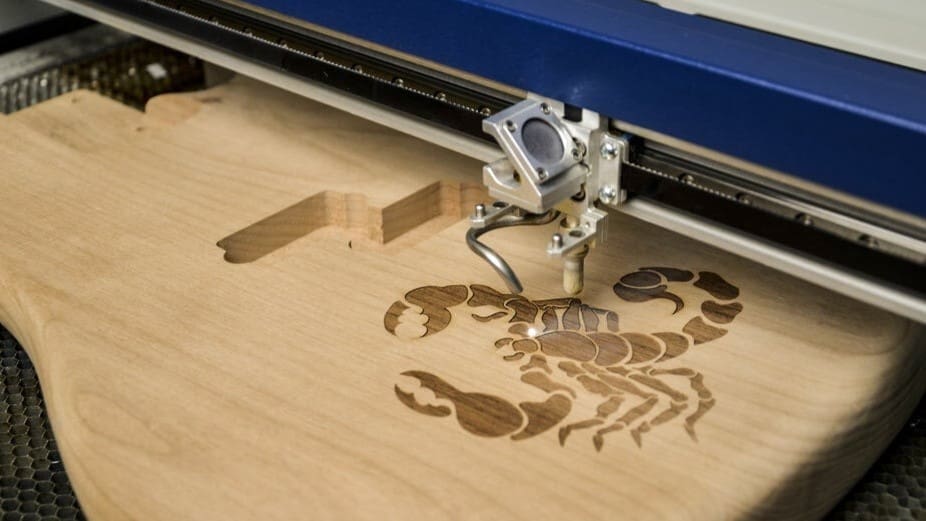
Use Cases & Applications
Both LaserGRBL and LightBurn are popular options for laser cutting and engraving projects. One of the primary uses for LaserGRBL is to laser etch highly detailed images into wood, metal, and glass. If your machine has a powerful enough laser, it can also be used for laser cutting. However, LaserGRBL lacks text insertion, fonts, shape filling, border tracing, and custom layering patterns that can correspond to color or engraved depth. Put simply, it will take more time to perfect custom designs using LaserGRBL.
Conversely, LightBurn is a handy customizer aimed at both hobbyist and small business owners. It’s versatile software that you can use for engraving names into children’s belongings, creating unique welcome signs, or adding custom messages onto liquor bottles, tumblers, and party or event favors. The sky’s the limit!

Company & Community Support
LaserGRBL has a wide and supportive community base. If you experience any issues or problems, you’ll likely find the solution on their Facebook page or in a helpful YouTube tutorial. Most of the information you’ll find will be heavily technical and aimed more at troubleshooting various issues than social content sharing. You’ll generally be able to find G-code edits on GitHub and links to how they’re used. This community includes CNC milling and advanced laser applications.
As for LightBurn, it has a dedicated support staff as well as an active community forum. You can find information and ask questions directly on the website. You’ll typically get a quick response, and even if it doesn’t get your problem solved immediately, it will get you pointed in the right direction. The website and forums are active, and you’ll find many users sharing their finished projects and ideas, so it’s also a good source of inspiration. This community is ideal for beginners, as they have outlined helpful pathways. LightBurn also has a YouTube channel with helpful videos for users at every experience level.
User Experience
LaserGRBL and LightBurn are both user-friendly programs. As you begin to create more advanced engravings and custom designs, LightBurn may become the preferred choice due to its large feature set. Some users on Reddit note that LaserGRBL is akin to Microsoft Paint, while LightBurn is more like Photoshop.
While LaserGRBL is a bit lighter on features, it offers all the basics and will get the job done. It makes it easy to enter custom G-code lines and see previews of engraving and cutting jobs. However, if you make complex image changes outside LaserGRBL using other programs, you can observe artifacts or glitches, which is also something to keep in mind.
If you begin to think about open-ended or licensed custom design software, there are some free options available, but most come with a hefty price tag, an annual fee, or like Cricut, very little control and complete loss of IP. As simple, ready-to-use, and professionally supported custom design software, the cost of licensing LightBurn is cost-effective on its own. It’s a nice little addition that the program also controls your laser engraver.
In terms of learning how to use the programs to engrave a single image, both methods are fairly straightforward. However, once you’ve taken the time to learn how to use the LightBurn control panels, it’s a much more efficient use of time for the added capabilities.
Final Thoughts
Ultimately, the choice between LaserGRBL and LightBurn comes down to your specific needs and preferences. If you’re looking for a free and straightforward program with nice cutting capabilities, LaserGRBL will be your best option. If you use another image editing software, such as Adobe or Gimp, LaserGRBL will retain image detail and translate it into your engraving. Just keep in mind that it has limited photo editing capabilities and the learning curve can be steeper. Overall, it seems LaserGRBL requires more trial and error, but can yield good results.
On the other hand, if you’re creating a custom engraving, LightBurn offers the easiest way to create, test, and visualize your project to get it done on the first try. Once you become more familiar with the interface and tools, LightBurn will allow you to create more advanced projects with less of a learning curve. However, its versatile capabilities come with a fee.
All in all, if you’re someone who doesn’t want to fight with software, or has given up on other hobbies out of frustration, LightBurn will get you engraving thoughtful, beautiful items in no time.
License: The text of "LaserGRBL vs LightBurn: The Differences" by All3DP is licensed under a Creative Commons Attribution 4.0 International License.