
Lychee Slicer: All You Need to Know

Lychee Slicer can greatly simplify, improve, and speed up how you work with your SLA printer. Read on to learn more about it!
Slice It Up

Among hobbyists, there are two main types of 3D printers: fused deposition modeling (FDM) printers, which build up melted filament layer by layer, and stereolithography apparatus (SLA) printers, which use a light source to react and then cure a photosensitive liquid as the build plate moves away from the source of light.
While both methods have their pros and cons, most modern SLA printers print section-by-section instead of line-by-line like FDM printers. This means that the majority of SLA 3D printers aren’t compatible with positional-based G-code slicers and require specific software in order to slice an object.
The fundamental incompatibility with G-code has created a marketplace for companies like Mango3D to write software like Lychee Slicer, which builds upon the basic functions from common slicers. Lychee Slicer, as a freemium piece of software, offers both enthusiasts and professionals a one-stop-shop to quickly slice objects for many different brands of SLA printers.
Offering features like automatic support generation, raft placement, and hollowing, Lychee Slicer aims to make working with your SLA printer much easier than what the stock manufacturer provides. Supporting versions on Linux, macOS, and Windows, both the free and paid versions of Lychee Slicer have out-of-the-box support for close to 75 different 3D printers.
In this article, we’ll go over Lychee’s basic and advanced features, the company’s pricing model, and its support for both free and paid users. We’ll also briefly compare it with some popular alternatives, such as ChiTuBox and Formware 3D Slicer, among others.
Pricing & Subscriptions
Lychee Slicer comes with three possible licensing versions: one free option with limitations and two paid options with a free 30-day trial. Take note that Mango3D charges its Lychee Slicer customers in euros; the prices below have been converted to US dollars.
The free version is available for users to download and install. It comes with the core functionality of the program and includes some of its most unique functions, which we’ll discuss more below. While we didn’t experience it while testing, there’s the possibility of receiving “3D printing related ads” in the free version.
Alternatively, you can try out one of the ad-free Pro subscription options. The no-contract monthly option (~$5 per month) gets you all the features of the free version plus the advanced features of the tool. The yearly option offers enthusiasts and frequent users a discounted ~$3 monthly price for 12 months and includes all of the same features as the monthly plan.
User Interface & Workflow

Lychee Slicer’s user interface (UI) should be familiar to those who have used FDM slicers like Cura or PrusaSlicer. In general, the slicer’s workflow is composed of a five-part process, with the printer setup only needing to be done the first time one uses the software.
Printer Setup
As mentioned earlier in the article, Lychee Slicer supports almost 75 different printers, and adding one of the supported printers is a very straightforward process. All you need to do is navigate or search through the list of manufacturers and select your model. Once you’ve added your printer, you also have the option to import or create a custom resin profile based on what your resin manufacturer provides.
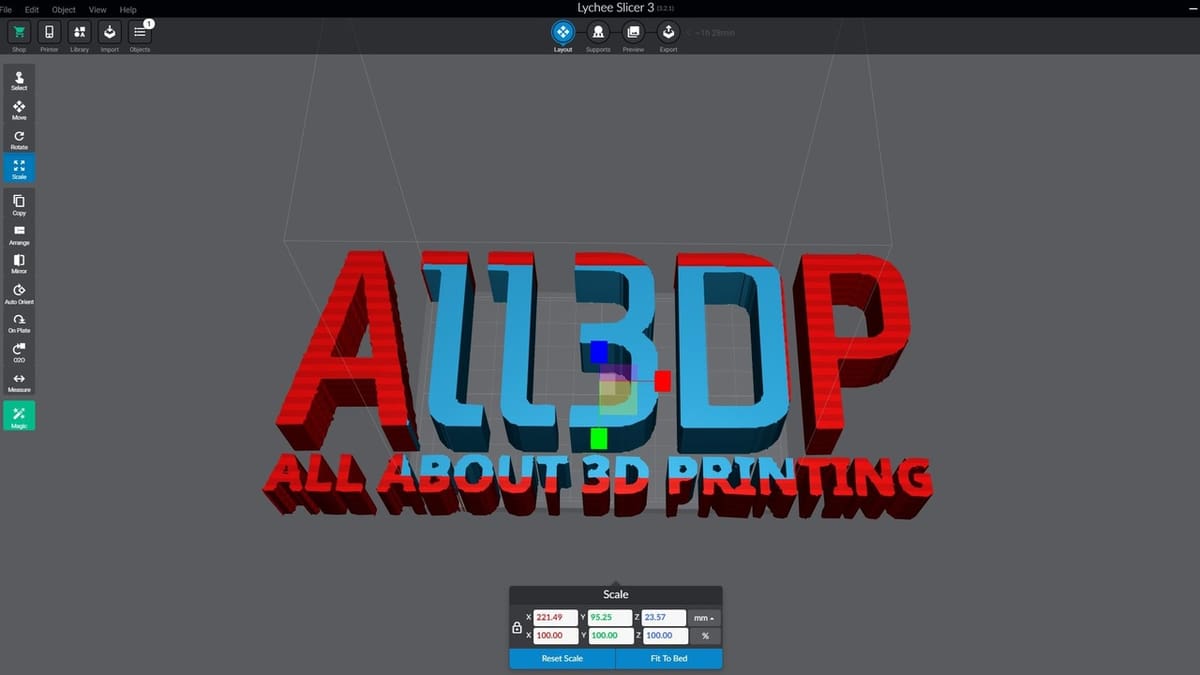
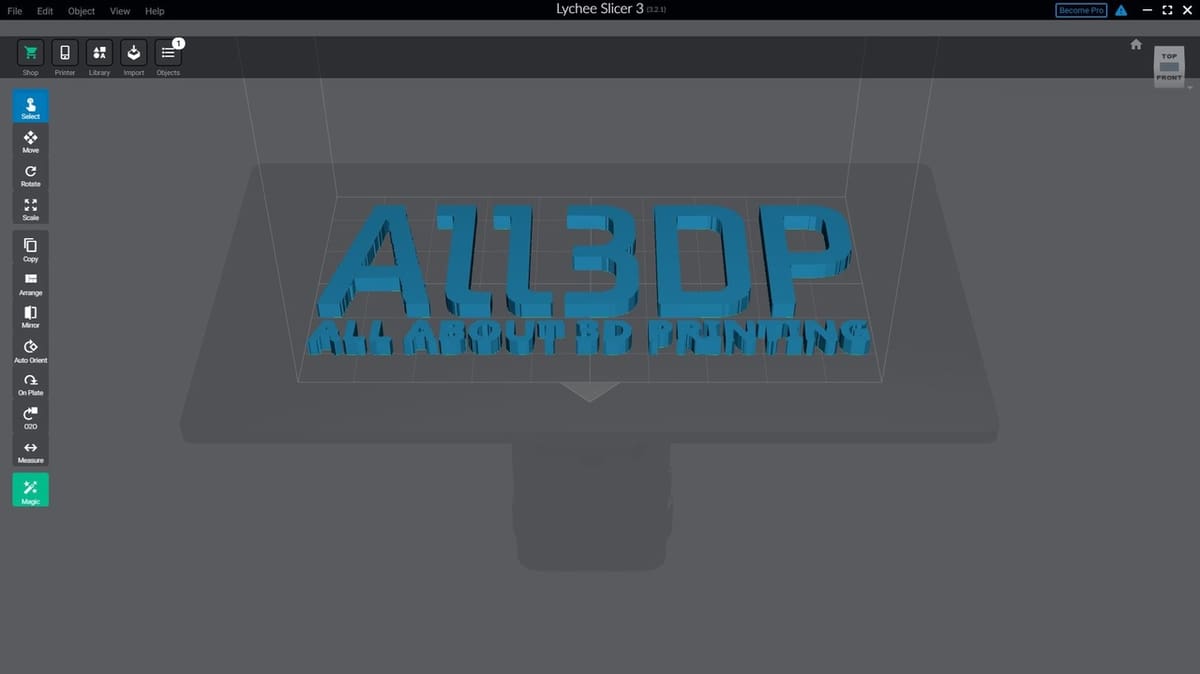
Layout
After you’ve finished the printer setup, the software will load into the “Layout” view, where you can add, scale, and orient models to your bed. You can also repair your object as well as access the “Magic” and “Measure” functions, which we’ll describe later in the article.
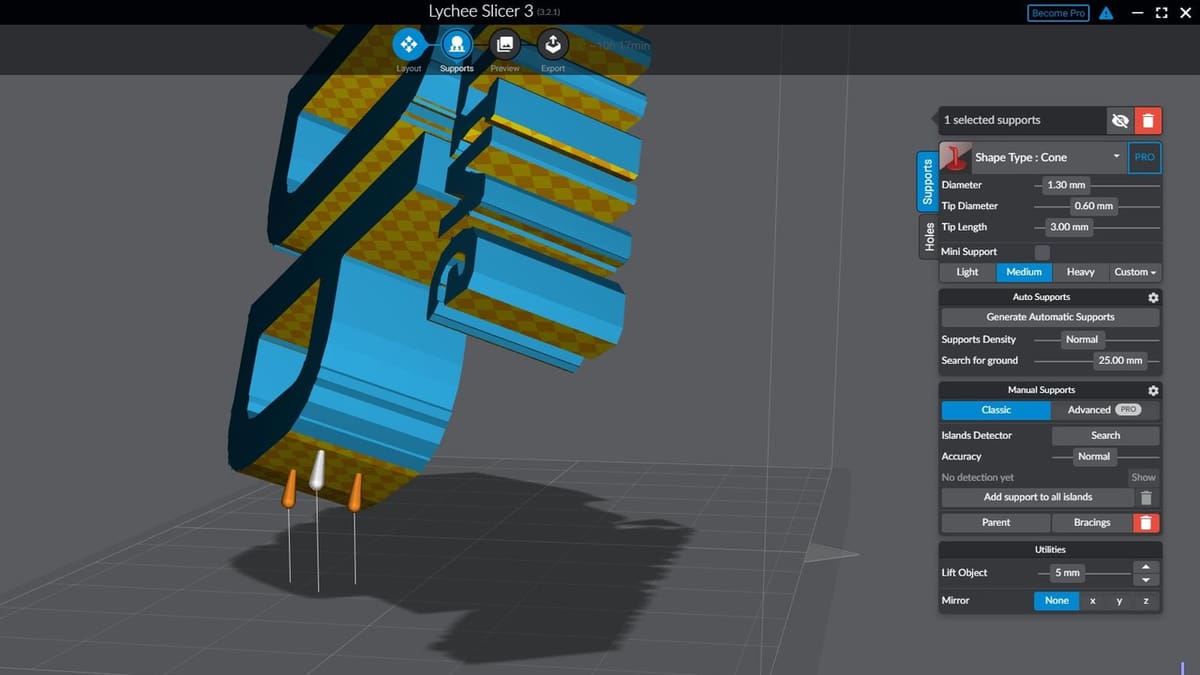
Support Generation
Moving to the next step, the “Supports” view is where you can review automatically generated support, build your own support, create rafts, and hollow out your object. This step is optional for users who opted to automatically create their supports but provides excellent functionality for more advanced use cases. This menu also allows you to tweak the shape, density, diameter of your supports, as well as raft characteristics.
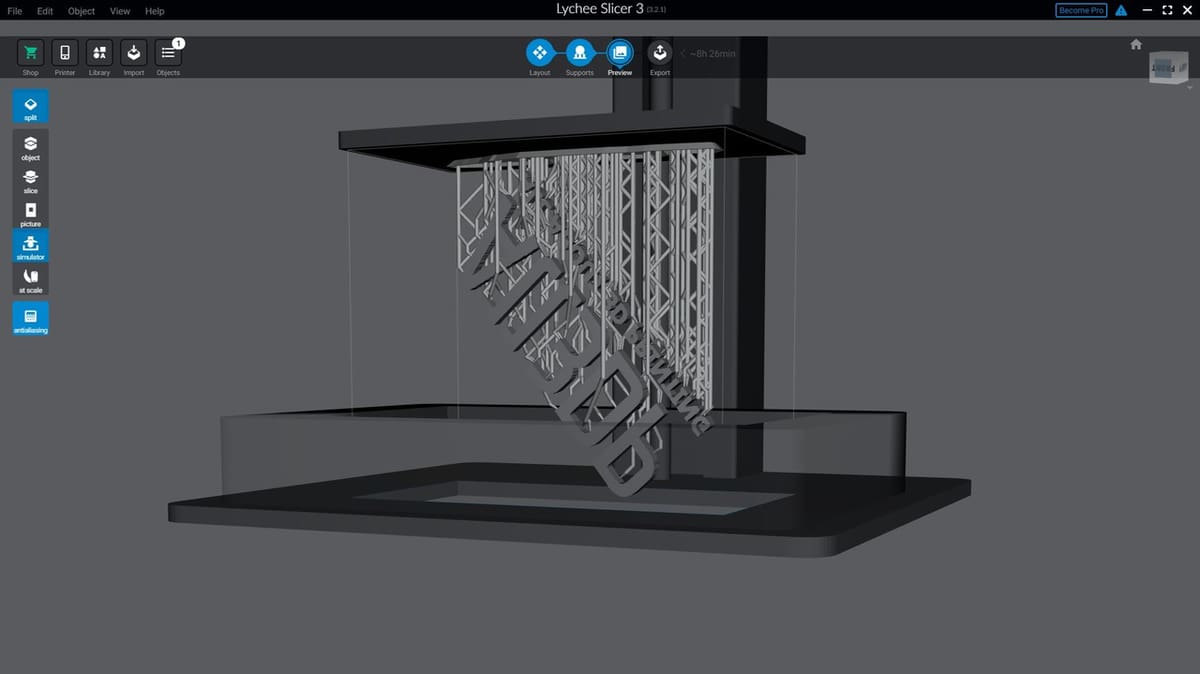
Print Preview
The “Preview” menu is where you can visualize your print in order to perform a final inspection before physically printing your object. This section is very similar to most other SLA slicers but adds unique features like the “Simulator” mode for visualizing your object as it prints and an “At scale” mode, which places your model beside some household objects for size comparisons.
Export
The last step of the Lychee Slicer workflow is the “Export” menu, where you can select your final print settings and preview the estimated print time. The options in this menu are limited, and if you’re configured to print with one of the out-of-the-box printers, the only choices you have are the type of resin you’re printing with and the anti-aliasing method you’d like to use.
Features
Not to be considered an exhaustive list, the following details many of the baseline features Lychee Slicer comes with that you’d expect from any type of SLA or FDM slicer.
Custom Printer Support & Resin Profiles
Lychee Slicer allows you to configure and set up your own “Free Zone” or custom SLA printer. Setting up a Free Zone printer is as easy as entering the dimensions of the build plate. Once done, you’ll get access to the slicer’s core functionality.
If you’re setting up a Free Zone printer, keep in mind that Lychee can’t directly create a file that’s compatible with your printer. You’ll need to export the 3D object (with the rafts and orientations made in Lychee) from Lychee to the slicer that came with your SLA printer.
Along the same lines as the Free Zone printers, users can also create or import custom resin profiles. Specifying cure times, layer thicknesses, movement speed, as well as price per bottle, these profiles can be a good way to dial in your print settings.
Scaling, Rotating, Moving, & Mirroring
Pretty much table stakes for any FDM or SLA slicer, users can perform basic manipulations of their objects once they have been imported into Lychee Slicer. In addition to the titled functions, users can also utilize undo and redo functions to correct any errors they may have made while configuring their model to print.
Manual Support Generation
Lychee Slicer, like ChiTuBox, offers users the ability to manually configure how the support structure of their model will be set up. Users can add supports by simply pointing and clicking on the model. In addition to the basic manual supports, the Pro version of Lychee Slicer comes with more support shapes and manual support placement methods.
3D Measurements (Pro License Only)
Having a built-in measuring tool is a nice-to-have feature that Lychee offers for its paid users. While most users can rely on their modeling tool to perform their measurements, there are times when you may want to measure your supports’ distance or have the convenience of quickly verifying your work one last time before sending it to the printer.
Unique Functions
In addition to the basic features above, Mango3D has added some unique features that aren’t commonly found in other SLA slicers:
Magic Mode
“Magic Mode” is essentially a one-click button that automatically optimizes the position, support structure, and orientation of one or many models that you load onto the build plate. This is an excellent time-saving function that will get many new SLA users up and running.
Overhang Detection
The “Island Detector” is used to automatically identify where you may need extra support structures in your model. While this feature is also available in both ChiTuBox and Formware, Lychee’s detector also enables advanced users to custom tailor their support structure to their exact specification. Note that free users lose out on the most detailed overhang scan called “Pro” accuracy mode.
Real-Time Hollowing, Infill, & Drain Hole Generation
While not a pure necessity for a slicer to have, the hollowing, infill, and drain hole generation functions of Lychee Slicer will enable users to save on costly resin while still creating strong prints.
Variable Layer Height (Pro License Only)
While only supported by certain 3D printers, enabling the “Variable Layer” option allows users to potentially optimize their print time and quality by automatically increasing or decreasing the layer height of your object. As best as we can tell, Lychee Slicer is the only SLA slicer that has this option; this type of functionality can be found in Cura and other FDM slicers.
Pixel Perfect Mode (Pro License Only)
The “Pixel Perfect Mode” is only available to Pro customers and aims to provide the highest level of accuracy for your model as possible. In a nutshell, the Pixel Perfect setting aims to slice the model in a way so that it exactly matches the resolution of your SLA printer.
Support
When it comes to support, Lychee Slicer offers paying customers support via their email help desk. While this should be sufficient for many, users should keep in mind that Mango3D doesn’t provide any information about expected response times to emails it receives.
Additionally, Lychee doesn’t offer any official documentation on its website or within the app itself (asides from a shortcut menu). Instead, they redirect users to the eight or so video tutorials posted on their YouTube channel. The tutorials are designed to guide users from start to finish on how to use Lychee Slicer.
While the YouTube videos are enough to get most SLA initiates up and running, the Lychee community seems to be fairly quiet on content sharing platforms: Few videos and third-party tutorials can be found. That being said, Lychee does host and offer support on its official Discord chat room where many users ask questions, share prints they’ve made, and discuss all things Lychee Slicer.
Alternatives
Lychee Slicer isn’t the only option for those shopping around for an enhanced slicer. If the default slicer that came with your 3D printer doesn’t have enough features, or if you have multiple SLA printers and want to streamline your build process, or if you just want to quickly and easily slice object, the following are great options:
- ChiTuBox is one of the most popular alternatives for many SLA printer owners. Its features are very similar features to Lychee’s and include automatic support generation, automatic object arrangement, object hollowing, and more. The free version is supported across Linux, macOS, and Windows platforms and has more formalized documentation on the website than Lychee Slicer. With that being said, Lychee Slicer offers more advanced customization features like infill generation.
- Formware 3D Slicer is supported on over 80 SLA printers and matches many of the features found in Lychee Slicer. One advantage that Formware 3D has over Lychee Slicer is its ability to create fault tolerance profiles for your resin. The “Shrinkage Correction” allows the slicer to accommodate for how much your model changes size during curing, ensuring that multiple parts fit together. Formware is currently only supported on Windows and has a one-time cost of $150.
As alternatives, some manufacturers offer their own slicers specifically for their brand of SLA 3D printers:
- Zortrax Z Suite is one of the more feature-filled out-of-the-box options. It’s designed to automatically detect overhangs, hollow or split your model, as well as smooth edges by anti-aliasing. While the cost is free, its Inkspire printer and cleaner cost over $2,500 and targets professional users.
- Photon Workshop from AnyCubic provides baseline slicing functionality for Windows and macOS users. You can scale, rotate, mirror, manually create drain holes, and select model infills.
- Asura is available for Peopoly SLA printers. It’s the most basic of the three manufacturer options on this list, with functions to manipulate your model, hollow it out, and estimate the amount of resin used. The software runs on macOS and Windows.
Lead image source: Mango3D
License: The text of "Lychee Slicer: All You Need to Know" by All3DP Pro is licensed under a Creative Commons Attribution 4.0 International License.