MainsailOS: How to Install It on a Raspberry Pi

MainsailOS is an operating system designed to run alongside Klipper firmware. Learn about MainsailOS and how to install it on a Raspberry Pi!
Rock the Sailboat
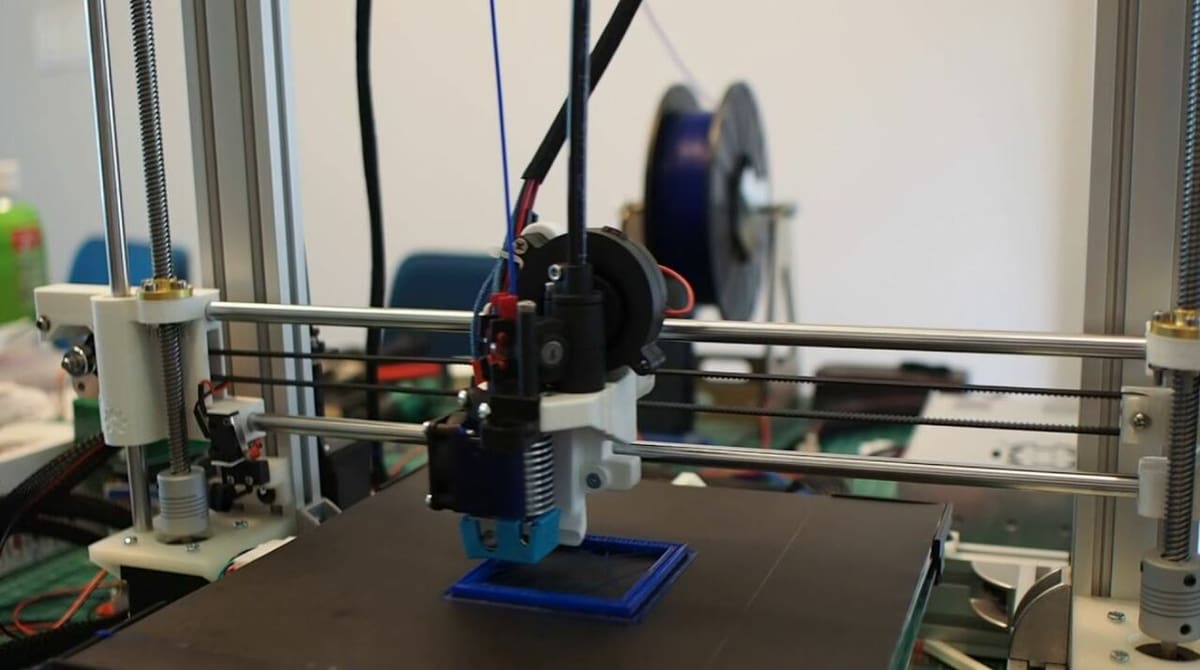
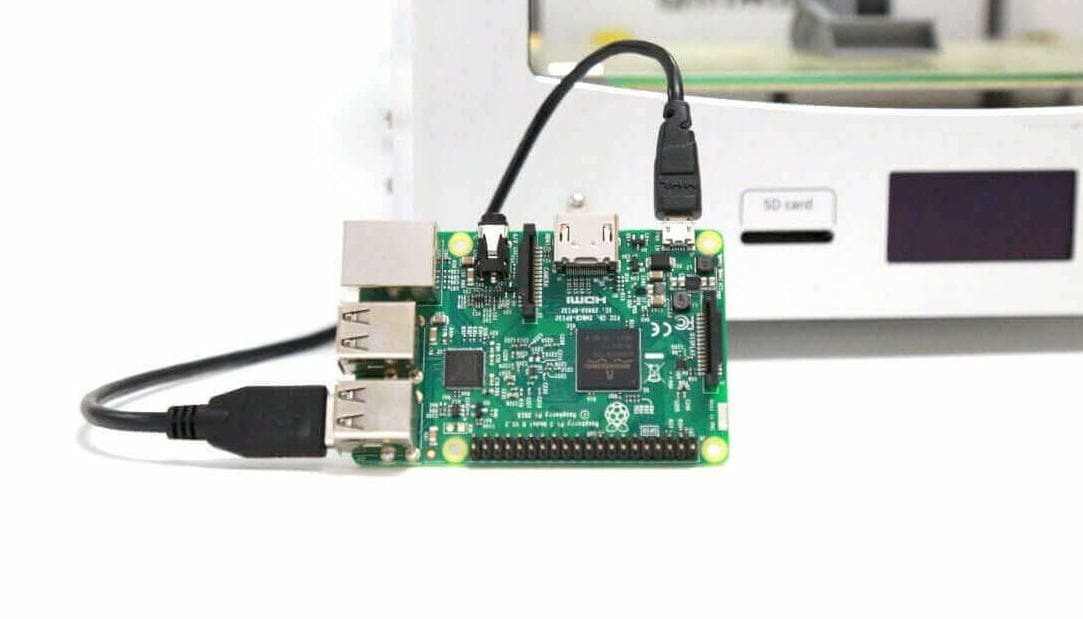
Klipper is a special type of 3D printer firmware that uses an external computer, usually a Raspberry Pi board or another compatible single-board computer (SBC), to pre-process G-code commands. This method of processing commands is unique to Klipper firmware, and it saves the printer time, yielding faster and more precise prints.
Klipper works by having a compatible operating system (OS) running on an SBC connected to the 3D printer’s mainboard. Because Klipper doesn’t work with direct interfaces, basically all OS options come with a corresponding web interface.
MainsailOS is an OS designed to work alongside printers running Klipper firmware. It comes with a compatible UI, known as Mainsail, which boasts many great features. The UI includes built-in 3D model rendering, mesh bed leveling tools, and support for multiple printers and webcams.
In this article, we’ll go over how you can install MainsailOS on a Raspberry Pi board, such as the Raspberry Pi 4. We’ve divided the content into a few main steps, but if you’d prefer to follow a video, there’s a good explanation from Nero 3DP. We’re only covering the MainsailOS installation here, but if you still need to install Klipper, there’s also a great video tutorial on that process from Chris Riley.

What You'll Need
Before we dive into the steps for installing MainsailOS on your Raspberry Pi, we first need to gather all the necessary materials. This includes both the physical hardware and the digital programs for the installation process. We’ve divided the list as such below:
Hardware
- A Raspberry Pi board (e.g. Zero W, 3B+, 4, etc.) or a similar compatible SBC (e.g. BeagleBone board)
- A power supply
- USB cables
- A microSD card (for the SBC)
- A separate computer with an internet connection
Software
- Raspberry Pi Imager
- Putty
- Notepad (or a similar text editor)
- WinSCP
Now, let’s get started!
Step 1: Downloading & Flashing the OS
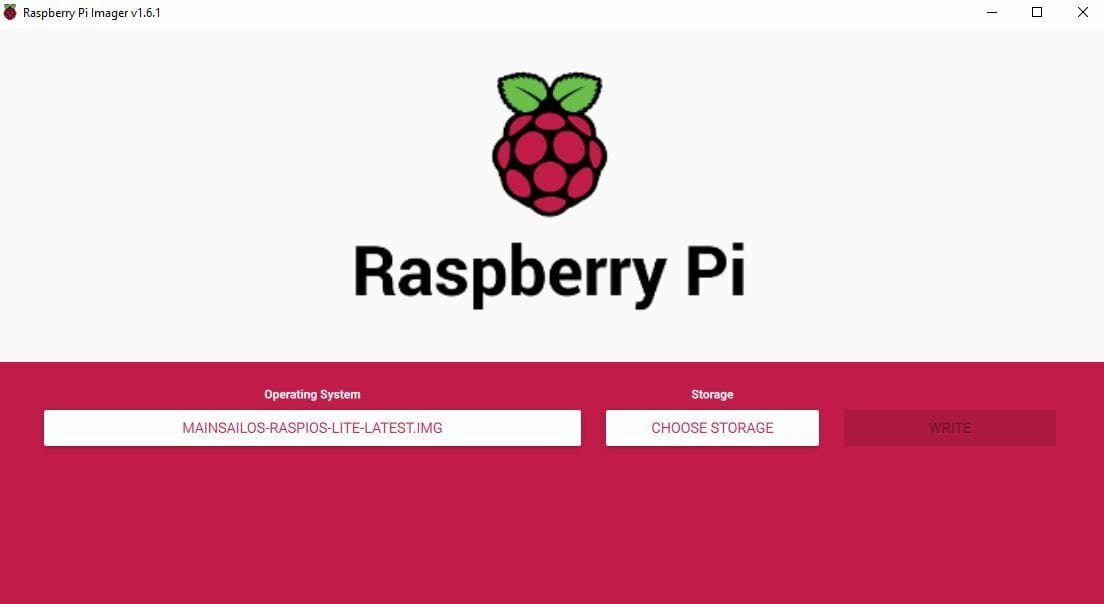
The first step is to download MainsailOS and flash the operating system IMG file onto your Raspberry Pi board’s microSD card. This step is pretty simple and is a common part of setting up any OS on a Pi or other computer. You can follow the steps below to complete this stage:
- Go to the MainsailOS GitHub repository and download the ZIP file of the latest release.
- In your device’s file explorer, extract the IMG file from the ZIP folder.
- Open the Raspberry Pi Imager application on your computer. Click “Choose OS”, scroll down and select “Use custom” to open the extracted IMG file.
- Insert the microSD card into your device and make sure no files are stored on the drive as they will be wiped.
- Choose your inserted drive for the “Storage” in Raspberry Pi Imager, and click “Write” to begin the process.
Flashing and validating the OS IMG file onto your Pi’s microSD card is a long process, so you probably will have to wait for a few minutes. Also, once the program finishes, make sure never to click “format” because this will erase the OS from the memory drive.
Step 2: Connecting to Wi-Fi & Setting Up
The next step is to connect your Raspberry Pi to Wi-Fi, as this will make it easier to locate the IP address. This step involves editing the MainsailOS configuration files to allow the Pi to connect to a Wi-Fi network.
- Open your device’s file explorer and go to your inserted microSD card. Remember not to format the card.
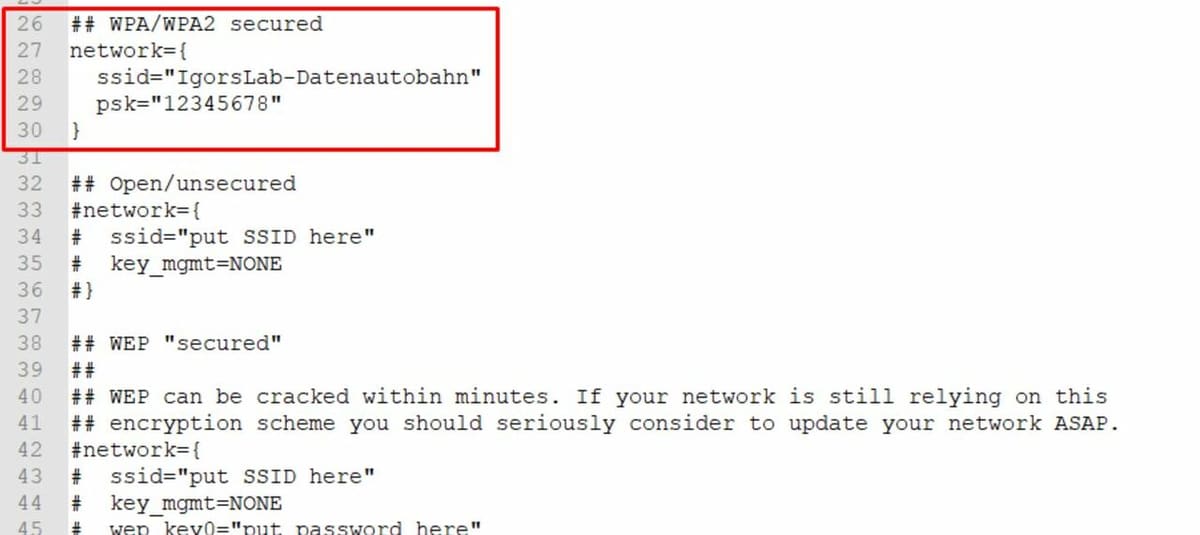
- Locate the “mainsailos-wpa-supplicant.txt” file and open it in Notepad or a similar text editor.
- Use the same steps as you would for OctoPi to configure the network for this MainsailOS file. If you’ve never done this before, find the section for your type of Wi-Fi network. Then delete the ‘#’ symbols in front of the lines of the section (uncomment it), and insert the required information (SSID and password).
- Make sure to also delete the “#” sign in front of the country you’re located in.
- Save the changes to the file, eject the microSD card, and insert it into your Raspberry Pi.
- Power on your Pi board and wait a few minutes to give the board time to connect.
Although these steps should work, some users noticed that their Pi only connected to Wi-Fi if they added the phrase “scan_ssid=1” after the “psk=” line at the bottom of their specific network type.
Step 3: Finding the IP Address
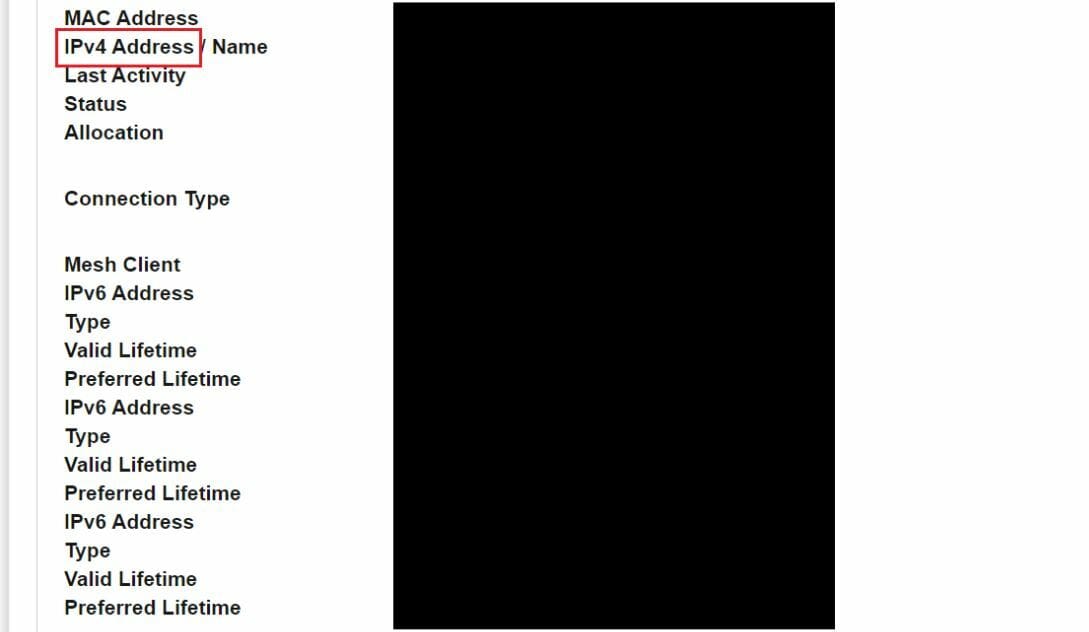
Next, we have to find the IP address of your Raspberry Pi device on the connected network. The web interface is accessed by keying the IP address into a web browser. When your Pi is connected to your Wi-Fi network, you can easily find its IP address using the router.
- Navigate to your router’s control gateway URL.
- If you have to, log in to the gateway website to access the control interface for your router.
- Go to your router’s page, where there’s a list of the connected devices.
- Under each connected device should be a name and the corresponding IP address. Search for your Raspberry Pi board, which should be labeled something like “Mainsail” or “Pi”.
- Record the IP address of the connected Pi board.
Another way you can find your computer’s IP address is through an IP scanning device. You can check out OctoPrint’s guide to learn about other ways to find your device’s IP address, too!
Step 4: Using the Interface
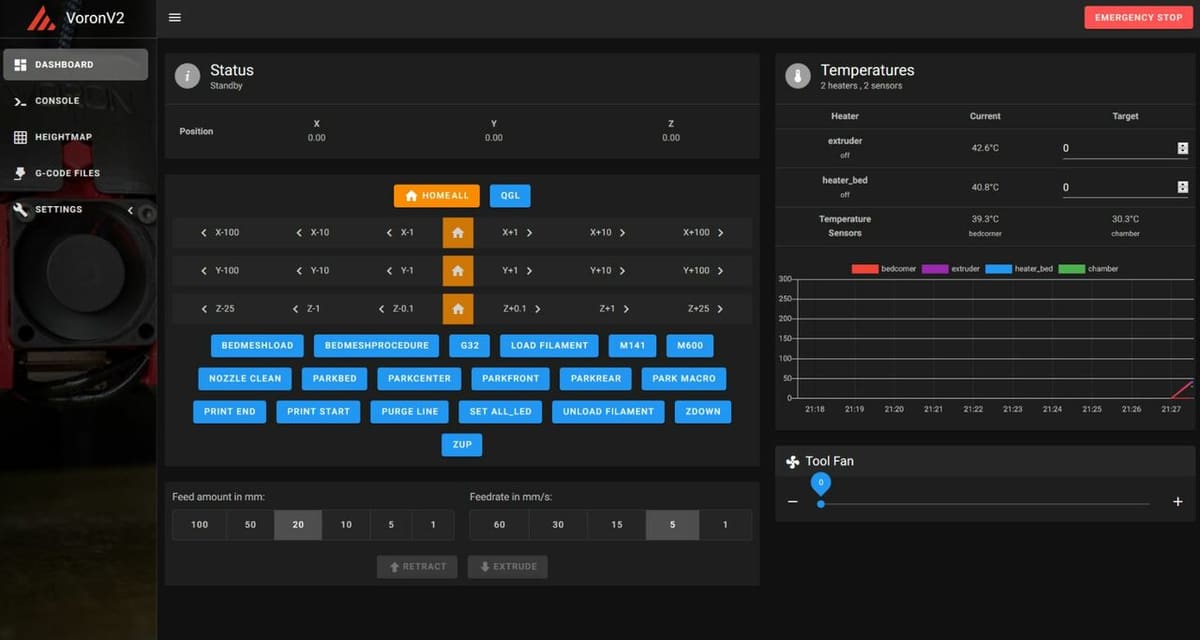
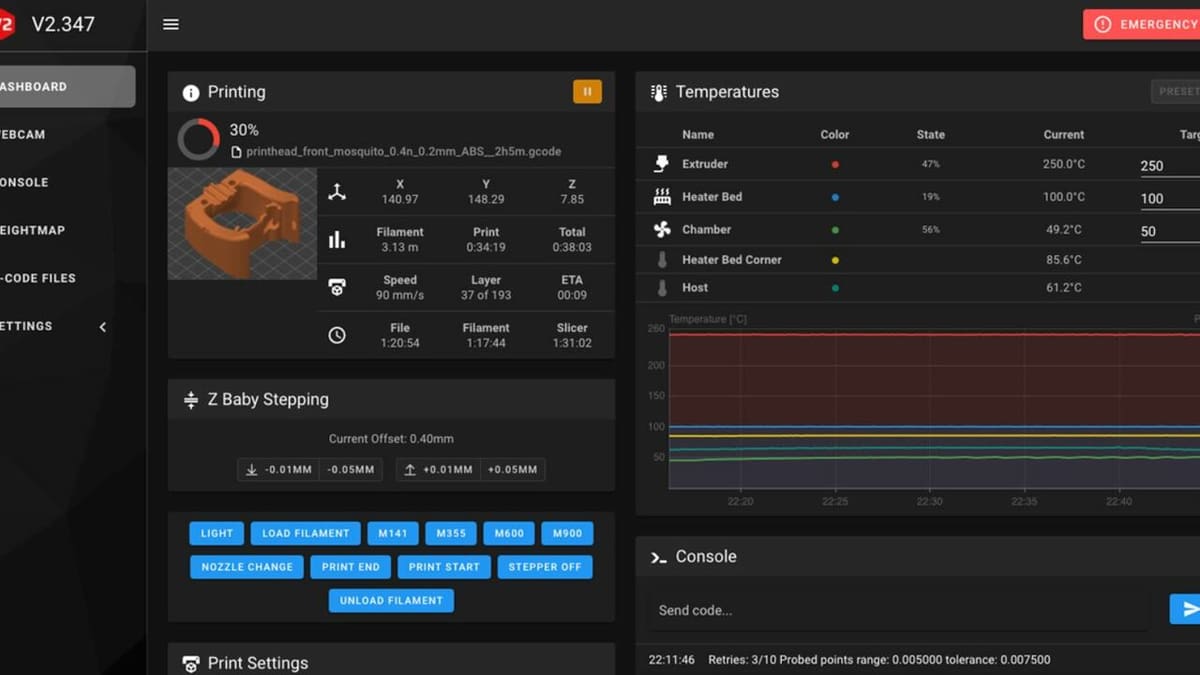
Now that you’ve successfully installed MainsailOS onto your Raspberry Pi board, it’s now time to access your new Mainsail interface. This is really easy; all you have to do is go to your preferred web browser and type in your SBC’s IP address.
On this site, you’ll probably instantly notice the clean and organized user interface. It’s important to mention that Mainsail is considered a lightweight platform, and it isn’t computing- or graphics-intensive. According to the website, the Mainsail interface is optimized for desktops, tablets, and even mobile devices.
On the platform, you can perform many different tasks, like load filament, start prints, turn off the stepper motors, prepare a nozzle swap, and even turn on connected lights. To make your experience even better, make sure to follow any instructions associated with errors prompted by Mainsail’s interface!
Lead image source: meteyou via GitHub
License: The text of "MainsailOS: How to Install It on a Raspberry Pi" by All3DP is licensed under a Creative Commons Attribution 4.0 International License.