Maya & 3D Animation: A Beginner’s Tutorial

In Maya, 3D animations reach new heights, thanks to superb tools. Read on to learn how to animate with Maya in just a few steps!
3D animations have been around for decades, and as they evolve over time, so does the software used to create them. While Blender is a great free, all-around option for digital artists, Autodesk’s Maya is the industry standard. Between both programs, there’s definitely a lot to learn for users looking to get into 3D animation.
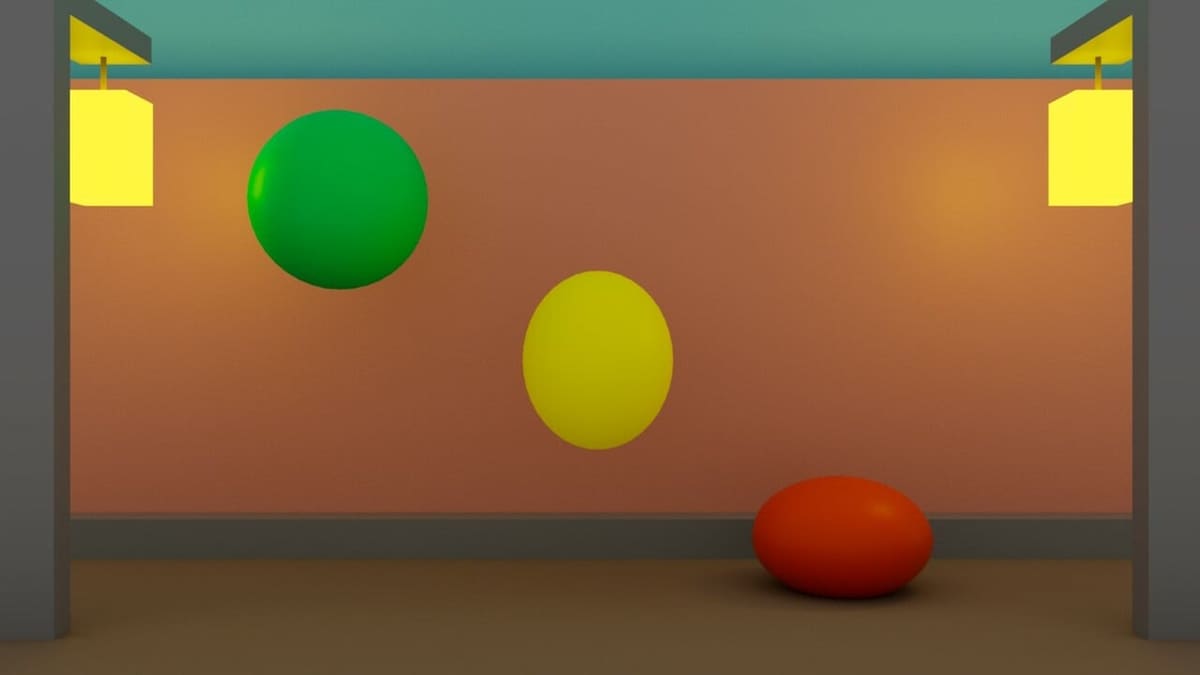
In this tutorial, we’ll walk you through the basics of 3D animation in Maya by recreating a simple bouncing ball scene. In the process, we’ll look at basic transformation, keyframing, lighting, materials, and rendering. We’ll be using the general workspace in the 2023 version of the software, but you shouldn’t have any issues following our steps with older versions.
If you’re not familiar with the software’s UI and tools, we recommend you first take a peek at our article 3D Modeling with Maya: The Basics & Tools
Animation Fundamentals
Before we can get started, it’s essential we’re familiar with Maya’s UI and the basic tools for animation. Here is a detailed list with the main tools we’ll be using, what they do, and where to find them.
Transform
Located at the top-left of the UI, the transformation tools allow you to manipulate and move objects in 3D space. The tools include the following:
- Move: Displaces along the three main axes X, Y, and Z
- Rotate: Rotates along the specified axis
- Scale: Scales the object
For both regular and rigged 3D models, transform tools are the main way of animating and posing your characters. These are used in combination with the Time Slider and keyframes in order to create movement.
Time Slider
Situated at the bottom of the workspace, the “Time Slider” – also known as the “timeline” – allows you to manipulate the passage of time within the scene and also add keyframes to 3D objects, among many other use cases.
Keyframing
Created on the Time Slider, keyframes allow us to save an object’s state in a precise moment of time, a “frame” in 3D animation terminology. Whereas traditional 2D animation requires artists to illustrate each frame to create movement, 3D software automatically creates the transition from one keyframe to the next, which makes animating much easier and saves a lot of time.
Graph Editor
Another important aspect of 3D animation is understanding what the “Graph Editor” is and how it works. The Graph Editor is essentially a more detailed way of looking at object movements and keyframes. To open it, simply click on the “Windows” menu at the top of the UI, then select “Animation Editor > Graph Editor”.
Doing this will make a new window pop up, showing us an empty grid or one full with points and lines depending on whether we have an animated model selected or not. It may seem scary at first, but fear not.
The Graph Editor has a few components, but the two most relevant for our purposes include the Outliner and the Graph View. Similar to Maya’s main UI, the Outliner is located on the left, and it displays an object’s channels. The main ones are as follows:
- Translate X, Y, and Z
- Rotate X, Y, and Z
- Scale X, Y, and Z
Occupying most of the window’s space, the Graph View is the grid we referred to before. It displays animation curve segments, which are made from the keyframes we give an object. The lower axis represents the frames (similar to the Time Slider), and the Y-axis shows the quantity.
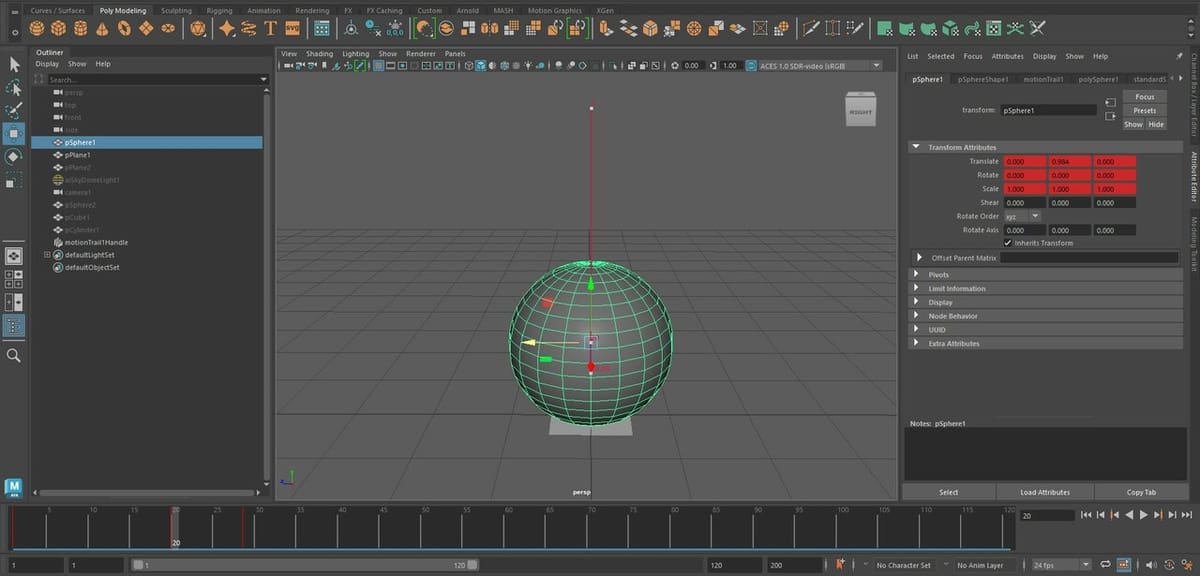
Outliner & Attribute Editors
Lastly, it’s important we’re familiar with these two windows in Maya. The Outliner shows everything that resides inside our scene: 3D models, images, cameras, axes, everything. While you can hide objects from the scene (by pressing ‘H’ on your keyboard), everything is still present in the Outliner.
You can rename things in the Outliner by double-clicking on the object’s name. It’s good practice, and we suggest you rename all of your assets to keep things tidy and make it easier to find specific assets in your scene.
The Attribute Editor, on the other hand, shows you most of an object’s properties. You can take a look at Maya’s official guidance to further understand everything that lies within it.
Step 1: Creating a 3D Model
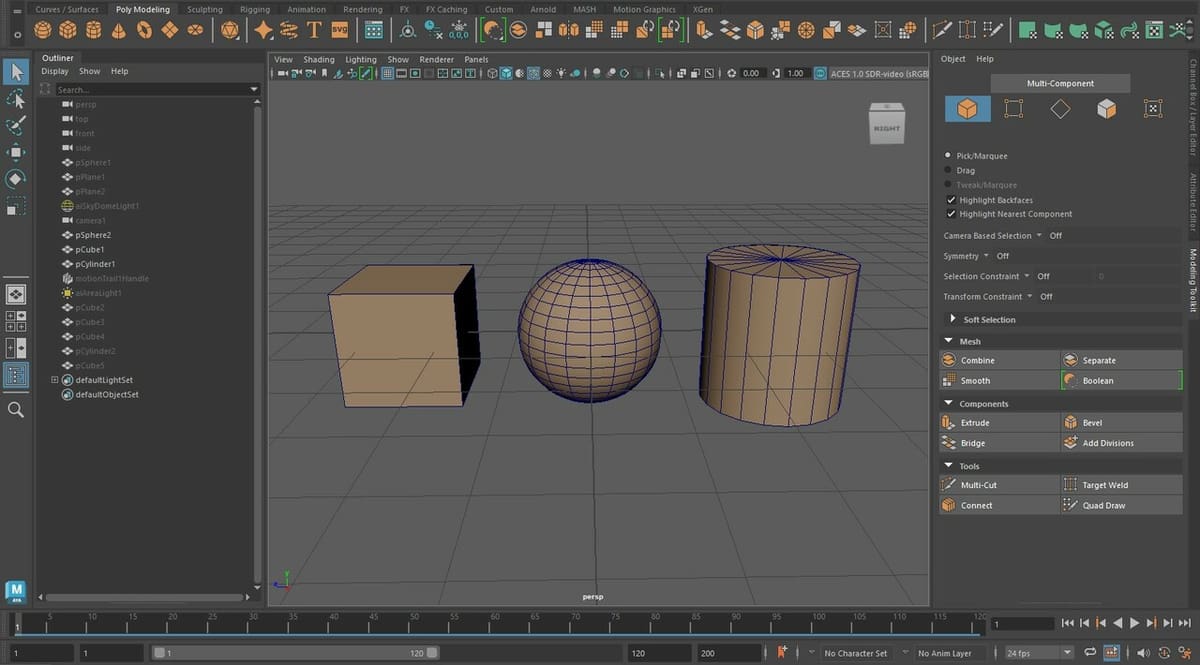
Our first step in this journey starts by creating a 3D model. Luckily for us, we won’t be making anything complex, so don’t worry if you aren’t familiar with modeling. You have two options: create a model from scratch or import an existing model.
Creating a Model
Since all we’re doing is creating a bouncing ball, we’ll need to model a ball and the ground on which the ball will bounce. This is pretty simple, and involves the following steps:
- Make sure “Modeling” is selected in the Menu Set drop-down box on the top left of the UI (below the Application Home icon and File menu).
- Select the “Poly Modeling” tools on the left side of the Shelf.
- Click on “Polygon Sphere”, which is the first tool on the shelf. This will create a sphere.
- Move the sphere upwards, then create the ground using the “Polygon Plane” tool.
- Scale the ground plane by using the Scale tool or by pressing ‘R’ on your keyboard to make it bigger.
Now, we should be good to head into the next section. However, if you’d like to add some extra props to your scene, we encourage you to try out the remaining Poly Modeling tools. Don’t worry about adding materials yet; we’ll be covering that in Step 4.
Importing a 3D Model
Alternatively, you can also import models into Maya, which can be a great way to add more assets into your scene without having to model everything individually.
We’ll be creating another plane to act as a building wall, a cube that will be the lower side of the building, and a very simple lamp post to decorate our scene. All of these elements, however, can be sourced from 3D model repositories if you prefer. They’re not essential for the purpose of this tutorial, so we won’t be covering the creation of these scene elements in detail.
Step 2: Animating 3D Models
As mentioned above, we’ll be creating a simple bouncing animation. This could either be an infinite loop or a more realistic bounce pattern. In this tutorial, we’ll go for the latter.
Setting Frames per Second (FPS)
Before we start to animate, let’s set the frames per second. This will determine the smoothness of the animation. Typically, you don’t want to go above 30 or 60, as this will make it more dificult to animate. Most 2D and 3D animations use 24 fps, which is the industry standard.
Simply locate the “Animation Preferences” icon on the bottom right of the workspace: the stick figure running with a cog. A new window will appear where you can set the frames per second. Also, make sure the playback speed matches the frames per second setting. Once this is done, we can close the window.
Animating
Now, we can get to animating with the following steps:
- Select the sphere.
- Make sure you’re in frame 1 on the Time Slider, then move the sphere to the height you want it to start the bounce from.
- Press ‘S’ on your keyboard to store the sphere’s position in the first frame. This creates the first keyframe.
- Before moving the sphere again, move to a different frame (somewhere between 10 and 20), then proceed to move the sphere until it’s touching the ground plane.
- Press ‘S’ on your keyboard again to keyframe its position, then press play to see the result.
We should now have a very rough animation of the ball falling onto the ground and staying there. Since we want the animation to look realistic, we’ll have to animate additional bounces.
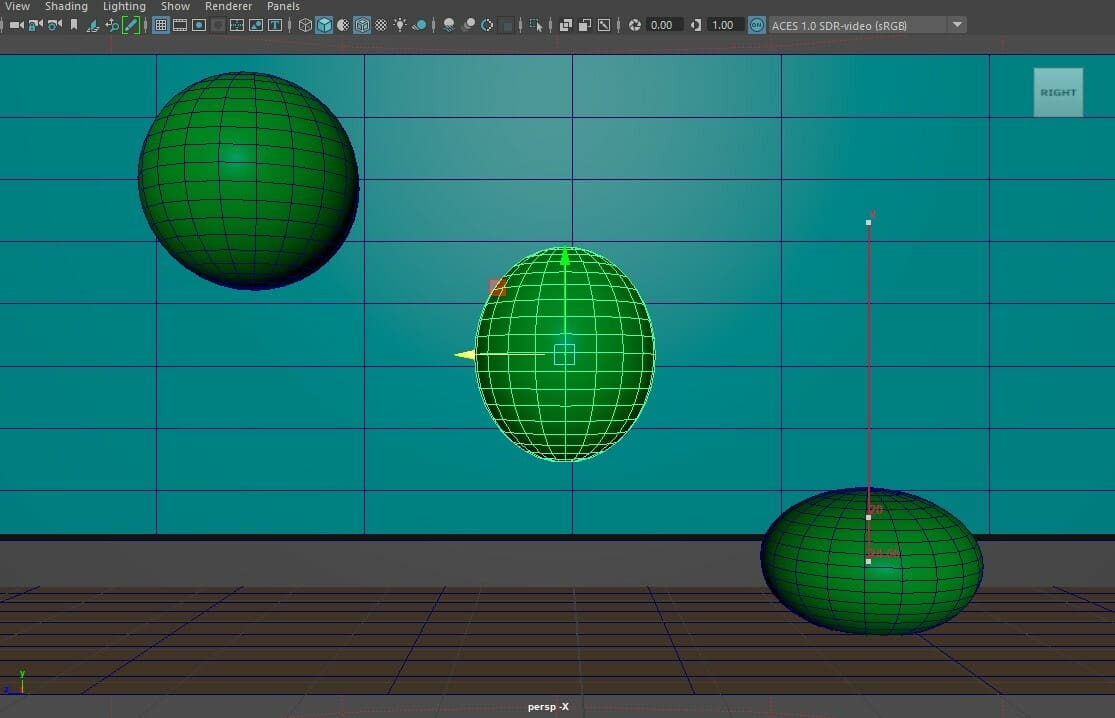
Most objects experience a bit of deformation when hitting a hard surface, and this is especially true for bouncy objects when looked at in slow motion. So, let’s add a squashing effect to our ball, just as it would have in real life.
- Move to 4 or 5 frames after the ball touches the ground.
- Scale the sphere in the Z-axis to squash it down. Do so until you’re happy with the effect.
- Don’t forget to reposition the sphere after scaling it down so the lower side of the ball is touching the ground again.
- Press ‘S’ on your keyboard again to keyframe the transformed sphere.
Now, when you press play, you should see the sphere touch the ground and proceed to squash just as a real bouncing ball would. All we need to do now is repeat the steps before but unsquashing the ball, then moving it upwards to create the bounce back.
Tips
In order to better adjust the timings, remember that you can also move keyframes in the Time Slider. To do this, press “Shift + LMB” and drag the keyframe to a new frame. Then, drag the red box until it’s back to being a single frame.
If you’re going for a looping animation, make sure the ball goes back to its starting position, then simply copy and paste the keyframes or as long as you want the animation to loop for. For those of you seeking the more realistic approach, don’t forget to position the ball lower and lower as it loses energy with each bounce, eventually going to a stop.
Step 3: Tweaking the Animation
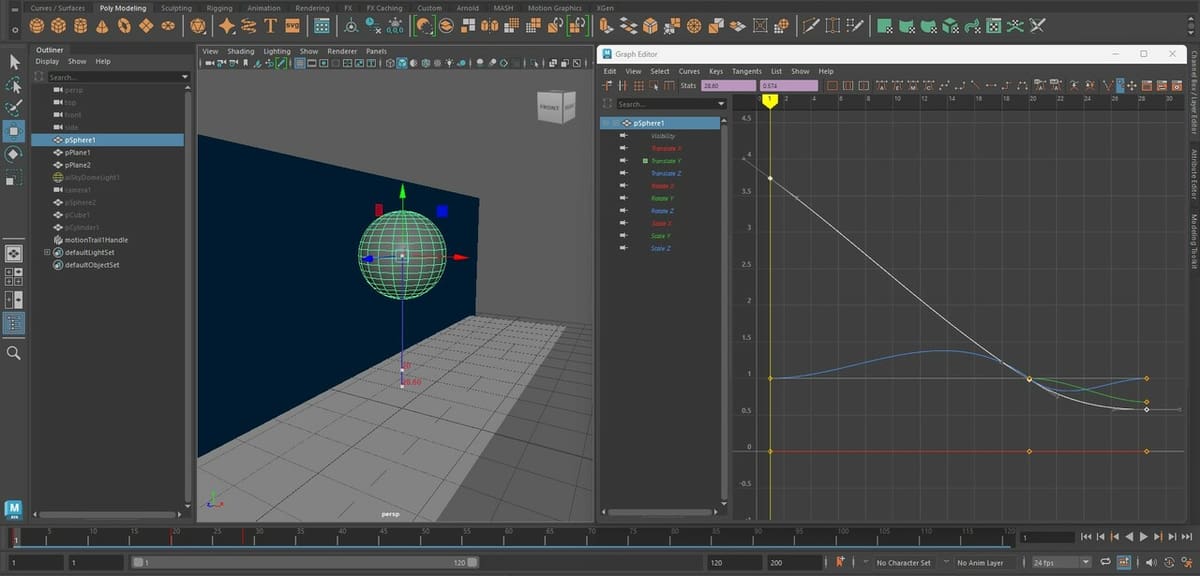
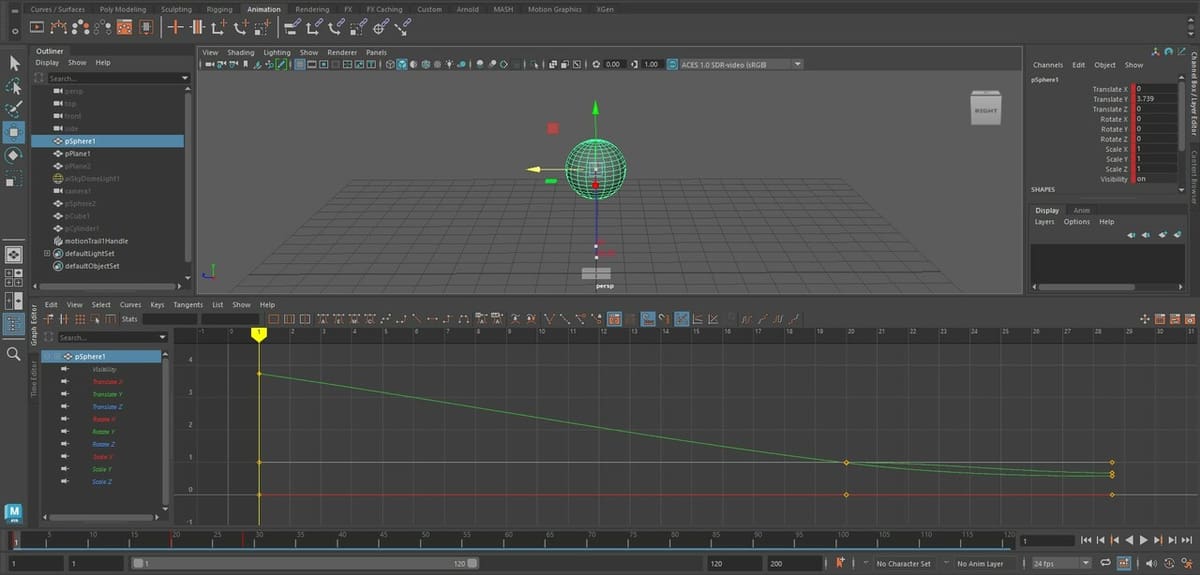
Remember how we only needed to add two keyframes to create a simple falling animation for our ball – one at the start and one at the end? Only two were necessary because Maya automatically connects both keyframes, and you can see this by looking at the smooth line that joins them in the Graph View of the Graph Editor.
In the Graph Editor, you’ll see your sphere’s bouncing animation as a mixture of dots and lines. Each dot represents a keyframe in the specified axis, and the lines are the connection between keyframes.
Just like in the Time Slider, you can add, delete, and move keyframes to further tweak your animations. The only tweak we’ll be making via the Graph Editor is to ensure that the line between the start and the moment the ball touches the ground is straight rather than curved.
By default, Maya smoothens out animation curves, which means the ball doesn’t fall at a steady rate, causing it to look funny. By straightening this curve out, we ensure that the ball falls at a constant speed. Here’s how to do it:
- Select the “Translate Y” channel in the Graph Editor’s Outliner.
- Next, select the starting keyframe. You should see a white line appear on top of it.
- Click and drag one of the ends of this line until it straightens out.
By doing this, we now have a steady falling ball that better represents how it would look like in real life.
Step 4: Adding Materials & Lighting
Even with our animation done, it’s never too late to add some extra props to our scene or even animate some of them, too. As mentioned before, we added a simple wall and ground setup with a lamp post to give our bouncing ball some company, but you’re free to design your scene whichever way you like best!
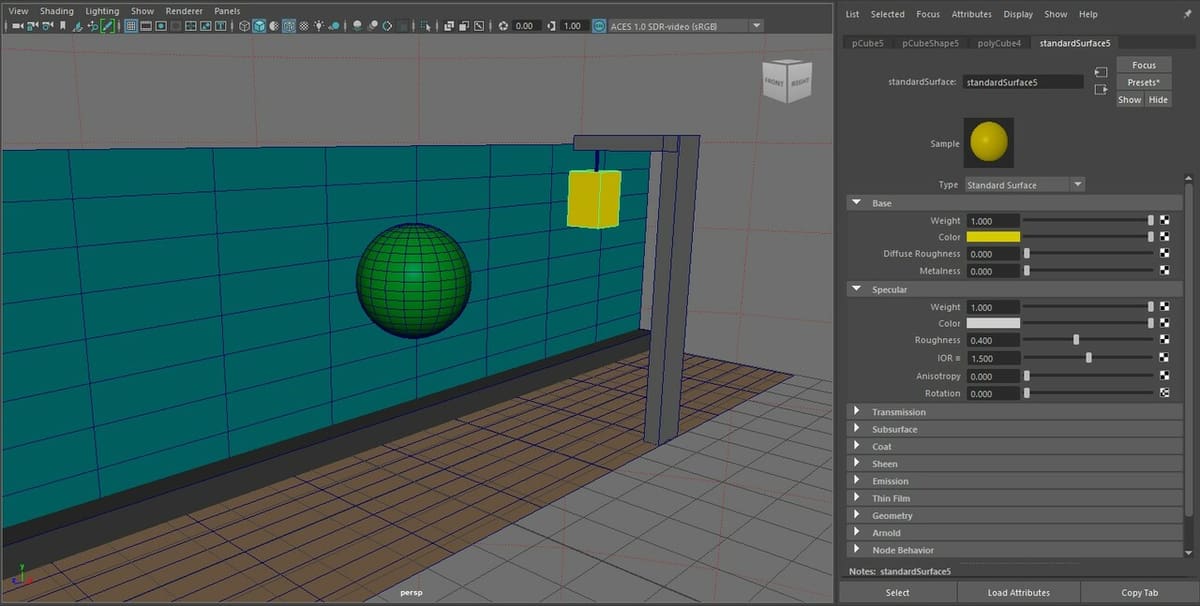
Once we’re happy with the way our scene and animation looks, we’ll need to add some materials and proper lighting before we can attempt to render the animation. To add some default materials to our scene, we’ll do the following:
- Select the object we want to color.
- Right click to open the pop-up menu.
- Select “Assign new material”.
- Choose “Standard surface”.
A new tab should have opened to your right in the Attributes Editor. Here, we can tweak the color and material properties of our object. Make sure to repeat this step for each object in your scene until you’re satisfied with the way everything looks.
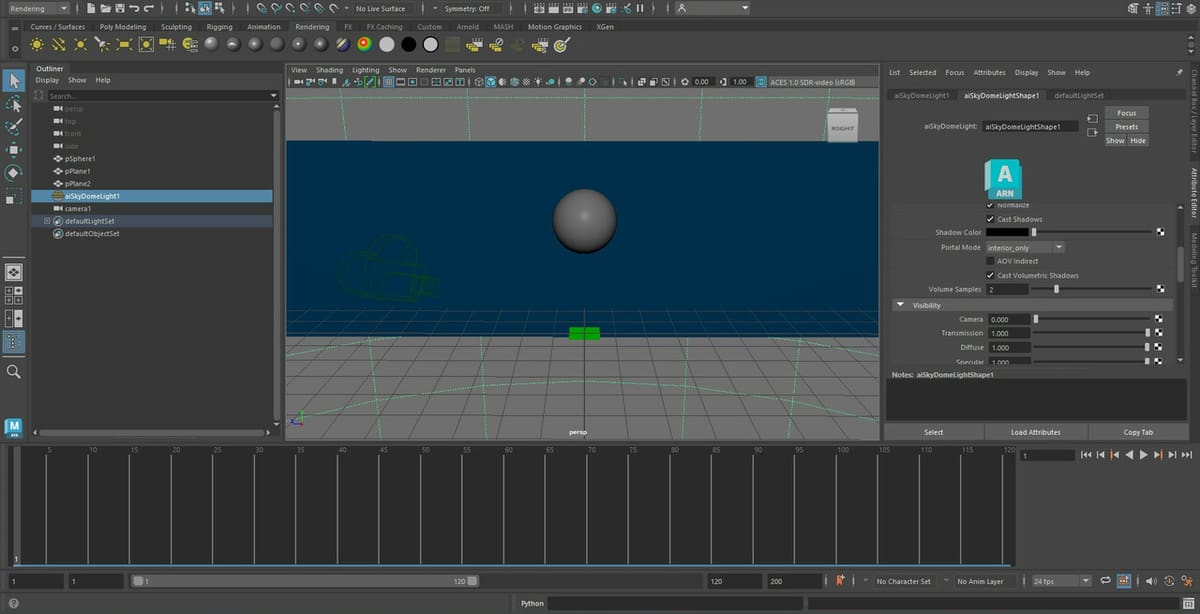
Lastly, let’s set up some basic lighting to ensure our scene is visible after being rendered:
- Click the “Arnold” tab on the Shelf.
- Select “Skydome light”.
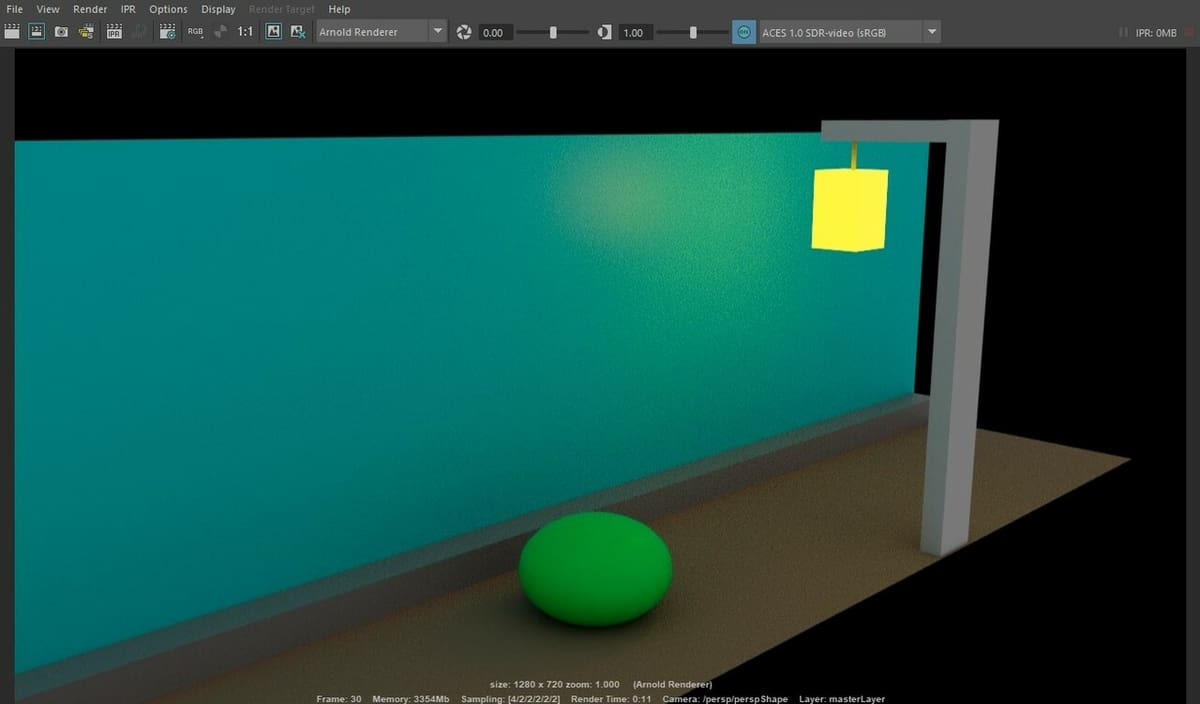
Skydome light is the easiest way to add some basic lighting to our scene. It ensures that our scene is equally lit. For a more detailed approach, we could add an “area light” to light up a specific part of the scene.
While tweaking lighting, it’s helpful see a preview of the rendered scene; you can see changes in real time. In order to preview how your scene looks rendered, press the Render icon in the same Arnold tab. A new window will appear that will allow you to preview the scene.
For the sake of keeping things simple, we won’t go into anymore detail about lighting, but we recomend you take a look at this short 2-minute video about the basics of lighting in Maya.
Step 5: Rendering the Animation
Our final step in this journey is to render and export our animation.
Setting Up the Camera
Although Maya allows you to render from the default perspective cameras, it would be better to create a new camera and position it somewhere in the scene so that it covers the area we want to render:
- Go to the “Rendering” tab on the Shelf.
- Click the “Create camera” icon.
- Position it wherever you’d like using the Transform tools.
You can also animate the camera using the same method we did to animate our bouncing ball. This comes in handy if you’d like to incorporate camera movement into the animation instead of it being steady the whole time.
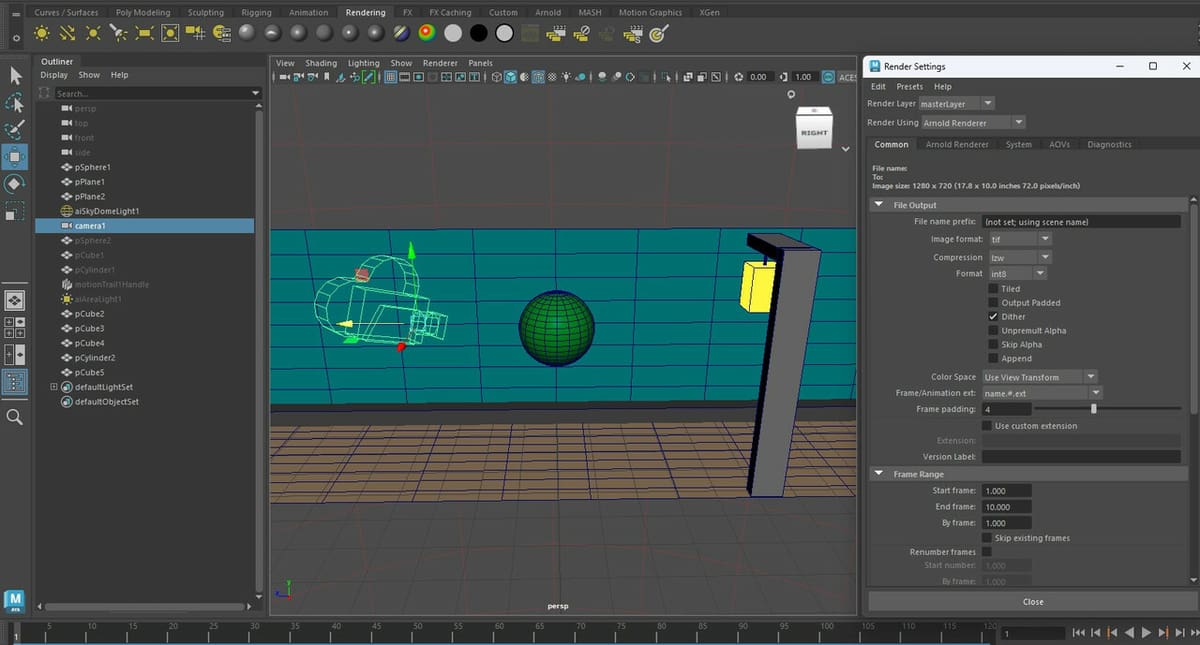
Render Parameters
Once we have finished setting up our camera, we’re ready to render our animation. We’ll do this by opening up the Render Settings window. To open it, simply click on the “Windows” menu at the top of the UI, then select “Rendering Editor > Render Settings”.
There are several settings that we can choose from, but we recommend you use the following:
- Render using: “Arnold Renderer”
- Image format: Select either “png”, “jpeg”, or “tif”
- Frame/Animation ext: “name.#.ext”
- Renderable camera: Select your new camera
- Frame Range: The “Start frame” should be 1, and the “End frame” should be the last frame of your animation.
- Presets: “HD_1080”
The remaining settings can be left as is, but feel free to choose a different resolution/image format if you wish.
Tip
If you want to render with a transparent background, make sure to use the “tif” image format. Maya’s Arnold Renderer doesn’t support transparency for PNG image formats when rendering image sequences.
Step 6: Exporting the Animation
All there’s left to do now is render and export our animation. Before we do this, though, you may want to confirm where you want Maya to save all of the rendered files. Go to “File > Project window”, and there you’ll see the default location. If you want to change the directory, click on “New” and choose the path you want your project to be saved in.
Now, let’s render our animation as an image sequence in Maya. In the process, we’ll make some adjustments to the settings to ensure Maya renders from the camera we want.
- Select “Rendering” in the Menu Set drop-down box on the top left of the UI (below the Application Home icon and File menu). The menus at the very top of the UI should now include the rendering related menus.
- Open the “Render” menu.
- Once opened, click on the small window-like icon to the right of “Render Sequence”. This will open up the Render Sequence Properties window.
- From there, swap the default “persp” camera to the one we want to render from.
- With the camera swapped, press “Render Sequence” or “Render sequence and Close”. Maya will then start to render our animation as an image sequence.
Step 7: Converting to a Playable Movie File
If everything went well, you should now have a folder containing all the rendered frames from your exported Maya animation. By default, Maya doesn’t allow you to export animations as movie files. So, you’ll need to convert your exported animation into a playable movie file,
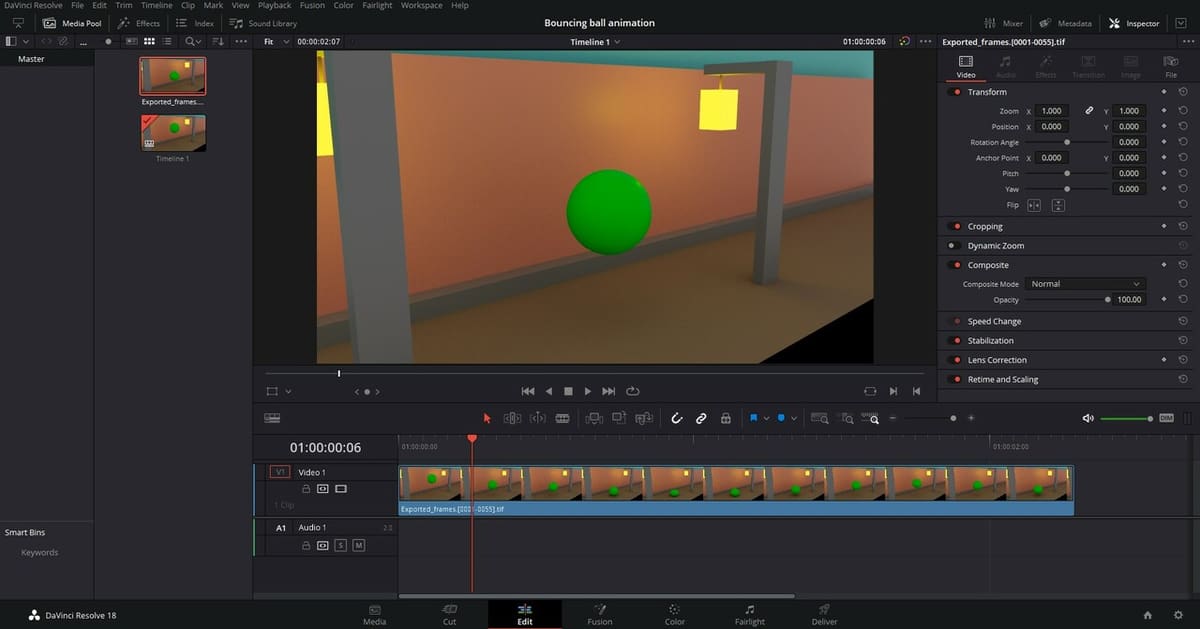
This can be done in programs such as DaVinci Resolve (which is free) or Premiere Pro, the paid alternative. You can also use Blender to turn image sequences into a movie.
Ultimately, you can use an online converter by searching for “Image sequence to video”. However, we don’t recommend this, as some sites may not offer the same performance as the aforementioned dedicated software suites.
That concludes our tutorial. We hope you found it useful. Don’t forget to save your project!
License: The text of "Maya & 3D Animation: A Beginner’s Tutorial" by All3DP Pro is licensed under a Creative Commons Attribution 4.0 International License.