What Is It?

Modo is 3D modeling software developed by the company Foundry. Although it was first launched in 2004, its first stable release wasn’t until September 2020, which is why you might only recently have been hearing about it. The software is available on Windows, Linux, and MacOS, and it has capabilities for polygon modeling, sculpting, texturing, animation, and rendering.
Developed with artists in mind, the software’s developers focused more on creativity, concepts, and beauty, rather than technical aspects. With that said, Modo also boasts a number of tools to get technical with shadows, visual effects (VFX), mesh size, and such.
Although it’s possible to do the complete design pipeline – from modeling or sculpting through animation to rendering – Modo’s core strength lies in modeling and rendering (which has a lot to do with the mindset of its target audience). Modeling in Modo combines three techniques, which makes the process very fluid.
Modo’s rendering tools allow the model to have good lighting and shadows, vibrant colors, and interesting camera angles when possible. That’s why Modo is considered to be more focused on the artistic side of things.
In this article, we’ll introduce you to the software, its features, and some resources where you can learn more about the program. Let’s jump in!

Pricing

Modo has several pricing options targeting different types of users. If you’re a student, there’s a free educational license for users at “qualifying” education institutions. Students at educational institutions that partner with Foundry can obtain a license from their school or university. If your institution doesn’t qualify, you can still get the software at a discounted price of $262.
Personal licenses are available to hobbyists, independent designers, and the like. For this, there are three options:
- Perpetual: This license is valid for a lifetime and costs $1,909. It comes with one year of maintenance, which includes software updates and new releases, full access to Foundry’s support services, as well as other benefits.
- Subscription: Paid either monthly or annually, this option costs either $65 per month or $659 per year. Maintenance is included.
- Maintenance: For users who have perpetual licenses, this option provides another year of maintenance after the initial term expires. It costs $440 per year.
There’s also Modo Businesses, which is meant for small companies with less than 50 employees, and Modo Enterprise, which is meant for larger companies. For these licenses, you have to contact Modo directly and ask for a quote.
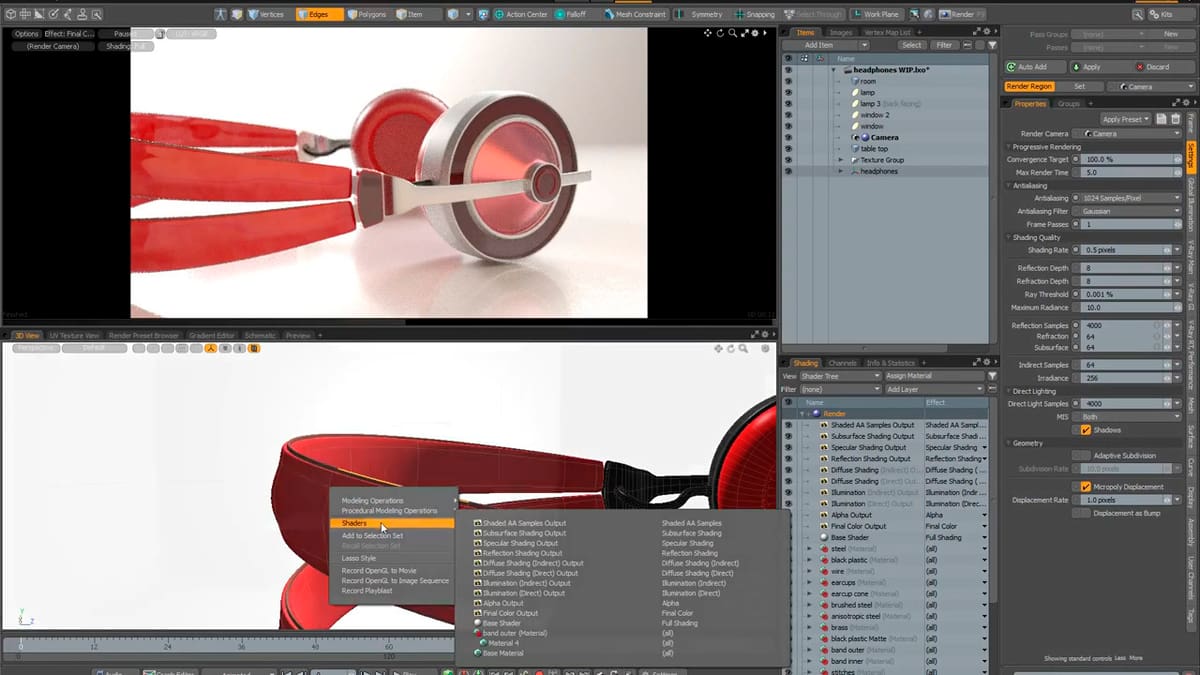
User Interface
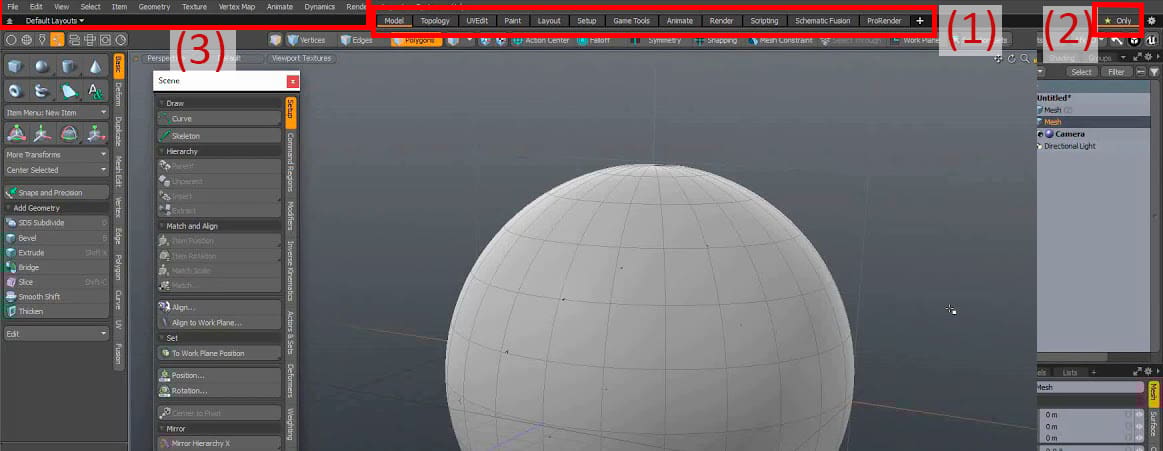
As with most programs, Modo’s layout can be customized, but let’s take a look at the default layouts. Located at the top of the window, the Application Menu bar (3) contains all of the functions available in Modo, regardless of whether they’re displayed elsewhere as icons. This includes additional layout options and the complete set of features for functions like animation, texturing, vertex paint, and so forth.
Layouts
Similar to Blender, Modo is organized in workspaces, called layouts, which contain different arrangements depending on where you are in the design pipeline. The default layouts include Modo, Model, Animate, Render, and VR, and they’re all are organized in tabs on the Switcher bar (1). You can add your own layouts with the plus (+) button. Hidden layouts can be revealed by unselecting the “Favorites Only” icon (2).
Selecting one of the tabs will display the recommended layout for each function. The Animate layout, for example, displays the animation timeline at the bottom of the workspace. The Render layout gives you a preview of your rendered result, displayed by default on the left side. At the same time, it keeps the items, shades, meshes, and other relevant menus to the right so that you can continue editing your work without having to exit the Render layout.
In the Model layout, the Modes bar – located below the Switcher bar – allows you to switch the selecting and editing modes, from vertex to edge to face. There are additional buttons for setting things like the center of where a tool will act, symmetry in features, and snapping to grid, which is helpful for operations that require more precision.
Regardless of the layout and where you are in the design pipeline, Modo lets you do pretty much everything at once. Although it’s not necessarily the most convenient way to work on complex projects, if you’re just modeling, staying in whatever layout you’re in can be just fine.
Elements of the Workspace
Now that we’ve covered how Modo handles layouts, let’s look at the various components of the workspace.
Viewport
The Viewport is located in the center and occupies most of the window, as is the case with most modeling software. In there, you can view your model and interact with it by selecting it, scaling it, moving it around, and modifying it.
Toolbox
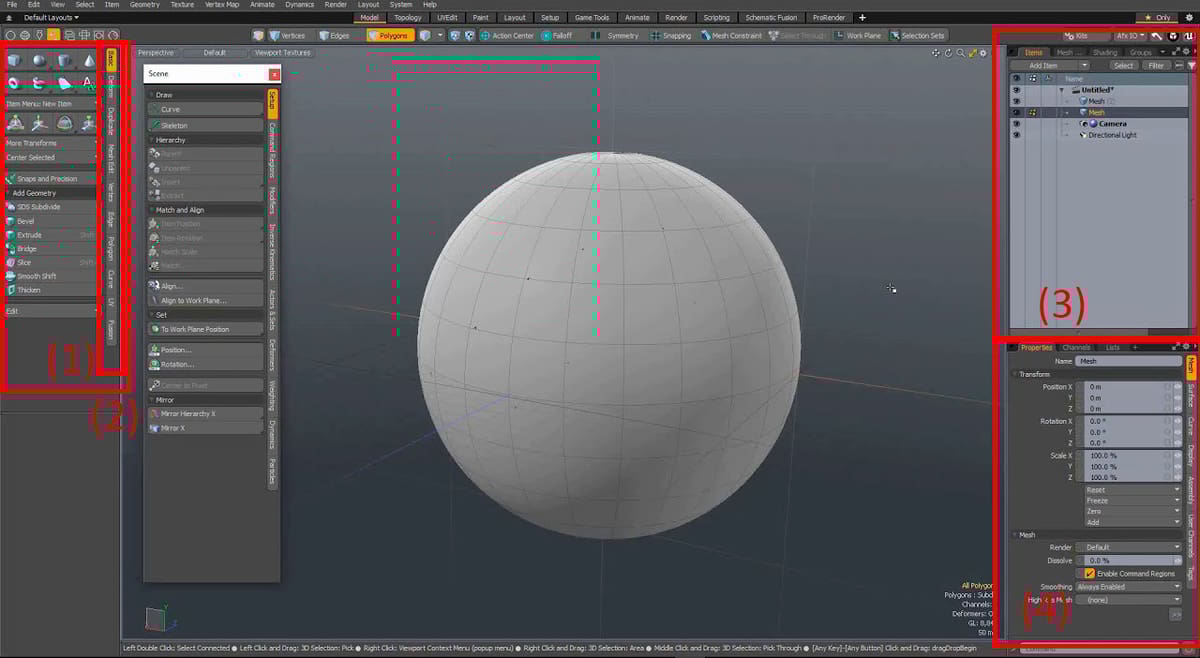
To the left of the Viewport is the Toolbox (1). Here, you can find transform tools such as translate, rotate, or scale, as well as some geometry features such as extrude, slice, and bevels. On the right margin of the Toolbox, you can find tabs (2) that include more advanced operations and tools.
Additionally, you can also find objects in the Toolbox to add to your viewport.
Right-hand Panels
To the right side of the viewport, there are two panels with several tabs that contain information about the scene. The top one (3) contains several tabs. The first one is Items, which lists all objects present in your scene, including cameras and lights.
The other tabs are Mesh, Shading, Groups, and Images, all of which indicate the kind of elements their names refer to. You can easily find everything organized in these tabs so that you can access them and make changes without much hassle. For example, the Groups tab shows items in a scene that have been grouped together so that they all can be treated as one when necessary.
The panel on the bottom right includes tabs for Properties, Channels, Display, and Lists (4). The Properties tab, as the name suggests, shows you the properties of a selected item and lets you edit them. Channel shows you attributes of an item that can be animated. Display controls the visibility of the objects on the viewport. Finally, Lists lets you view and create custom functions.
Features & Functions
Modeling
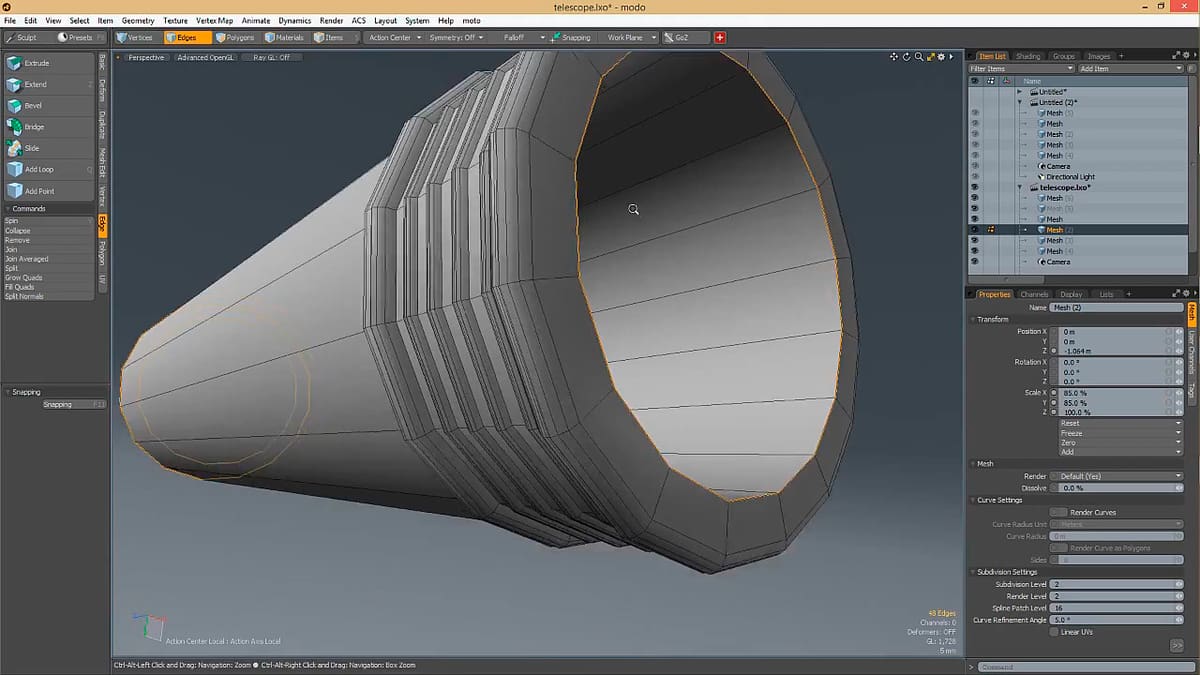
Modeling in Modo is a little different from other modeling software because it combines polygon modeling, sculpting, and procedural modeling all in the same environment. This makes the modeling process flow easily.
Polygon modeling consists of editing the polygons that make up the mesh of the object, by scaling, rotating, and performing other modifications. You can edit polygons by selecting vertices, edges, or faces. Modo provides additional functions such as splines and loops.
The sculpting functions work similarly to those in any sculpting program. Starting with a sphere, as if it was a ball of clay, you can model shapes with the help of different tools that flatten, broaden, pinch, and smooth the model. Advanced sculpting tools can also be found in the Paint layout.
Finally, procedural modeling means using algorithms to create a model rather than focusing on the shapes first. For example, L-system lets you achieve realistic renders by programming a set of parameters. This is ideal for objects such as detailed trees or grass, which you don’t want to model parts one by one. Instead, you give the general parameters, and the software creates the model for you.
This combination of techniques lets you have a lot of creative freedom in the modeling process and frees you from worrying about the limitations of the program.
UV Unwrapping
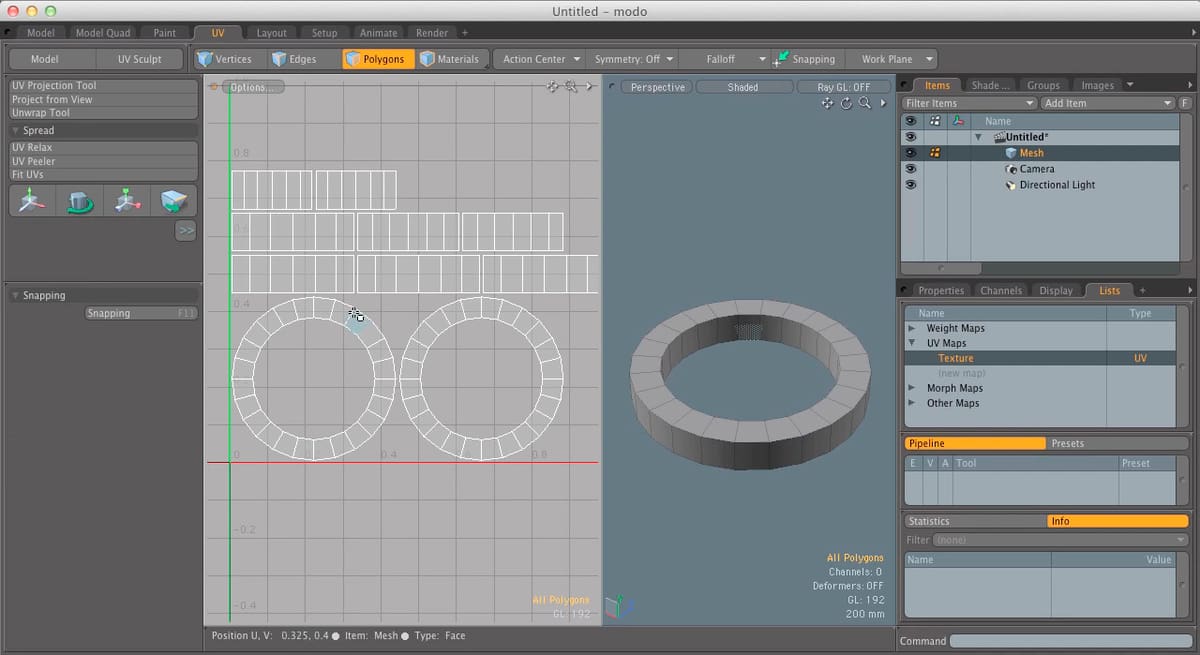
UVing refers to working with vertex and mesh maps, which is the result of unwrapping an existing mesh. This means you can take an object’s mesh and convert it into a 3D map. This is useful for creating textures, as UVing lets you see very clearly where each spot of your texture will be applied.
Painting
Beyond UV unwrapping, Modo also lets you paint directly in your 3D space onto an object. Instead of creating a texture and applying it to the model, you can directly paint on the model without having to import an image. For this, Modo has a selection of brushes and color palettes.
Animating
The animation workflow, in short, consists of creating your model, adding a camera and lights, and adding keyframes in your timeline with the key poses of your character. Then, Modo is able to interpolate the frames in-between to obtain a smooth animation.
Rendering
This is the process where Modo’s rendering engine interprets the settings for your objects’ lights, colors, and materials, as well as the camera you’ve set up for your scene. You can add textures, colors, and materials to any objects present in the scene to change how they will behave. You can also have warm and cold lights, as well as many other colored light sources.
Modo users praise its rendering capabilities because it uses very vibrant colors, with high quality and complex textures.
VR Projects
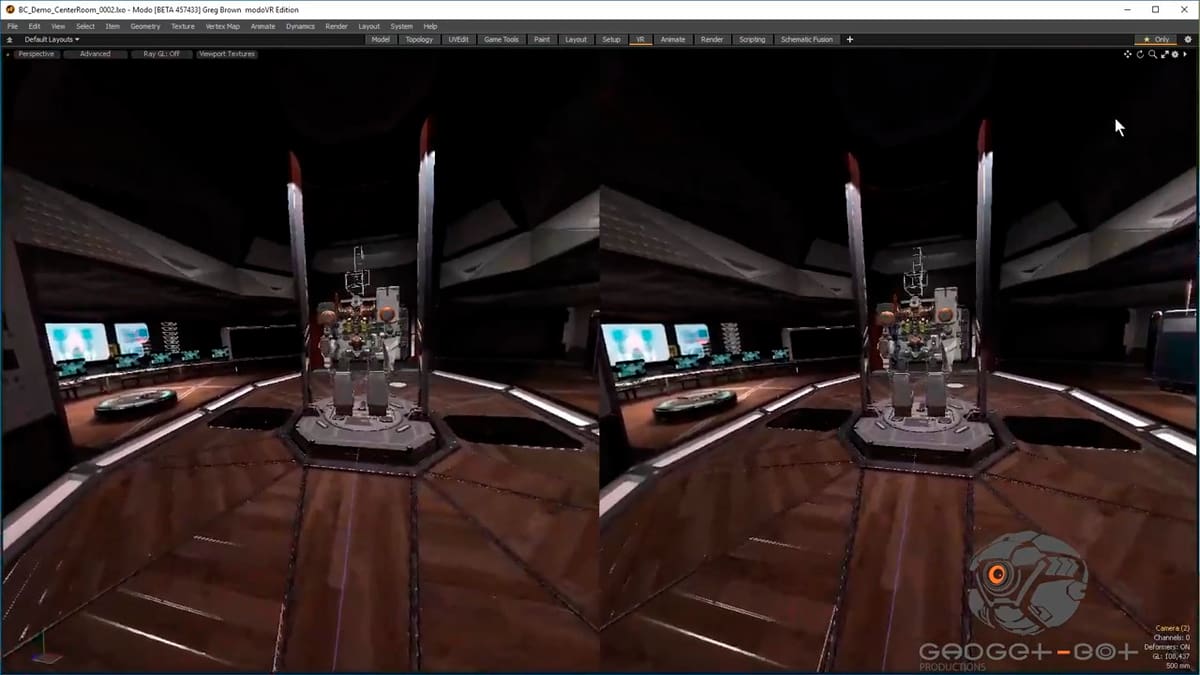
This is a unique function that we haven’t seen in many other modeling programs. If you’re working on a project that’s intended to be used with a VR headset, Modo has a specialized layout to set it up.
Even cooler, Modo lets you work on the model while using the headset. This is mostly used to check proportions and lights without having to exit the program, render it, and then load it onto your VR. Instead, you can do everything while still inside Modo.
Best Tutorials
We hope this article was helpful to teach you the basics of Modo. However, the best way to learn is to get creating yourself! So, here are some good tutorials to help you get started in your Modo journey:
- The Coffe Mug demo, which is one of Modo’s official tutorials, is a good, easy exercise to get you familiar with the tools. It’s simple enough that you get to focus on both the modeling and rendering processes.
- This tutorial on Modo basics helps you to understand how Modo’s different modeling techniques work. It’s especially focused on polygon modeling, which is the most popular method. Beyond teaching you what it is, the tutorial does a great job of showing you how to do it in Modo. Comments praise it for being very easy to understand.
- For animation, the tutorial Exploring the Principles of Animation with Modo shows you more than just how to have your object change poses; it also teaches you how to make it stretch and contract during its movements so it looks more fluid and realistic. These basic principles are fundamental to making your animations look professional.
- Finally, The Modo Render Cheat Sheet teaches you the usual workflow for rendering as well as the best settings. The resulting scene looks amazing! It’s a paid tutorial series, but you can watch a preview to see what’s offered before making the commitment. People who have bought it have said it’s very complete and not very complex.
Lead image source: James Atkinson via Foundry Community
License: The text of "Modo (3D Modeling Software): All You Need to Know" by All3DP is licensed under a Creative Commons Attribution 4.0 International License.