NanoDLP: All You Need to Know

For the resin printing enthusiasts: Learn all about NanoDLP, the web-based platform that controls and monitors your resin printer!
What Is It?
NanoDLP is a web-based platform that provides control and monitoring of LCD and DLP 3D printers. As such, it’s convenient for its ability to run on multiple internet-connected platforms like a PC (on any OS) or a Raspberry Pi. The software is free to use but manufacturers are asked to purchase a license.
The system is made up of a web interface and a control board. If you go with a Raspberry Pi, which most users tend to do, the board can be connected to the pins directly.
Note that the NanoDLP user experience is considered by many to be not so straightforward. Beginners in printing, electronics, or software might therefore consider seeking a different option.
In this article, we’ll be going over everything you need to know about NanoDLP including its best features, user experience, what you’ll need to set it up, and some alternatives. Let’s get to it!
Features

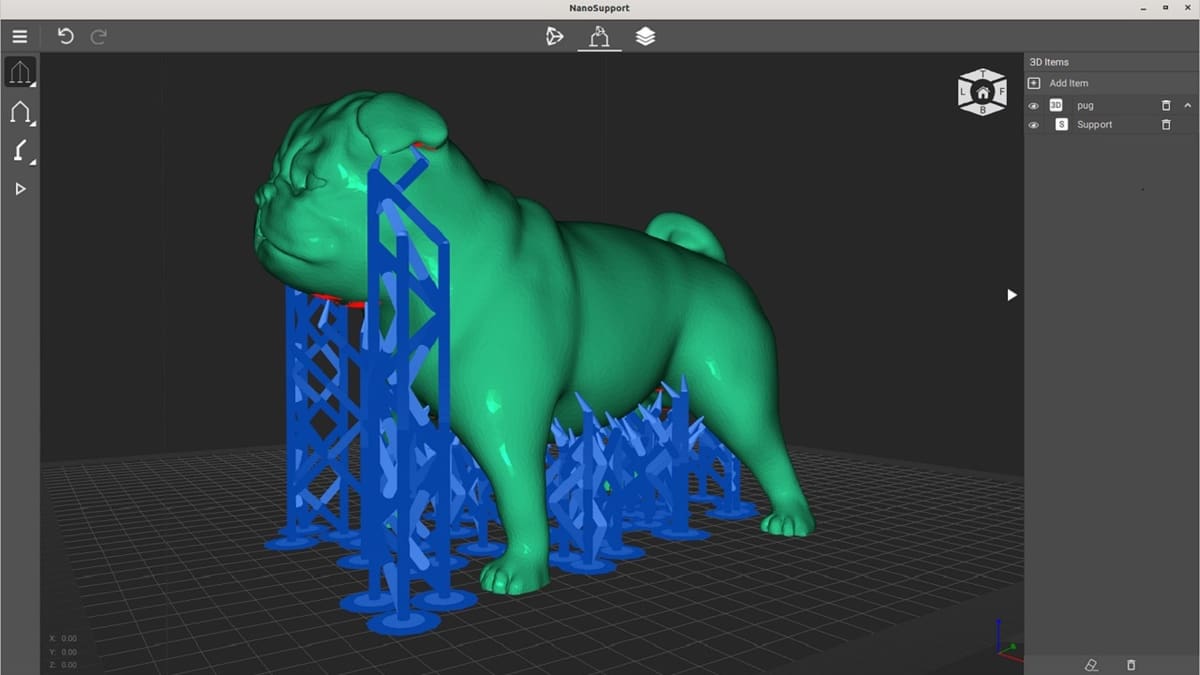
NanoDLP’s main feature is allowing remote monitoring and control of resin 3D printers over the web. It also comes equipped with a slicer, but it’s not the strongest of tools; users desiring better model preparation might instead choose to use a well-established slicer like ChiTuBox or Lychee.
Apart from these core competencies, there are a number of other features to help you get the best printing results when going from a 3D model to a print. One is given a lot of control to adjust settings like curing times, and you can take advantage of the remote slicing capabilities. Here, we’ll be going into some of these features in more detail.
Print Quality
These tools can be used to add extra detail to your print:
- Anti-aliasing smooths the edges of the model.
- Pixel dimming preserves details by preventing over-curing and extends the lifetime of the PDMS (silicone).
- Correcting lens distortion reduces the distortion caused by the lens of the projector.
- Hollowing 3D structures makes your object hollow and saves on material. Generally speaking, If you’re planning to activate this setting you’ll want to add drainage holes to prevent uncured resin from being trapped inside.
- Apply 3D infills is similar to doing so for an FDM print.
- Customized light source allows you to adjust the strength of the light source to help extend the life of your light and customize the area color.
Efficiency
With NanoDLP’s settings, you can print using the least possible amount of material and time.
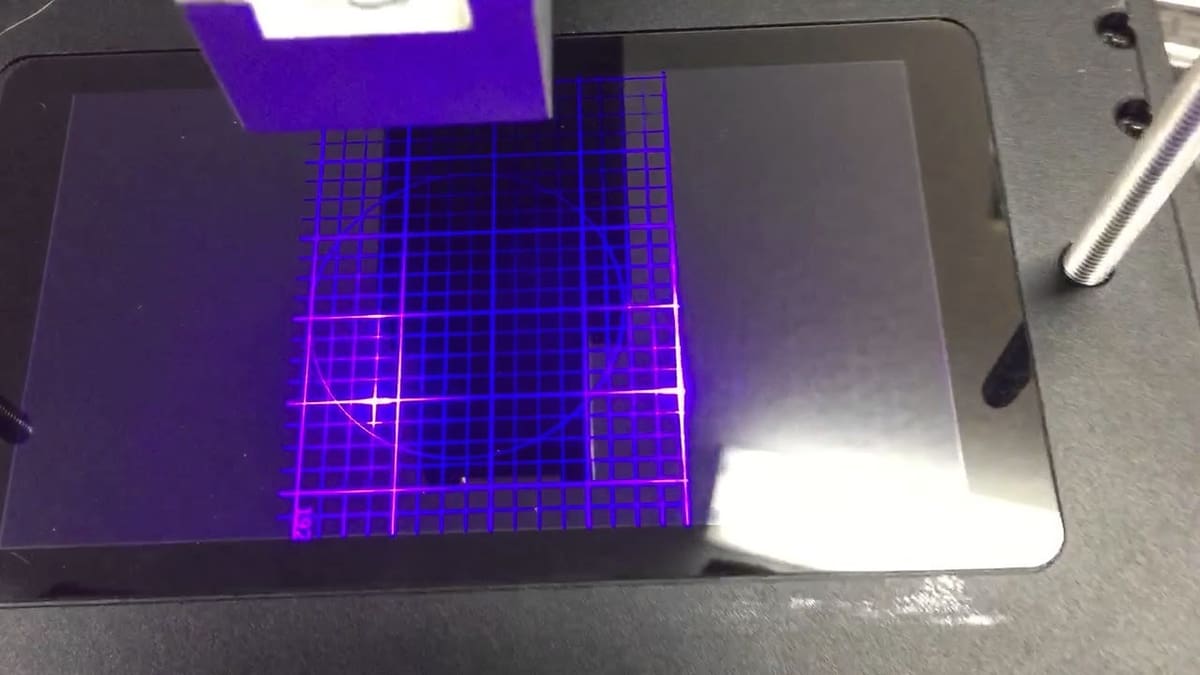
- Mask support and generator multiplies the mask over the plate to have the light evenly distributed over the platform. You can generate this mask by using the light sensor and the online interface.
- Blackout singles out an area of the plate for removal during printing.
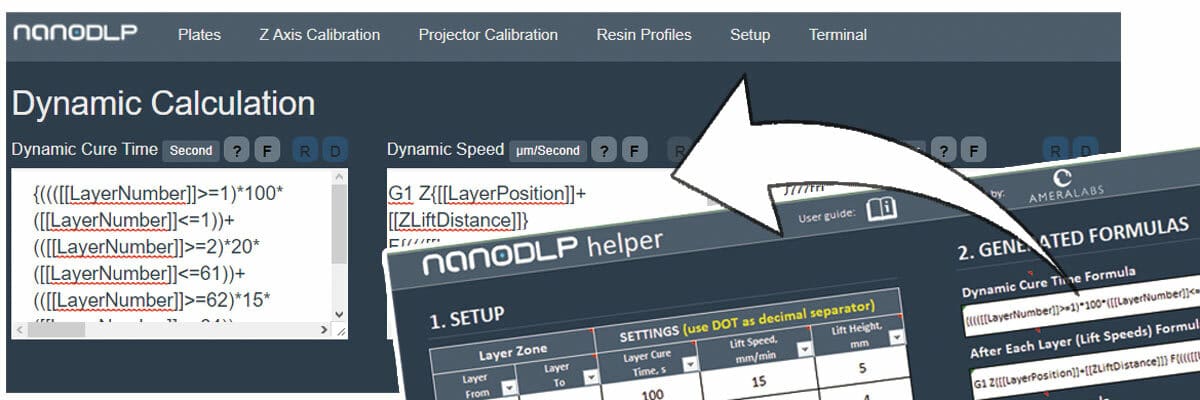
- Dynamic cure times calculates the cure times for each layer based on position factors and presents the data on the interface. The image above is part of a tutorial that shows how to use a spreadsheet to set up cure times.
- Speed and acceleration can be directly adjusted based on the fill area of specified layers. While speed is a common setting to be able to control, with NanoDLP you can even define the acceleration of the machine.
User Interface & Experience
NanoDLP offers an appealing user interface with the following attributes:
- Accessibility: NanoDLP can be operated online through the cloud and accessed through a computer, tablet, or phone.
- Upgrading: It’s easy to upgrade to newer versions.
- Security: You’re protected over your local network.
- Customization: You can change aspects such as what information about the printer can be seen (e.g. position and layer) and print settings (e.g. speed and quality).
- Monitor: The software can monitor hardware resources and detect problems.
A Couple Issues to Be Aware Of
From the forums, some users have reported issues such as bugs in the rendering of some STL models and Meshmixer-generated supports. Some believe this is due to the software struggling to process large STL files. If that happens, it’s recommended to take the problem directly to the NanoDLP support team. There have also been issues with the software not recognizing the user’s printer over the network, which could have to do with the model of Raspberry Pi being used.
There have also been reported issues with using additions such as a Raspberry Pi camera to monitor the building process. Specifically, the camera has had problems picking up colors. Other users have recommended that a filter should be used for correction.
Considerations
Makers considering setting up a NanoDLP-based printing system should be aware of some potential downsides:
- Rendering: As rendering happens on the online browser, you’ll want to have a newer computer and a strong internet connection.
- Power: If you choose to use a Raspberry Pi as the backbone of the system, you should keep in mind that slicing will be limited by the processing power of the device.
- Device recognition: Depending on the model of single-board computer (SBC) you’re using, you might have trouble with the software effectively connecting to your system.
- Rotating objects: Unlike some resin slicers, NanoDLP can’t rotate objects in discrete steps; rotation is done freehand with the mouse. This could be difficult in trying to orientate the object accurately.
What You'll Need
Now that you know all about what NanoDLP can and can’t do, let’s take a look at how to set it up.
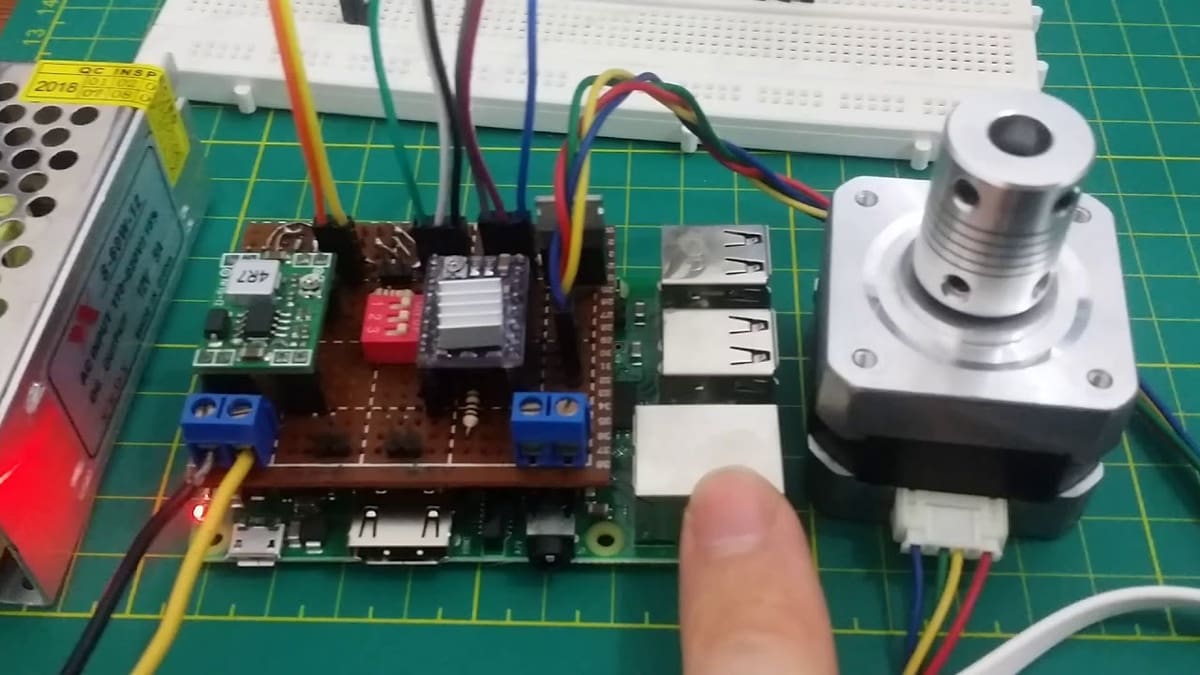
As stated earlier, most users prefer to use NanoDLP with a Raspberry Pi. In fact, that’s what’s recommended by the developers because NanoDLP is supported by Raspberry Pi OS (formerly Raspbian). Additionally, you’ll need NanoDLP’s control board. As part of this setup, it’s possible (but not necessary) to add an LCD display.
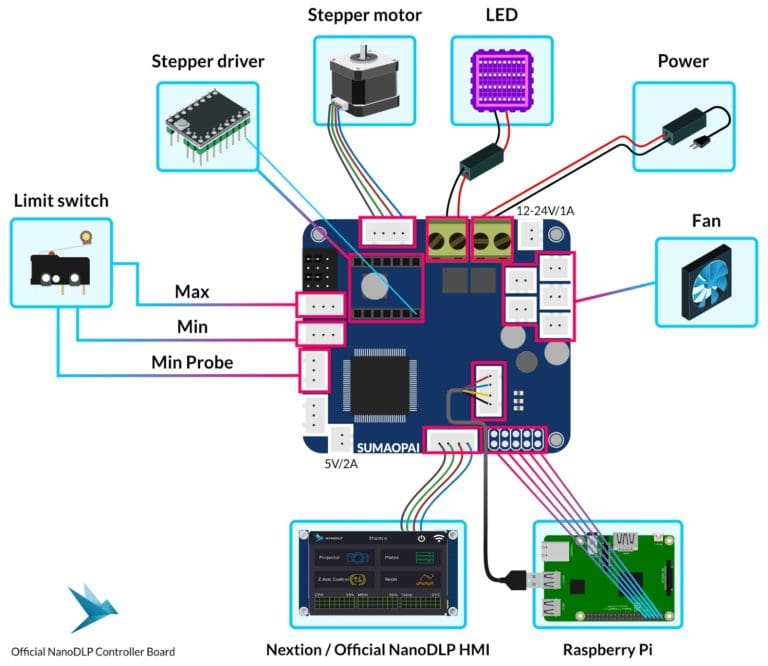
To set up the NanoDLP control board with a Raspberry Pi, gather the following items:
- An SD card with the NanoDLP image preloaded onto it
- An Ethernet cable to connect the Raspberry Pi to the internet
- An LED array
- A stepper motor and driver
- A power supply of 12 or 24 V with a current rating of 5-20 A
- Limit switches
- An LCD display with an HMI cable (optional)
For more information on tools and setup, or if you’re more of a visual learner, check out this helpful video tutorial.
Once you have everything connected and working, it’s time to set up your first print, which you can do via NanoDLP’s online interface.
Support
If you’re using NanoDLP, you have a lot of options when it comes to support, both from official and third parties. Here are some of your best bets:
- YouTube: NanoDLP doesn’t have its own channel but there are numerous videos from fellow makers who go over setup, troubleshooting, and use of the system.
- NanoDLP: Hosted on the NanoDLP website, the official support page has a community forum along with tutorials and advice. There’s also direct navigation to the support team and blog pages.
- Reddit: While there isn’t an official subreddit, there’s plenty of advice and ideas in the 3D printing and resin printing subreddits.
Lead image source: NanoDLP
License: The text of "NanoDLP: All You Need to Know" by All3DP is licensed under a Creative Commons Attribution 4.0 International License.
CERTAIN CONTENT THAT APPEARS ON THIS SITE COMES FROM AMAZON. THIS CONTENT IS PROVIDED ‘AS IS’ AND IS SUBJECT TO CHANGE OR REMOVAL AT ANY TIME.