Non-Planar 3D Printing: 90° Overhangs

Looking for a challenge? How about printing 90° overhangs without supports? Read on and find out all about non-planar 3D printing.
Non-planar 3D printing is a unique approach to fused deposition modeling (FDM), utilizing all axes at the same time. In other words, the printing truly occurs in three dimensions.
With regular FDM 3D printers, layers are “locked” at a single height, while in non-planar 3D printing, that restraint is removed and the printing of smooth, curved layers is possible, resulting in brilliant surfaces. This helps eliminate the famous “staircase effect” that’s present on surfaces made by regular FDM printers.
The concept of non-planar 3D printing has already shown its potential in various different applications where curved surfaces are required, such as printing RC airplane wings. So, let’s learn more about it!

True 3D Printing
One of the first developments in the field of non-planar 3D printing took place in 2018 at the University of Hamburg. The team there further developed the concept, but even today, non-planar 3D printing is still in its very early stages.
What’s less frequently discussed about non-planar 3D printing are the 90° overhangs. Considering the nature of the technique, these overhangs are a bit tricky to achieve. Tricky, but not impossible…
Hardware & Software Tweaks
Before a 3D printer can be exposed to some non-planar work, the accompanying slicer software needs to be modified. Not every slicer is capable of creating G-code for non-planar 3D prints. Luckily, there are modified versions of Slic3r and PrusaSlicer that make it possible.
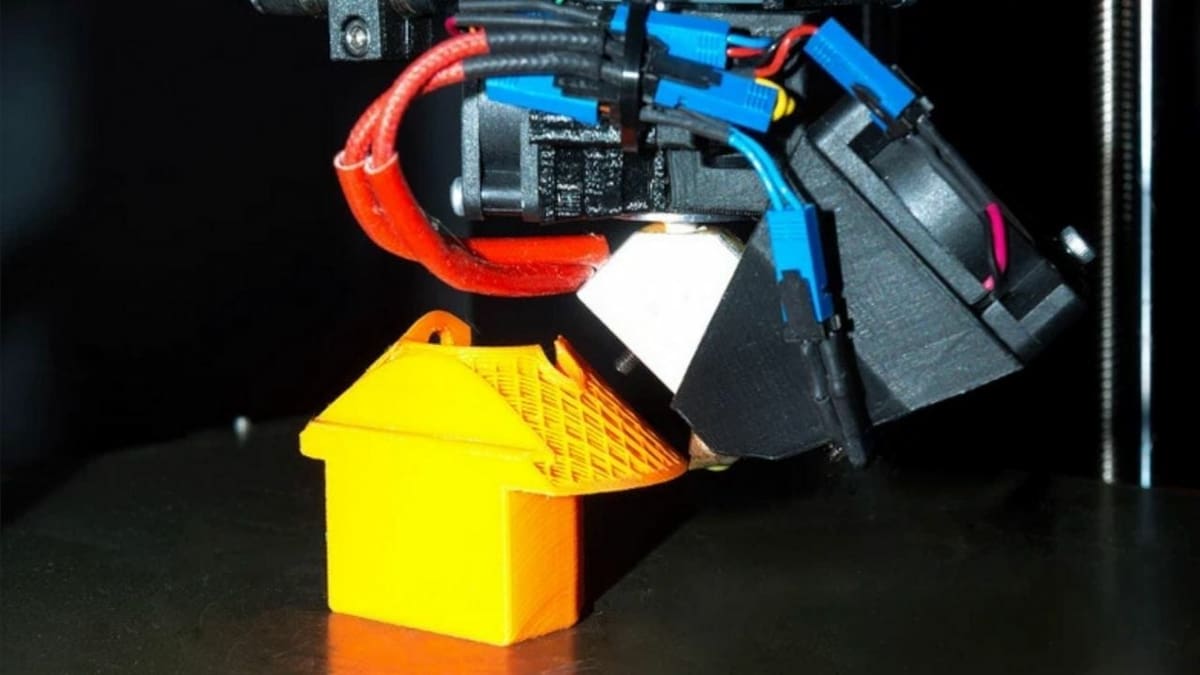
In most cases, the printhead will need to be altered, too. Most 3D printers’ printheads don’t provide much clearance around the nozzle. As such, if model curvature is printed in non-planar mode, the printhead will crash into the part. Therefore, modifications to the extruder might be required in order to increase the clearance.
How It Works
So far, the only publicly shared experiment on performing non-planar 90° overhangs has been conducted by Rene K. Mueller, an expert in the field of 3D printing. He published his results on XYZ dims, a site dedicated to detailed research into both software and hardware aspects of 3D printing.
The research is fairly new, as Rene himself started the work in January 2021. What inspired him to try and code his own conic slicer for performing non-planar overhangs is the concept of a rotary angled nozzle, originally developed by the Zurich University of Applied Sciences (ZHAW).
Instead of trying to copy that rotating nozzle concept, Rene decided to attempt similar conic shapes with a vertical nozzle. But again, because of the physical limitations of such a nozzle, he simply made his cones less steep, ensuring that the nozzle wouldn’t crash into the cone while printing. Following several iterations of his experiment, he eventually made it work.
Slicing in Non-Planar Mode
The concept of printing 90° overhangs with a non-planar 3D printing setup is an interesting one. It’s possible, but the slicer’s algorithm needs to be modified first.
Rene created his own algorithm for Slic3r, which provides the ability to print in non-planar mode. He included multiple variables which the user can change, depending on what the 3D printing setup looks like. The modified slicer can be downloaded for free from GitHub. If you’d like to try it out for yourself, you can visit a more detailed guide on how to set it up.
The algorithm is set to generate G-code for a 4-axis rotating nozzle setup by default, but it can easily be changed to work with a conventional 3-axis belt 3D printer. Here, we’ll focus on how a 3-axis printer can achieve non-planar overhangs.
90° Overhangs
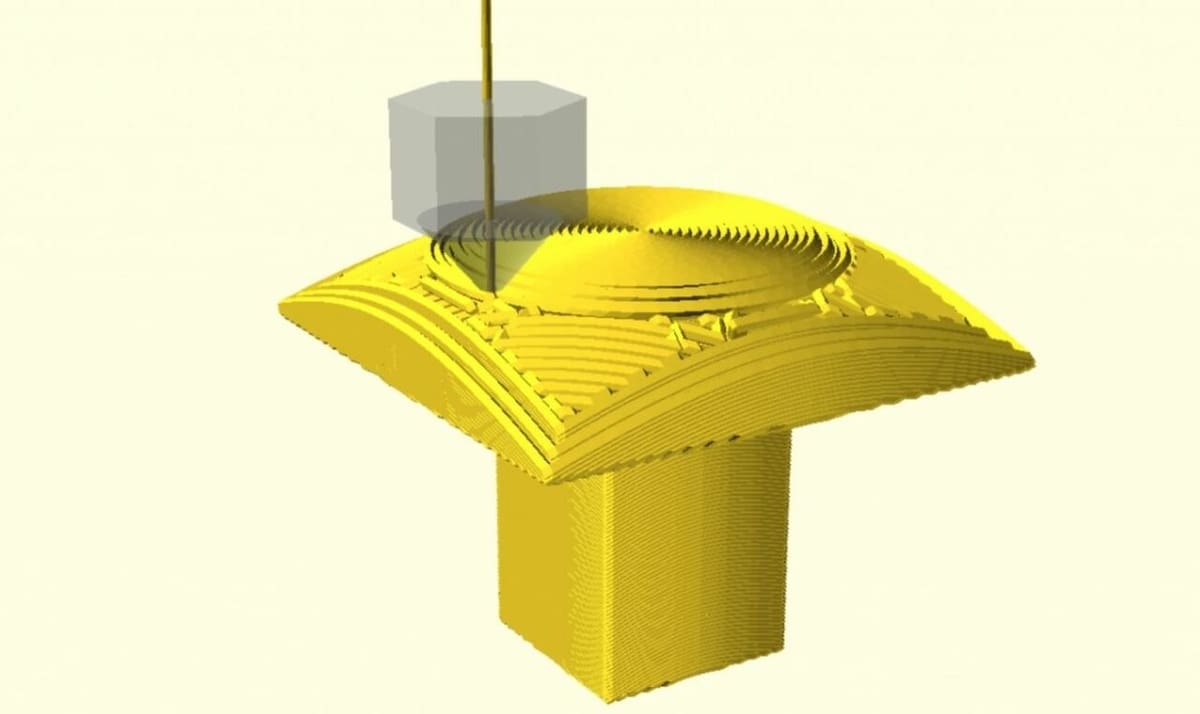
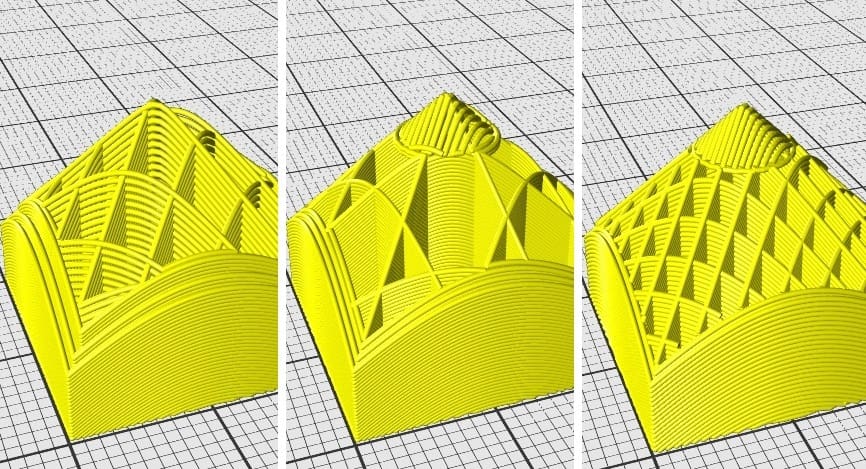
The idea behind making non-planar overhangs is to have the edges of layers slope downwards, forming either a conic or tilted 90° overhang.
Conic Overhang
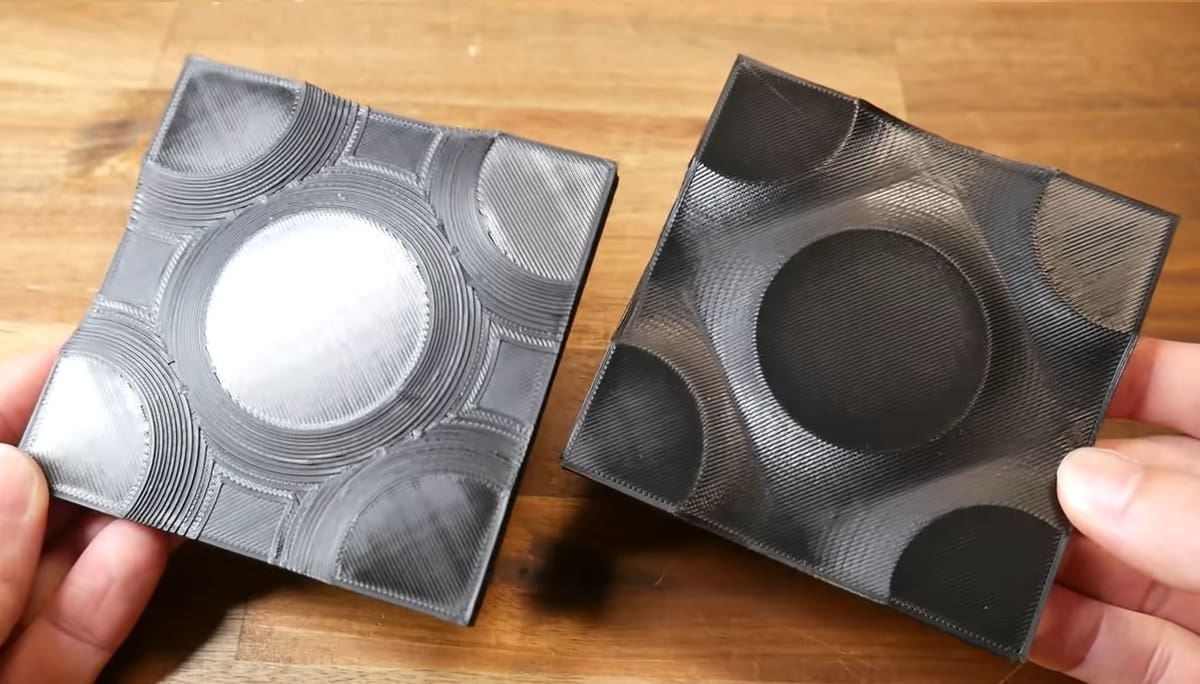
A conic overhang slopes downwards from all sides, creating a mushroom-like shape. The main limitation with making conic overhangs is the cone angle. Because many printers have fans around the nozzle, they will eventually get into the way and crash into the cone if the angle is too steep.
During his research, Rene concluded that a cone angle of 15-25° is optimal. If you go higher, more problems occur both in terms of hardware limitations and decreased print quality: Because the nozzle stands vertical while printing angled layers, it runs over them, thus decreasing the quality.
Again, 3D printed non-planar overhangs are still in an early stage of development, so quality isn’t the main concern. The technique will definitely improve as more experiments and slicer modifications are made.
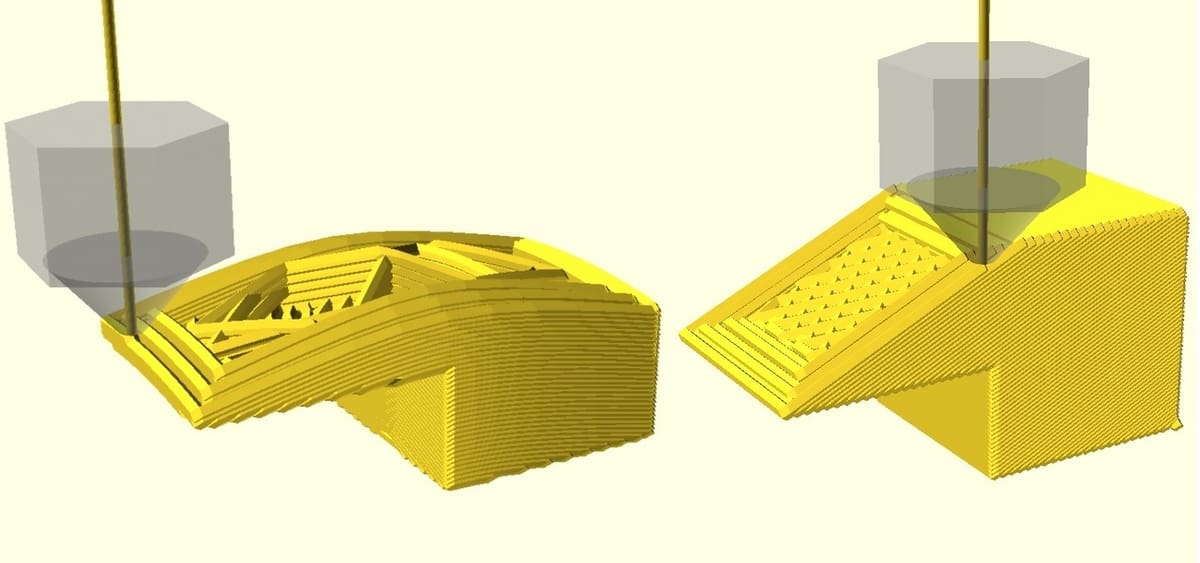
Tilted Overhang
Tilted overhangs are geometrically simpler than conic ones because they’re made in a single direction. Print quality is slightly better here, but it’s important that the angle is kept up to around 25° to keep it safe. The extrusion rate is also important, since it dictates whether or not the top surfaces will be smooth or rough. The exact value is quite dependent on the printer and can require a few test prints to get right.
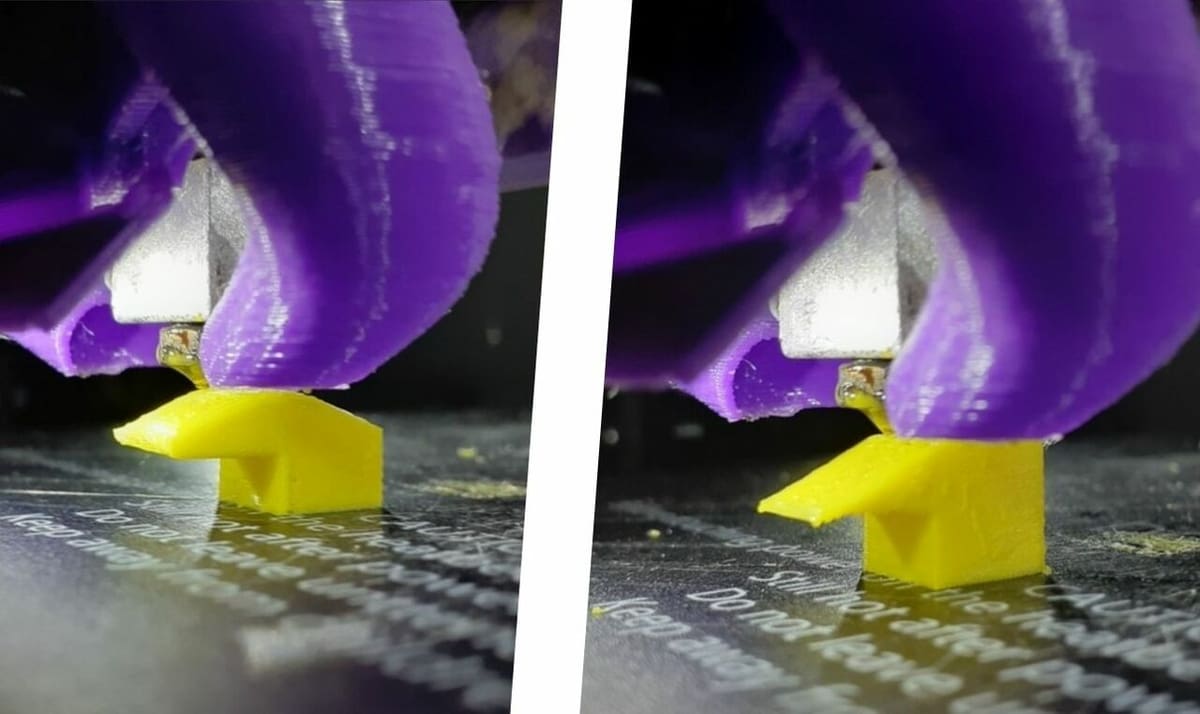
Adjusting the Printhead
As we’ve already mentioned, non-planar 3D prints on a 3-axis 3D printer require clearance from the nozzle and the rest of the printhead. The parts that are usually sticking out are the vents that help with cooling. Removing these vents does indeed improve clearance, but the lack of cooling can cause a decrease in print quality.
It remains to be seen what solutions will come for this issue. For now, each printhead needs individual mods, since they’re all different sizes and shapes.
License: The text of "Non-Planar 3D Printing: 90° Overhangs" by All3DP is licensed under a Creative Commons Attribution 4.0 International License.