
OctoPrint Bed Level Visualizer: All You Need to Know

OctoPrint's bed visualizer plug-in is a great tool for calibration and troubleshooting. Learn more about OctoPrint Bed Level Visualizer!
OctoPrint is a hugely popular 3D printing tool, and it offers much more than simply a solution to monitor and control 3D printers wirelessly. And much of it is due to plug-ins.
Virtually anyone with the knowledge can develop and register a plug-in for OctoPrint, which means there are hundreds of different plug-ins for the benefit of us, the users.
One useful plug-in is the Bed Level Visualizer, which comes in handy for users struggling with manual bed leveling or simply investigating issues related to bed adhesion and uneven printing.
So, without further ado, let’s understand all this plug-in does and how useful it can be for calibration and troubleshooting.

What Is It?
Bed Level Visualizer was developed and is still maintained by jneilliii, a seasoned author of multiple OctoPrint plug-ins.
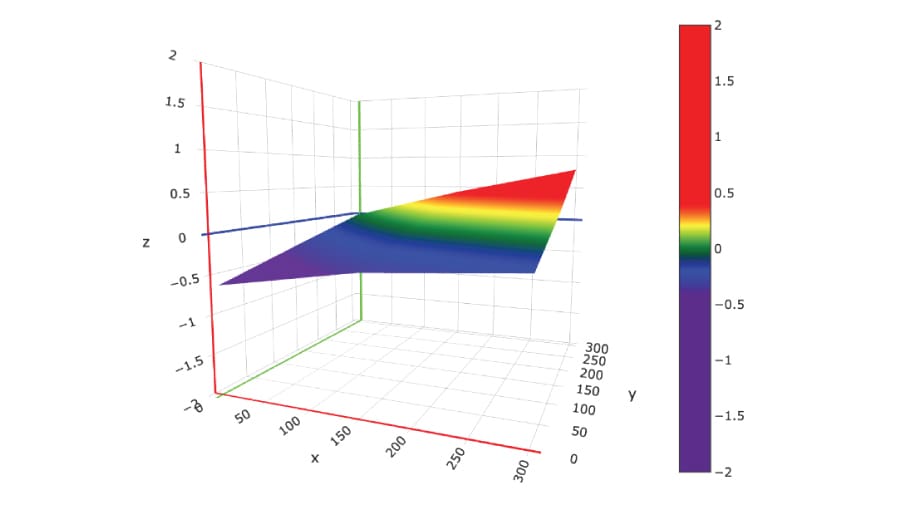
And what does it do? Basically, it creates a digital visualization of the 3D printer’s bed. Individual nozzle-to-bed height values are collected by a level sensor or even manually, and then plotted by the plug-in to create a virtual representation of your print bed.
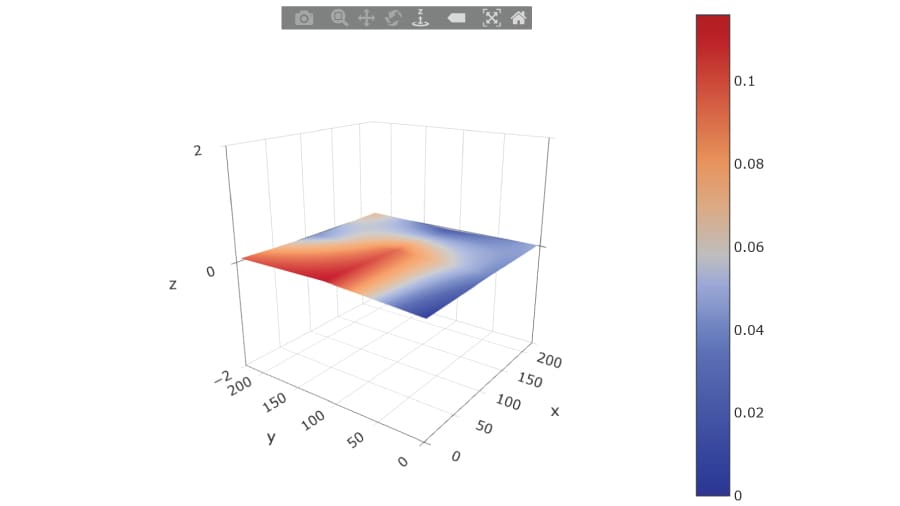
The generated topography map shows high and low areas of the bed in relation to the X-, Y-, and Z-axes. This allows the user to check the bed for regularity and levelness, both crucial aspects for successful 3D printing.
This topography information is then used by automatic bed leveling features to ensure levelness during the printing process. In addition, the plug-in assists in bed leveling for 3D printers without a sensor, as we’ll see next.
Usefulness
There are a couple of different uses for the Bed Level Visualizer, as it’s meant for both calibration and troubleshooting.
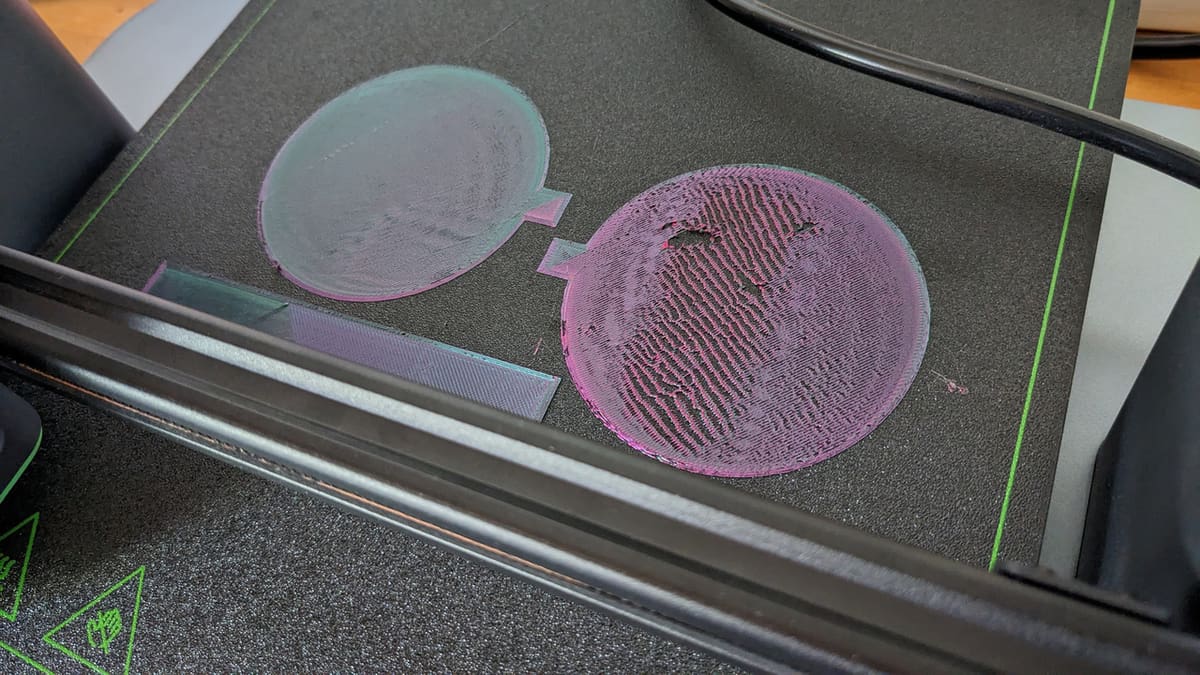
Hardware issues such as warped beds are common yet hard to diagnose, especially when uneven areas are in the center of the bed. The topography maps generated by the plug-in show exactly where bumps are located and how severe they are.
Although automatic bed leveling is meant to deal with these issues, it’s highly beneficial to reduce unevenness manually as much as possible before that, as ABL can only help so much. This is especially a must for printers with highly warped beds.
Manual Bed Leveling
Since most printers these days come stock with an automatic bed leveling probe, making a topography or height map (also known as bed mesh) is pretty easy – given that the probe does it for you. However, if you have a printer without an ABL sensor, you can still do it using the Bed Level Visualizer with some extra efforts.
The easiest way to do manual bed leveling is by using the “paper method”.
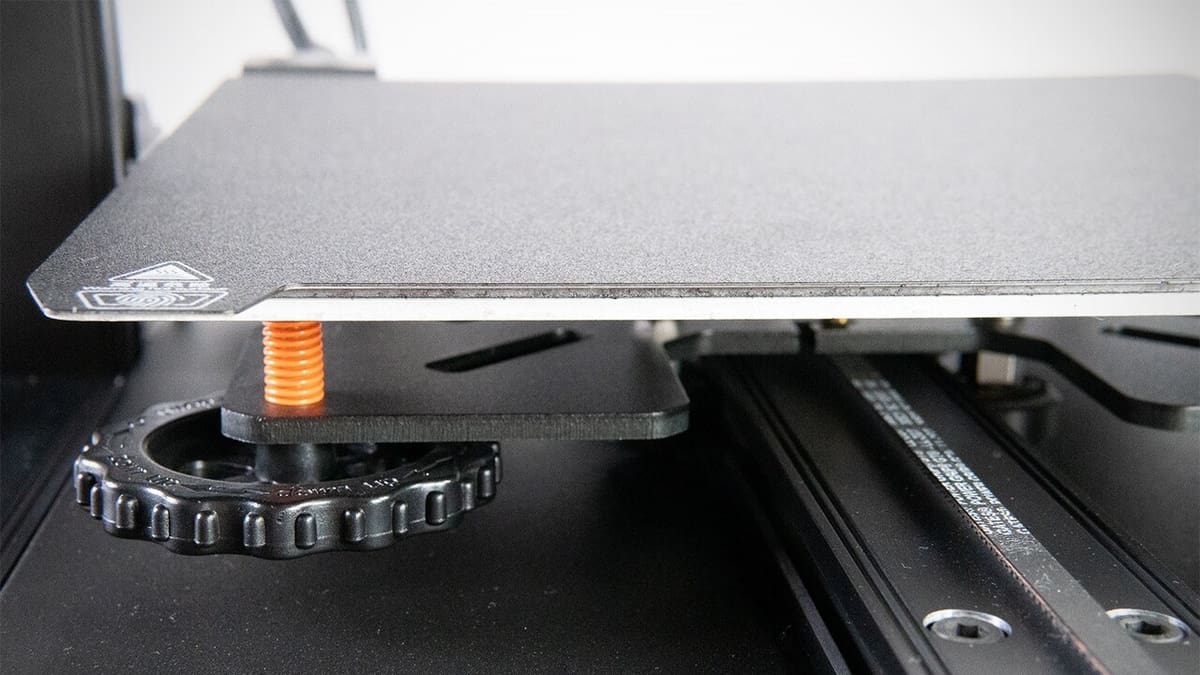
The specific steps vary from firmware to firmware, but generally you have to start from one corner of your bed (right where the spring height adjustment knob is). Then, the printhead will be moving to predesignated points across the print bed, one at a time. At each point, you’ll adjust the nearest corner’s screw to ensure there is a consistent gap between the nozzle and the bed by checking whether you are able to barely slide a paper through or not. This step ensures a consistent gap between the nozzle and the bed across the entire build volume.
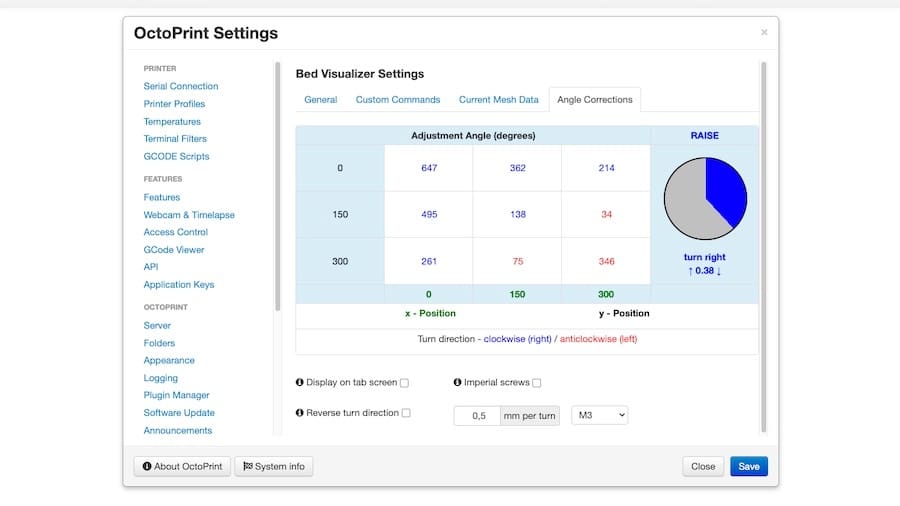
Once the manual adjustments are complete, the plug-in processes the height data to create a detailed topography map of your bed’s surface. If your bed still needs some adjustments, the “Angle Correction” tab will tell you which corner’s screw needs to be tightened or loosened and how much.
If you’re running Marlin on your printer, check out Teaching Tech’s tutorial for the complete process.
Requirements & Installation
To be able to run the Bed Level Visualizer plug-in, all that’s really required is a compatible firmware that supports mesh bed leveling: Examples include Marlin, PrusaFirmware, Smoothieware, and Klipper.
In addition, it’s highly recommended that the board you use to run OctoPrint has at least 512 MB RAM. The plug-in can be installed via OctoPrint’s Plugin Manager, but be aware that for some boards the installation may take up to 30 minutes.
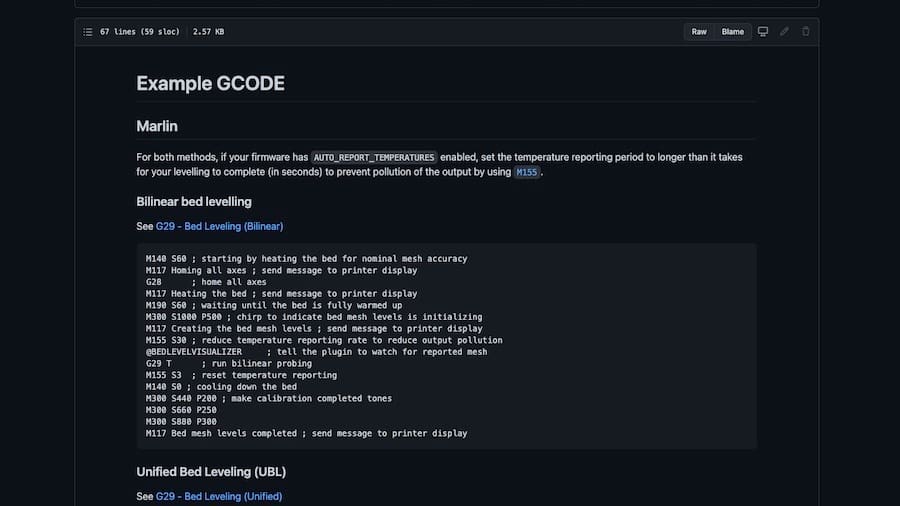
For setup, a brief G-code script is required for running the mesh update process. The plug-in’s GitHub page provides some script examples for users not acquainted with G-code commands for different firmware.
Improving the Bed Mesh
While an ABL sensor can create a topography map for the bed easily and compensate for the high areas and low areas during printing, it can still struggle with higher amount of warping. The general consensus is to manually tram the bed as much as possible so the ABL can help with the remaining areas that are too small to fix manually. Here are some ways to make sure your bed is as level as possible before ABL.
Adjusting Bed Springs
For printers with adjustable bed screws and springs, proper tension is the first thing you want to achieve. Start by tightening all the screws completely (finger tight, don’t apply too much force!), ensuring the springs are fully compressed. Then, loosen all screws three turns, following a criss-cross pattern. After that, proceed with the height map generation and make further changes with the spring tensions as shown in the Angle Correction tab.
For more consistent performance, consider replacing stock bed springs with silicone spacers, which hold their tension better over time.
Leveling Prusa-Style Beds without Adjustable Bed Springs
Some printers such as Prusa’s MK2, MK3, MK4, or Sovol’s SV06, lack adjustment knobs and have aluminum spacers instead of springs. To adjust the bed height on those printers, use shims like heat-resistant Kapton tape under the PEI sheet to fix dips or high spots. Another option is to replace the aluminum spacers with silicon spacers, which would allow you to adjust the bed by tightening or loosening the screws of the spacers with a screwdriver.
Tilted Z-Axis
Printers with dual Z-axis motors controlled by a single driver can develop a tilt if one side goes out of sync. This misalignment can cause first layer issues on one side of the bed, and the height map would look slanted as well.
To detect and fix a tilted Z-axis, measure the height of both sides of Z-axis from the frame. If the measurements differ, power off the printer and manually twist the lead screw on one side to match the other.
Acceptable Variance & ABL Limits
How much variance is too much variance? There doesn’t seem to be a definitive answer to that question. In theory, the auto-bed leveling sensor should be able to work with any amount of variance.
However, a good rule of thumb is to go with the layer height. If you’re printing with a 0.2-mm layer height, aiming for a variance below 0.2 mm should yield the best results. Variances up to twice the layer height (0.4 mm in this case) should still produce an acceptable first layer. Regularly check your height map and make minor adjustments to stay within this range.
Final Tips
- Clean the bed to remove debris or residual filament that might affect the leveling.
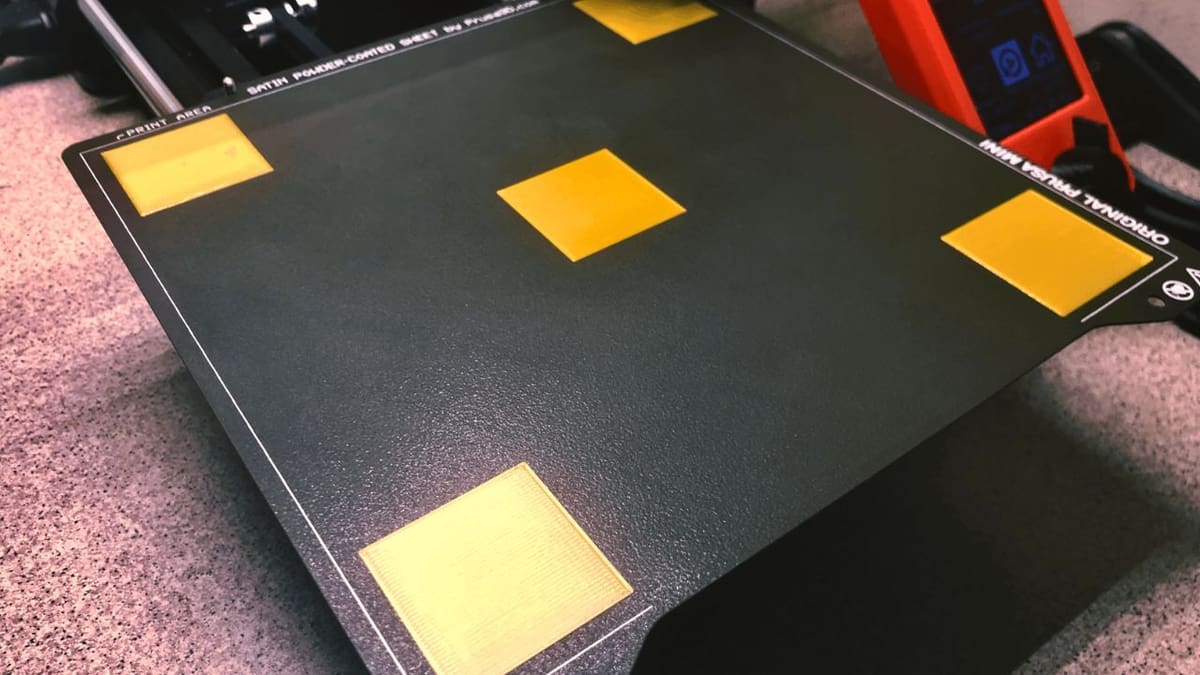
- Use first layer test prints to check if the bed has been leveled properly. Don’t forget to adjust the z-offset first.
- Avoid overtightening screws, as that can warp the bed. Likewise, avoid keeping screws too loose as well since they might vibrate and get looser during printing.
- If your bed is warped beyond fixing, consider replacing the PEI sheet with a glass bed as they tend to pretty flat.
Final Thoughts
With everything set up, all that’s left is running the plug-in via the corresponding tab in OctoPrint. Here, there are different steps depending on how unlevel your bed might be.
For minor unevenness, a manual correction using the bed’s corner studs is usually enough. If the bed is discovered to be warped, however, we suggest trying Marlin’s manual mesh leveling or even upgrading to a level sensor. If the warping is too severe, replacing the bed altogether might be the best option, depending on your budget.
License: The text of "OctoPrint Bed Level Visualizer: All You Need to Know" by All3DP is licensed under a Creative Commons Attribution 4.0 International License.