OctoPrint-BLTouch (Plug-in): What Is It & How to Install It

The OctoPrint-BLTouch plug-in is useful to remotely control a BLTouch sensor on your 3D printer. Read on to learn more about how to use it!
Touch and Go
Today’s 3D printers, especially the more inexpensive consumer options, still require manual bed leveling in their stock form. This means operators have to use adjustable leveling nuts (or similar methods) to raise or lower certain points on the bed.
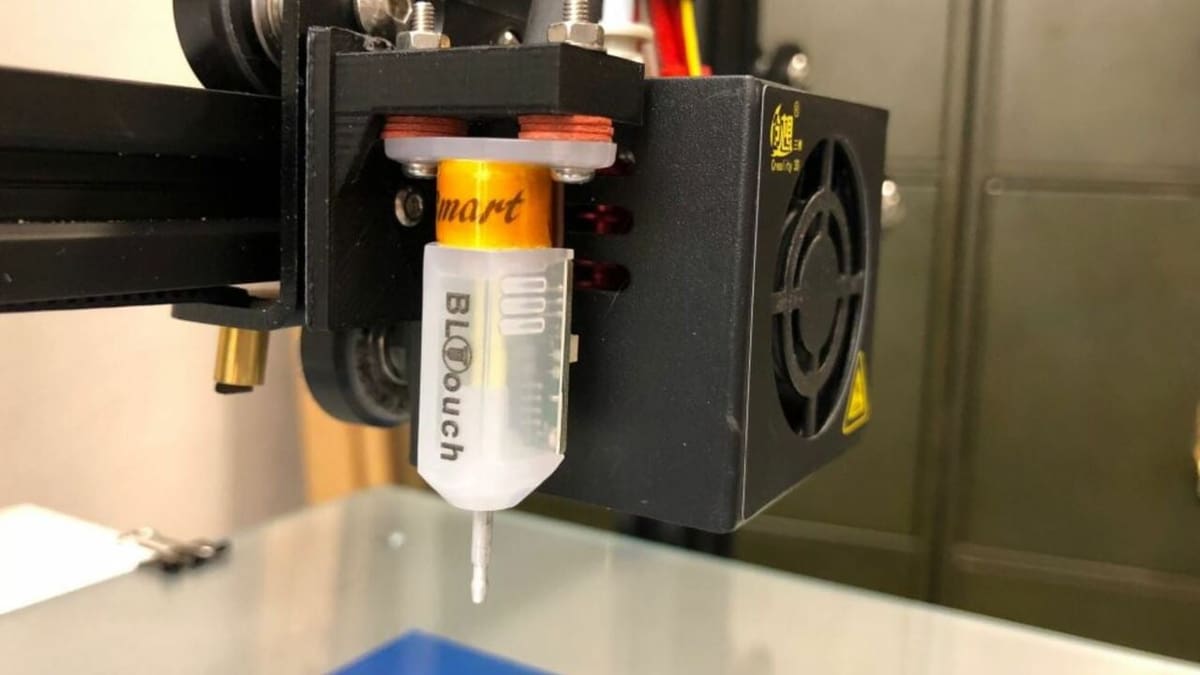
To eliminate the repetition and annoyance of the manual bed leveling process, you can use automatic bed leveling (ABL) sensors like the BLTouch. These devices work by measuring points on the bed to develop a digital mesh. This mesh is used to ensure that the nozzle is equidistant above the bed in all areas, resulting in a better and more reliable first layer (as long as the Z offset is right).
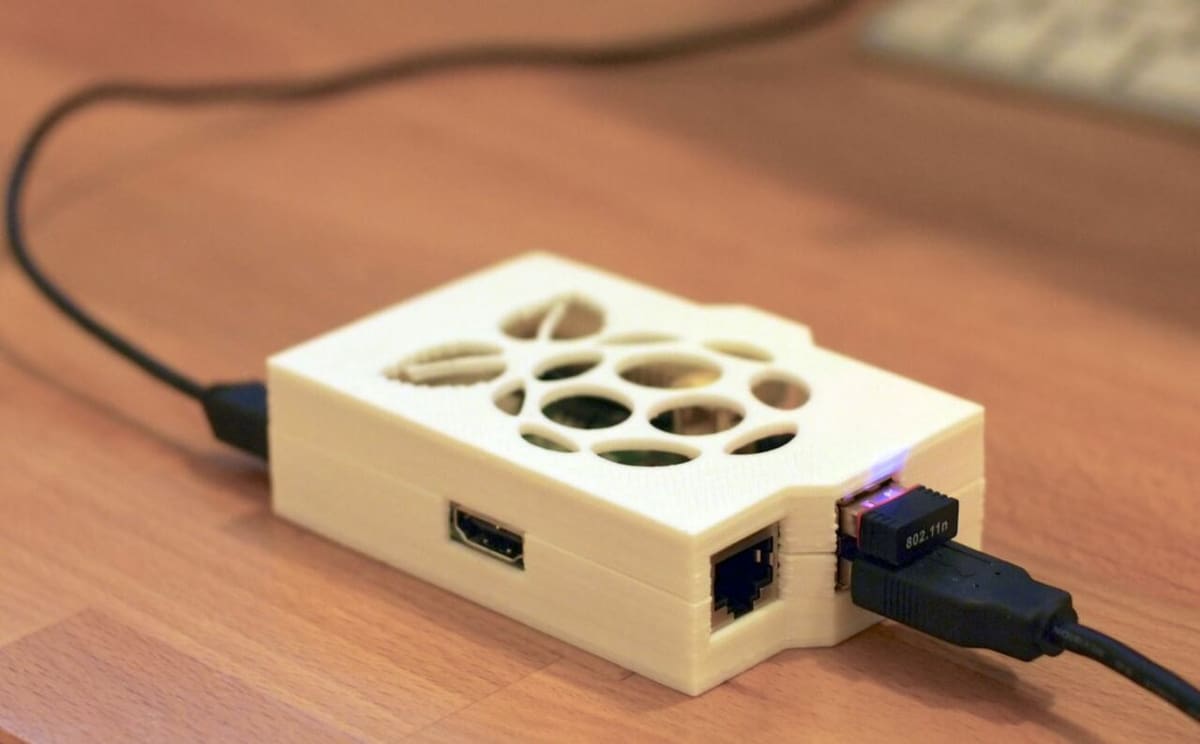
OctoPrint is another common upgrade for 3D printers and is a remote printing server that operates on a computer, such as a Raspberry Pi board. OctoPrint is open source so you can add community-developed plug-ins to further enhance its capabilities.
In this article, we’ll be going over one such Octoprint plug-in, known as OctoPrint-BLTouch. We’ll review what the purpose of this plug-in is, how to install it, and how to use it. Enjoy!
What Is It?
The OctoPrint-BLTouch plug-in was developed by jneilliii in mid-2017. Though it doesn’t add any special features, the plug-in lets you control your BLTouch via your OctoPrint interface.
Given that OctoPrint is designed to work with all printers, it doesn’t contain many features in its stock form (with no plug-ins). As such, there aren’t any controls meant for a BLTouch device. However, there are a few BLTouch-specific control buttons accessible on your printer’s LCD if you’re using certain firmware (e.g. Marlin 2.0 with BLTouch activated).
These buttons can perform tasks like raising, lowering, or self-testing the BLTouch probe’s measurement pin. Clicking them sends a G-code command that instructs your printer to perform the specified task. Essentially, the OctoPrint-BLTouch plug-in adds a digital version of these buttons, which mask the actual G-code commands, to your OctoPrint control interface.
The plug-in currently has six buttons, but the creator has added new features in the past, so there could be more in the future. The features include raising the probe pin, lowering the pin, performing a probe test, releasing the alarm, running a leveling sequence, and saving all settings.
This plug-in is popular with users including TeachingTech, a popular content creator for 3D printing activities, who included it on their top 15 list of OctoPrint plug-ins. It’s also been featured on other best plug-in lists from different users, such as GadgetFreakz and IoTRant.
Now, let’s get to how to install and use the OctoPrint-BLTouch plug-in!
Installation
Installing the OctoPrint-BLTouch plug-in is super easy, just follow the steps below. The only things you need are a properly installed BLTouch device and an OctoPrint server connected to your 3D printer.
- Go to your OctoPrint interface (the IP address of the device hosting your OctoPrint server).
- Click the wrench icon (settings) located in the top right of your OctoPrint interface.
- Find and open the “Plugin Manager”.
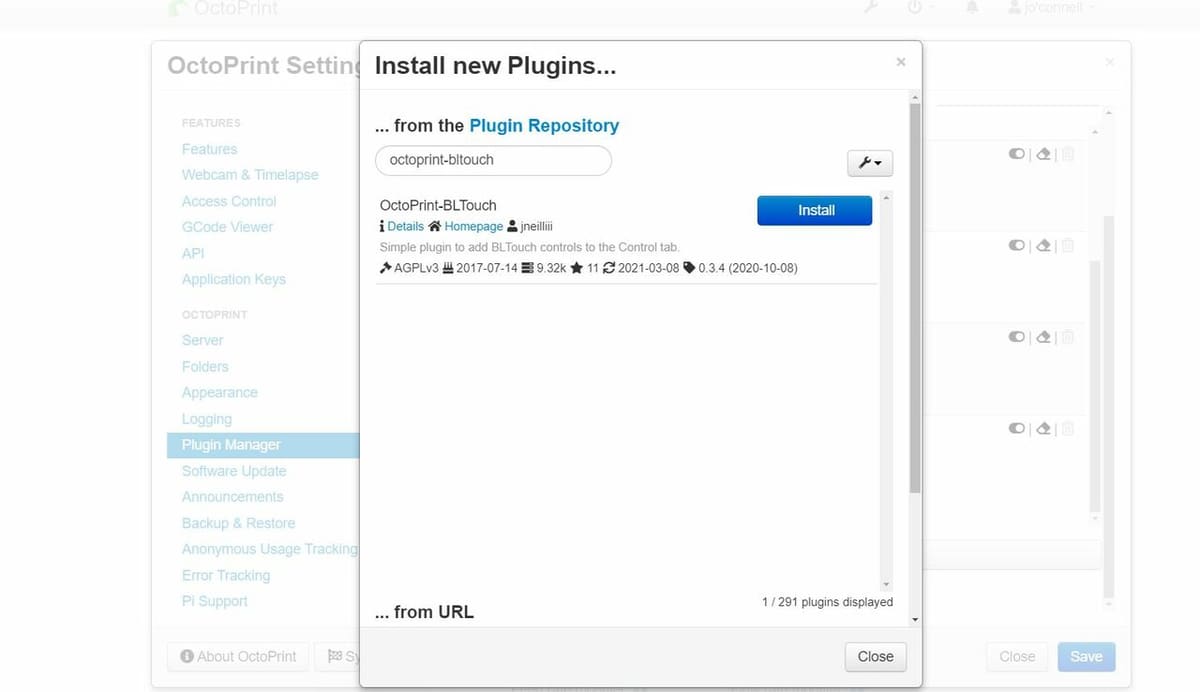
- Click “Get More…” at the bottom of the window.
- Search “OctoPrint-BLtouch” and click “Install”.
- Wait for your OctoPrint server to download the plug-in, then restart it, as instructed. Also, make sure the device you are running OctoPrint on is sufficiently powered.
That’s it; you’ve now successfully added the OctoPrint-BLTouch plug-in to your OctoPrint server!
Use
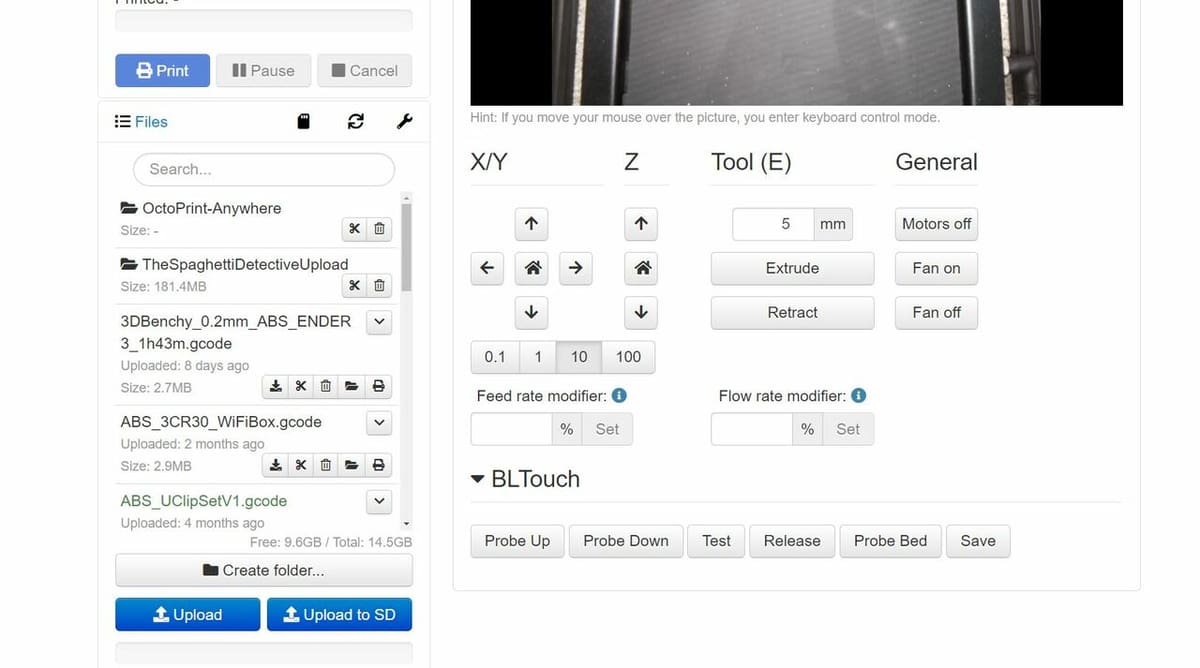
Now that you’ve installed it, you can use the buttons that have been added to the “Control” portion of your OctoPrint interface (at the bottom).
Before we get to the buttons, it’s important to point out that each of the buttons explained below masks a certain G-code command to your printer. If you want to change the specific command sent for each button, you can do so in the “BLTouch Plugin” section on the settings page of OctoPrint. This is especially helpful if your printer runs a special type of firmware that uses different G-code commands for the desired actions.
- Probe Up retracts the BLTouch probe’s pin, moving it back into its default out-of-the-way position.
- Probe Down performs the exact opposite motion of the previous action, extracting the probe’s pin so it can measure the distance between the probe and the bed.
- Test initiates a BLTouch self-test, where the probe’s pin is retracted and extracted a few times so you can ensure that the device is properly powered and functioning.
- Release sounds like it would do the same thing as the “Probe Down” button, but it actually releases the alarm on the BLTouch. This flashes the BLTouch’s internal red LED on and off a few times, so you can see that it’s working.
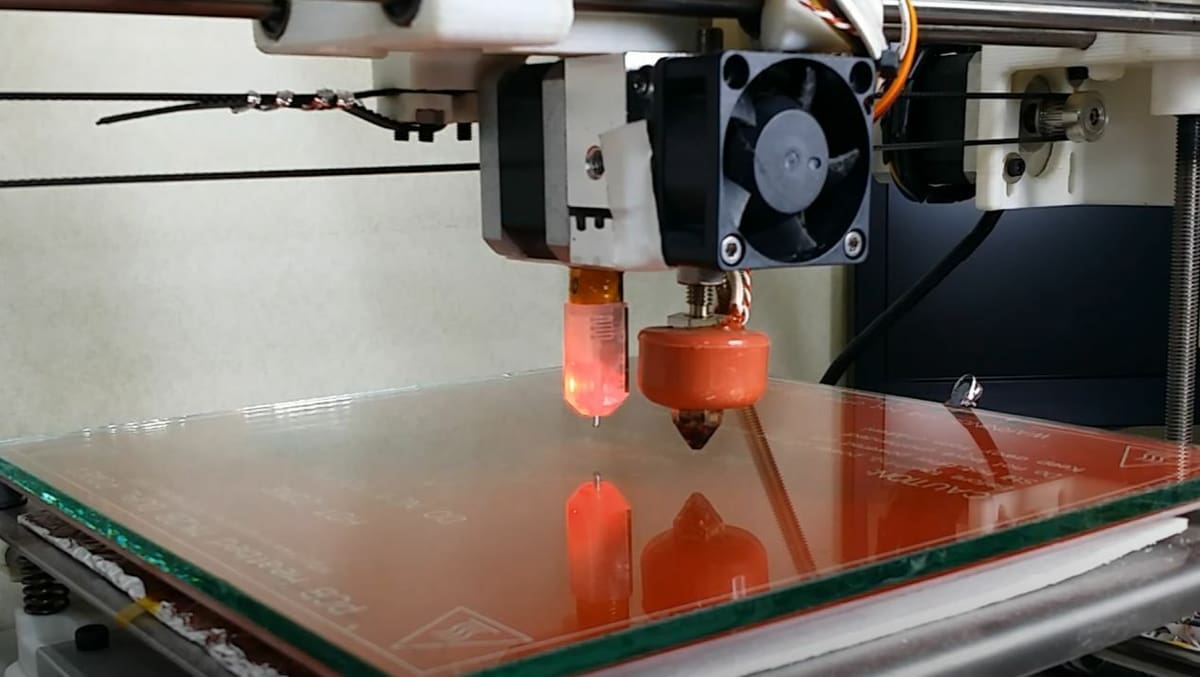
- Probe Bed performs an automated bed leveling sequence, moving your printhead to a few points on the bed (specified in your firmware) to create a digital mesh of the bed (leveling mesh).
- Save sends the standard M500 G-code command to your printer, used to save any adjustments or findings, such as a new digital mesh.
A common use example would be if you wanted to remotely level your printer with your BLTouch sensor. First, you’d click the “Test” button and through an attached camera, make sure that the BLTouch device is working. After you confirm this, click “Probe Bed” to tell the printer and BLTouch sensor to perform a leveling sequence. Finally, once the sequence finishes, you can use the “Save” button to store the new digital bed mesh on your printer so that it’s used in future prints.
Alternatives
While the OctoPrint-BLTouch plug-in is pretty useful, it’s not the only way to control your BLTouch device. There are a few other ways, but they’re not considered as easy as simply clicking a button on the OctoPrint interface.
The first is to use your printer’s stock display interface. If your printer is running a somewhat newer version of Marlin firmware, you can navigate through the interface to find the BLTouch controls. Here, you can move the probe up, down, and test it. In other sections of the interface, you can also probe the bed (level the bed) and save your settings.
Another way is to send the G-code commands to your printer via a G-code terminal, such as the one offered in Pronterface. You can usually find the G-code command that will perform a specific action on your firmware’s website (the code for Marlin is clearly listed online).
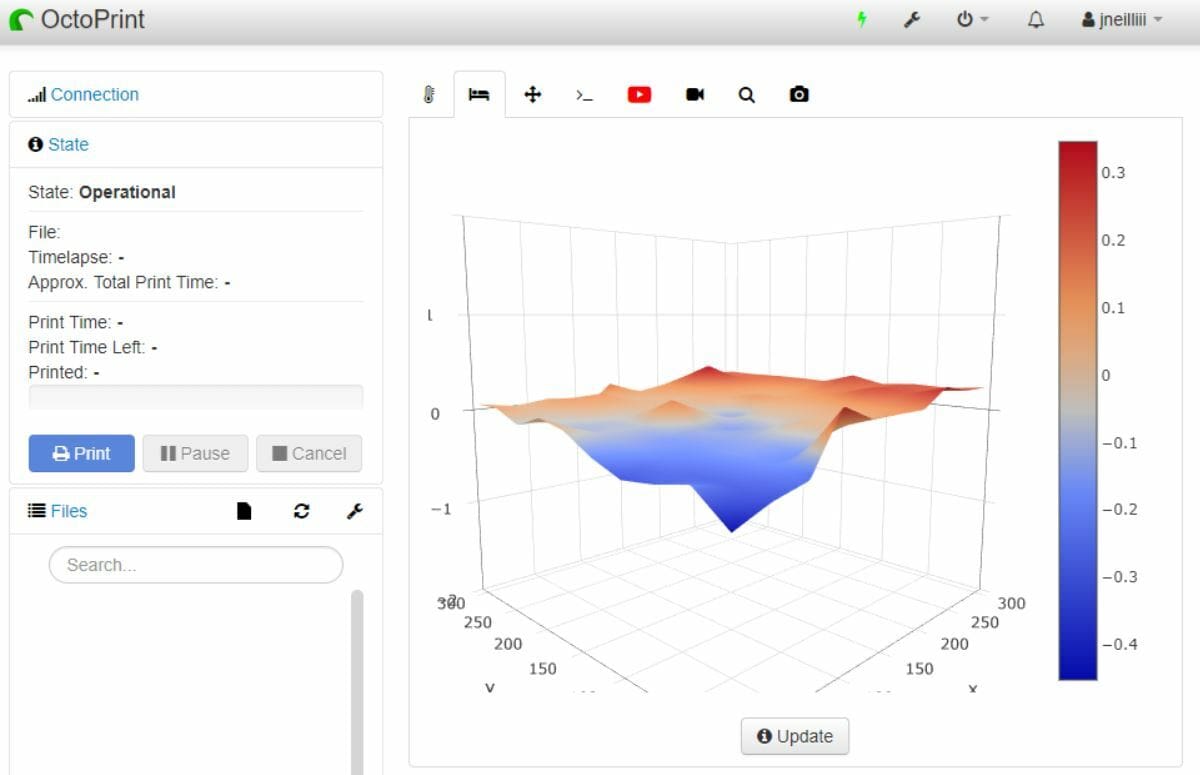
Although there’s not another plug-in that achieves the same goal as OctoPrint-BLTouch, the Bed Level Visualizer OctoPrint plug-in is closely related. It maps the data taken from an ABL probe, such as a BLTouch, and turns it into a visual 3D graph to show you how level (or unlevel!) your build platform is.

Lead image source: Jonathan Lundström
License: The text of "OctoPrint-BLTouch (Plug-in): What Is It & How to Install It" by All3DP is licensed under a Creative Commons Attribution 4.0 International License.