
How to Install OctoPrint on Linux/Ubuntu

OctoPrint on Linux is a great combination for diehard Linux and 3D printing fans. Read on for an OctoPrint-Linux installation guide!
Linux is a family of open-source operating systems (OS), the first of which was designed by Linus Torvalds in the early 90s. Linux comes in many varieties that might look and feel very different from each other, despite all being Linux. Each variation is called a distribution, and a hugely popular one is Ubuntu. In fact, web servers running Ubuntu are powering most of the internet!
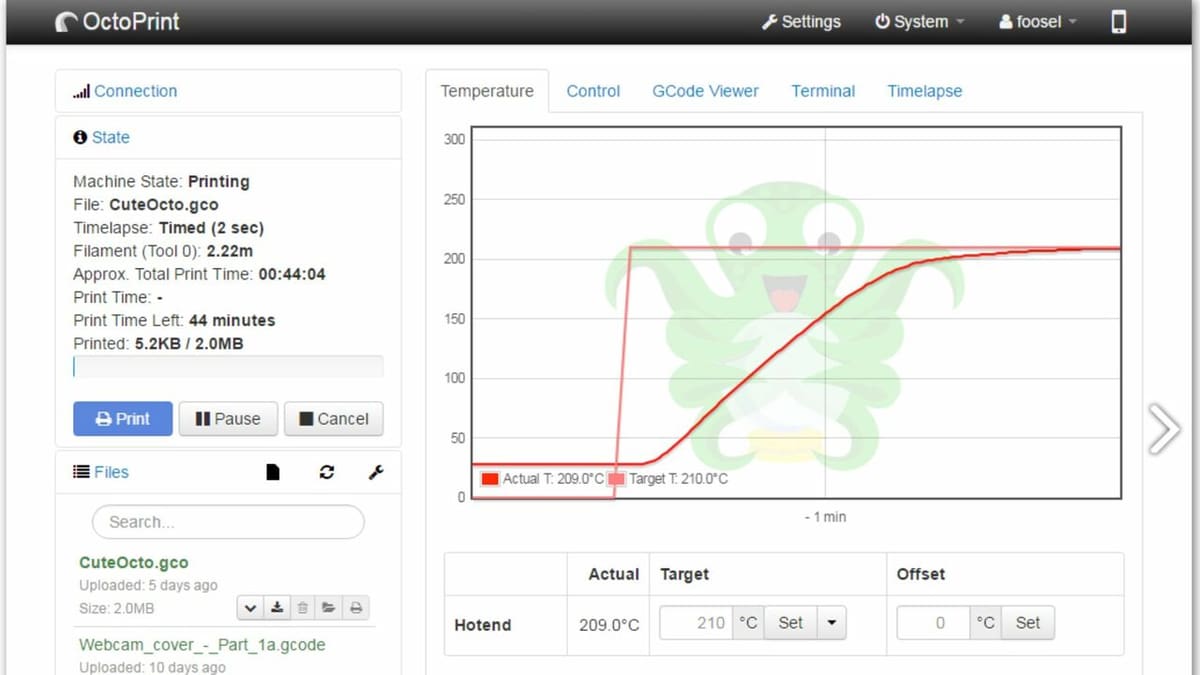
OctoPrint is a web-based interface for monitoring and controlling your 3D printer. You can send G-code, upload prints, monitor your printer’s status, and more. In this article, we’ll discuss how to install OctoPrint on Ubuntu. We’ll first look into why you might want to install OctoPrint and Linux in the first place. Then, we’ll explore a few different ways to do it. Finally, we’ll wrap up with a few more tips and tricks.
To get the most out of this tutorial, you should be comfortable with programming in the terminal, and the computer you’re installing OctoPrint on should be connected to the internet.

Why Do It
There are many reasons to install OctoPrint on Linux. The most common is that you want to monitor and interact with your 3D printer remotely – no more plugging in a USB or SD card. Instead, you can simply drag and drop G-code from your slicer to your printer.
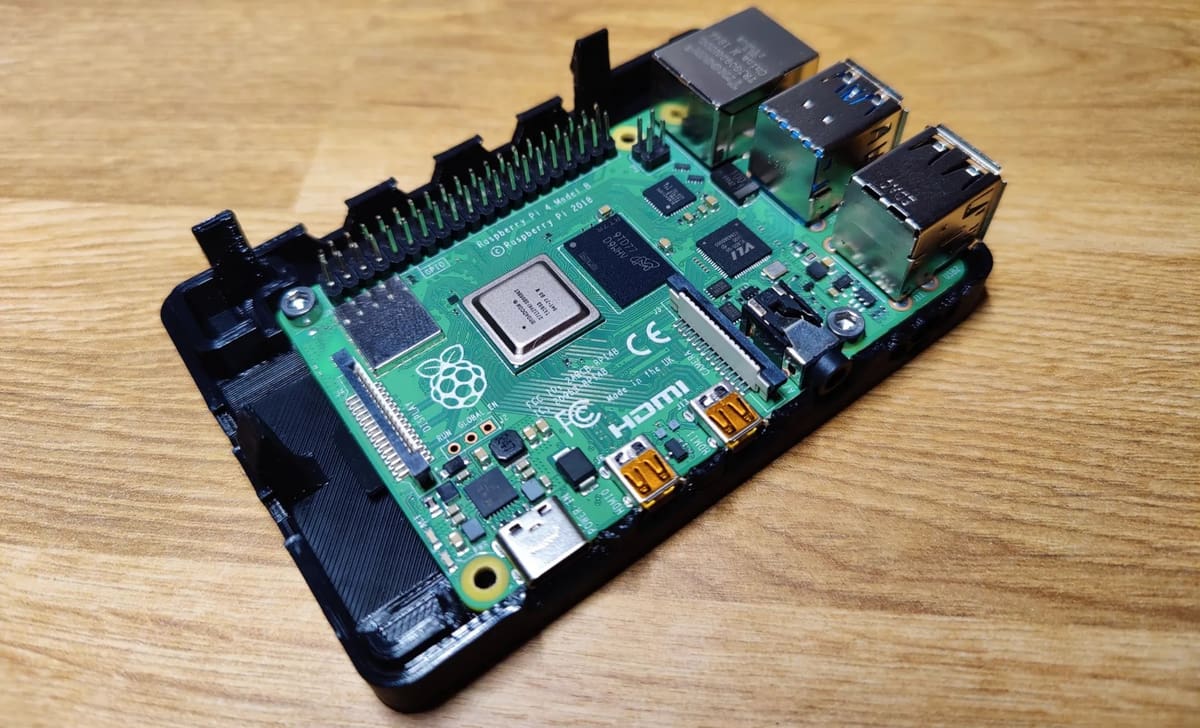
More specifically, most people who want to use OctoPrint likely want to run it on a cheap single-board computer (SBC) such as the Raspberry Pi. These are the perfect machines to run Linux on. If you run a lightweight distribution, such as Ubuntu Server, your SBC will thank you, and your OctoPrint interface will likely be snappier too, as you’re using fewer resources to run the OS.
The Options
Below, we’ll present three ways to install OctoPrint on Ubuntu, all of which have pros and cons.
The first is pretty easy and involves flashing a Raspberry Pi-ready Linux distribution to the Pi. The second way is slightly trickier and involves, as mentioned above, running Ubuntu Server. Though trickier, this method allows for more customization and is more flexible than installing the OctoPi image. Last but not least, the third method is a bit more streamlined and can be beneficial if you’re running multiple printers. This involves using a script called OctoPrint Deploy to simplify the OctoPrint install process and is especially useful in that it is “OS agnostic”, meaning it can run on many of the most popular Linux distributions.
In the simple method, the user downloads OctoPi, which is a “lite” version of Raspberry Pi OS along with OctoPrint and all of its dependencies. OctoPi makes it easier to get up and running with OctoPrint, as everything you need to get started is already there on the MicroSD card along with your OS.
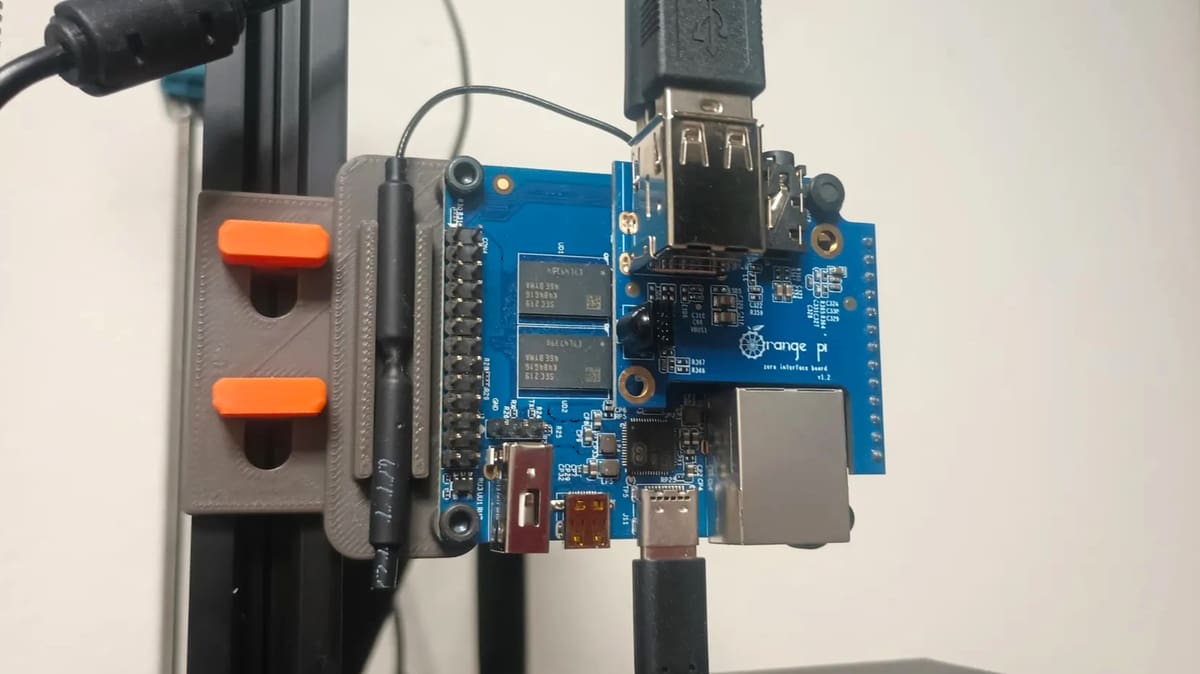
But perhaps all of your Raspberry Pis are tied up in other projects, or you want to, say, repurpose an old computer that is no longer in use. This is where Ubuntu Server excels! It’ll work on almost any machine you have lying around – for example, we installed this on an old Lenovo Mini PC and an OrangePi Zero 2.
And if you’re still interested in the trickier method, a further benefit is the popularity of Ubuntu. There’s likely a forum post dedicated to whatever problems you may encounter or a package to do whatever you can dream of.
One note of clarification before we continue. In this setup you wouldn’t be controlling your printer directly, i.e. from a screen attached to your printer, but through the browser on another computer. If you want to control your printer directly with the SBC or other Linux machine running OctoPrint you would need a touchscreen with an OctoPrint-compatible user interface, like OctoDash, Touch UI, or similar.
The Easy Way
In the first guide, we’ll download a Linux distribution that has OctoPrint already installed. This distribution is called “OctoPi”, and we’ll be using it to flash a MicroSD card to install Linux and OctoPrint on a Raspberry Pi.
What You'll Need
To get started with the easy method, you’ll need the following:
- A computer with internet access
- Raspberry Pi Imager
- Raspberry Pi 3B, 3B+, or 4B
- A power adaptor for the Pi
- MicroSD card with at least 8 GB
- USB cable to connect the Pi to the printer
While you can install Linux and OctoPrint on almost any computer, OctoPrint recommend the Pis mentioned above. If you’re trying to install OctoPrint on something that isn’t these three Pis, such as the Raspberry Pi 5, see the trickier way and the more streamlined option below.
With regard to power, a 5.1-V power supply is recommended for all three Pi models, but the electrical current and connection type you need will vary according to the model. It’s important to get the right power supply because under-powering the Pi can result in printing issues. The following are recommended:
- 3B/3B+: MicroUSB connection, 2.5-A current
- 4B: USB Type-C connection, 3.0-A current
Lastly, the shorter the USB cable, the better, as this minimizes interference. You’ll want USB Type A for the Pi to whichever connection your 3D printer has.
Step by Step
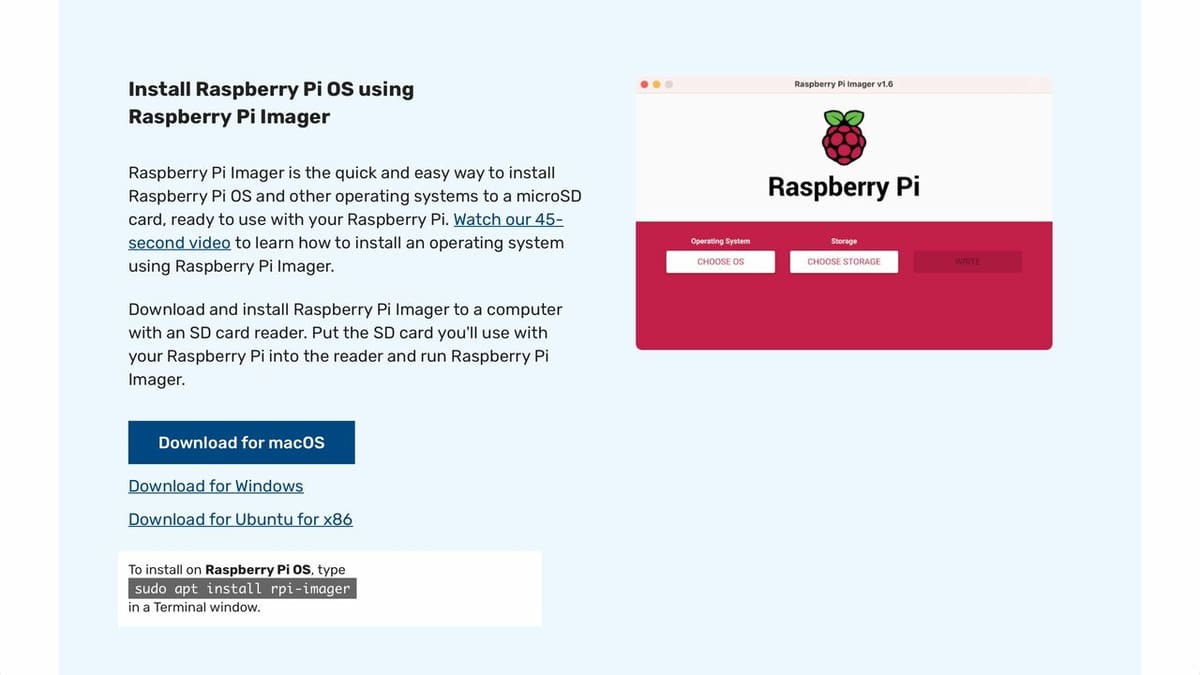
- Download and install Raspberry Pi Imager on your computer.
- Launch the imager software, then choose your OS. Scroll down the list of options until you see the tab “Other specific-purpose OS”.
- Select “3D printing”, then choose the stable version of OctoPi.
- Click the gear icon. This will launch the settings window for your OctoPi installation where you can enter your Wi-Fi name (SSID) and password. Doing this now will save you a lot of hassle later on!
- Write your configured OctoPi image to your MicroSD card and wait for the installation to complete.
- Eject the card from your computer. Don’t click “format” on any pop-ups on your computer. Otherwise, you’ll have to start all over again!
- Insert your MicroSD card into your Pi and connect the USB cable from the Pi to your 3D printer.
- Boot the Pi up.
After a few minutes, you should be able to access your OctoPrint instance from your browser. If you run into any trouble, check out this excellent and concise five-step guide from OctoPrint.
The Slightly Trickier Way
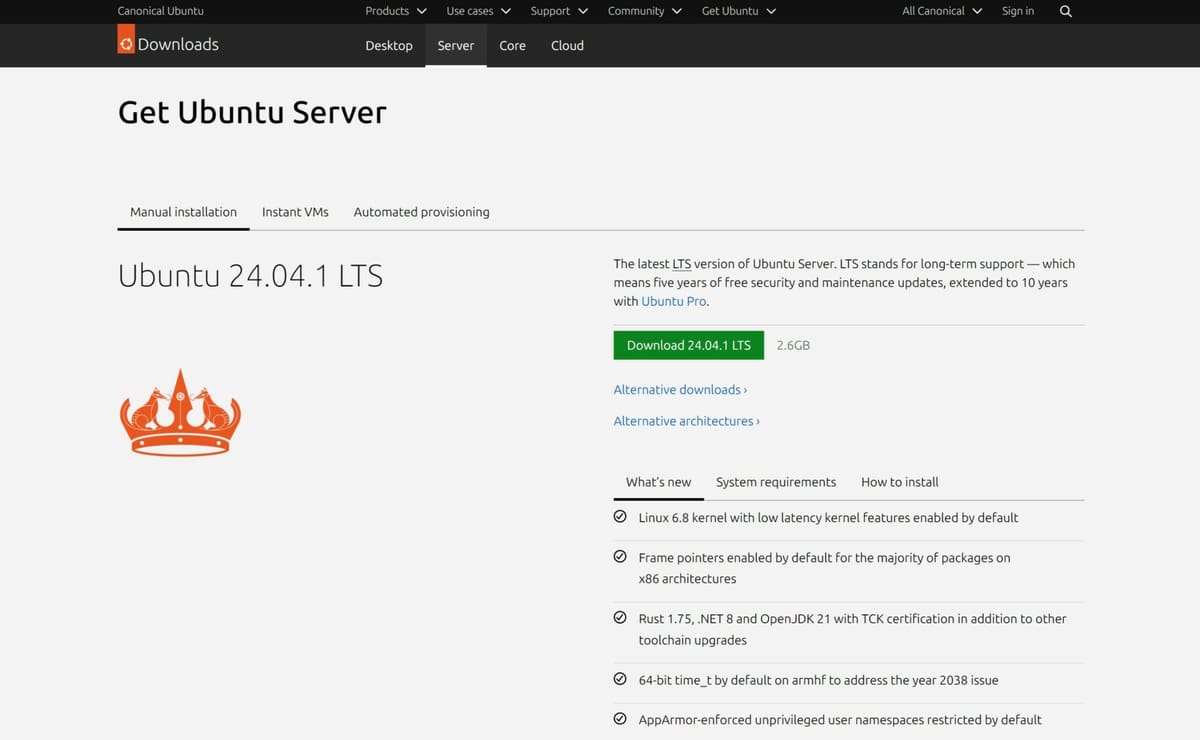
For the trickier installation method, we’ll need to install Ubuntu Server 24.04.1 LTS (long-term support). We’ll download an Ubuntu image and write it to a USB stick or SD card. We’ll then use this to install Ubuntu onto a machine of your choice. After that, OctoPrint can be installed onto that operating system from the terminal.
As an aside, all of the commands you’ll see below have been tried on Ubuntu 24.04.1 LTS.
What You'll Need
To get started, you’ll need the following.
- A computer with an internet connection
- Ubuntu Server 24.04.1 LTS image
- Balena Etcher, which you’ll use to write the Ubuntu image to the SD card
- A target machine on which you’ll install OctoPrint (usually a Linux-based SBC)
- 8-GB or greater USB stick or (Micro)SD, depending on the ports your computer has
- Your IP address
- Your Wi-Fi password (or an Ethernet cable if your target machine doesn’t have Wi-Fi)
Preliminary Steps
Here, we’ll be doing the preliminary setup to prepare us to install OctoPrint. This includes making sure we have the right version of Python. Then, we’ll make a note of the IP address of the machine we’re installing OctoPrint on so we can access OctoPrint later. Finally, we’ll create a new user to run the OctoPrint instance for more security.
Get Ubuntu Server
Let’s start with flashing a live Ubuntu image to a USB stick or MicroSD card using Balena Etcher.
- Download Ubuntu Server.
- Insert your SD card or USB device into your computer.
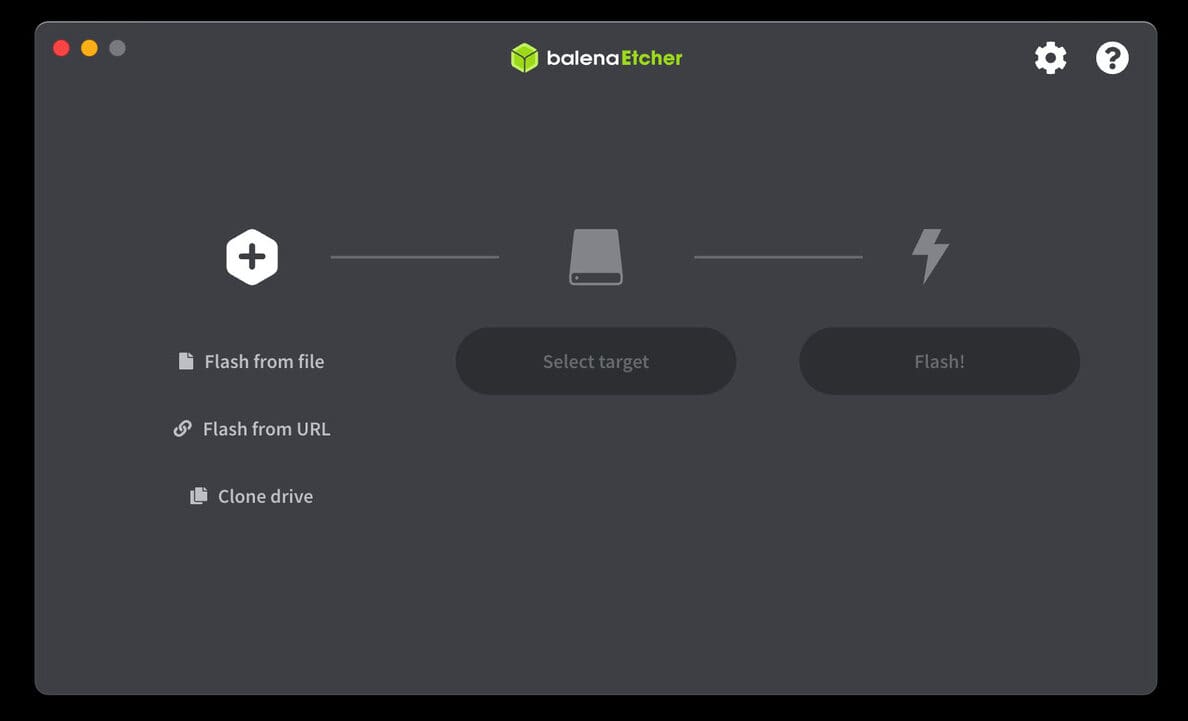
- Open Balena Etcher.
- Choose “Flash from file” and select your downloaded Ubuntu ISO file.
- Select your target disk. Make sure this is your USB device or SD card so you don’t erase your hard drive!
- Click Flash! and wait for Balena Etcher to write to the drive you’ve chosen.
- Eject the drive. Depending on your computer, you may get a pop-up that your drive is damaged. You can safely ignore it.
Install Ubuntu Server
Here, we’ll take the installation drive you prepared previously and use it to install Ubuntu on your target machine. Please be aware that this will wipe everything on your target machine!
- Turn off your target machine.
- Insert the USB stick or SD card with Ubuntu into the machine that will be running Ubuntu.
- Turn on the machine and enter the boot menu. There’s often a small instruction line in the bottom right corner, such as “Press F12 Boot for boot menu” or “Press Del for Setup”. If you’re stuck, do a Google search with the name of your machine and “boot menu”, and you should be able to find what it is.
- From there, select the Ubuntu drive you’ve inserted.
- Follow the on-screen instructions to install Ubuntu. You’ll need to add your Wi-Fi credentials at the networking stage if you plan on using Wi-Fi. More information on all the options can be found in the official documentation.
Once Ubuntu has successfully installed, you should have a blank terminal window open in front of you. Let’s ensure everything is up-to-date.
- Enter the command:
sudo apt update
Update Python
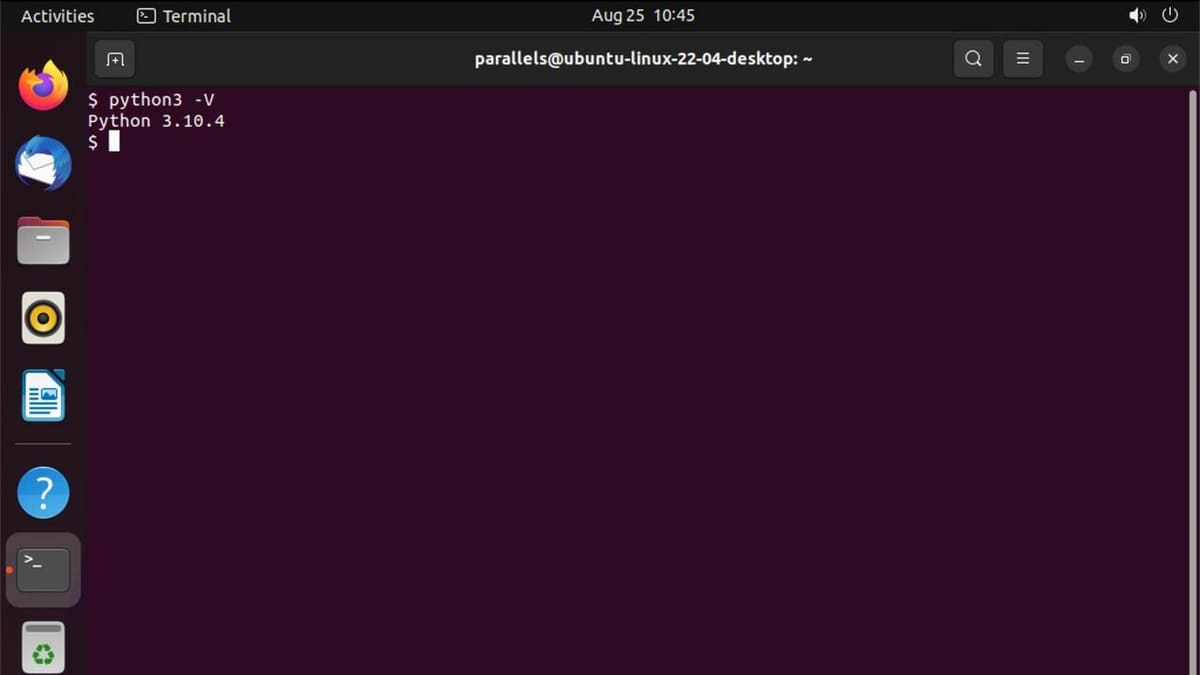
Here, we’ll be double checking we have all the correct dependencies to run OctoPrint. We’ll need Python 3.6 or newer, as Python 2 is now severely deprecated.
- Check your Python version by entering the command
python3 -V. This should return something like the following:Python 3.x.y - If the command doesn’t return
Python 3.x.y, install Python with the commandsudo apt install python3 - Install the Python dependencies needed to setup OctoPrint successfully:
sudo apt install python3-pipsudo apt install python3-devsudo apt install python3-setuptoolssudo apt install python3-venvsudo apt install gitsudo apt install libyaml-devsudo apt install build-essential
- Ensure everything is up to date with the command
pip install pip --upgrade
Check Your IP
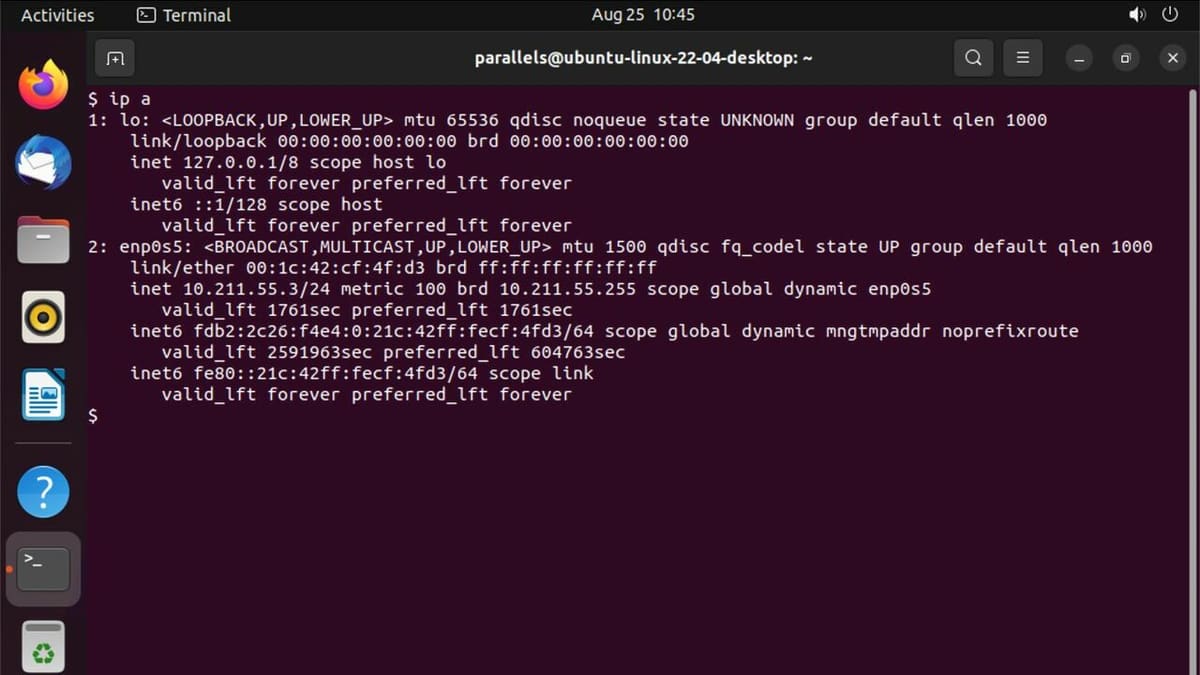
To find your IP address, we’ll use the command ip a, which will return several long lines of text. You’re looking for a line in the following format: inet 192.168.x.yyy/zz
This is your IP address. Make a note of it because we’ll need it later to connect to OctoPrint.
Add a New OctoPrint User
In this part, we’ll be adding a new user to run OctoPrint. This will help to keep your system more secure, which is especially important if you decide to allow access over the internet. Enter the following commands to do the following actions:
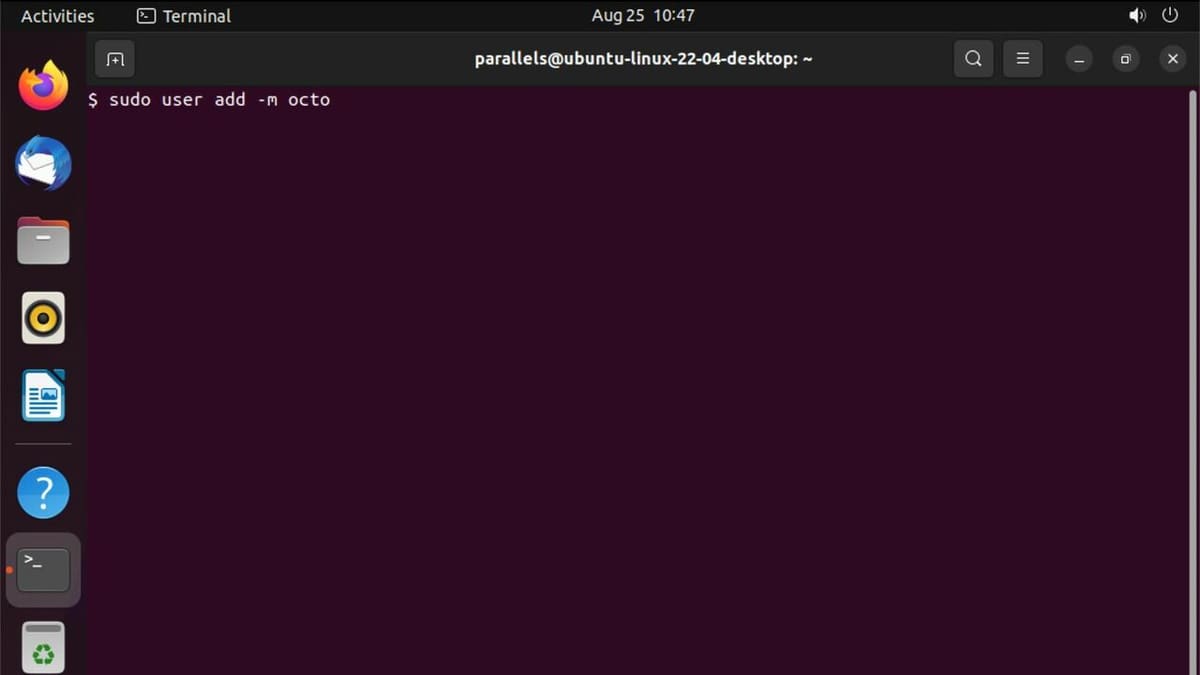
- Make a new user account called octo:
sudo useradd -m octo - Choose a password of your choice; we’re using something easy (octo), but make sure your password adheres to modern security standards:
sudo passwd octo - Add the octo account to the user groups you will need to talk to your 3D printer with the command:
sudo usermod -a -G tty,dialout octo
Install OctoPrint
Here we are at last – actually installing OctoPrint!
- Switch users to your newly created octo user, then we’ll make a folder to hold OctoPrint and switch into it:
su octocd ~cd /home/octomkdir OctoPrint && cd OctoPrint
- Create a Python virtual environment to run OctoPrint in:
python3 -m venv venv
- Install OctoPrint, finally:
. venv/bin/activatepip install --no-cache-dir octoprint
- Download and install a small helper script to run OctoPrint at boot:
wget https://github.com/s1906007/All3DP-OctoPrint-Ubuntu/blob/main/octoprint.service && sudo mv octoprint.service /etc/systemd/system/octoprint.servicesudo systemctl enable octoprint.service.
- Activate OctoPrint at last:
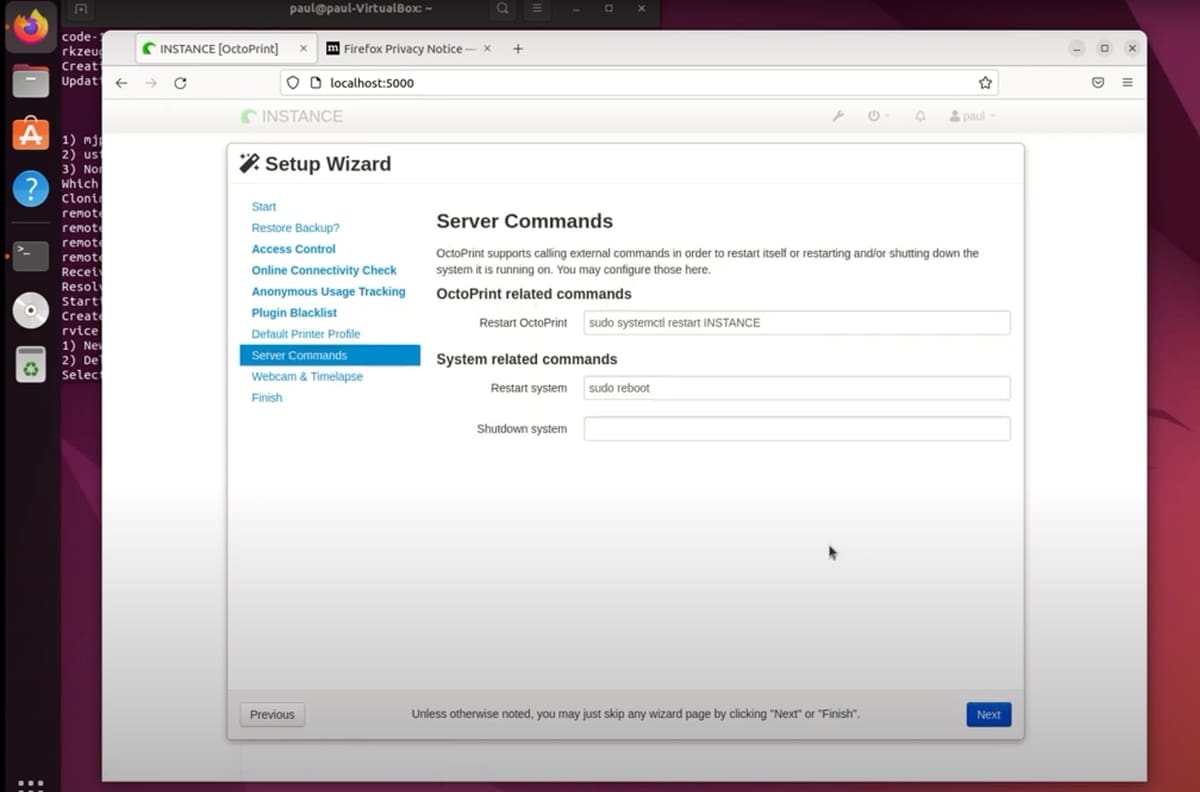
~/OctoPrint/venv/bin/octoprint serve
- Now, remember the IP you wrote down earlier? Type [IP]:5000 (e.g. 192.168.1.200:5000) into a web browser, and you should be able to see OctoPrint running!
A More Streamlined Option
Last but not least, the third method of installing OctoPrint is through the use of a semi-automated installer script, namely OctoPrint Deploy.
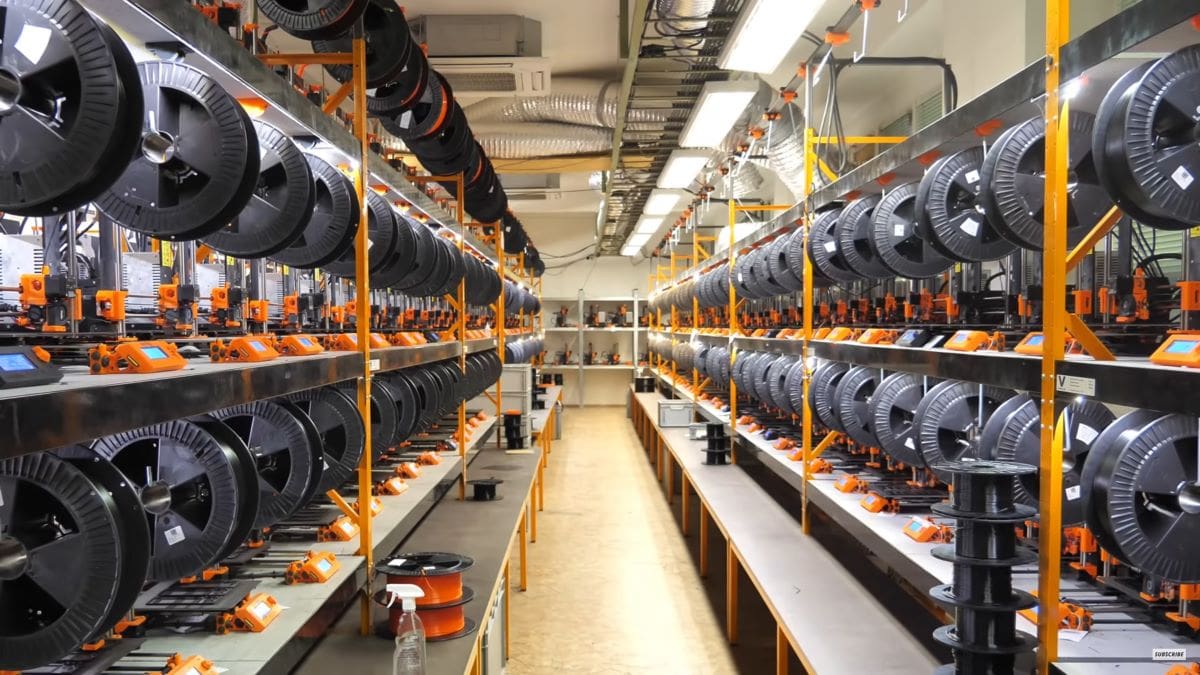
This is especially useful if you plan on installing OctoPrint on multiple machines, as it can be used to “deploy” to a large number of 3D printers that are connected to a shared network. It also just simplifies the installation process for an individual machine, and can do so on many of the most popular Linux Distributions, including Ubuntu Server!
While this method does streamline some of the steps involved, it’s also more advanced in certain ways, as it offers additional options that many novice users wouldn’t really need. It also relies on the user having a certain amount of underlying knowledge about how to connect to and control a Linux computer from the command line.
What You'll Need
To get started with OctoPrint Deploy, you’ll need the following.
- A computer with an internet connection
- Any of the following Linux distributions: Ubuntu 20+ (including Ubuntu Server), Mint 20.3+, Debian, DietPi, Raspberry Pi OS, Armbian, Fedora 35+, Arch Linux, or openSUSE
- Balena Etcher, which you’ll use to write the OS image to the SD card
- A target machine on which you’ll install OctoPrint (usually a Linux-based SBC)
- 8-GB or greater USB stick or (Micro)SD, depending on the ports your computer has
- Your IP address
- Your Wi-Fi password (or an Ethernet cable if your target machine doesn’t have Wi-Fi)
Using OctoPrint Deploy
Install your OS of choice on your Linux machine and connect it to your network; this can be done following the “The Slightly Trickier Way > Preliminary Steps > Install Ubuntu Server”, and “The Slightly Trickier Way > Preliminary Steps > Check your IP” steps.
Next, you’ll need to connect to your device to download and use the OctoPrint Deploy shell script. If you’re using an OS without a GUI or are running “headless” (i.e. without a monitor and keyboard attached), you’ll need to SSH into the device to run the script. This is just a way to control your Linux machine from another computer, using software like PuTTY. If you need help with this process, we’ve got an article on how to enable SSH on your Raspberry Pi.
Once you’re connected to your Linux machine through an SSH session, there are only a couple of steps to get and use OctoPrint Deploy:
- Clone into the OctoPrint Deploy GitHub Repo using the command:
git clone https://github.com/paukstelis/octoprint_deploy - Next, run the shell script using the command:
sudo octoprint_deploy/octoprint_deploy.sh - Choose “Prepare System” from the menu and use the installation wizard. Follow the prompts, which will walk you through the OctoPrint installation, and set it up according to your needs and preferences.
And that’s it! Many of the options you’ll be prompted for are only relevant if you’re deploying multiple 3D printers at once, so most of the time you can just continue with the default settings if you’re only setting up one machine.
If you need more detailed instructions or want to know how to use OctoPrint Deploy to its fullest potential, check out the OctoPrint Deploy GitHub page. It has a very comprehensive explanation for all of the steps involved.
Next Steps

After all of this has been set up, there are quite a few things you could do. For example, you could set a static IP. Or to make your life even easier, why not try setting up a custom internal domain name for your OctoPrint server? You could also use Obico (previously the Spaghetti Detective) to make monitoring your OctoPrint setup easier.
Check out the cool plug-ins you can get, learn how to set up a webcam for those beautiful time-lapses, and connect directly to Cura.
As you can see, there’s no shortage of cool things you can do with OctoPrint!
License: The text of "How to Install OctoPrint on Linux/Ubuntu" by All3DP is licensed under a Creative Commons Attribution 4.0 International License.