How to Set Up OctoPrint on Raspberry Pi 4

OctoPrint and Raspberry Pi 4 are a match made in 3D printing heaven. Read on for our step-by-step guide to get started!
In an interview with Thomas Sanladerer, Gina Häußge explains her motivation for creating OctoPrint: solving a problem faced by many new to desktop 3D printing. She wanted to supervise her prints, but couldn’t work and enjoy computer gaming in a room with a busy 3D printer. The heat, smell, and worry of particulate exposure added some urgency to find a solution.
Fortunately for us, Gina built OctoPrint, a web front-end that facilitates remote operation of 3D printers, and she made it free to use under the GNU Affero General Public License. Today, it thrives through an active community of users and developers.
Compared with dedicating a desktop computer or laptop to the task, running OctoPrint on a Raspberry Pi can be less costly, more flexible, and more reliable. Here, we explain why OctoPrint is so popular and how to get it working using OctoPi, a custom-built system image for the Raspberry Pi.
OctoPrint Workflow
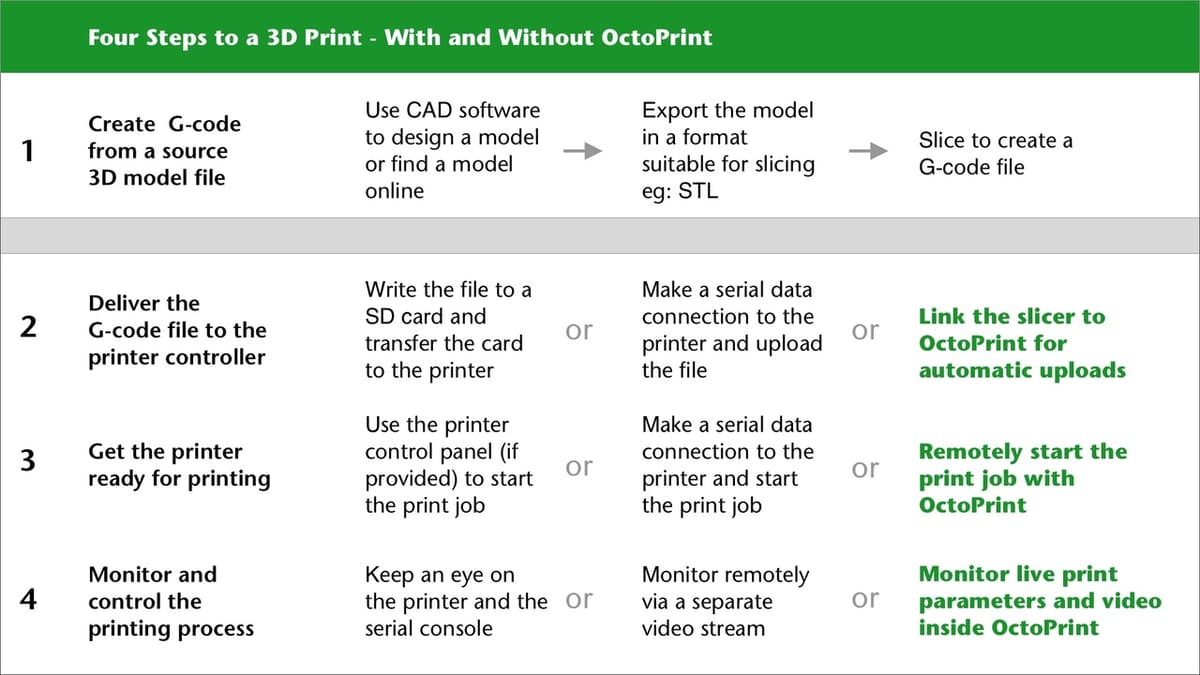
A 3D print project, from the initial idea through to successful completion, can be seen as a workflow. OctoPrint helps you to refine your workflow and focus on creating great prints. Once installed, you may wonder how you ever managed without it! It connects directly to your printer, with a detailed web interface that can be accessed remotely.
Here are the functions that you can expect to see after completing a basic install:
- Connection State: The state of the serial link to the printer
- Print State: The current print job, time elapsed, and estimated time remaining
- File Manager: A manager for G-code files stored on the Pi and the printer’s SD card
- Temperature: Presets and a graph view for bed and tool temperatures
- Control: Printer controls for movement, feed, fans, and motors
- Webcam: Streaming video incorporated into the Control tab
- GCode Viewer: Visualization of the current G-code file with layer navigation
- Terminal: Terminal window and command-line access to the printer controller
- Timelapse: Configuration of the timelapse mode and a timelapse file manager
Read on to discover the best way to get started with OctoPrint on the Pi 4.
Why the Pi?
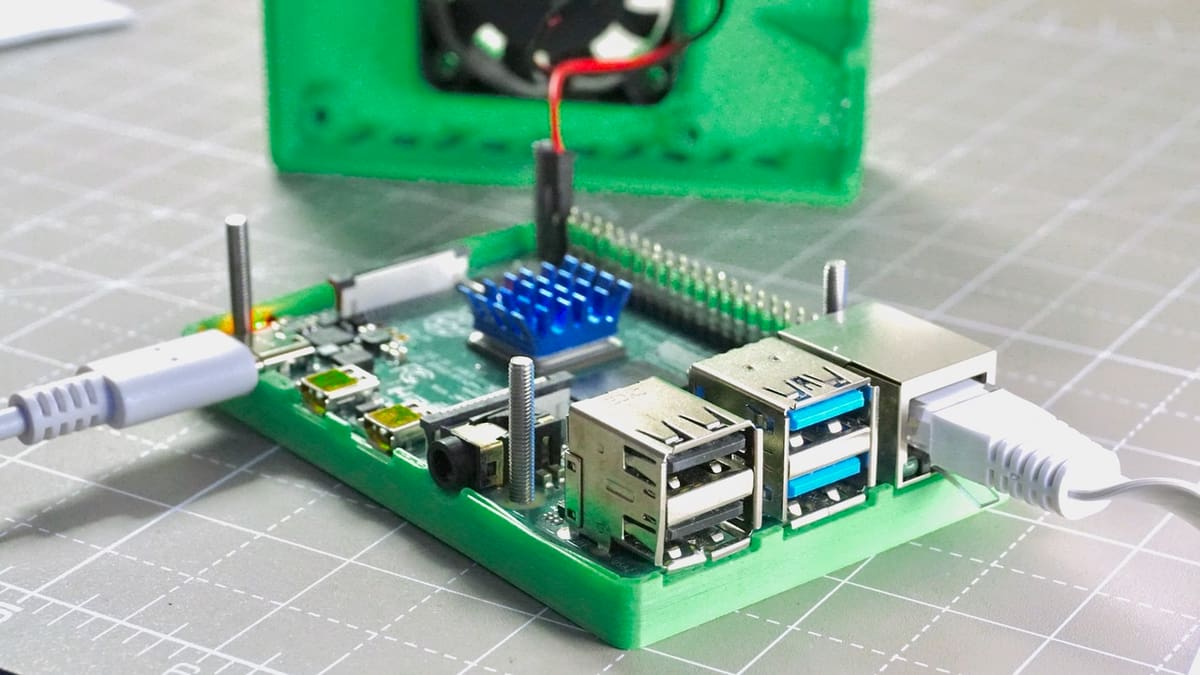
A Raspberry Pi 4 Model B together with a suitable power supply, fan, and MicroSD card currently costs around $95. For a budget 3D printer, a Raspberry-Pi-powered OctoPrint server will add a lot of useful functionality. If your printer already has built-in networking and remote management, then the advantages are less clear. The opportunity to add plug-ins may still make it worth the expense.
OctoPrint will run nicely on earlier versions of Raspberry Pi hardware, and a common favorite is the less expensive 3B+. We are going with the 4B to gain snappier performance and faster video processing.
Alternative Setups
If you’d rather install OctoPrint manually for Windows, macOS , or Linux, then head over to the OctoPrint Community Forum to find out how.
However, users report that running OctoPrint alongside other tasks on the same computer can cause instability. For example, a Windows update or unexpected reboot can interrupt an ongoing print. Using a dedicated computer helps to avoid these and other problems. A Raspberry Pi (or another SBC) is ideal because it fits in a tiny space, effectively becoming just another component of your printer.
What You'll Need
These are basic requirements to set up OctoPrint on a Raspberry Pi 4:
- Raspberry Pi 4 (2 GB or more)
- Case
- Fan (not needed if the case provides passive cooling)
- Recommended power supply (USB Type-C 3A)
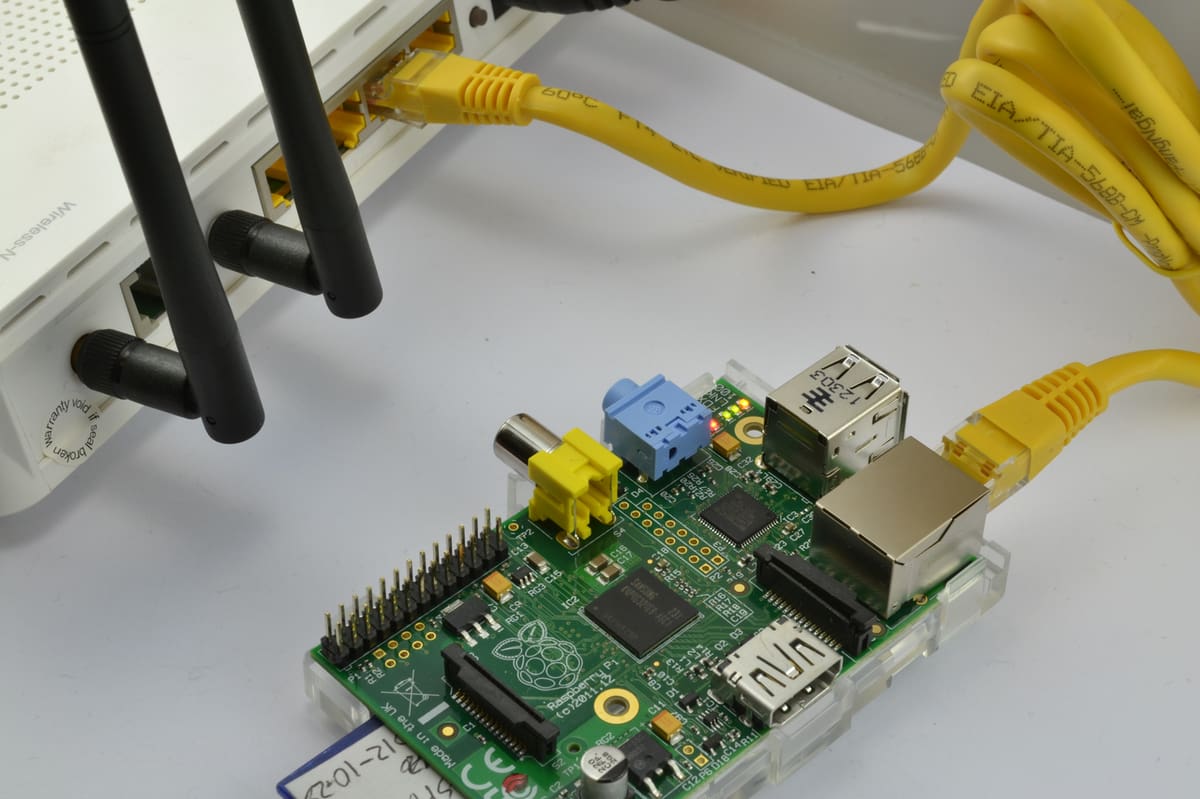
- Ethernet or Wi-Fi available at the printer location
- MicroSD card (8 GB or more)
- OctoPi image file (32-bit version)
- Etcher
- Visual Studio Code
You’ll also need the following, but it’s likely you already have them:
- Serial cable to connect your printer to a USB Type-A port on the Pi 4
- Additional SD card for your 3D printer
- Computer running macOS, Windows, or Linux
- MicroSD adapter (if needed for your computer)
- Ethernet cable
If you’re really looking to up your setup, you’ll also want the following:
Installation
These installation steps will be familiar if you’ve previously created a system image for a Raspberry Pi. The difference is that the OctoPi image includes everything needed to run both your Pi and OctoPrint. As soon as the Pi has booted, OctoPrint will work without any additional system-level configuration.
You don’t need to connect a screen or keyboard to get your Pi going. When updates are needed, they’ll usually be handled within the OctoPrint web interface.
Flash the OctoPi Image
- Download the OctoPi image file and extract it from the ZIP file to your desktop.
- Download and run Etcher.
- Insert the MicroSD card, in an adaptor if needed (cancel all prompts to format the card).
- Run Etcher and choose “Flash from File”.
- Navigate to the large uncompressed file downloaded in Step 1. Choose “Open”.
- Choose “Select target” and select the MicroSD card you inserted at Step 3.
- Double-check that you’ve selected the correct target, as any data present will be erased.
- Choose “Flash!”. The process can take up to 15 minutes.
- When the process is complete, remove the card (cancel all prompts to format the card).
- Quit Etcher.
- Remove the MicroSD card from the computer.
Network Configuration
- If you plan to use only wired Ethernet, skip to Boot-up the Pi below.
- Re-insert the MicroSD card into your computer (cancel all prompts to format the card).
- Navigate to “octopi-wpa-supplicant.txt” and open it with Visual Studio Code.
- Follow the instructions at the top of the file to insert your Wi-Fi SSID and password between the double-quotes. Keep the spacing of the text block exactly the same.
- If this is an additional OctoPrint server on your network, you’ll need to configure a different hostname.
- Save the file and eject the MicroSD card (cancel all prompts to format the card).
Boot-up the Pi
- Load the freshly imaged MicroSD card into your Raspberry Pi.
- Connect the Ethernet port if you’re not using Wi-Fi.
- Power-up the Pi!
Within a few minutes, the Pi should be serving the OctoPrint web service to your local network. To find it, go to http://octopi in your web browser (don’t forget the “http://” or it may not work).
Running OctoPrint
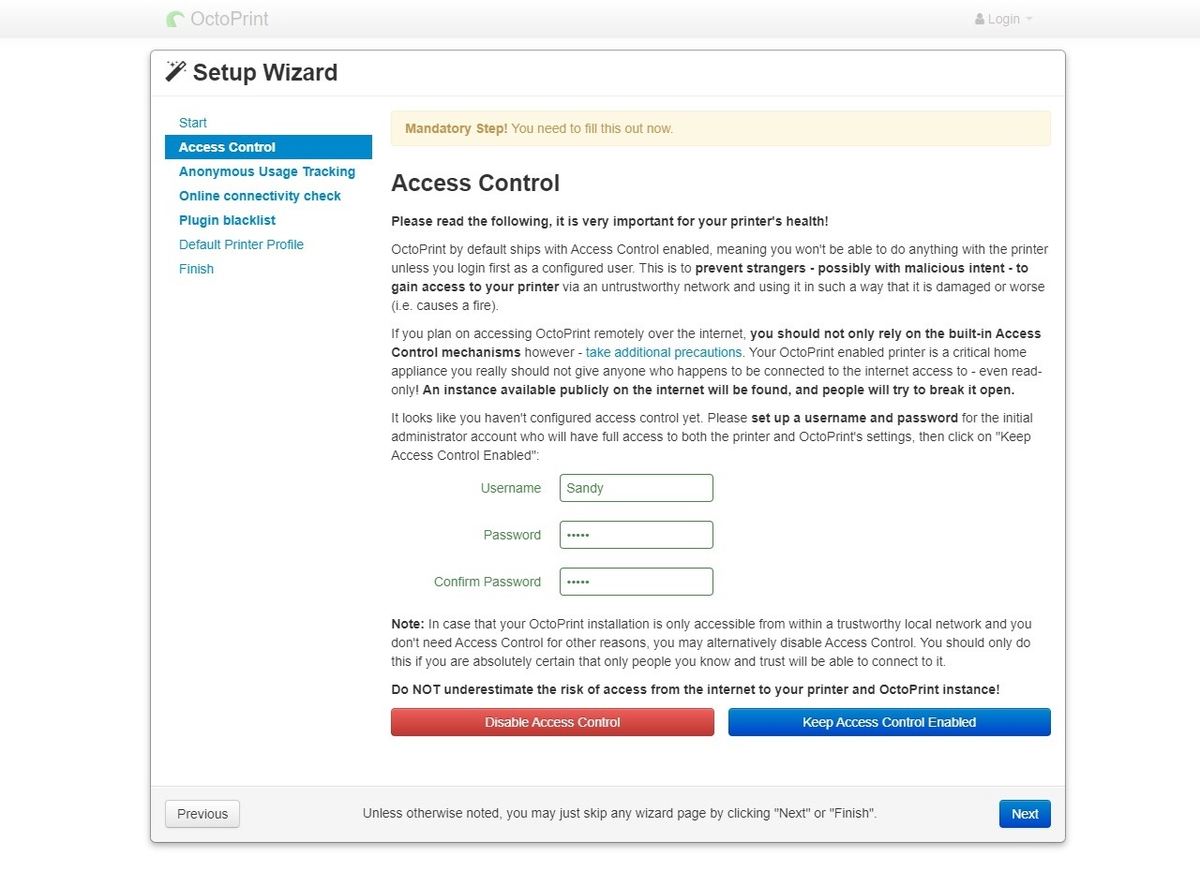
The first boot of OctoPrint will launch a Setup Wizard. Work your way through, making sure to configure “Access Control” and all four sections of the “Printer Profile” page.
- Connect your printer to one of the Pi’s four USB Type-A ports.
- Plug in a webcam if you want to use the streaming video and timelapse functions.
Troubleshooting
If OctoPrint doesn’t respond after five minutes then check your network router control panel for a new client. Note down the IP address that the router has allocated and enter it into your browser (after “http://”). If the problem persists, try connecting the Pi to your network using an Ethernet cable. If this works, the problem is probably with your Wi-Fi configuration.
OctoPrint has a large and helpful community. If you’re struggling to make it work, search the Community Forum for a solution.
Connect a Slicer
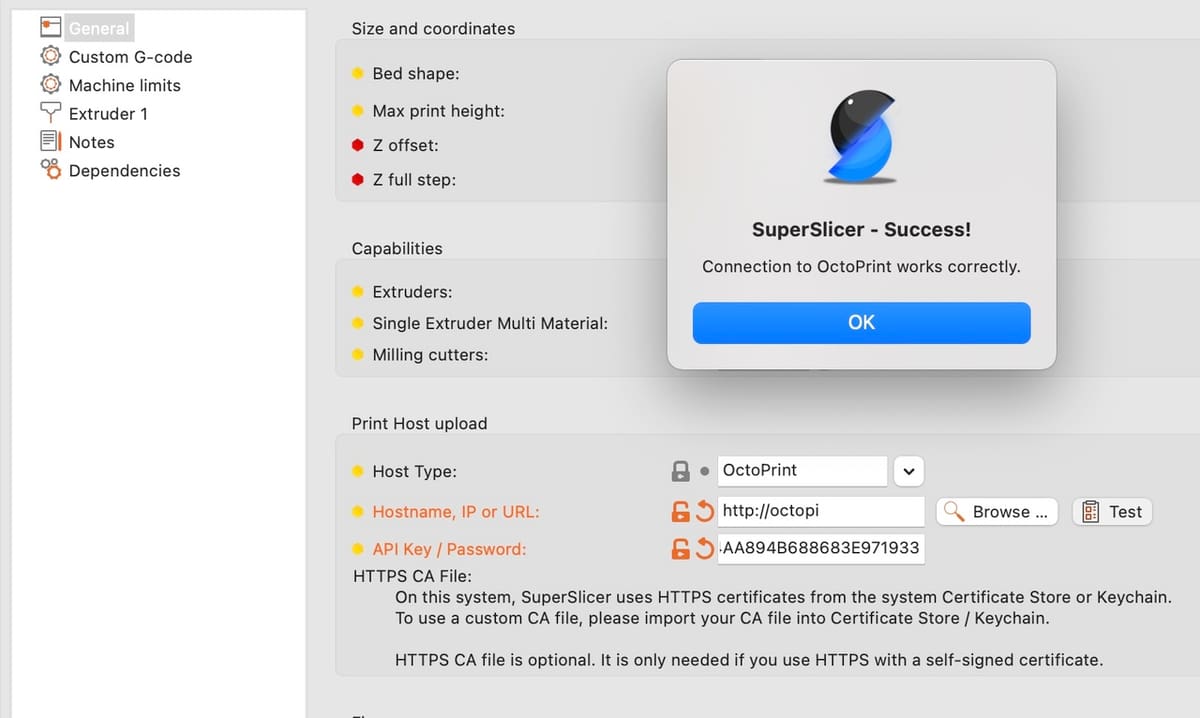
Your slicer software probably offers an option to link to a “Print Host”, and you can set this to OctoPrint. Once configured, the slicer can automatically send G-code files to OctoPrint’s local file storage.
As an example, in PrusaSlicer, the configuration is in the “Print Settings”. It needs a hostname and a password. If you’ve followed our guide, then the default hostname for OctoPrint is http://octopi or the local IP address of your OctoPrint server. The password is an Application Key that you can generate using OctoPrint. Find it under “OctoPrint Settings > Features > Application Keys”.
Connection Quality

OctoPrint communicates with your printer controller using a serial connection. It can be very slow, with many printer controllers limited to achieving 2 MB a minute or less. If the connection is too slow because of errors in communication, printing directly from OctoPrint can fail.
You can check the error rate by opening OctoPrint’s “State” tab. When connected to the printer, this reports the “Resend ratio”. Anything above 0% indicates a problem. The system automatically corrects communication errors and so the risk is in the delay’s length. Prints may fail if the data cannot reach the printer faster than the printer prints.
You can identify a poor connection by checking the Resend ratio. A good tip is to upload a big file to the printer’s SD card before doing any printing directly from OctoPrint. During the upload, if the Resend ratio is high, you know you have a problem before a failed print can happen. Try swapping out the cable or reducing the transfer rate.
Managing Files
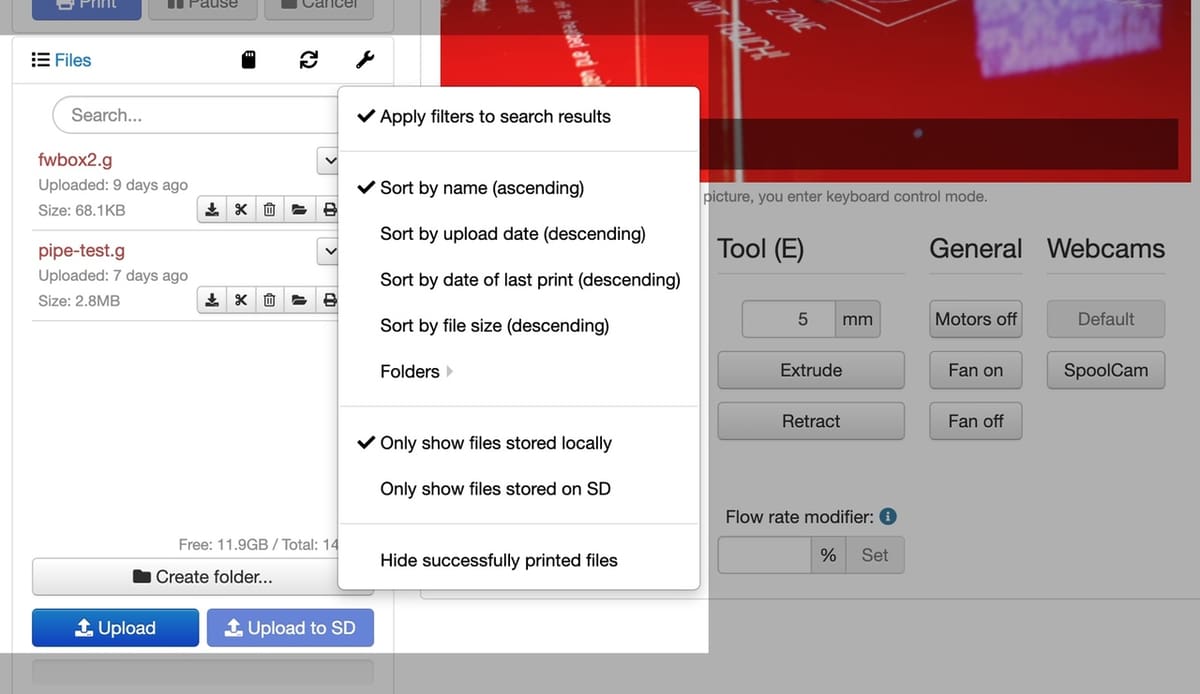
Managing files through OctoPrint is convenient but can be confusing. OctoPrint displays files located in two places, in three ways.
The “Files” tab needs to be open to view the file manager. Files “stored locally” are located on the MicroSD card of the Raspberry Pi, while files “stored on SD” are located on the SD card of the printer itself. Tap the wrench icon on the “Files” tab to change how the list of files is displayed. The options are to show only files stored locally, only files stored on SD, or all files (no checkmarks visible).
As seen above, you can choose to upload to local storage or directly to the printer’s SD card using the buttons at the bottom of the file listing in OctoPrint.
Plug-ins
For the final step, adding plug-ins is easy:
- Tap the wrench icon at the top of the interface screen on the right.
- Tap “OctoPrint > Plugin Manager” in the sidebar.
- Default plug-ins are shown. Tap the “Get More” button at the bottom of the list.
- Use the “…from the Plugin Repository” search field to find the plug-in you want to install.
- Tap “Install”.
- Restart OctoPrint.
As for which plug-ins to install, a good place to start is changing the look of OctoPrint to be to your liking with Themeify. A useful feature might be an emergency stop button with Simple Emergency Stop, and we highly recommend installing The Spaghetti Detective to be alerted of print fails. Finally, create mesmerizing clutter-free stop motion videos of your prints with Octolapse.
But these are just a handful of suggestions, head over to the OctoPrint Plugin Repository to find many more, or check out our article on the best plug-ins.
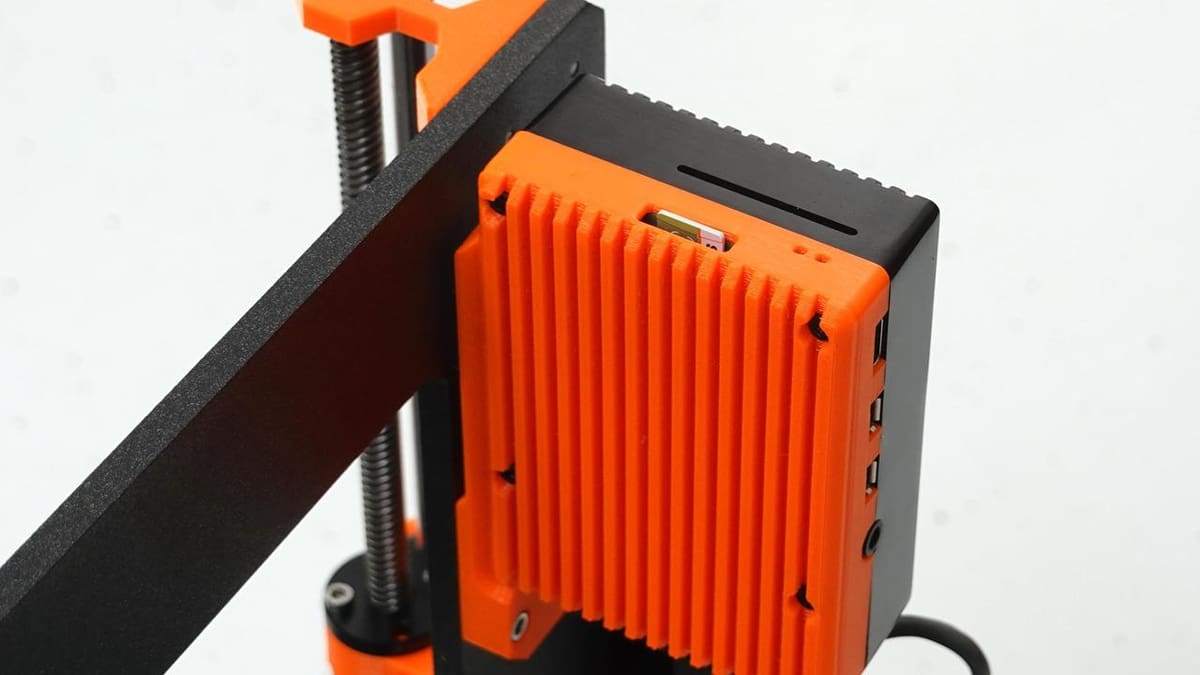
Lead image source: laurentrm via Reddit
License: The text of "How to Set Up OctoPrint on Raspberry Pi 4" by All3DP is licensed under a Creative Commons Attribution 4.0 International License.