Orca Slicer: Seam – All You Need to Know

Orca Slicer has been gaining popularity thanks to its advanced tools. Read on to discover how to get seams right with it!
Orca Slicer is a relatively new protagonist in the 3D printing slicer landscape, but it has already gained a lot of popularity. This open-source program was originally developed by SoftFever but it has now become a community project with new releases every month. Since it’s based on Bambu Studio, which happens to be a fork of PrusaSlicer, Orca Slicer offers all the features that those two popular slicers provide, together with unique tools.
For example, one of the most loved features of this software is the “Calibration” tab, which lists a variety of test models that will help you tweak your printing profile. Don’t worry if you’re not an expert – we’ve got you covered.
Along with its distinctive tools, Orca Slicer includes all the common settings that you’ll find in most slicers, such as the seam settings. The printing seams are the points where the toolhead starts extruding the layer. When changing layers, the toolhead has to move up to the appropriate height. Once reached, it restarts extruding the filament. At this point, you can see the seams that bother many makers.
In this article, we’ll take a look at how to adjust your settings in Orca Slicer for perfect seams. Let’s get started!
What Are They
As mentioned, seams are created between layer changes when the toolhead jumps from a finished layer to a new one. When doing so, the toolhead stops extrusion to reach the next location. However, due to the nature of the FDM process, some melted plastic remains in the hot end and can ooze out during the layer change.
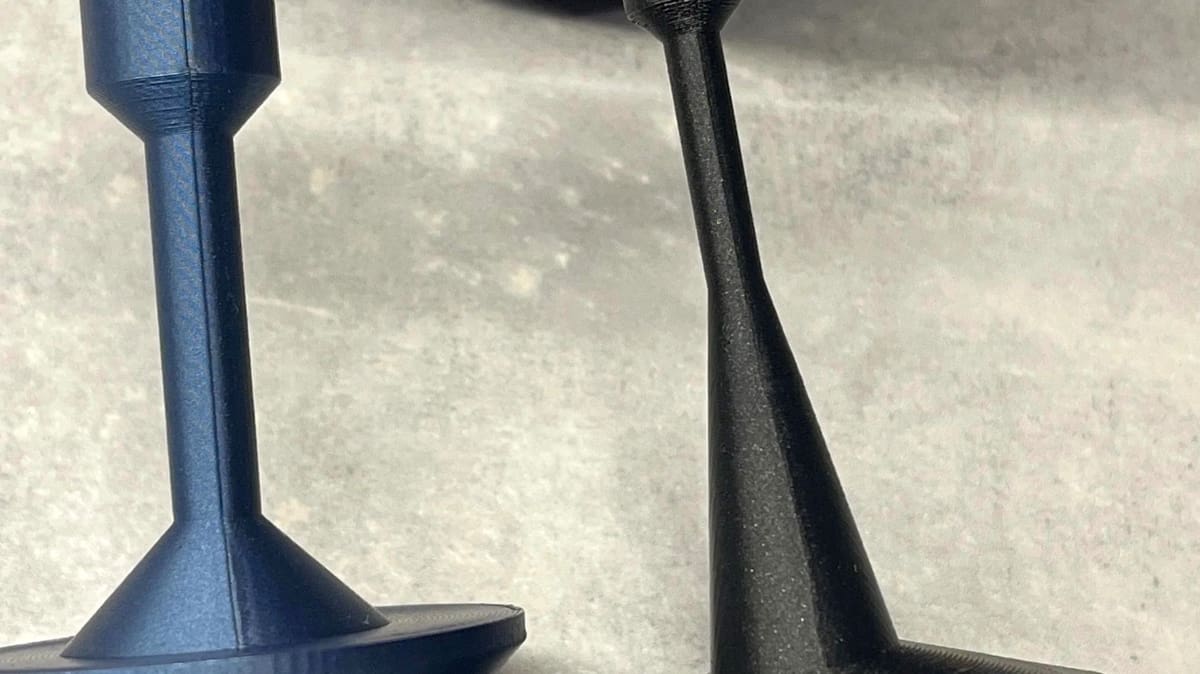
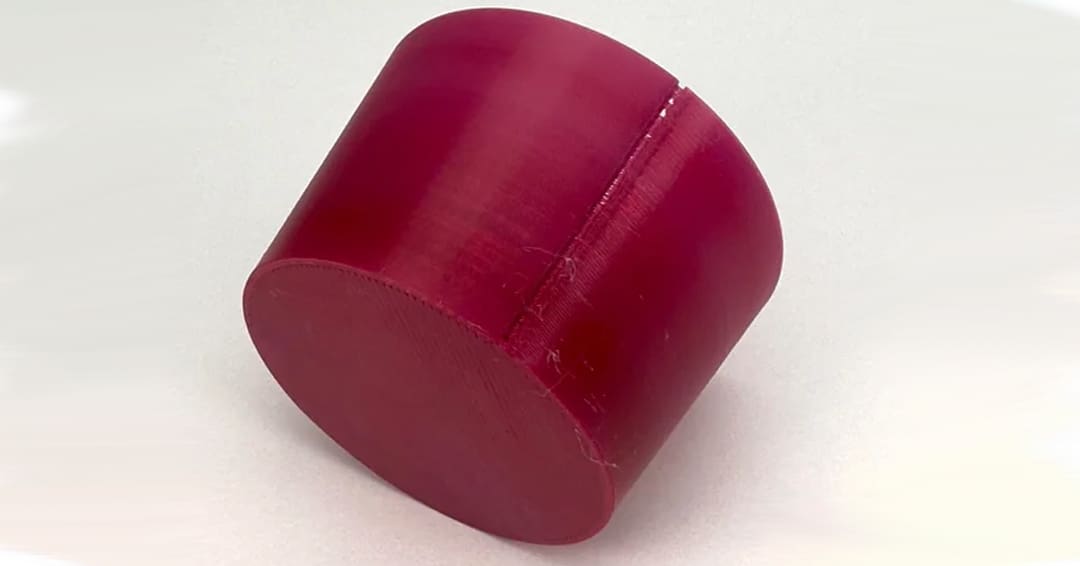
When filament starts flowing again to create the new layer, the excess material is deposited, creating a little bump that’s called a Z seam. Many users are annoyed by this mark since it presents as a defect on the printed part. A Z seam typically looks like a single line running along the Z-axis of your model. The seam’s visibility depends on many different factors. For example, shapes with sharp corners can hide the seam on the corners, whereas tall, cylindrical parts tend to have a visible seam. Generally speaking, tweaking the printing profile can help hide these bumps. Most slicers set the starting point of the next layer directly above the end point of the previous layer, so the bumps align to create a visible Z seam.
Z seams are problematic for a few reasons. Not only do they affect the print aesthetic, but also the functionality. In particular, when printing parts that require tight tolerances, seams can get in the way of a successful result by creating undesired blobs that mess up the object’s dimensions. Unless you paint your piece or smooth it when post-processing it, your parts will show this defect. But don’t worry, we can minimize the effect of Z seams with a few setting tweaks in Orca Slicer!
How to Access Them
Seams are always part of an FDM print, except when printing in vase mode. However, there are some settings that we can adjust to decrease their visibility.
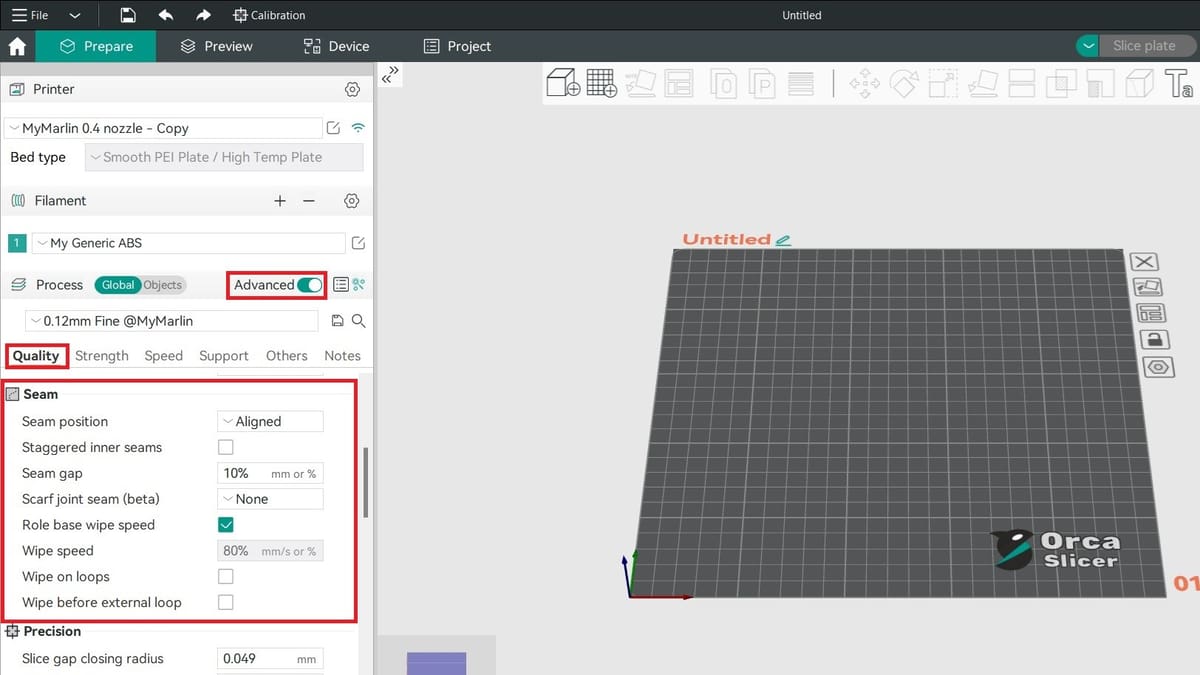
In Orca Slicer, these settings can be found under the “Process” section in the “Quality” tab. There, you’ll find the “Seam” menu by scrolling a bit down. Make sure to enable the advanced view by toggling the “Advanced” switch. By doing this, you can access all the available settings for seams.
Now, let’s analyze the specific settings that we’re working with.
Seam Position
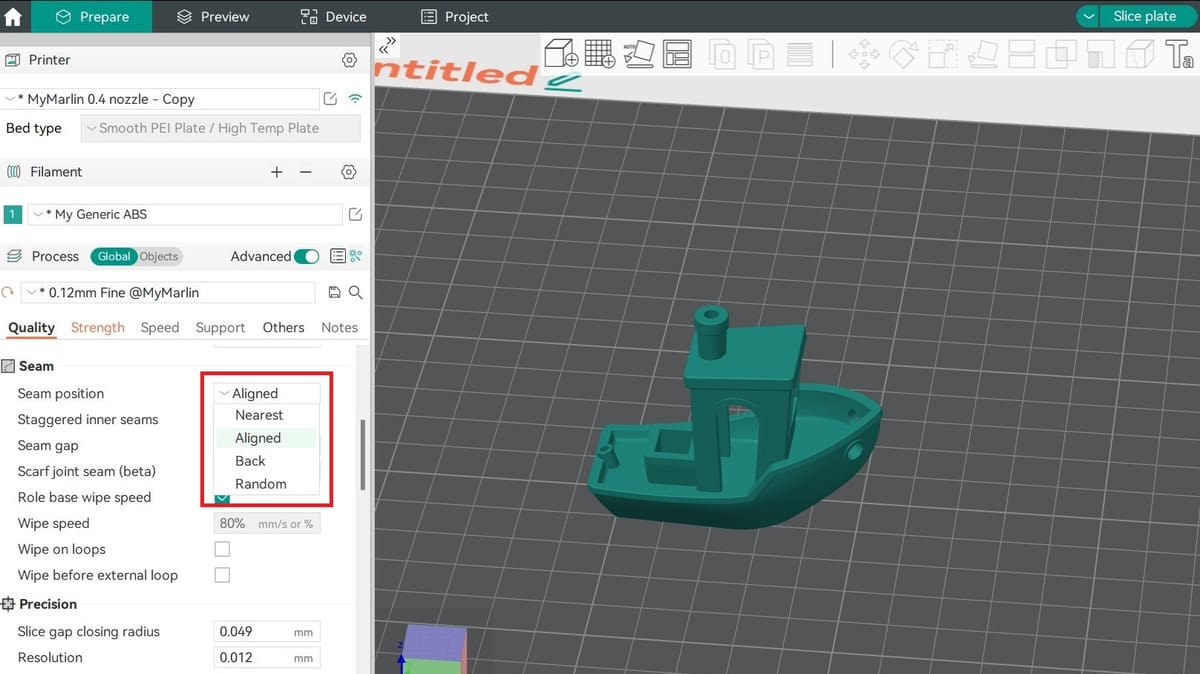
The first setting we’ll look at is “Seam position”. As you may have guessed from its name, it lets you decide where to locate the seam on a model. There are four options that you can choose from: “Aligned”, “Nearest”, “Back”, and “Random”. Their names are pretty self-explanatory, but let’s take a look at them.
- Aligned: With this option enabled, the slicer instructs the 3D printer to start a new layer near the starting point of the previous one. When this style is selected, the seams usually form a straight column.
- Nearest: In this mode, the software searches for the nearest edge of the current layer to start extruding. If your model has sharp corners, this is the best way to hide seams. If the software doesn’t find any sharp corners, it will use the end of the previous path.
- Back: When you select this mode, the slicer will use the “Aligned” logic on the back part of the model, which is relative to the printer itself. You can rotate your model in the slicer to set the side where your seam should go facing the backside of the plate. This is particularly useful when printing a part that will be displayed with a hidden side, such as a trophy or wall art, because we can concentrate the seams there. However, one user found that this setting causes a curvy seam on some models.
- Random: As you might have guessed, this setting will create a random seam pattern by choosing a different starting point for each layer. The seam will be less noticeable this way, but the surface of the piece will be less smooth, with small zits appearing along the entire perimeter.
In addition to the position, you can enable the staggering of inner seams, which is especially useful for models that are meant to be under mechanical stress.
Seam Gap
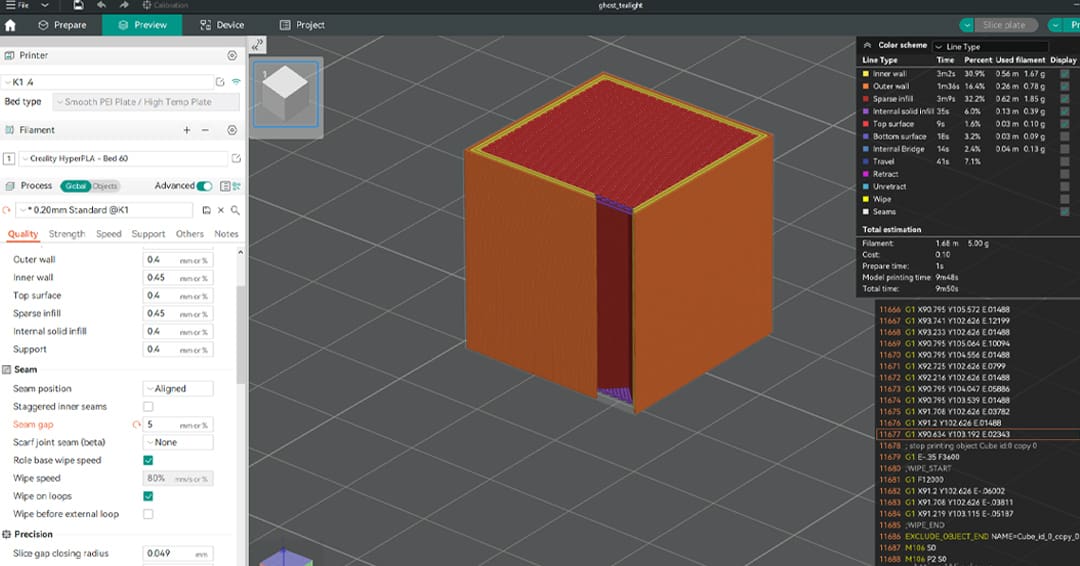
Seam gap is a setting that can greatly help you reduce the visibility of the seams. You can set a desired value in percentage or millimeters and the loop of the layer will be shortened by that amount. In this way, the seam doesn’t overlap with the layer material, reducing potential bumps and any visibility.
The standard value is set to 10% and should be sufficient for this purpose. If you’re finding that’s not the case, try increasing it to 15%. A greater value isn’t recommended, as this can lead to holes that resemble under-extrusion.
Although the seam gap setting can be a useful option in some cases, it doesn’t always work. For example, a Reddit user observed that setting the seam gap to 0% and doing a pressure advance calibration gave them the best results with their Bambu Lab X1 Carbon prints. On the other hand, the Ender 3 Max had no issues using the seam gap setting. Based on your machine, you may need to tweak this value accordingly.
Wipe
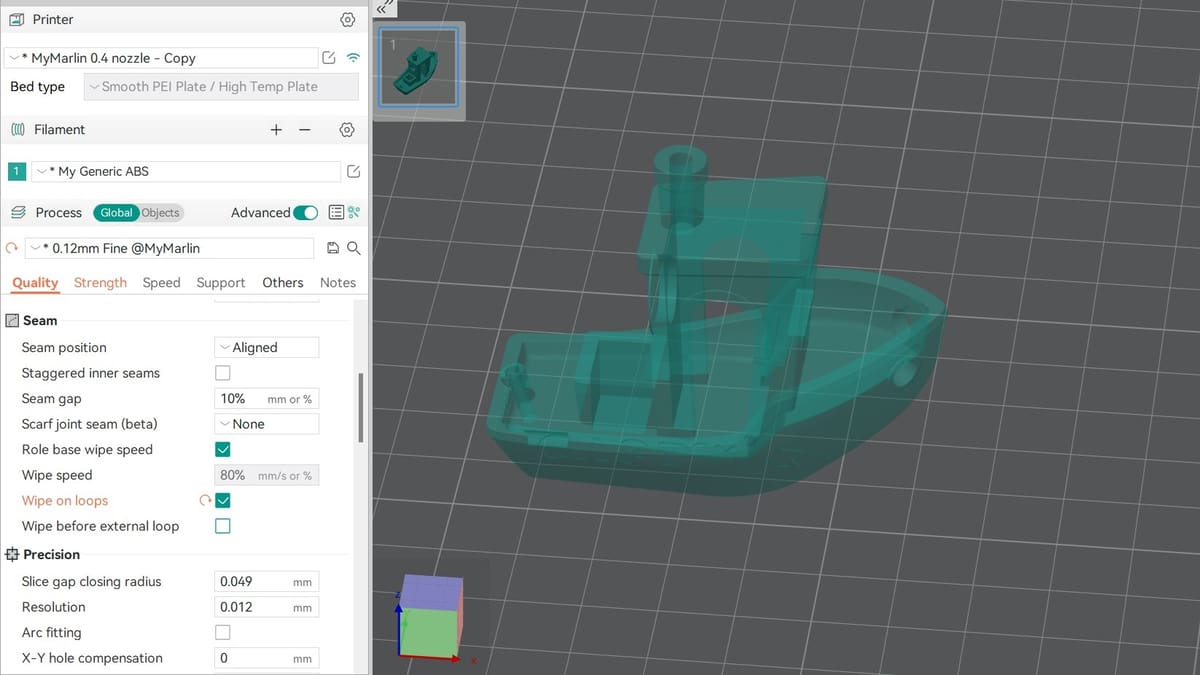
Among the settings available, you can enable wiping for seams. This feature instructs your printer to move slightly back on its path before changing layers.
When disabled, the nozzle finishes a layer and returns to the starting point, moving quickly to the inside to print the inside wall of the next layer. When doing so, the toolhead slows down, but the material keeps flowing, creating a small bulge. Wiping seams helps minimize the visibility of the seam because the toolhead doesn’t move abruptly to the inside, and the material oozing out is distributed on the toolhead’s short path when moving back.
There are some settings that can be tweaked for the wipe. While wiping is enabled by default, the speed can be either set at a custom value or the “Role base wipe speed” option can be selected, which will use the same speed for printing a specific feature for wiping. This setting should give best results, since the toolhead won’t change its speed suddenly when printing, extruding the filament smoothly.
“Wipe on loops” can also be checked, with which the toolhead will make a small inward movement before the layer is left for the next one. Finally, “Wipe before external loop” can be activated, so the extruder will make a slight movement inward before de-retracting. These options minimize blobs on outer walls, hiding the Z seam. They can be especially useful when the “Walls printing order” (under “Walls and surfaces”) is either “Outer/Inner” or “Inner/Outer/Inner”.
It’s worth noting that not all settings will necessarily work for all model, material, and printer configurations. For example, for one Reddit user, not enabling wiping on loops helped improve their seams in Orca Slicer.
Seam Painting
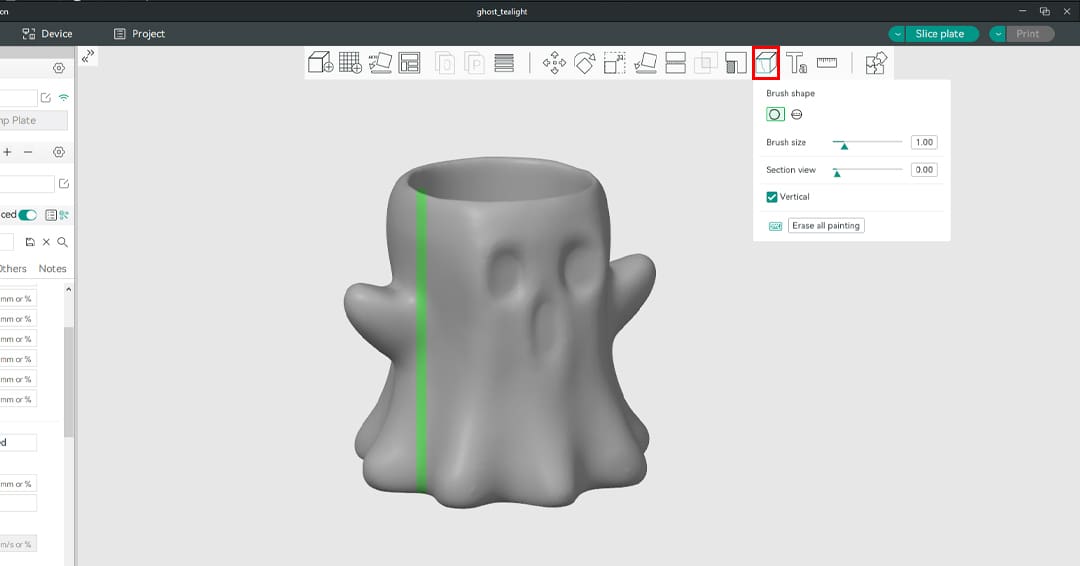
This last tool we’ll be looking at can be really useful for obtaining the exact seam result you want, since it allows you to choose the seam position by drawing it. To use it, click on the corresponding icon on the top menu bar or use the shortcut ‘P’. A little window will pop up. Here, you can choose some settings that will help you with the seam painting process, such as the brush type (circle or sphere).
You can also set the size of your brush, although it’s recommended to keep it at the minimum since the seam is only a point. Finally, you can use the “Section view” option to create a clipping plane to hide a part of the object and reach areas that are difficult to paint. To help you in the process, Orca Slicer also offers the “Vertical” option, which keeps your drawing line vertical, achieving an effect similar to the “Aligned” seam position.
To draw the desired seam position, click with the left mouse button and drag the mouse where needed. A green line will appear on the model. On the other hand, if you use the right button, you can add seam blockers. Those areas will be highlighted in red and seams won’t be positioned in these zones.
While some Reddit users had trouble drawing a straight vertical line with their mouse, one user used a touchscreen PC and a ruler to achieve the desired results. Pretty creative!
Tips & Tricks

Now that we understand the available settings for seams in Orca Slicer, let’s talk about some tips and tricks that can really help minimize unsightly print artifacts. Keep in mind that to fix print issues like Z seams, you’ll first have to identify and fix the problem’s source. In the case of Z seam, this is pressure inside the hot end that releases excess material onto a print.
Here are some features and calibration techniques that you can look into if Z seams continue to plague your 3D prints, even after adjusting your settings in Orca Slicer.
Scarf Joint
This brand-new tool was developed by the 3D printing community to hide seams. Its name is inspired by a woodworking and metalworking technique, and it creates two tapered ends where the layer starts and ends. Basically, a printed wall wraps over itself while maintaining the layer height with a throttled flow rate. This feature allows the printer to extrude less plastic as the gap between the two ends narrows, minimizing the excess material that leads to seams. It’s especially useful for hiding seams on curved surfaces. It can be enabled by activating the “Scarf joint seam” setting in Orca Slicer. When you enable it (either for contour or contour and hole), some subsettings will be displayed. If you’re interested, a good guide to understanding how it works and how to tune it can be found on Printables. Keep in mind that this option is available only as of Orca Slicer 2.0, and at time of writing, it’s in beta mode.
Vase Mode
If you want to eliminate seams completely, this is the right solution for you. With vase mode, spiral vase, or “Spiralize Outer Contour“, a single and continuous wall is extruded. In this case, seams aren’t a problem since the toolhead doesn’t interrupt the extrusion for the layer change. One thing to note is that “Spiral vase”, which you can find in the “Others” tab of the “Process” section under “Special mode”, can’t be used on all models. In fact, this option changes the structure of the print. Aesthetic prints are best suited for this mode because functional prints usually require strength that vase mode doesn’t offer.
Proper Calibration
Although tweaking the settings that we’ve explored previously is important, there are some other factors that you should keep in mind to avoid seams and bumps. Many users found that their seams were better after tuning flow and pressure advance in Orca Slicer. You should properly calibrate your printer and printing profiles using the right E-steps, flow rate, nozzle temperature, and print speed, together with retraction and pressure advance. Orca Slicer offers a long list of test prints that you can use to optimize your print profile. You can dive further into the topic by reading our article about Orca Slicer calibration. In addition, you can follow the order that the software suggests for the process: begin with the temperature tower, then the flow rate test, the pressure advance calibration, and finally the retraction test.
License: The text of "Orca Slicer: Seam – All You Need to Know" by All3DP is licensed under a Creative Commons Attribution 4.0 International License.