
Orca Slicer: Vase Mode – Simply Explained

Spiral or vase mode has been around for ages; Orca Slicer is relatively new. Read all about how Orca Slicer's vase mode works!
Whenever you see a printer showcased in a store or at a fair or conference, it’s likely using a model that has been designed for and sliced using vase mode. This provides an extremely fast and filament-saving build, and is used to impress potential customers.
In a nutshell, vase mode can provide you with excellent lightweight prints for a multitude of uses, printing the design in a single continuous line.
Orca Slicer is one of the the newest kids on the block, and it’s quickly become one of the most popular slicers for fused deposition modeling (FDM) 3D printing. Among everything it has to offer, it incorporates a vase mode slicing option called “Spiral vase”.
Let’s find out why you might use this feature, when you might want to skip it, and how to get the best out of it with Orca Slicer.
What's Orca Slicer
Orca Slicer traces its origins to Bambu Studio, a fork of PrusaSlicer, which is in turn based on Slic3r. With these earlier developmental improvements, it carried a significant amount of optimization and innovation even before developer SoftFever started working on it. The software is sponsored by BigTreeTech and Qidi, and has a full list of backers available on its GitHub page.
Orca Slicer is available only from GitHub. SoftFever warns that there are several other sites claiming to be official Orca Slicer sources, but these may be used for malicious intent, so best be safe than sorry and skip them altogether.
Orca Slicer’s streamlined UI makes it slightly easier to learn than PrusaSlicer, and it contains many of the optimizations and improvements from Bambu Studio and SuperSlicer. While it is a fork of Bambu Studio, Orca Slicer maintains wide printer compatibility and allows access to machine features on non-Bambu printers that are locked out in Bambu Studio.
Next, we’ll discuss Spiral vase mode.
What's Spiral Vase Mode
Spiral vase mode, vase mode, or “Spiralize Outer Contour” (as it’s known in Cura) refers to a printing process where the outer perimeter is printed as a single line with a (relatively) smooth rise in the Z-axis. The printed path forms a spiral moving up, and the produced model will have a bottom but no top layers, hence it will resemble a vase.
Spiral vase prints as a single continuous line, with a single wall and 0% infill. There will also be no top layers, and if you’re going to make a time-lapse video of the print, the time-lapse must be set to “traditional” rather than parking the printhead for each frame.
Spiral vase mode won’t effect the number of bottom layers or the layer height. It also doesn’t affect the extrusion width. Both layer height and extrusion width will have an increased effect on the properties of your finished print, as layer adhesion and wall thickness are going to drive the part strength.

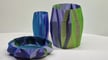
While vase mode has some clear downfalls, it still has several applications. From seasonal decorations, like a Jack-o-lantern or a Christmas tree, to wings for planes and containers, there’s plenty to create. Of course, you can also print actual vases and flower pots (although you’ll most likely need to waterproof it), and pen holders. There’s also vase mode Gridfinity for those who like their bins 3D printed quickly.
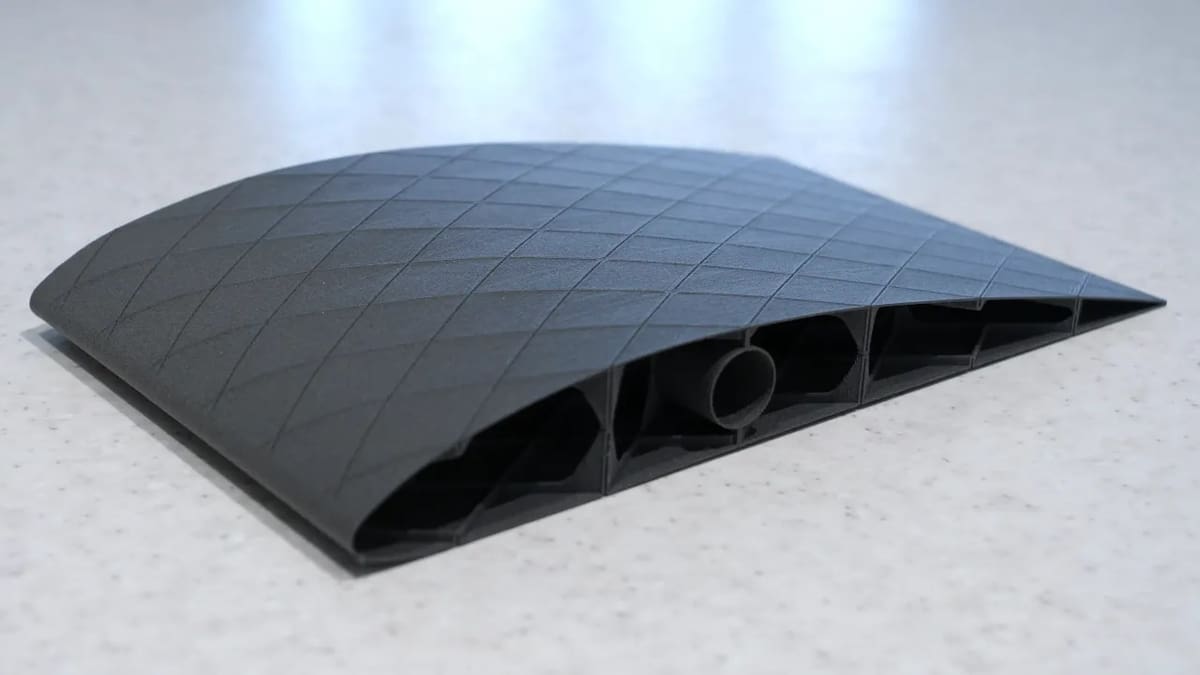
This might sound great, but everything has pros and cons, and vase mode’s no exception. For example, if the item isn’t designed for it, it may just not work. With several internal cavities and steep overhangs, dice towers are challenging to design for vase mode – yet it has been done!
You’ve also got to consider layer adhesion. With a single line printed consecutively, the strength of your model will only be as good as your layer adhesion. We recommend bumping up the temperature slightly to improve it and try to avoid delamination.
Lastly, depending on intended use, one might have to keep in mind hoop stress, which is the tensile force along the wall in response to a pressure gradient. A model printed in vase mode is going to be one line width thick. This limits its strength when compressed without special design features – like the ribs in the wing structures. That said, the model might be a bit more resistant than one might imagine in terms of hoop stress.
Cons & When to Use It
As mentioned, Spiral vase mode is great if you’re trying to save on filament use and print time, and you don’t need particularly sturdy prints. Next are a few issues that you’ll want to go over if you’re wondering if the feature suits your needs or not.
Cons
- Reduced part strength
- Limited geometry (no internal geometry, which is especially challenging on steep overhangs)
- No top layers (though, if your part narrows to a single point, it can have a top, like a tree)
- Changes other settings in your Orca Slicer print profile, such as disabling supports and setting infill to 0
- Requires changes to time-lapse settings; it must be in the traditional mode rather than parking the nozzle
Best Use Cases
- Very large items that need to be printed quickly
- Items that have to be lightweight
- Printed parts that benefit from using hoop strength rather than either its compressive or direct tensile strength
With this out of the way, let’s look at how Spiral vase mode can be achieved in Orca Slicer.
Vase Mode in Orca Slicer
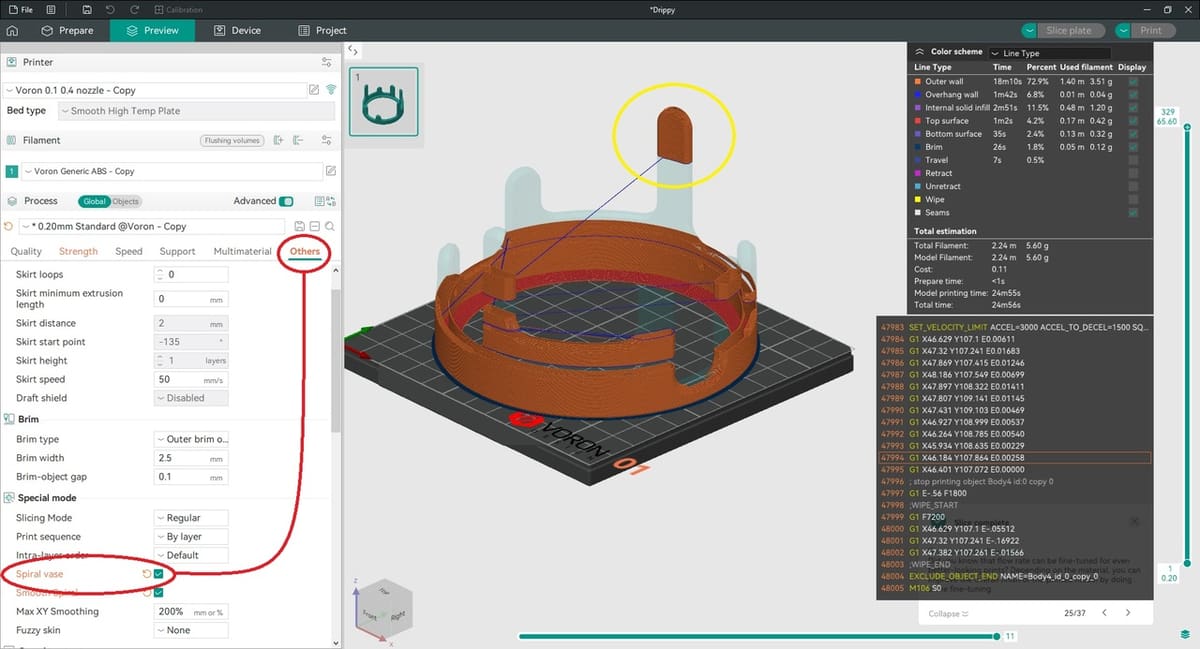
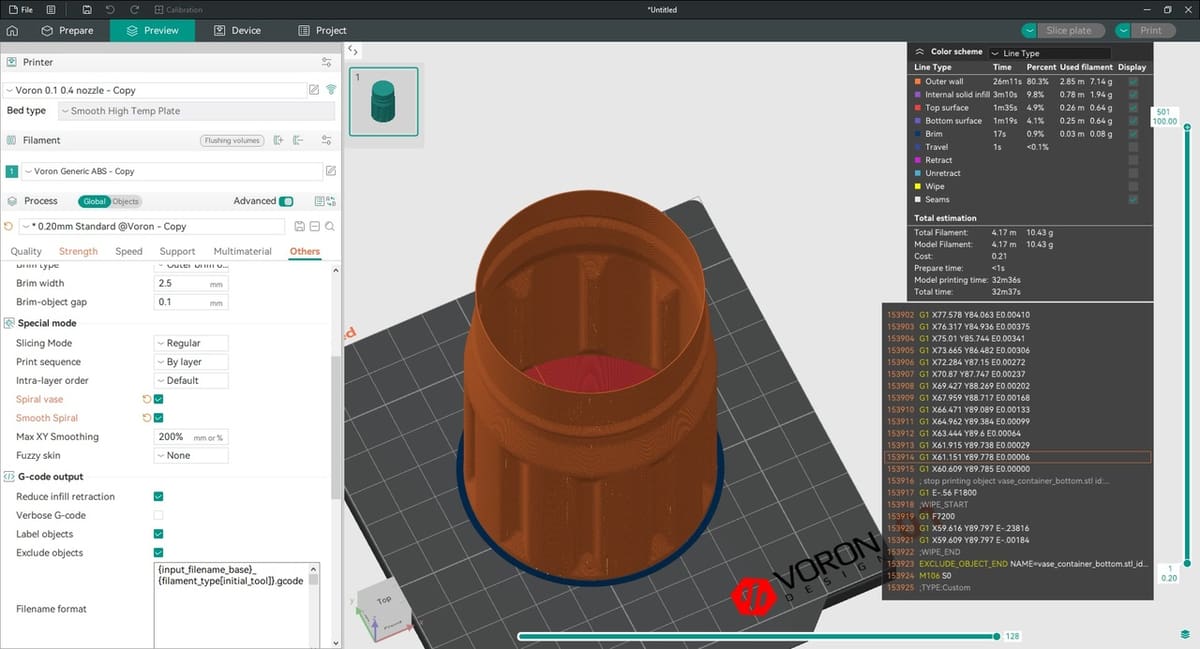
Similar to Cura and – predictably – Bambu Studio, setting Spiral vase in Orca Slicer is simple. The checkbox to enable the tool is located in the Global processes under the “Other” tab, as shown above. Checking this box will pop up a warning window that indicates changes to several settings.
These settings, which will be marked in orange, include Wall loops (narrowed down to 1), Top shell layers (changed to 0), and Sparse infill density (also changed to 0).
After applying vase mode, keep an eye out for a warning that will let you know whether the model has “floating regions” (it may be hidden under the G-code preview dialogue). If so, you’ll need to either re-orient the design so as to avoid such sections.
You should also carefully check the print preview. While Orca Slicer will warn you about floating regions, if your model has multiple peaks, it will not be printable in vase mode, but you may not receive a warning. This can be seen in the image above.
You may also notice a “Smooth Spiral” setting. This helps remove any visible seam by smoothing out the X and Y movements as the spiral moves up.
Remember that, when you turn vase mode off in Orca Slicer, you’ll have confirm that the other settings have returned to the original profile. For that reason we recommend setting up vase mode as a separate print profile rather than just turning it on and off from the check box.
Tips & Tricks
While spiral mode predominately relies on the model’s design, there are a few other areas that can be considered to ensure as successful a printing experience as possible.
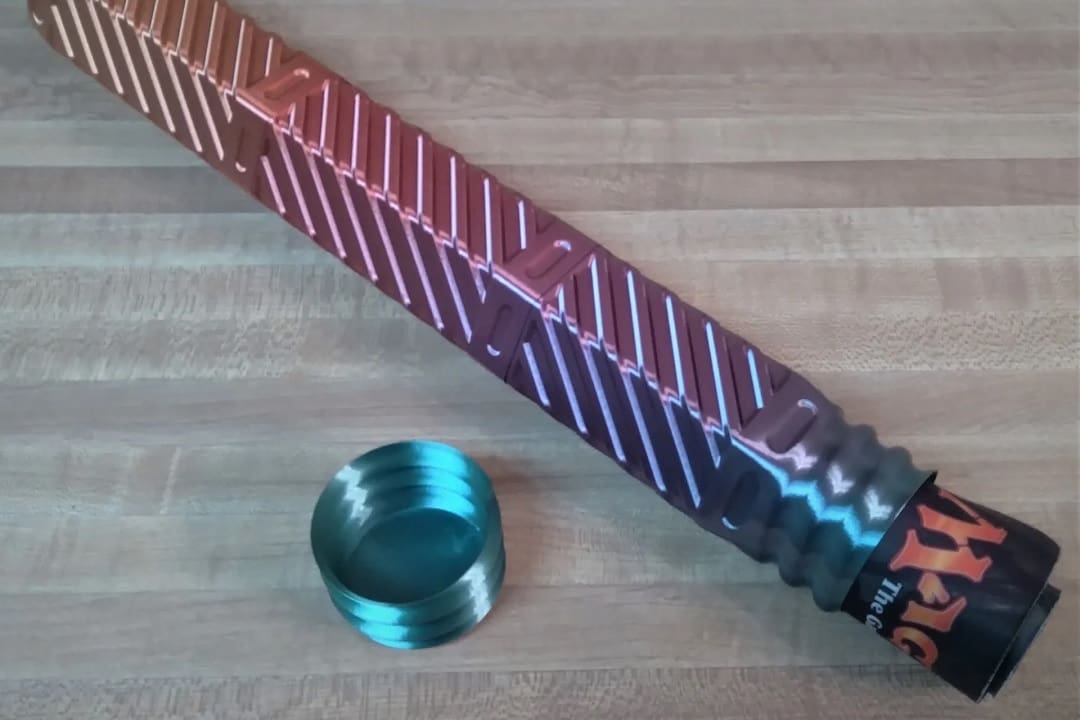
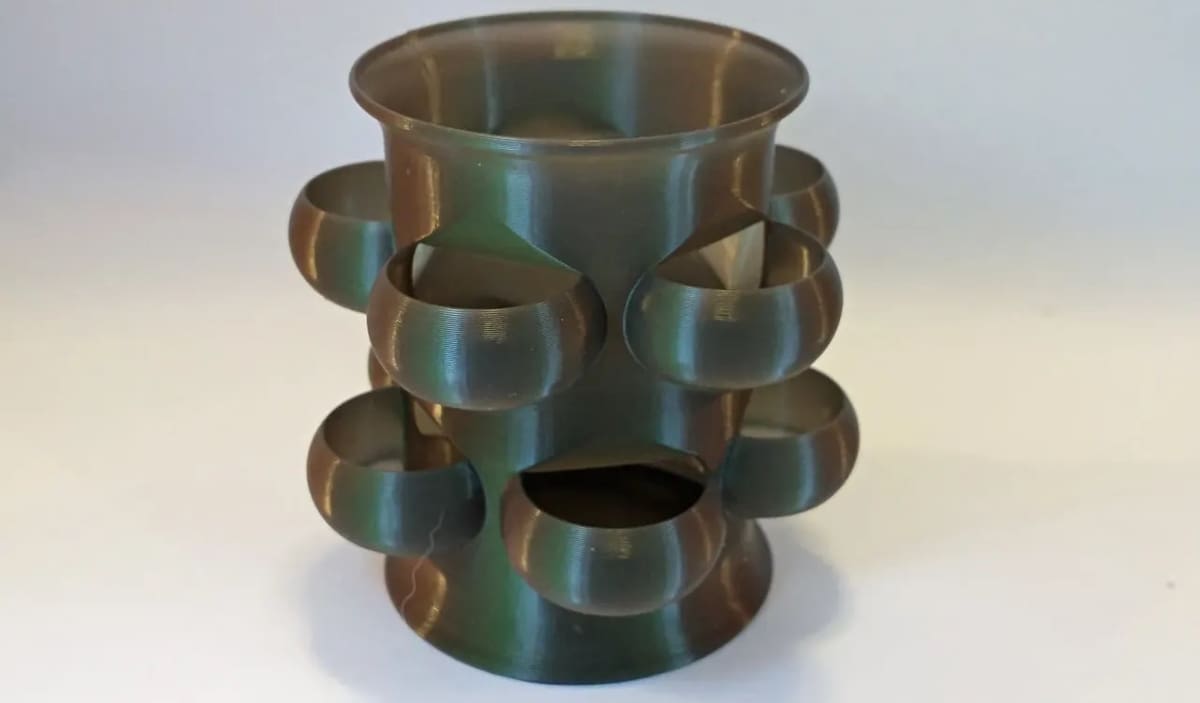
The best filaments for vase mode are those with good layer adhesion, such as TPU and PETG. However, if your vase has holes in it (like this dice tower), you’ll also need a material with good bridging ability. PLA and ABS work well here, but again, watch out for that layer adhesion.
As mentioned, there are some models that simply cannot be printed in Spiral vase mode. Anything with internal geometry is immediately out. If you look into the more intricate vase models, like this rose, all the surfaces are still external perimeters.
It sounds strange to say, but you often can’t print vase-shaped models. This is because they are models that were designed with each layer having two separate walls (inner and outer), either for improved strength or aesthetic reasons, which breaks the rules of vase mode.
There are a few other edge cases that can’t be printed, but essentially the model has to be a solid and have only one edge on every layer (no multi-spire castles here).
That being said, there are many ways to exploit the vase mode setting, like with a watering can or a dice container. In the dice container, designer Dragon used tiny gaps to enforce external perimeter on all faces of the insert. If there’s a design you like and want to see whether it works with Orca Slicer’s Spiral vase mode, slice away and the program will let you know!
License: The text of "Orca Slicer: Vase Mode – Simply Explained" by All3DP is licensed under a Creative Commons Attribution 4.0 International License.