Orca Slicer vs Bambu Studio: The Differences

Having a hard time choosing between Orca Slicer and Bambu Studio? Read on to learn about the nitty-gritty and decide which one's for you!
Since the release of its first printer, the X1C, Bambu Lab has collected quite a lot of success, and so has its slicer Bambu Studio. Although it’s based on PrusaSlicer, Bambu Studio is really different from its “parent”, since Bambu Lab has changed the UI and added new features.
Originally developed only for Bambu Lab 3D printers, this software has now extended its catalog and offers premade profiles for some of the most famous machines in the industry, such as the Creality K1, the Voron series, and more.
From this base, a new protagonist entered the slicing world to create an advanced program, perfect for expert users. SoftFever, taking Bambu Studio as the starting point, developed Orca Slicer, which is talked about a lot thanks to the unique features that it offers.
These slicers are similar, since one is a fork of the other. However, they present some differences you should know about. The best part is that you can try both and decide which works best for you because both are free to download and use. We’ll look at the latest stable versions of both programs: 1.9.2 for Bambu Studio and 2.0.0 for Orca Slicer. Read on to find out more!

System Requirements
Every time you install a new program, you should make sure that your computer meets the minimum system requirements so the software can work properly. Both Bambu Studio and Orca Slicer are available for the most popular operating systems. The only system requirements that are specified for those slicers are the following:
- Windows 10 (64-bit) or above
- MacOS 10.15 or above
When it comes to Linux, you can find the instructions on the GitHub page of Bambu Studio that helps you to compile the slicer for both Fedora and Ubuntu. For Orca Slicer, you can find the Linux AppImage to install the slicer on many OSs, such as Ubuntu, Fedora, and Linux Mint among others.
Once installed, using the programs is easy. They offer pre-installed profiles for many printers available on the market to help new users start their journey. Once you become more knowledgeable, you can leverage their most advanced feature to take your print to the next level. So let’s dive deeper into them!
UI & Layout
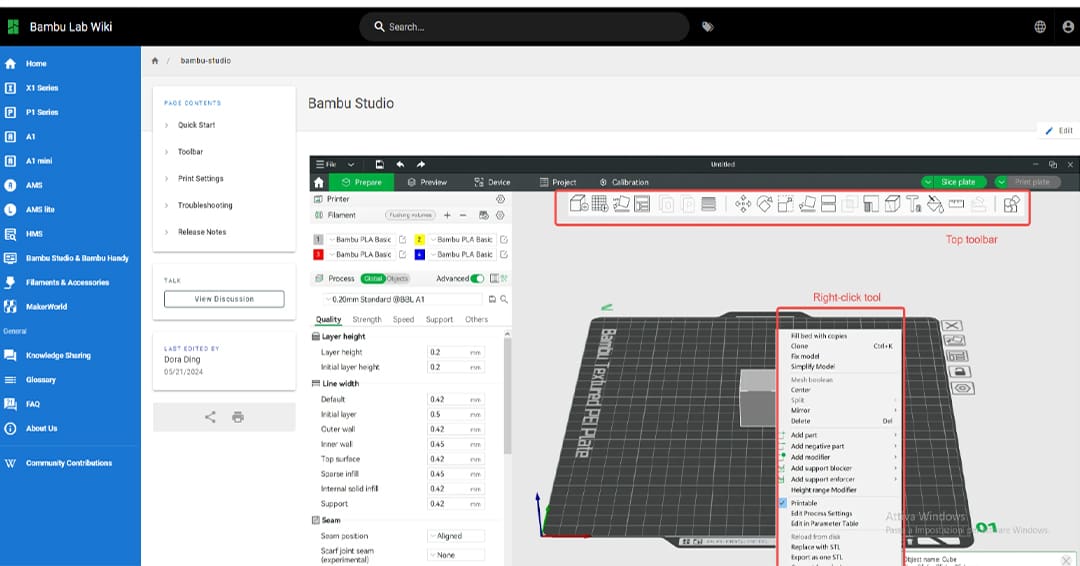
Let’s dig deeper into the topic by talking about the interface. As we have said, since Orca Slicer is a fork of Bambu Studio, there aren’t many differences in the layouts. In fact, you’ll find that many of the shared tools and settings are located in the exact same locations and have the exact same symbols. There are four tabs at the top, depending on what stage you’re in, and a top toolbar offers the main tools you’ll quickly need access to. And to the left, you’ll find the settings. So let’s take a look at the most important features that they share:
Project-Based Workflow
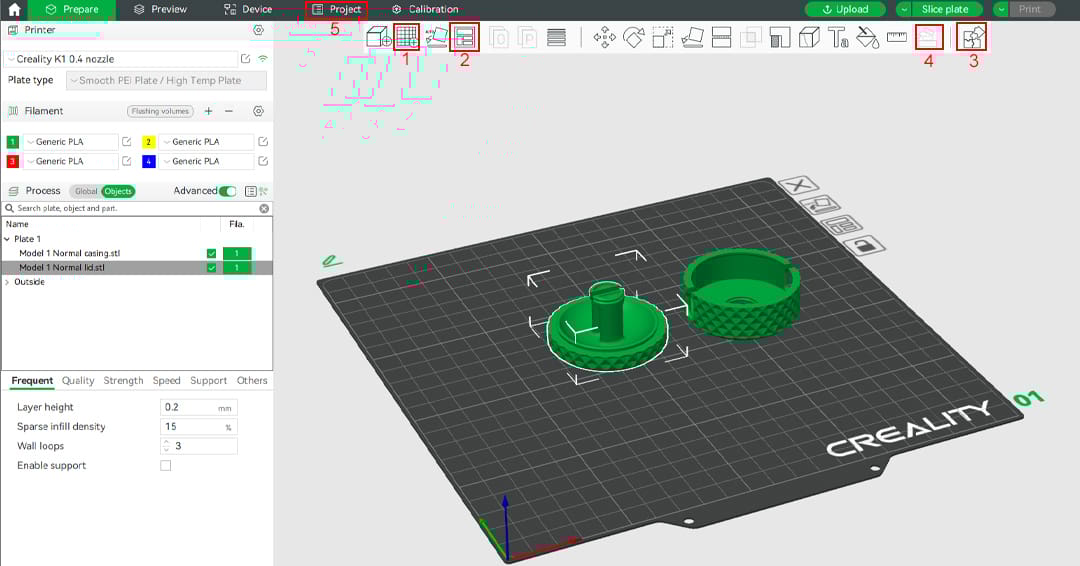
One of the most important features that differentiates Bambu Studio and Orca Slicer from other slicers is the logic behind the workflow. Both Bambu Studio and Orca Slicer have given special emphasis to projects by adding tools that ease the process for multi-part prints. For example, you can add multiple plates by clicking on the “Add Plate” (1) option. With this feature, Bambu Studio and Orca Slicer add a plate to the workspace so you can easily organize the project’s parts and ensure you’re not missing any.
If you’re not sure about how to place them, you can let the software help you by using the “Arrange all objects” tool (2). The program will automatically lay out your pieces, adding plates if necessary. Then, you can slice all plates to obtain a fast preview of how much filament and time the project would take.
If you want to get a final check before clicking on “Print”, you can take advantage of the “Assembly view” (3). With this feature, the slicer tries to understand how the final object will be once it’s finished. Then, it builds the object so you can check that all parts have been imported and fit together as they should.
Bambu Studio has also introduced a “Assemble” tool (4), which lets you check the fit only of the components that you choose. This is really convenient to speed up the process by checking only the parts that involve tolerances.
When proceeding with the project, you can keep track of it, and add notes, images, links, and additional material in the “Project” tab (5). If you’re working on a complicated design, this sort of whiteboard can massively help you.
Settings Categories
Another characteristic of Bambu Studio and Orca Slicer is the settings’ organization. You can access all the parameters you need on the left panel. Both software allow you to hide this bar with the shortcut “Shift + Tab” to have a clearer view of the objects you’re workin.g with. In Orca Slicer, you can also do it by clicking on the “Collapse sidebar” command.
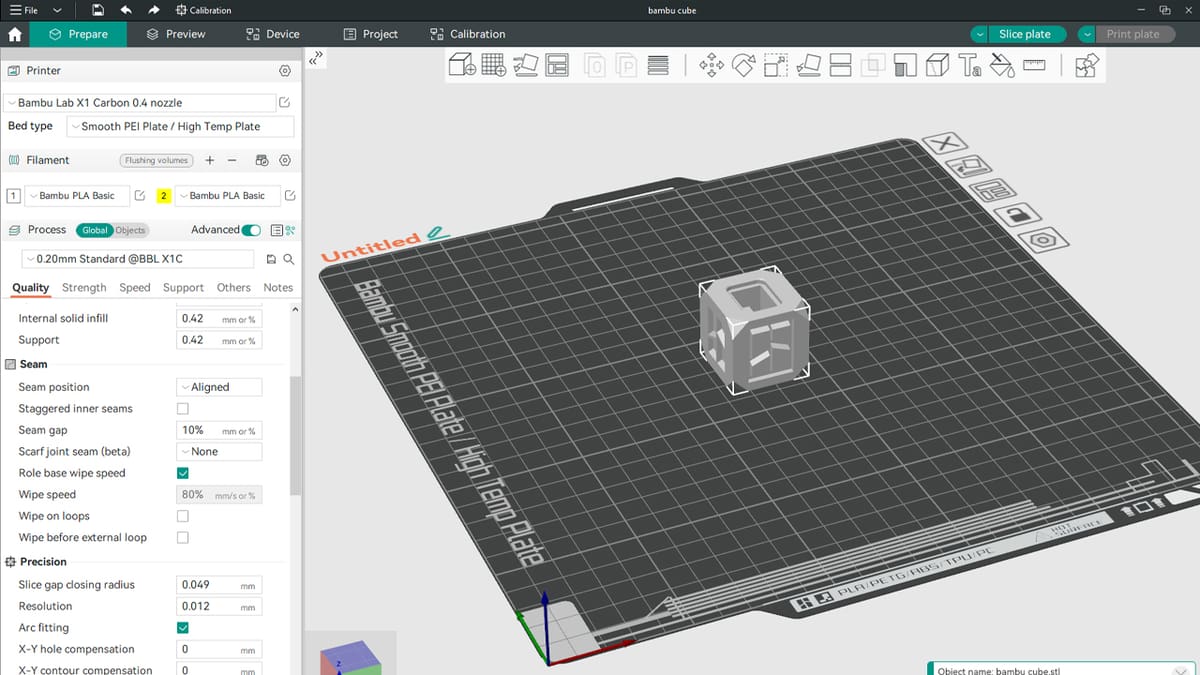
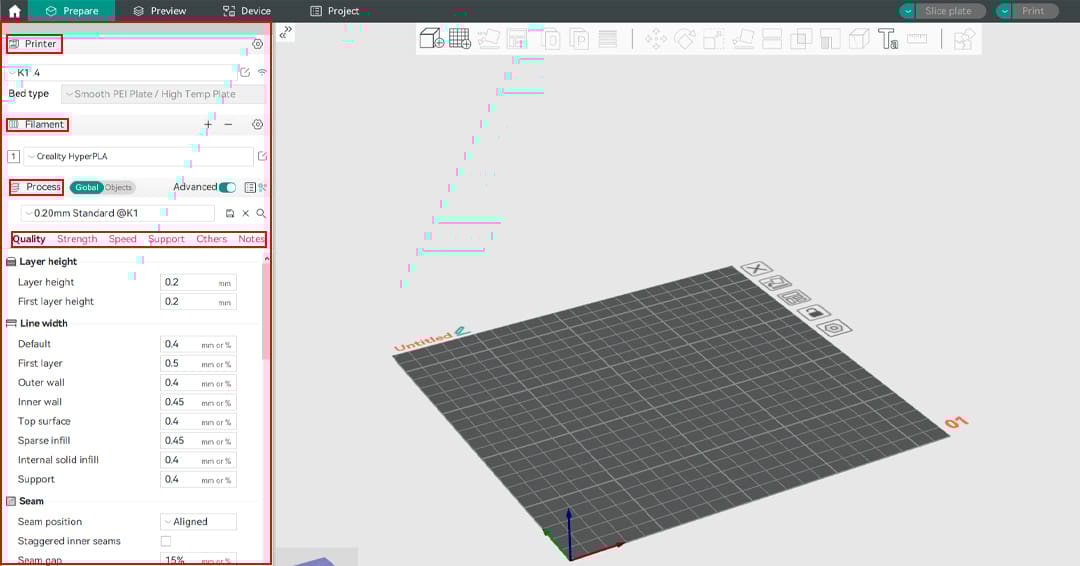
On the sidebar, you can find three blocks: “Printer”, “Filament”, and “Process”. The names speak for themselves. Under the “Printer” tab, you can access the machine settings. The same goes for the “Filament” sections, while in the “Process” window, you can find six other subsections.
The “Printer” section is the simplest one. You can choose the machine that you’re using from the drop-down menu, modify the profile by clicking on “Edit preset”, and add a machine or a connection. The filament block is similar and lets you add presets, modify them, and add spools for multicolor and multi-material printing.
The “Process” space is the biggest one, since it offers all the items that you can imagine to tweak your print settings. You can enable or disable the “Advanced” view based on your experience level. You can also compare the settings of different objects if you happen to have multiple parts with different settings. This is possible by clicking on “View all objects settings”, near the “Compare presets” tool, which lets you compare the different profiles you have created in the program to find which best suits the imported model.
The main difference that Bambu Studio and Orca Slicer present compared to other slicers is the organization of the settings. Usually, the items are listed based on features. Typically, you’re likely to see categories like walls, infill, and support in the most famous software, such as PrusaSlicer or UltiMaker Cura. Bambu Lab and SoftFever have decided to add a twist to it by dividing the settings based on their main influence. For example, the infill can be found under the “Strength” tab because it mainly affects the resistance of the part. This is great for beginners who are learning how additive manufacturing works.
Tips
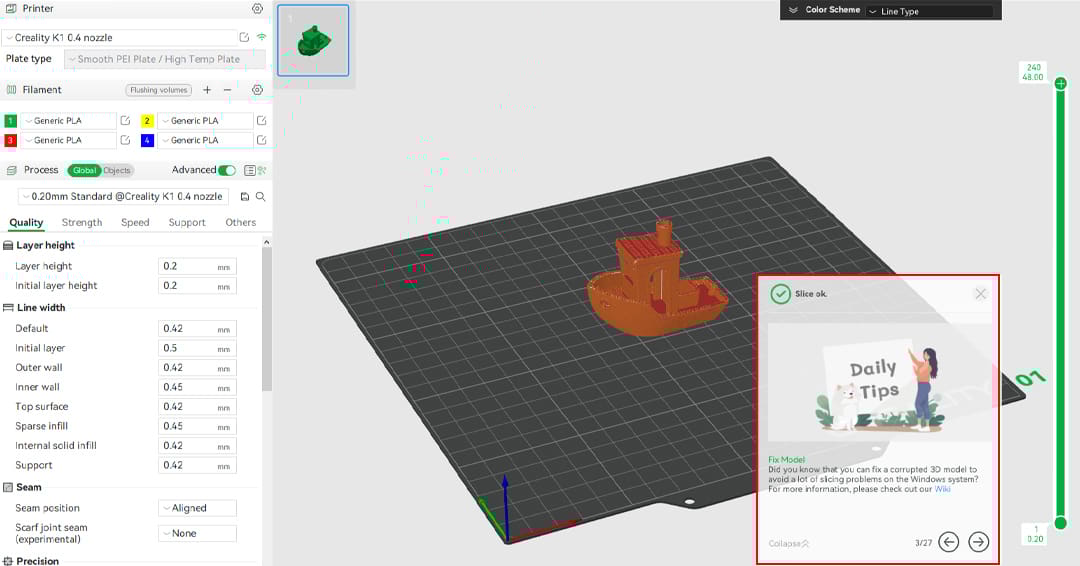
Especially if you’re a beginner, you need to increase your slicer knowledge. To do that, you can utilize the daily tips of both programs.
Bambu Studio and Orca Slicer offer the possibility to enable daily tips, which are pop-up windows that will give all kinds of suggestions regarding the slicing process. In Bambu Studio, they’re always enabled. To activate them in Orca Slicer, enter the “Preferences” menu (shortcut “Ctrl + P”) and tick “Show the ‘Tip of the day’ notification after start”.
When a tip pops up, usually there’s a brief explanation of the suggestion and a link to the corresponding guide. That is especially true for Bambu Studio, which features an entire manual of the slicer. You can also surf between tips with the arrows.
Furthermore, if there’s something wrong with the model, the programs will let you know after the slicing process with a warning. They’ll also suggest how to fix the problem so you can adjust the parameters before printing.
Features & Functions
Now that we’re familiar with the interface, let’s talk about the features that those slicers offer. Since Orca Slicer is a fork of Bambu Studio, there are some common traits but also some differences.
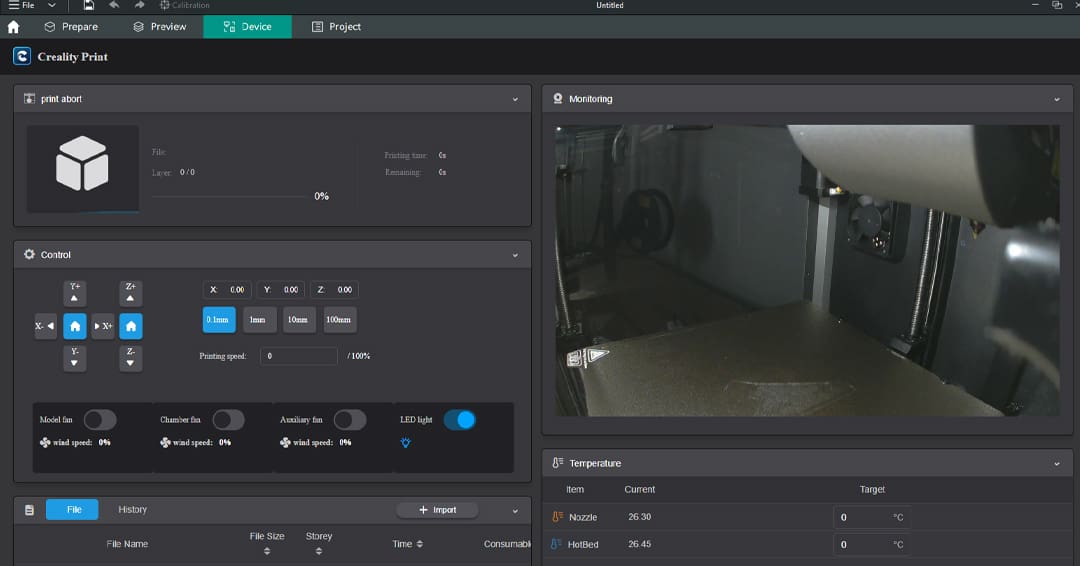
Device Tab
More and more printers nowadays have an online interface. Since the increase in popularity, Klipper is becoming more and more common on stock printers, but we can also access our machines online via OctoPrint, PrusaConnect, and others. Both Orca Slicer and Bambu Studio allow you to connect directly to the printer, without needing a browser to check on it.
Here’s how you do it:
- Click on the “Connection” icon in the “Printer” section. A window will pop up to let you add a physical printer.
- Select the “Host Type” from the ones that are listed.
- Write the address at which your machine can be found in the “Hostname, IP or URL” line and check if the software has found it with the “Test” feature.
If everything goes as planned, the software will tell you that the connection works properly. If you’re not sure about the IP address of your machine, you can use the “Browse” tool that will scan the devices on your network to find your machine.
Now that Bambu Studio and Orca Slicer can communicate with your machine, you can move to the “Device” tab to access your printer’s online interface, and you can conveniently send files directly from the slicer to the machine.
Toolbar
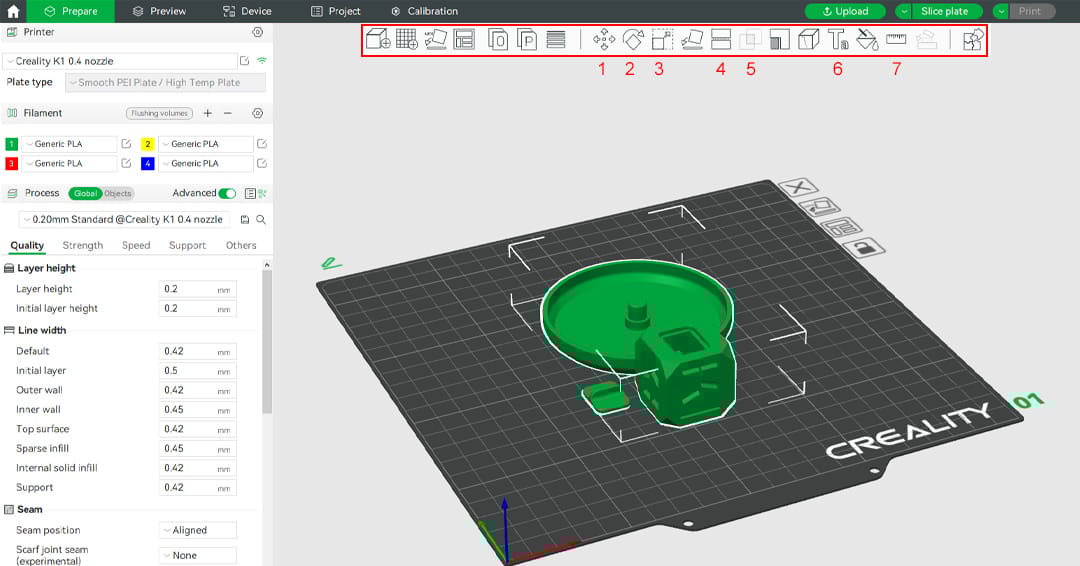
Bambu Studio and Orca Slicer offer some great tools that are extremely helpful when preparing a part. You can access those tools from the toolbar that is on the top of the workspace. Here, you can find the classic commands, such as “Move” (1), “Rotate” (2), and “Scale” (3), but also some new ones.
Slicers are becoming more sophisticated, providing features that were available only on 3D modeling software before. Modifying your model is now really simple. For example, you can cut parts with the cut tool (4). This lets you divide your parts to print them more easily. You can decide at which height and angle the plane will cut the model, and you can even add connectors to assemble the pieces more easily.
But that’s not it! You can add holes or pins with the “Mesh Boolean” feature (5). You can either join parts or perform a cut from two shapes.
Additionally, there’s the possibility of customizing your parts with the “Text shape” command (6). With this feature, you can emboss, deboss, or create a standalone model of a text. This can be really useful to add a sign, a label to differentiate prints or a decoration.
Finally, you can also check your model dimensions with the “Measure” tool (7). This is particularly useful when you have downloaded a part online and you want to make sure that it suits your needs.
Multicolor Printing
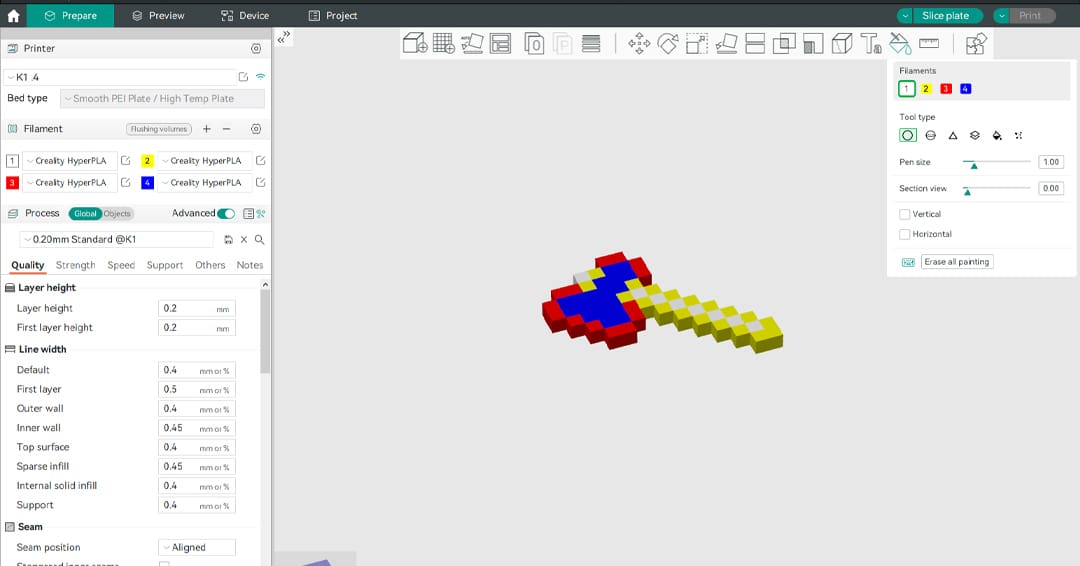
The Bambu Lab AMS has made multicolor printing much more popular and accessible. But to work properly, a multicolor printer or multicolor unit needs a good slicer. Here enter both Bambu Studio and Orca Slicer.
Their “Color painting” tools allow you to easily prepare a multicolor print by painting the model exactly how you want it. It will only appear once you’ve added more filaments to the settings. You can leverage the different types and dimensions of brushes to paint the object where needed. You can also take advantage of the section view to reach the parts that are hidden, and you can also activate the “Vertical” or “Horizontal” option if you need some straight lines.
Furthermore, you have the possibility of tweaking the flushing volumes to optimize the filament usage for the purge tower. To do it, click on the “Flushing volumes” setting of the “Filament” section. A window will pop up, then you’ll be able to insert custom values for color changing.
Finally, if you own an AMS, you can even synchronize the filament list with the slicer by clicking on “Synchronize filament list from AMS”. The software will automatically recognize the AMS connected to the printer and will download the filament data. Keep in mind that to use this feature, you’ll need to connect your Bambu Lab machine to the slicer.
Premade Profiles
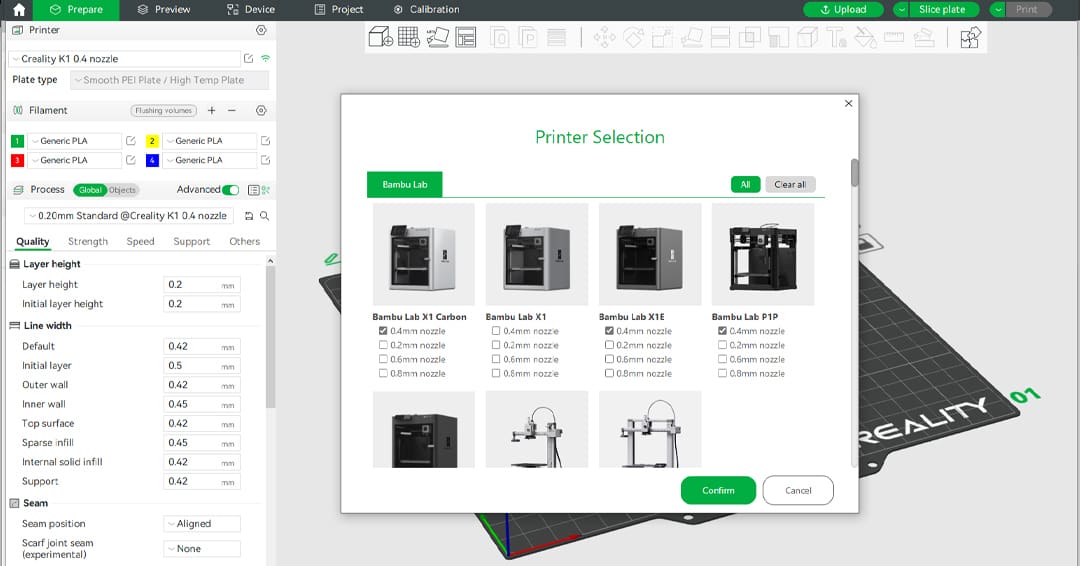
As we said at the beginning, Bambu Studio was born only for Bambu Lab printers but is now offering premade profiles for third-party machines, such as Creality printers, Prusa ones, and Vorons, among others. That’s without a doubt a great initiative by Bambu Lab.
Orca Slicer is a community project, and many users have collaborated to create premade profiles for a wider variety of machines. There’s a pretty high chance that your machine will be on the Orca Slicer “Printer selection” list.
Furthermore, there are lots of premade profiles for Orca Slicer that you find on 3D model repositories such as Printables and Thingiverse. For this reason, generally speaking, Bambu Studio is arguably best suited for Bambu Lab users, while Orca Slicer is perfect for those who own other machines. Additionally, as some Reddit users have noted, Orca Slicer profiles seem to be better tuned compared to Bambu Studio ones, thanks to the community’s contributions.
Unique Features
Bambu Studio made a big leap from PrusaSlicer by revolutionizing the interface, improving multicolor slicing, and creating a project-oriented software, but now it’s Orca Slicer’s time to innovate. The community-driven program introduces unique features with every release, that make it perfect for those who like to experiment.
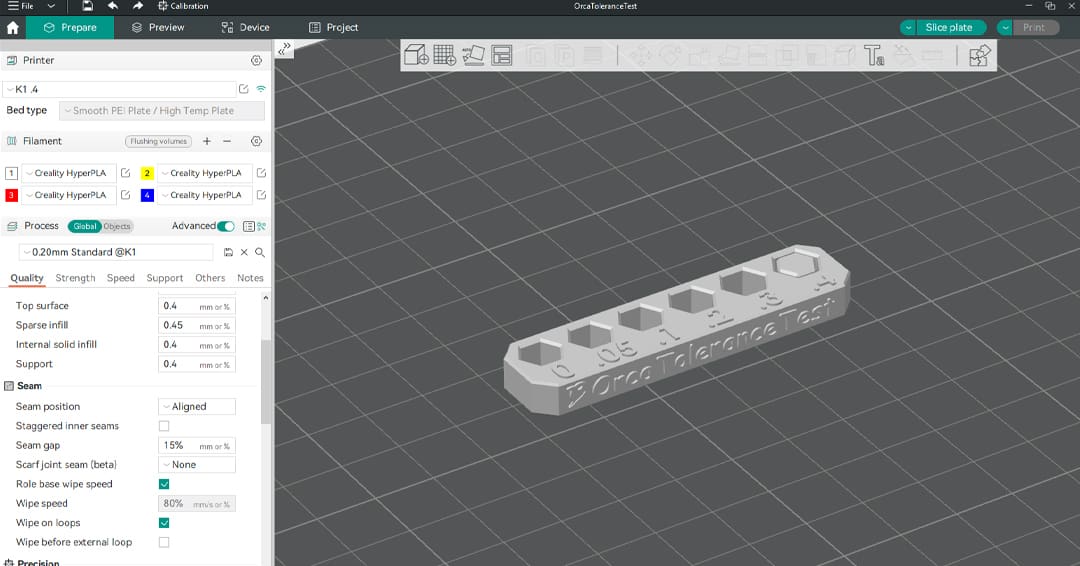
One brand-new innovation is the scarf joint, which is meant to hep with tricky seams. Although Bambu Studio has now introduced it too, Orca Slicer was the first to navigate those waters. The same goes for the “Calibration” section: Bambu Studio is trying to catch up because it’s one of the most appreciated features of Orca Slicer.
Nevertheless, Orca Slicer keeps offering some tools that Bambu Studio can’t brag about. For example, “Make overhang printable” is a sophisticated feature that only Orca Slicer can boast. This tool modify the geometry of the piece to reduce as much as possible the need for supports.
User Experience
Since they’re so similar, the user experience doesn’t differ much between the two slicers. They’re both packed with interesting features that help you with the slicing process, and they remain organized despite the impressive list of settings. Additionally, if you’re just starting, you can disable the “Advanced” view to access only the really important items.
The workflow in the two programs is also really similar: You import a model, tweak the settings if needed, slice it, and load the file directly from the slicer to the machine thanks to the “Printer connection”. Then, you can check on your printer from the “Device” tab. Bambu Studio has recently further simplified the process because you can now import models directly from MakerWorld (Bambu Lab’s model repository) to Bambu Studio.
As some Reddit users suggest, if you own a Bambu Lab machine, you should definitely use Bambu Studio for at least a couple of weeks, since the profiles are highly optimized for Bambu Lab printers, and if you feel the need, try Orca Slicer to tweak further the printing settings with the help of the “Calibration” section. On the other hand, if you don’t own a Bambu Lab machine, you have a higher chance of finding a profile for your printer in Orca Slicer rather than Bambu Studio.
Company & Community Support
Since Bambu Studio is maintained by a big company and Orca Slicer is developed by the community, the support that you can find is different. Bambu Lab has a FAQ page, an official wiki, a YouTube channel, and a community forum where users can search and find resolutions to common issues. If you don’t find what you need among these resources, you can write a ticket to the online technical support. Furthermore, if you’re a business using Bambu Lab products, you can also access a specific customer portal for support. You can also check out the BambuLab subreddit, although there’s no such option that caters specifically to Bambu Studio.
On the other hand, Orca Slicer support isn’t as extensive as Bambu Studio, but it’s still quite good. You can ask questions to the community on the dedicated Discord group, on the GitHub page in the “Discussions” section, or, if you’re more familiar with Reddit, you can check out the Orca Slicer subreddit. The community behind Orca Slicer is also working on a manual, which you can find in the wiki section of the dedicated GitHub.
Final Thoughts
As you can see from this comparison, Bambu Studio and Orca Slicer are both great slicers. If you own a Bambu Lab machine, you should definitely use Bambu Studio to begin printing with it, but you can then try Orca Slicer if you desire to tweak the settings further. On the other hand, if you own machines from other companies, you won’t have difficulty finding a profile for them in Orca Slicer.
Both slicers can be used by beginner and intermediate users, but if you’re an advanced maker, you can go straight to Orca Slicer and take advantage of all the settings that it provides. If you’re a maker who loves testing new tools as soon as they come out – for example, scarf joints – you’ll love Orca Slicer. Plus, if you own different machines from different brands, it’s convenient to have them in one place.
License: The text of "Orca Slicer vs Bambu Studio: The Differences" by All3DP is licensed under a Creative Commons Attribution 4.0 International License.