
Orca Slicer vs Cura: The Differences

It's Orca Slicer vs Cura: A brand-new slicer faces off against the arguably most popular and known option. Let's compare them!
When 3D printing, the slicer is a fundamental component of the process because it highly impacts print results. Machine improvement has gone hand-in-hand with software development, allowing us to achieve greater and greater results. So, let’s take a look at two of the most appreciated slicers in the 3D printing community: UltiMaker Cura and Orca Slicer. They’re both free but are also pretty different, so you might be wondering which will suit your workflow best.
One of the most popular slicers in the 3D printing world is without a doubt UltiMaker Cura. Released in 2014, this software has 10 years of development on its back. For this reason, Cura is one of the most suggested slicers for beginners: it’s a stable program that’s continuously improved by the company behind it, UltiMaker.
On the other hand of the spectrum, there’s Orca Slicer. Developed by the community, it isn’t even two years old, yet its popularity and use have skyrocketed over a short period of time, and for good reason. In fact, Orca Slicer is one of the most advanced slicers that you can use, with a long list of unique features.
Although Orca Slicer is a fork of Bambu Studio, which happens to be a fork of PrusaSlicer, this software has set itself apart from them and implemented some tools that makers love. This slicer is definitely worth a try, especially for advanced users.
Now, let’s dive deeper into the topic!

System Requirements

No matter which slicer you go for, it’s important to ensure that your computer meets the minimum system requirements so the program can work properly.
For Cura, you’ll need at least 550 MB of available hard disk space and an Intel Core 2 or AMD Athlon 64 with at least 4 GB of RAM, as well as support for OpenGL 4.1. Although Cura will work with these specs, UltiMaker recommends 600 MB available hard disk space and Intel Core i3 or AMD Athlon 64 with 8 GB of RAM.
On the other hand, the exact technical requirements for Orca Slicer aren’t specified, but the software is available for the most popular operating systems, including Windows, MacOS, and Linux. You can check detailed installation instructions for this slicer on GitHub. The process is as simple as finding the right folder for your device and following SoftFever’s guide.
UI & Layout

Cura’s and Orca Slicer’s interfaces have common traits and differences. Cura was designed to offer a clean interface where beginners can easily get their bearings, while Orca Slicer was meant to offer the most tools possible. Let’s dive deeper into it.
UltiMaker Cura
Cura offers an intuitive environment to ease the process for newcomers. It’s easy to learn thanks to key components of its organization:
- Beginner-friendly interface: Cura features a clean layout with a work area for the model and drop-down menus to access profile settings. This way, items are organized in categories and can be hidden when unnecessary, and you can also search for specific settings to make things faster.
- Customizable menus: Cura lets you personalize the items of the prints settings list so you can always reach the ones you need the most. Furthermore, you can also choose to use one of the premade layouts (Basic, Advanced, Expert), based on experience level.
- Visual hints: When selecting a model, Cura automatically enables the manipulation panel on the left, letting you know how you can modify your file (e.g. move, scale, rotate, and more). Furthermore, when tweaking your settings, Cura will highlight in yellow the values that seem out of range, helping you obtain great prints.
- Extensions: Cura offers many extensions, which you can find on the top menu, such as time-lapse creations or multicolor printing (“Post Process > Modify G-Code”). You can also add external extensions, like OctoPi, which allows you to upload prints directly from the slicer to your machine.
Orca Slicer
Although Orca Slicer also offers a clean layout, the interface is more complex than Cura’s and is meant to give you all the most advanced instruments that you may need. For this reason, the most evident characteristics of this slicer are:
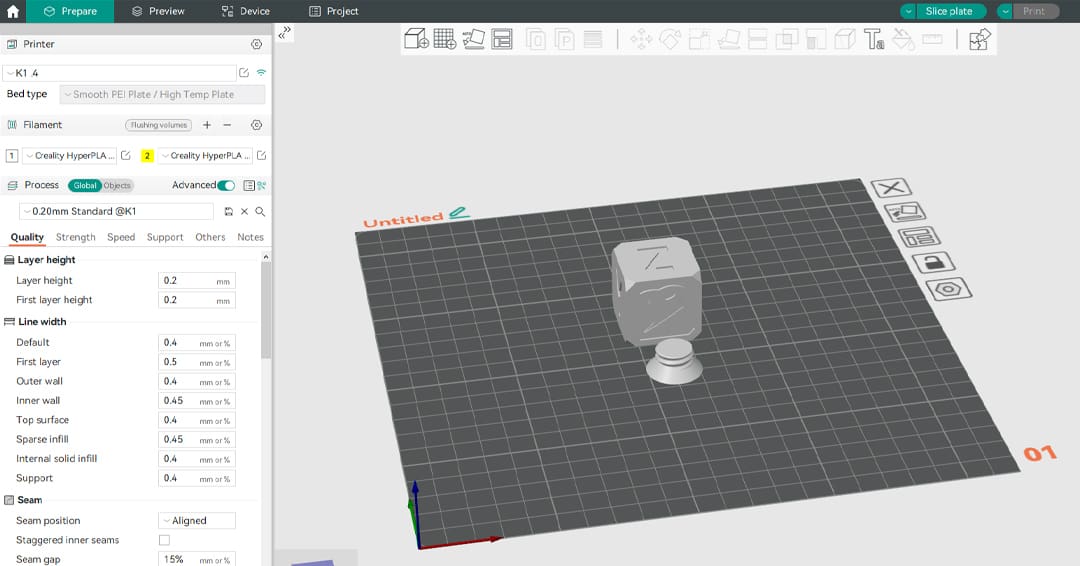
- Setting groups: Orca Slicer and Bambu Studio are the only slicers that offer this setting subdivision. The print settings are organized based on the aspects of the print they influence the most. This kind of organization is helpful to beginners because it allows them to understand which settings are most important for strength, quality, or speed.
- Project-oriented interface: Orca Slicer offers lots of instruments that will greatly help you with your bigger projects. The possibility to add multiple plates, the “Arrange” tool, the “Assembly view”, and the “Project” tab will come in handy with multi-part prints.
- Pop-up suggestions: To help you improve in 3D printing and increase your knowledge, Orca Slicer creates pop-up windows in the right corner of the program with different suggestions. Furthermore, if the software notices potential problems with the print after slicing, it will let you know and recommend a solution.
- Smart G-code preview: Once you have sliced your model, you’ll be automatically redirected to the “Preview” tab. Here you can visually check the G-code by moving the arrows on the right and bottom sliders, but you can also inspect the lines of code thanks to the window that reports the G-code lines.
Features & Functions
While in general they might appear to be pretty similar, Cura and Orca Slicer are different, and each offers distinctive tools that make them stand apart from the other. Next, we’ll compare the standout features in the latest stable releases of the software (Cura 5.7.1 and Orca Slicer 2.0.0). Let’s see what they offer!
UltiMaker Cura
- 3rd-party support: Cura offers tons of premade profiles that make it a perfect slicer for beginners. Furthermore, if your machine comes with a printing profile, there’s a high chance that it was created for Cura specifically. But if you can’t find your printer’s model, you can create a custom profile and tweak it as necessary. While Orca Slicer also offers premade profiles, it’s nowhere near the default options that Cura has.
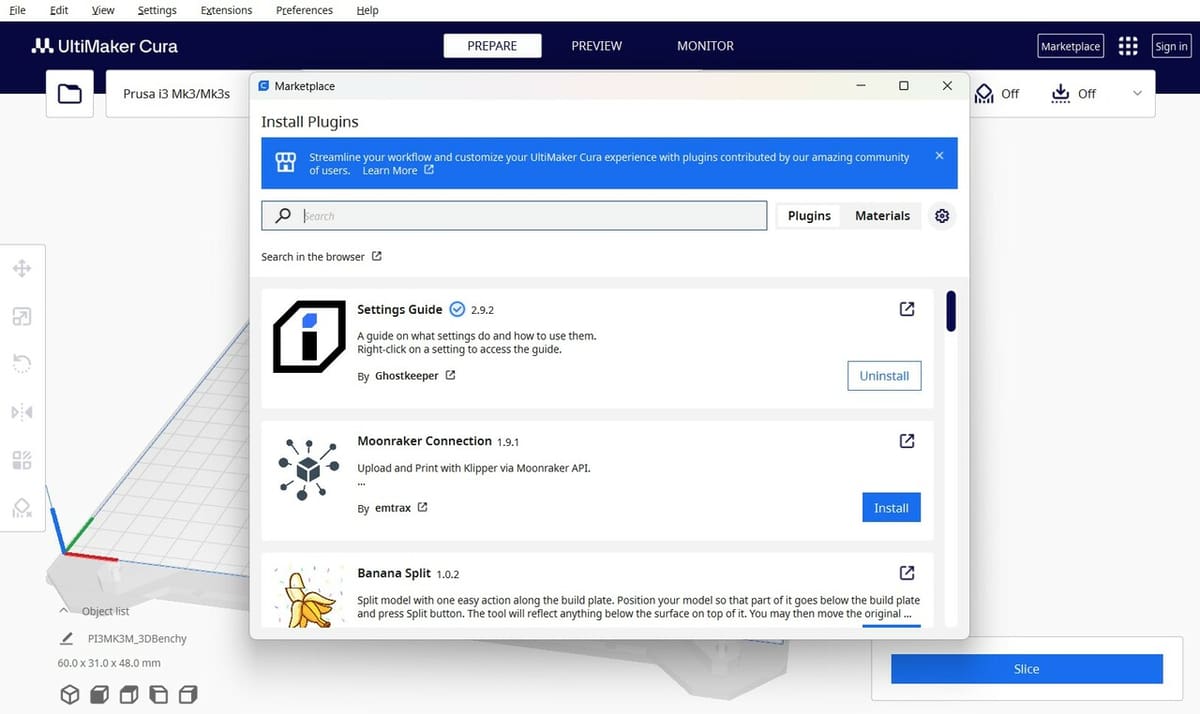
- Marketplace: In the Marketplace, you can find many plug-ins that you can easily add to Cura to enhance your experience. Plug-ins are features that expand the capabilities of your software. Orca Slicer doesn’t offer any such add-ons at the moment, while you can choose from a long list of options with Cura.
- Custom scripts: Under “Extensions > Post Processing”, you can add custom scripts to your G-code. There are many options to choose from. For example, you can add pauses for color changes or to insert items like magnets with the “Pause at height” script.
- Custom print settings menu: As we have mentioned previously, in addition to the premade menu modes, you can create your own list of settings, tailoring it to your needs. To do that, go to “Settings > Configure settings visibility…” or click on the three lines from the Print settings menu and select “Manage Setting Visibility…”.
- Thingiverse implementation: Thingiverse is one of the biggest model repositories and it’s also developed by UltiMaker, which is why, as of the release of Cura 5.7.0, the two are connected. When navigating on Thingiverse, if you find a model that you like, under the “Files” tab, next to the download icon of each file you can find the Cura symbol, which will make the file automatically open in Cura, if you have it downloaded on your PC.
Orca Slicer
- Calibration: One of the most appreciated tools offered by Orca Slicer relates to calibration. With it, a long list of calibration models are included by default that allow you to tweak your profile to get the most out of your printer. Don’t worry if you’re not an expert yet, the Orca Slicer team has got you covered with a clear guide that helps in the calibration process. You can access it by clicking on “Calibration > Tutorial”.
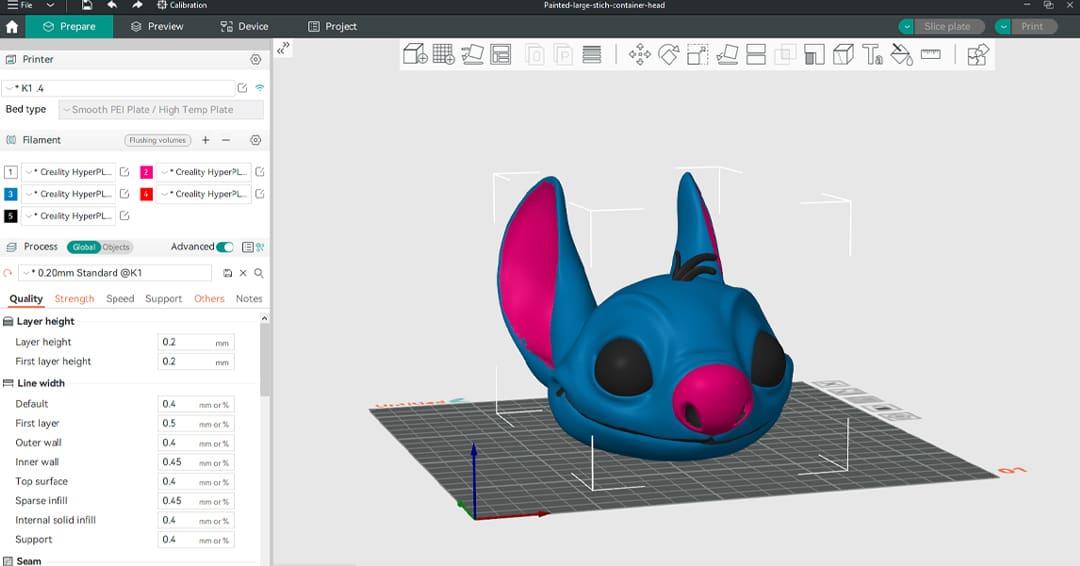
- Multicolor: Being a fork of Bambu Studio, Orca Slicer has inherited the instruments dedicated to multicolor prints. It’s easy to add more filaments and paint the desired areas with different colors. You can set the number of spools by clicking on the plus and minus icons of the Filament section. Once you have set the right colors and materials for each slot, you can begin painting the model as you like by clicking ‘N’ or selecting “Color painting” in the top menu.
- Unique tools: Many users have moved to Orca Slicer because of the tools that it offers that no other slicer can claim, such as mouse ears or the brand-new scarf joint. Additionally, Orca Slicer offers some tools that Cura misses, like support painting.
- Project workflow: As we hinted at before, Orca Slicer offers numerous tools that make organizing projects a breeze, such as the possibility of adding multiple plates and arranging the different pieces with the top menu tool “Arrange all objects” (‘A’). But that’s not all! The “Assembly View” option (right of the top menu) lets you check that the pieces will fit together, and under the “Project” tab, you can collect all kinds of information regarding your project.
- CAD features: Inspired by PrusaSlicer, Orca Slicer provides some tools that let you skip CAD design. From negative parts, which allow you to perform a cut in the piece without a Boolean operation, and modifiers, which let you add cool effects to your piece in a matter of seconds, Orca Slicer is clearly more than just a slicer.
User Experience

Both slicers are loaded with interesting and useful features, and while they’re still well-organized, Cura maintains a cleaner interface that can help new users. Because of three premade settings filtering options – Basic, Advanced, and Expert – makers can have a simpler or more detailed list of settings, while Orca Slicer offers only two options (enabling and disabling the “Advanced” setting), which might just make Cura friendlier for beginners.
Furthermore, as noted by a Reddit user, one of Cura’s highlights is the premade printer profiles. The long list and the high quality of the profiles can be really helpful when getting the hang of a new machine. That’s not to say that Orca Slicer doesn’t have printer presets – there’s just more variety in Cura (over 440 vs. around 135).
On the other hand, it’s worth noting that, being a fork of Bambu Studio, Orca Slicer is better suited for Bambu Lab printer owners (at time of writing, there are no Bambu Lab presets in Cura). For the same reason, Orca Slicer is also a breeze when working with multicolor prints, so if you own an IDEX machine or use a multicolor unit, Cura might not be the right choice.
In any case, Orca Slicer can be used later to take the quality to the next level, thanks to the calibration tools that it offers.
Company & Community Support

Both slicers are open source, but since their origins are so different, their supports are different.
Cura is much older than Orca Slicer, and it’s developed by a company rather than a small community. For this reason, you can find official resources for Cura both on UltiMaker’s YouTube channel and on the UltiMaker forum. You can access UltiMaker support directly from the software by clicking on the square icon at the top right of the UI and selecting “UltiMaker support”.
Furthermore, since Cura has been widely used for premade profiles from 3rd party machine manufacturers, you can also find brief guides of the software on different printer companies’ websites.
That’s not to say that you’re on your own if you’re working with Orca Slicer. You can find support from the community on the dedicated Discord group, on the GitHub page in the “Discussions” section, or, if you’re more familiar with Reddit, you can check out the Orca Slicer subreddit.
Final Thoughts
So which is better for you? The answer is, “it depends”.
As we have seen in this comparison, both slicers are valid options and have their pros and cons. Although they are both a good choice for beginners and advanced users, Cura might be more appropriate for those who are newer to the 3D printing world thanks to its intuitive interface.
On the other hand, Orca Slicer is meant for more expert users who can greatly benefit from the wide list of settings and tools that this slicer offers, and who are willing to spend some time tweaking the profiles to get the best print quality possible. For a big project that involves printing various parts or having a clear workflow that includes using multiple build plates, Orca Slicer would be the better choice.
The major advantage of Cura is its longer presence in the 3D printing landscape. There are lots of guides and community members that can help you. Orca Slicer is relatively new but the team behind it has proven to be determined to implement more and more features that will change the 3D printing game from the software side.
License: The text of "Orca Slicer vs Cura: The Differences" by All3DP is licensed under a Creative Commons Attribution 4.0 International License.