
Overclock Your Raspberry Pi 4: All You Need to Know

Overclocking is a simple but not always safe way to get more out of a processor. Read on to learn how to overclock your Raspberry Pi 4!
Around the Clock

Overclocking is a simple concept that involves running a CPU outside of the operational envelope specified by the chip manufacturer. Every electronic component is designed to operate in specific conditions, such as within ambient and internal temperature ranges as well as at particular voltages and currents.
In each specified condition, there’s usually an upper and lower limit. For example, most integrated circuits are qualified for a “commercial” temperature range of 0 to 70 °C ambient, whereas the “military” temperature range is much wider: -55 to 125 °C.
The obvious motivation for overclocking is that it offers an easy means of wringing more computational power from a CPU at no additional cost. Other reasons could include that it’s a hobby or a means to experiment by pushing the limits. At the same time, overclocking also increases the chip temperature.
In this article, we’ll look at how to use this method on a Raspberry Pi 4. But first, let’s review some background information on clocks and CPUs.

Clocks in Digital Electronics

Practically all modern CPUs and microcontrollers are based on synchronous circuitry. This means that a single “clock signal” controls the timing of different operations inside the silicon chip (for example, moving data from one location to another).
How Clock Signals Work
Clock signals are periodic square waves, where the signal voltage repeatedly switches between two values: near zero (or ground) and a positive voltage near the supply voltage.
Depending on the chip architecture and implementation, several clock cycles may be needed to execute an instruction. For example, some variants of the venerable 8051 microcontroller need 12 clock cycles to multiply two numbers. On the other hand, a “superscalar” CPU manages several instructions in a single clock cycle. Be that as it may, increasing the clock frequency (also called clock speed) always makes everything go faster.
Modern CPUs usually include several clocks and clock frequencies, which are derived from one master clock by various means. This is the reason why clock frequencies can be adjusted simply by writing data into control registers.
In a typical CPU, each subsystem normally runs at the lowest practical speed in order to minimize the overall power consumption. In a Raspberry Pi, the CPU core runs at a standard clock frequency of 1,500 MHz, whereas the graphics processor only runs at one-third of that speed. Both clocks can be adjusted separately.
A Bit of History
Overclocking started nearly 40 years ago, in the 1980s, when PCs were based on Intel and AMD 8086 and 8088 CPU chips. These early CPUs didn’t have any built-in facilities for adjusting the clock frequency. Overclocking could only be achieved by swapping the clock crystal on the motherboard, a procedure requiring a fair amount of skill and experience as it involved de-soldering and re-soldering. Needless to say, motherboard manufacturers were less than enthusiastic about such activities, which also voided any and all warranties.
Fast Forward
Today, overclocking is much easier (and doesn’t require a soldering iron). In fact, most CPU and motherboard manufacturers support overclocking and market it as a feature. For example, the Intel 486-DX2 CPU, launched in 1989, introduced the possibility of adjusting clock speeds simply by writing data into control registers, thereby establishing overclocking as a popular hobby.
In fact, the clock frequency isn’t fixed in modern CPUs, but is automatically adjusted according to need (computational load). Indeed, different parts of a chip usually run at different speeds. Also, most CPUs are protected against damage by overheating. When the chip temperature rises above a set limit, the clock frequency is automatically reduced, thus lowering the temperature again.
Keeping It Cool
The inevitable consequence of overclocking is an increased temperature of the CPU chip. Integrated circuits and many other electronic components are rather sensitive to the effects of elevated temperatures. Damage is immediately evident only at extreme temperatures, but long-term effects from less-than-extreme temperatures can be more subtle and difficult to diagnose.
Heat causes all materials to expand. Integrated circuits are built from many different materials with different amounts of heat expansion. Heat expansion puts mechanical stress on the joints between materials, and after repeated cycles of heating and cooling, cracks may appear in joints between dissimilar materials.
Semiconductors
Semiconductor devices are manufactured by introducing minuscule amounts of “impurities” or “dopants” into a pure silicon substrate. This is how dynamic structures like transistors and diodes are created. Even though an integrated circuit is entirely solid state, at elevated temperatures, the dopants may move around by diffusion. When exposed for a prolonged period, this can affect the behavior and characteristics of those devices and can cause erratic behavior of the chip.
Methods for limiting power consumption are nowadays a vital part of any CPU and microcontroller. In battery-operated devices such as cellphones, the main motivation is to make the battery charge last as long as possible. For grid-connected equipment, the aim is to keep the CPUs and other components as cool as possible.
Cooling Fundamentals
No machine or device is ever 100% efficient, be it a silicon chip, an internal combustion engine, or even a biological entity. This means that a part of the energy consumed by a device is always converted into heat. And the “harder” a device works, the more heat is generated.
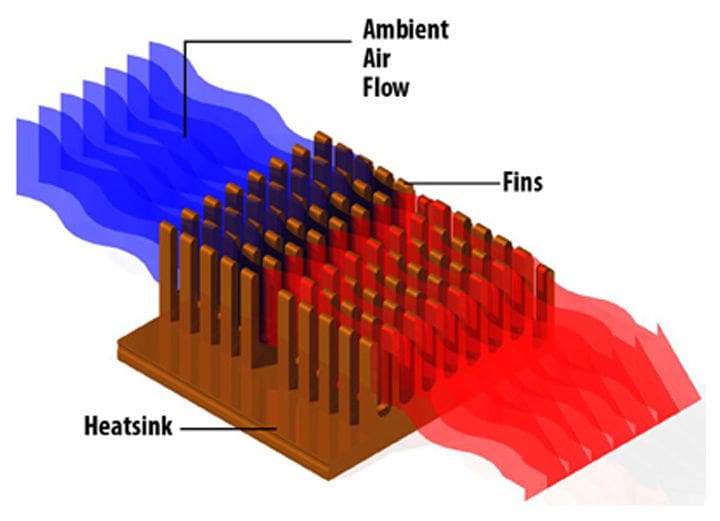
Heat naturally flows from a hot volume to a colder volume, thereby evening out the temperature difference. In a CPU, heat is generated in the silicon chip, and from there it flows into the environment. In most cases this is air, meaning electronic devices are mostly cooled by ambient air.
Heat flow increases with an increasing temperature difference between the hot and the cold. Accordingly, the temperature of an integrated circuit such as a CPU always rises until the system reaches a thermal equilibrium. The chip temperature then stabilizes at a level that allows all the “excess” heat to flow from the chip into the environment.
Three Levels of Cooling Solutions
Though it’s not really relevant for a discussion around the Pi 4, it is interesting to consider what cooling options exist. Generally speaking, cooling methods can be roughly classified as follows:
- Basic: Air cooling
- More complex: Liquid cooling or heat pumps
- Extreme: Liquid nitrogen or dry ice
Air
Air cooling is simple, safe, and straightforward. The critical detail is how heat flows from a hot solid (the CPU package) to the surrounding cool air. Increased surface area leads to better heat transfer.
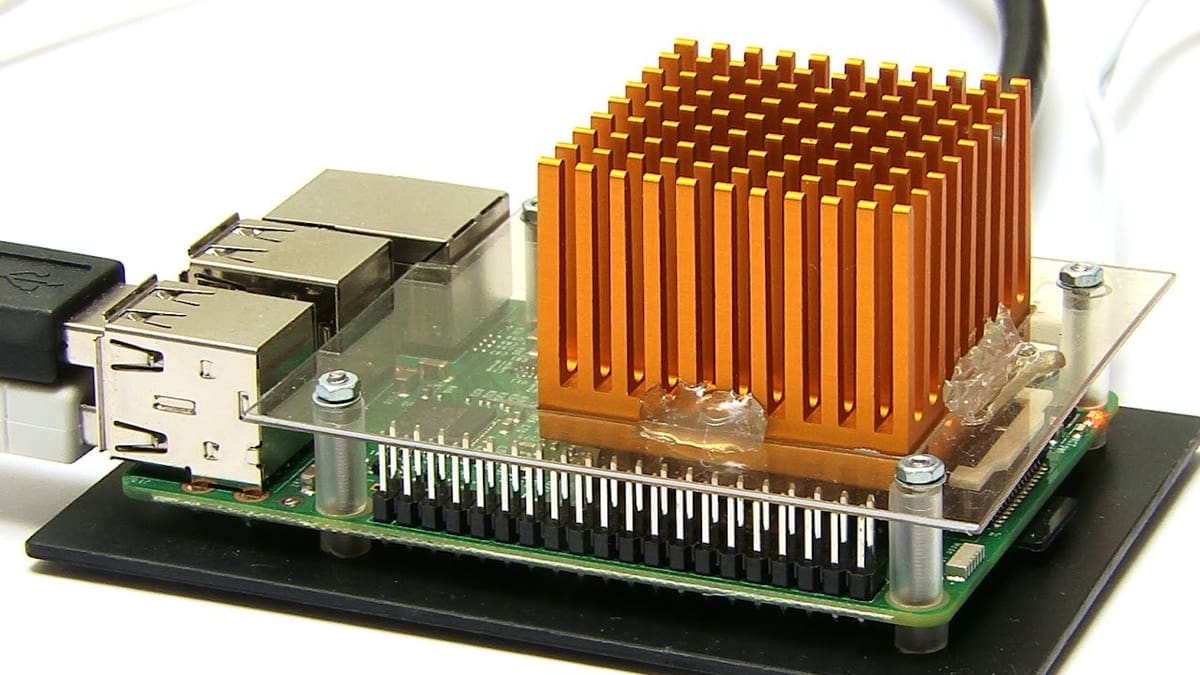
By their nature, CPU packages are quite small with little surface area. For better cooling, the surface area is usually extended by affixing a “heat sink” to the CPU. Heat sinks come in many shapes and forms, but their main goal is to maximize the surface area while minimizing the volume or size. Additionally, a fan blowing air past the heat sink will greatly improve the cooling effect.
At the same time, air cooling solutions tend to be fairly bulky. Furthermore, unfiltered air contains dust particles, which tend to accumulate in various nooks and crannies inside the equipment. This is something that most laptop users are all too familiar with.
Liquid
Liquid cooling is more compact than air cooling, but fundamentally not much different. A liquid, usually water, is merely used to transport heat elsewhere. In the end, the heat is transferred to the ambient air via an arrangement of heat sinks and fans quite similar to direct air cooling.
Heat Pumps
In air cooling, the lowest temperature is in the ambient air. But for increased cooling, temperatures below ambient can be achieved by means of heat pumps. Refrigerators and freezers utilized in many households are all based on compressor- or evaporator-type heat pumps. Similar cooling kits are available for PC overclocking, but for a Raspberry Pi, only a hardcore enthusiast would resort to such means.
A thermoelectric or Peltier heat pump is a more practical way to cool electronics, as it’s an entirely solid-state device with no moving parts. A Peltier cooler is a thin sandwich of active elements between two parallel plates. When a DC current flows from one plate to another, a temperature difference appears between both sides. Peltier cooling isn’t typically used in household refrigerators since a compressor-type heat pump consumes much less energy for a given cooling effect.
Extreme
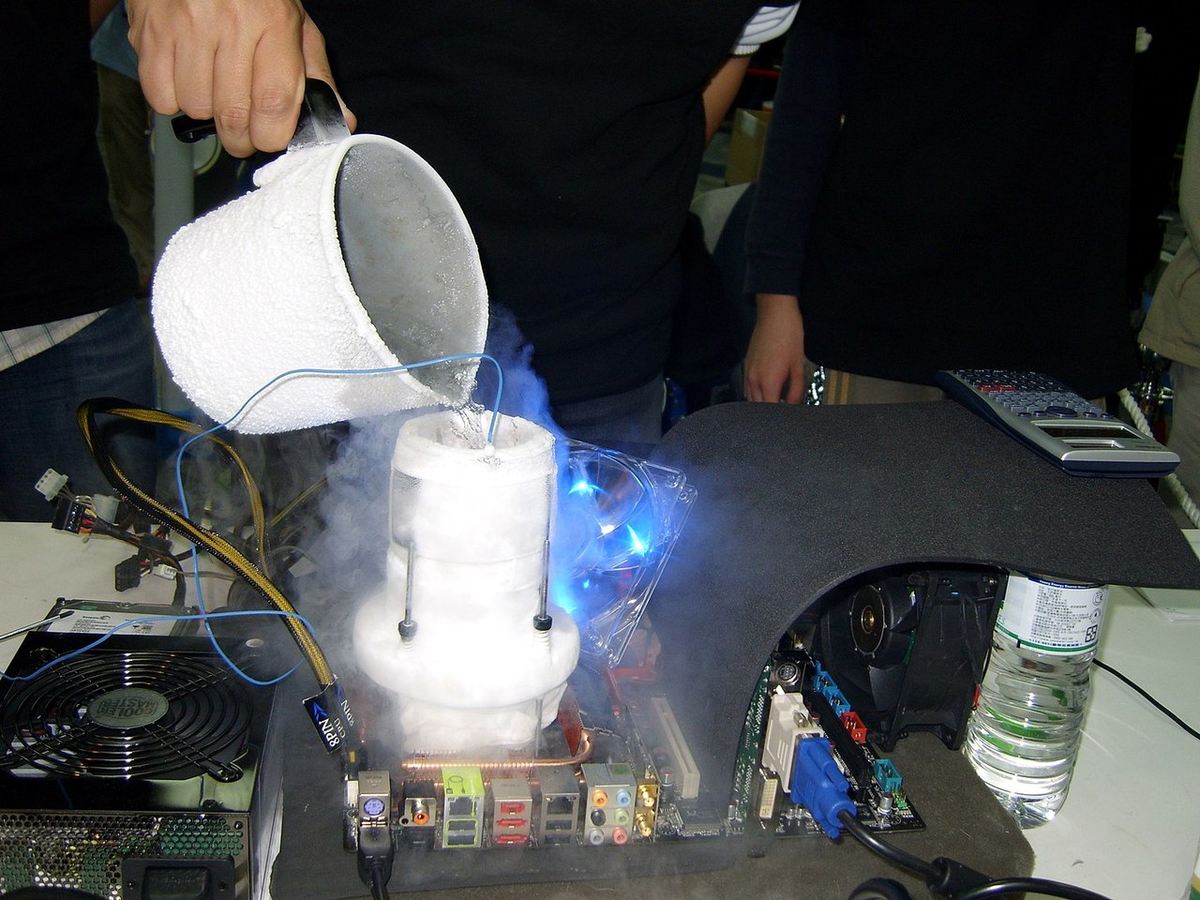
The lowest possible temperatures are obtained by means of liquefied gases. Such liquids are produced in industrial facilities with very powerful cooling equipment. The temperature of liquid helium is close to absolute zero, but a more practical substance would be liquefied nitrogen.
The boiling temperature of liquid nitrogen is -196 °C. At room temperatures, the cold liquid constantly boils away, but its temperature remains at the boiling point as long as there’s any liquid left. This kind of cooling is very simple, as no machinery is needed, however the liquid must be replenished from time to time in order to maintain the cooling effect.
Liquid nitrogen has been used for achieving overclocking records, but it’s definitely not something to try at home! Skin contact can cause extreme frostbites and serious tissue damage. The boiling nitrogen is released into the surrounding air, thus lowering the relative content of oxygen. Nitrogen is relatively inert and not poisonous by itself. However, without sufficient ventilation, lower oxygen content in an enclosed space could cause loss of consciousness and even death by asphyxiation.
Dry ice (solid carbon dioxide), in combination with a liquid that has a low freezing temperature, can be used for somewhat less extreme liquid cooling. This approach yields a temperature of -70 °C.
Process
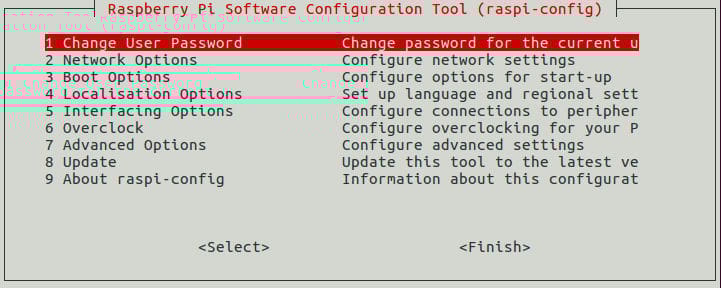
In normal PCs, the clock settings are defined in the BIOS, something the Raspberry Pi doesn’t have. Instead, most operational conditions are defined in a file named “config.txt”. The Pi reads this file when booting and adjusts its operation accordingly.
Among many other details, config.txt can include more than 30 settings related to clocks, but some parameters may seem a bit obscure, depending on the experience level of the user. A detailed explanation is available in the official Raspberry Pi documentation.
Adjusting the Clock Speeds
Adjusting clock speeds or frequencies is as simple as directly editing config.txt, or using the raspi-config menu opened by typing a command in a terminal window. Anyone interested in overclocking should obtain more detailed information about the effects of settings on actual clock frequencies, chip temperature, and general performance improvements, if any.
Fortunately, designers of modern CPUs have been kind enough to integrate a temperature sensor on the chip itself. Measuring CPU temperatures and checking actual clock frequencies is done simply by issuing commands in a terminal window connected to the Pi. No instruments are needed at all. (The documentation explains the commands to use for displaying various operational parameters.)
- Typing
cat /sys/class/thermal/thermal_zone0/tempin a terminal window and hitting the Enter key will display the chip temperature in the same window. The displayed result needs to be divided by 1,000 to find the value in degrees Celsius. - The command
vcgencmd measure_clock armwill display the current CPU clock frequency.
For general performance measurements, the computer industry has developed many different benchmarks suitable for evaluating the computational performance of CPUs and entire computers. Useful hints as to what’s available for benchmarking are found on websites such as Tom’s Hardware.
Benefits

In a Raspberry Pi, there are two major subsystems where overclocking brings significant performance gains without resorting to extreme cooling: the CPU core and the graphics processing unit (GPU).
For the Pi 4, the nominal GPU clock frequency is 500 MHz and the maximum nominal CPU core frequency is 1.5 GHz. The new Pi 400, however, is specified for a nominal core frequency of 1.8 GHz due to better cooling built into the keyboard enclosure containing the Raspberry Pi itself. Any Raspberry Pi will automatically throttle the CPU clock if the chip temperature increases to 80 °C, thus protecting the chip against damage by ambitious overclocking.
With adequate air cooling and efficient heat sinks, the CPU core frequency can be safely increased to above 2.1 GHz. The GPU clock frequency can similarly be increased from 500 MHz to 700 MHz. Altogether, a significant performance gain is obtained without ill effects on the CPU chip, as long as one is careful with the cooling.
Lead image source: MakeUseOf
License: The text of "Overclock Your Raspberry Pi 4: All You Need to Know" by All3DP is licensed under a Creative Commons Attribution 4.0 International License.