Painting 3D Prints: All You Need to Know

Painting 3D prints can add *the* final touch to your models. Learn how to combine 3D printing and the artisanal craft of hand painting!
Painting 3D prints can significantly enhance their appearance, making them look more polished and professional. Whether you’re a hobbyist looking to add a personal touch to your creations or a professional seeking to elevate the quality of your prototypes, the right painting techniques can make a world of difference.
There are plenty of steps to follow, so we’ve put together a comprehensive guide covering the entire process, from designing and slicing your model to the final paint job. We will walk you through preparing your model for easier post-processing, choosing the best paints, and using the right accessories to achieve a flawless finish.
Let’s dive into the steps and tips that will transform your 3D prints into stunning works of art.
Choosing Paints
Before we get started on the actual process, a few decisions need to be made.
Types of Paint
Defining the right type of paint is crucial for achieving the best results on your 3D prints. Different paints offer varying benefits, from ease of use to the quality of finish. Understanding the characteristics of each type can help you make an informed decision based on your specific needs. Here’s a look at the most commonly used paints for 3D printing projects and their unique advantages.
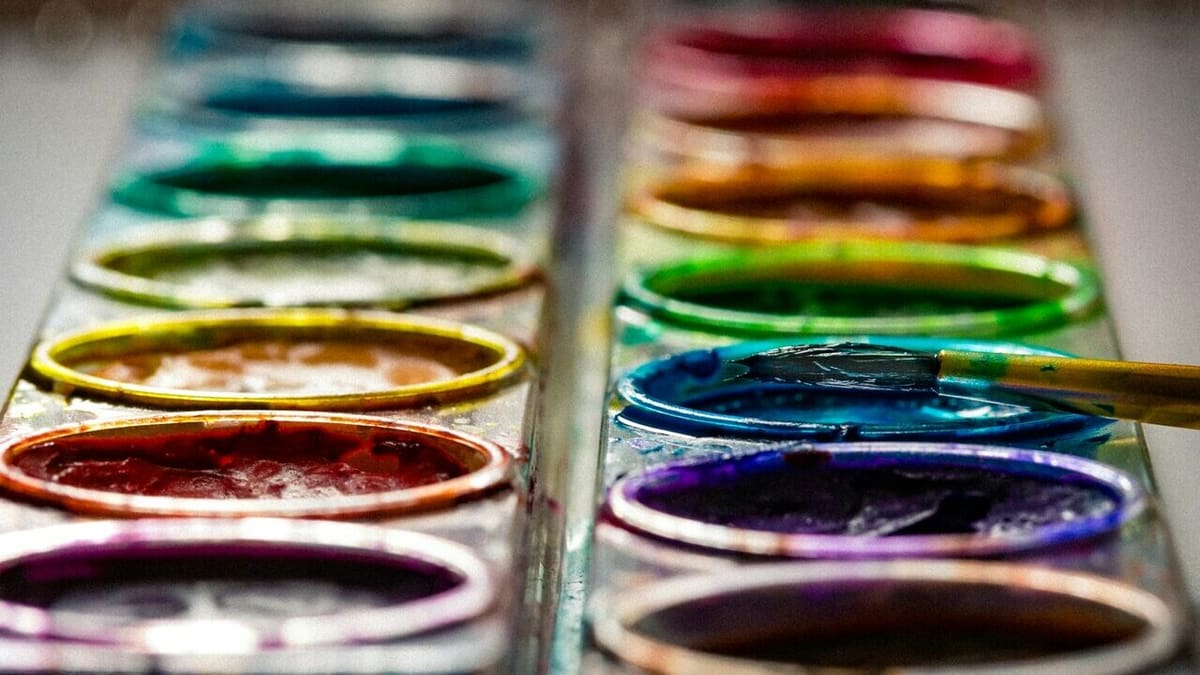
- Acrylic paints: These are water-based, easy to clean, and available in a wide range of colors. They work well on PLA, ABS, and resin prints.
- Enamel paints: These oil-based paints provide a durable, glossy finish. They are ideal for prints that will be handled frequently.
- Spray paints: These are great for even coverage and large surfaces. They come in various finishes and colors. Although a bit of practice might be required, spray paints are great for achieving a quality smooth finishing as there will be no marks of brush strokes.
- Model paints: Specialized paints like or are designed for detailed work and come in small bottles. These kinds of paint are suitable if your model has small details to paint on different colors.
Considerations
Before you purchase any paints, you’ll want to go over some key considerations:
- Compatibility: Ensure that the paint is compatible with the print material. Acrylics are versatile, while enamels may require a primer for proper adhesion. For example, PETG is known for adhesion issues, but in general, adding a layer of primer should do the trick no matter what combination you’re going for.
- Finish: Decide if you want a matte, satin, or glossy finish based on the final look you aim to achieve.
- Durability: Consider the durability needed depending on intended use – will the print be set outdoors and be exposed to weather? Is it a toy or model that will be handled repeatedly? Is it a miniature for gaming? Will it simply be on display? Enamels and clear coats add an extra layer of protection.
Accessories & Safety Equipment
Not only with paints and brushes a perfects finish is made. A variety of tools and gadgets comes handy either to make the job easier or to improve its quality. Although not everything on the list bellow is necessary all at once, you may count on DIY accessories and other common or cheat items.
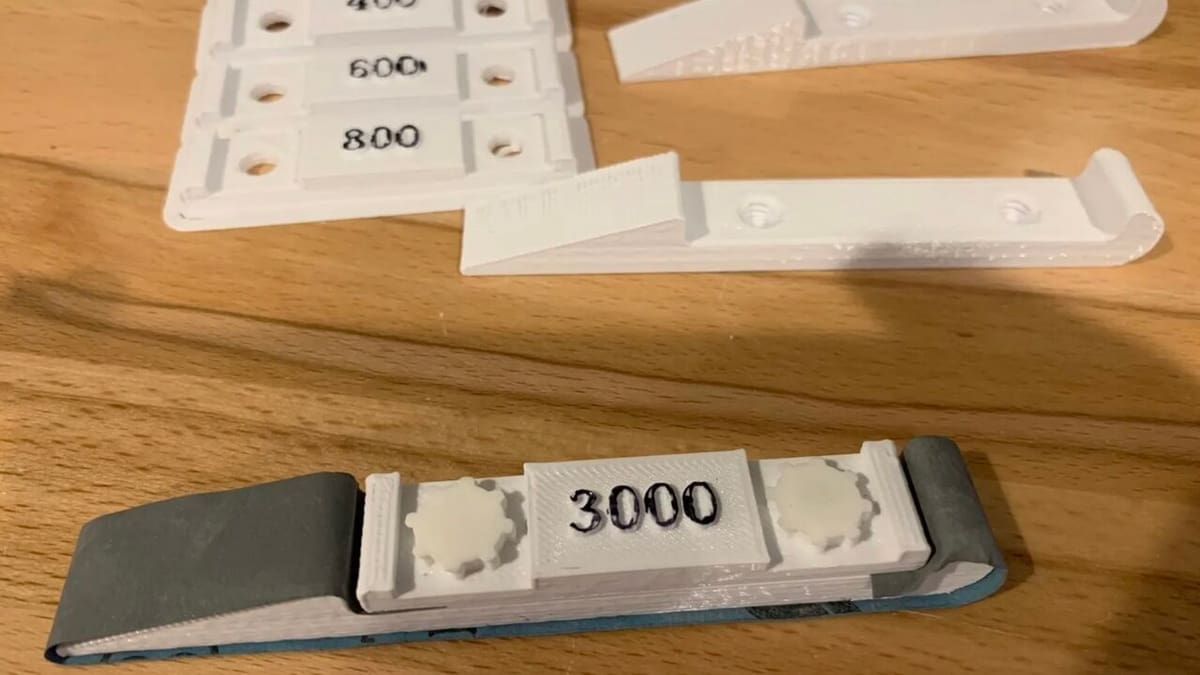
- Sanding blocks: To uniformly sand flat areas and tricky corners, those are a must-have. Of course you could purchase one, but why would you do this if there are excellent 3D printable ones?
- Files: Sometimes a more precise or smaller tool to remove material is needed. In such a case, a file is a good choice.
- X-acto knife: Thin cuts to remove supports and other artifacts will more than likely be part of the process, and that’s where the X-acto knife comes in. Be careful to not hurt yourself.
- Cutting pliers: The use of these is similar to that of the X-acto knife, but for coarser work. It’s easy and less risky.
- Tweezers: These come in handy to hold small parts. If you don’t have a pair, consider printing one.
- Airbrush: It provides precise control over paint application, and is ideal for detailed work and smooth finishes. Excellent finishing tool, but with a somewhat significant price tag. (As with anything, you’re likely to find cheaper alternatives, but keep in mind how much use you’ll require of it and what the quality of the work expected is.)
- Turntable: A rotating platform that allows you to paint the model from all angles without touching it – as useful as it gets. And you can also 3D print one.
- Masking tape: This is essential for protecting areas you don’t want to paint and to create sharp lines.
- Magnifying glass: While not the most important tool on this list, it helps in painting tiny details, especially on intricate models.
- Cardboard box: It’s perfect for making a painting booth and (hopefully) containing any splashes or unintended sprays.
- Respirator mask: It protects you from inhaling fumes from spray paints and primers, especially the non-water based ones.
- Gloves: These prevent paint from getting on your hands and provide a better grip on the model.
- Safety goggles: They protect your eyes from paint splatters and dust particles.
Preparing & Printing
While the tools, your safety, and the workspace involve important decisions, there are also a few aspects to keep in mind when it comes to designing and printing your model.
Designing & Slicing Considerations
Effective preparation for post-processing begins with smart design choices and thoughtful slicing techniques. These considerations are crucial for a smoother and more efficient experience.
- Orientation: Place the model to minimize support structures and layer lines in visible areas. Sometimes could be worth doing some STL editing to split and print the model in parts. This may sound like a lot more work, but it could actually save loads of time.
- Support structures: Go for support structures that are easy to remove to avoid damaging important areas of the model. Experiment with different support structures and densities. Know the difference from supports starting only from print bed and from everywhere. Learn how to use support blockers in your slicer.
- Surface details: Consider adding extra thickness to fine details to ensure they remain visible after sanding and painting. While slicing the model, take some time to verify the wall thickness and visualize the layers in critical areas.
Printing Considerations
The printing process itself plays a crucial role in determining the quality and ease of post-processing for your 3D prints. By focusing on factors such as layer height, infill density, and the choice of materials, you can set a strong foundation for a smooth and efficient finishing process.
Fine-tuning these settings can help you achieve prints with fewer imperfections, reducing the time and effort needed for sanding, painting, and other post-processing steps. Here’s a look at the key aspects to consider when printing your model to ensure optimal results.
- Layer height: Use a finer layer height (e.g. 0.1 mm) in FDM printing for smoother surfaces that require less sanding. A 0.05-mm layer height when printing resin would be ideal, but if time is of the essence, 0.1 mm would also work.
- Infill density: Higher infill can provide a more solid feel, but consider the balance between strength and print time, especially when it comes to resin 3D printing. Again, intended use of the model in question will help define this.
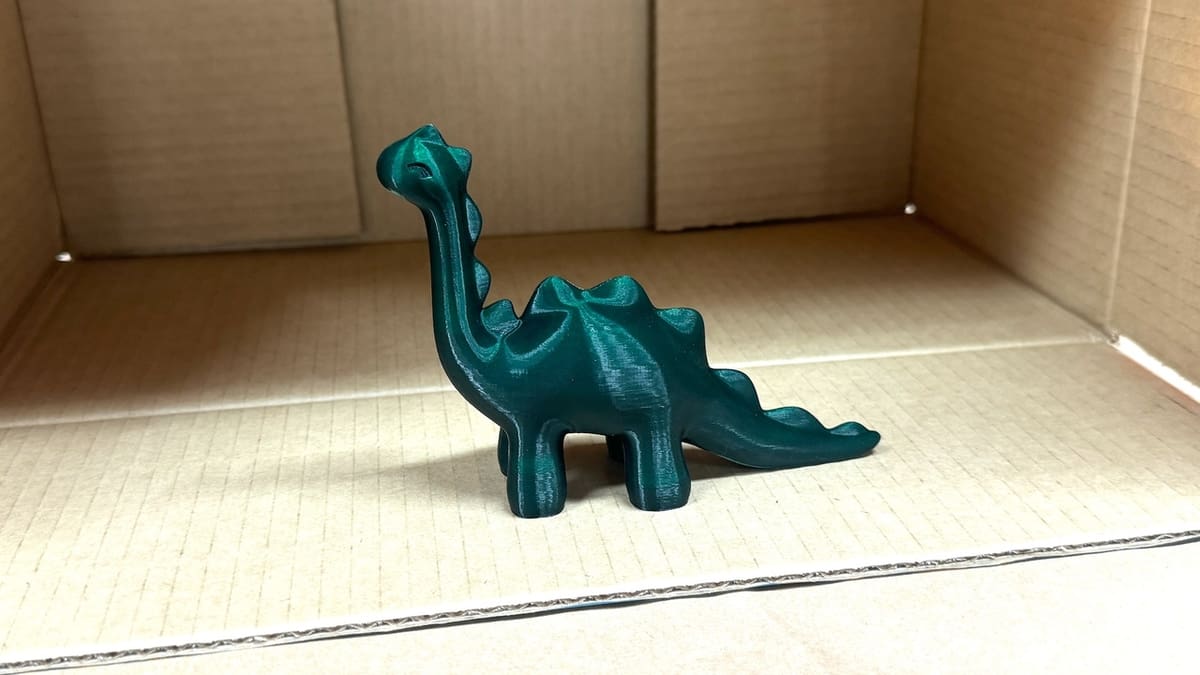
- Materials: Choose a material that suits your post-processing needs. PLA, ABS, and resin are common choices. While under different circumstances, each material’s specific characteristics might come into play (e.g. PLA not being ideal for the outdoors), because of the priming and coating, these considerations aren’t as important (although this might also depend on the exact conditions the print will be exposed to, as well as the post-processing involved).
Post-Processing
A crucial step in preparing your 3D prints for painting is thorough cleaning and sanding. This process ensures a smooth surface, free from imperfections, that will hold paint well and look professional. By carefully removing supports, sanding with progressively finer grits, and filling any gaps, you can achieve a high-quality finish. You can find detailed information on post-processing in our article about sanding 3D prints.
Here are the key steps to follow for effective cleaning and sanding of your 3D prints:
- Remove supports: Carefully remove any support structures using pliers or a hobby knife.
- Initial sanding: Start sanding with a lower grit sandpaper (around 200) to remove layer lines and imperfections.
- Filling gaps: Use a filler or putty, like , to fill any gaps or imperfections. Sand the filled areas once dry.
- Final sanding: Progress to higher grit sandpaper (up to 1,000 in some cases) for a smooth finish.
- Smoothing ABS with acetone: There’s the option to smooth the surface of ABS with acetone. If you intend to do it, skip the filling the gaps and final sanding steps. Before proceeding with the painting, make sure that all the acetone evaporated from the printed part.
Priming & Painting
Once your 3D print is ready to be painted, a few stages are involved.
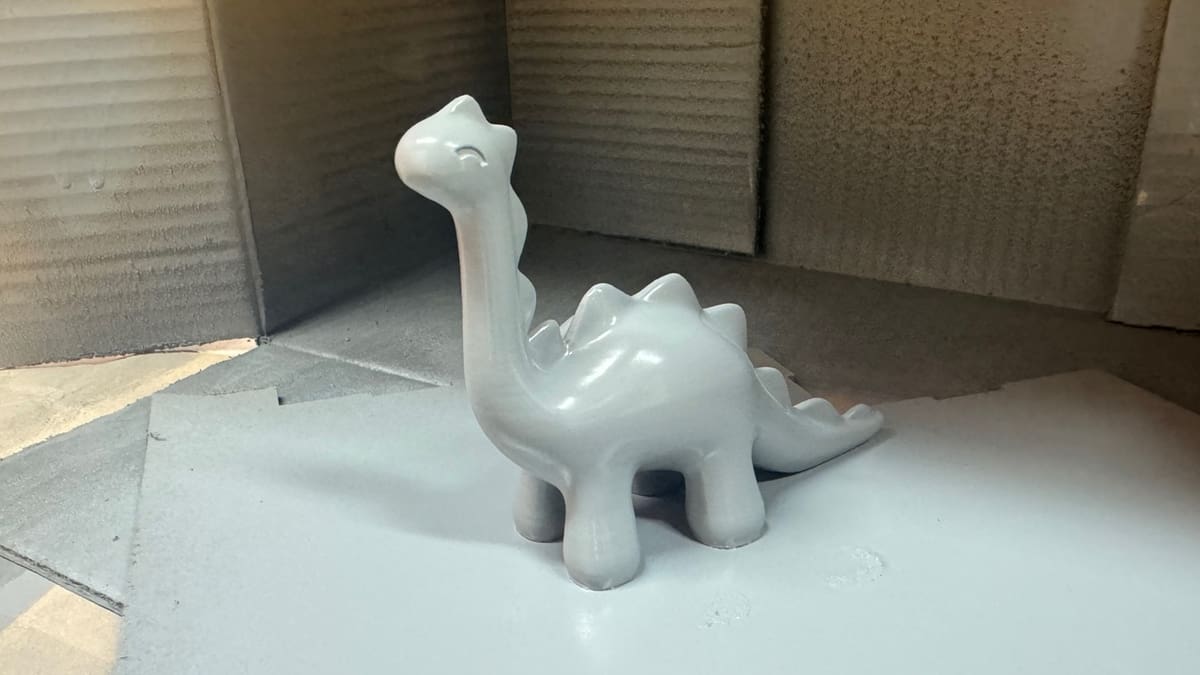
Priming
Use a spray primer to create a uniform surface for the paint to adhere to. The primary goal of the primer is to prepare the surface to receive the paint, by promoting better adhesion and a uniform finish. Primer comes in brush-on or spray alternatives and, as with paint, spray is great for achieving a quality smooth finishing as there will be no marks of brush strokes that can be tricky to disguise.
Apply it in thin, even coats and let it dry completely. Sand lightly with fine-grit sandpaper if necessary.
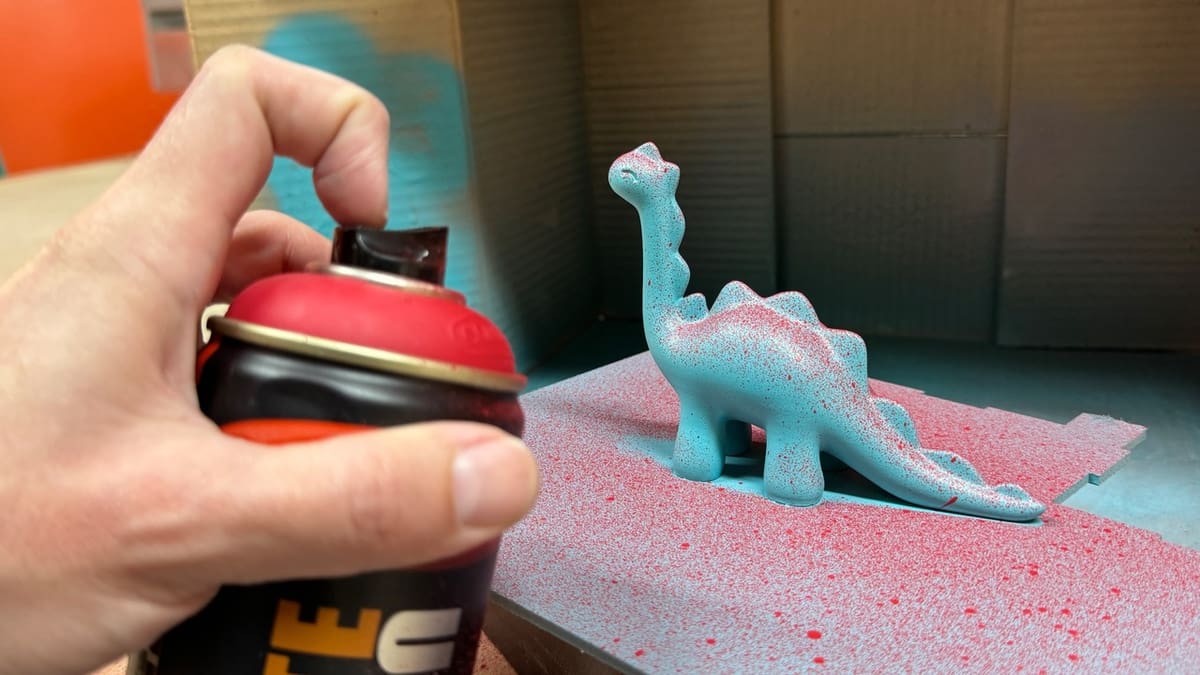
Painting
Bringing color and detail to your 3D print through painting can significantly enhance its appearance and realism. The painting process involves applying a base coat, adding detailed touches, and building up multiple layers for a rich, smooth finish. Each step requires careful attention to ensure the paint adheres well and the final result is both vibrant and durable.
- Base coat: Apply a base coat of paint. This can be done with spray paint for an even finish or with acrylic or enamel paint and a brush for more control.
- Multiple coats: Apply multiple thin coats of paint, allowing each layer to dry before applying the next. Usually, one or two coats over a base coat are sufficient for a good result.
- Fine detail: Use smaller paintbrushes for detailed work. A steady hand might be necessary and this is something one develops with practice. Masking tape can help create sharp lines and protect areas you don’t want to paint.
Sealing
Once the paint is dry, apply a clear coat to protect the paint job. This can be matte, satin, or gloss, depending on the desired finish. Although this is an optional step, it ensures more durability to the work.
Tips & Tricks
Achieving a professional finish on your 3D prints involves more than just following the basic steps. By incorporating some practical tips and tricks into your painting process, you can ensure better results and a more efficient workflow. From understanding your materials and ensuring proper ventilation to testing your paint and using the right tools, these insights will help you navigate common challenges and enhance the overall quality of your painted 3D prints.
- Know your materials: Read and follow the manufacturer’s recommendations before applying the painting products. Also, try to choose proper materials depending on the job. The material might differ if you work with decoration pieces or resin miniatures.
- Work in a well-ventilated area: Spray paints and primers have the potential to release fumes into the air, which can pose health risks if inhaled. Minimize exposure to these potentially harmful vapors by working in well-ventilated areas or with appropriate protective equipment.
- Patience is key: Allow adequate drying time between coats to avoid smudging.
- Test first: Test your paint on a small, inconspicuous area or a similar piece of plastic to ensure compatibility and color.
- Proper tools: Use high-quality brushes and paints for the best results.
License: The text of "Painting 3D Prints: All You Need to Know" by All3DP is licensed under a Creative Commons Attribution 4.0 International License.